
Steampunk Top Hat
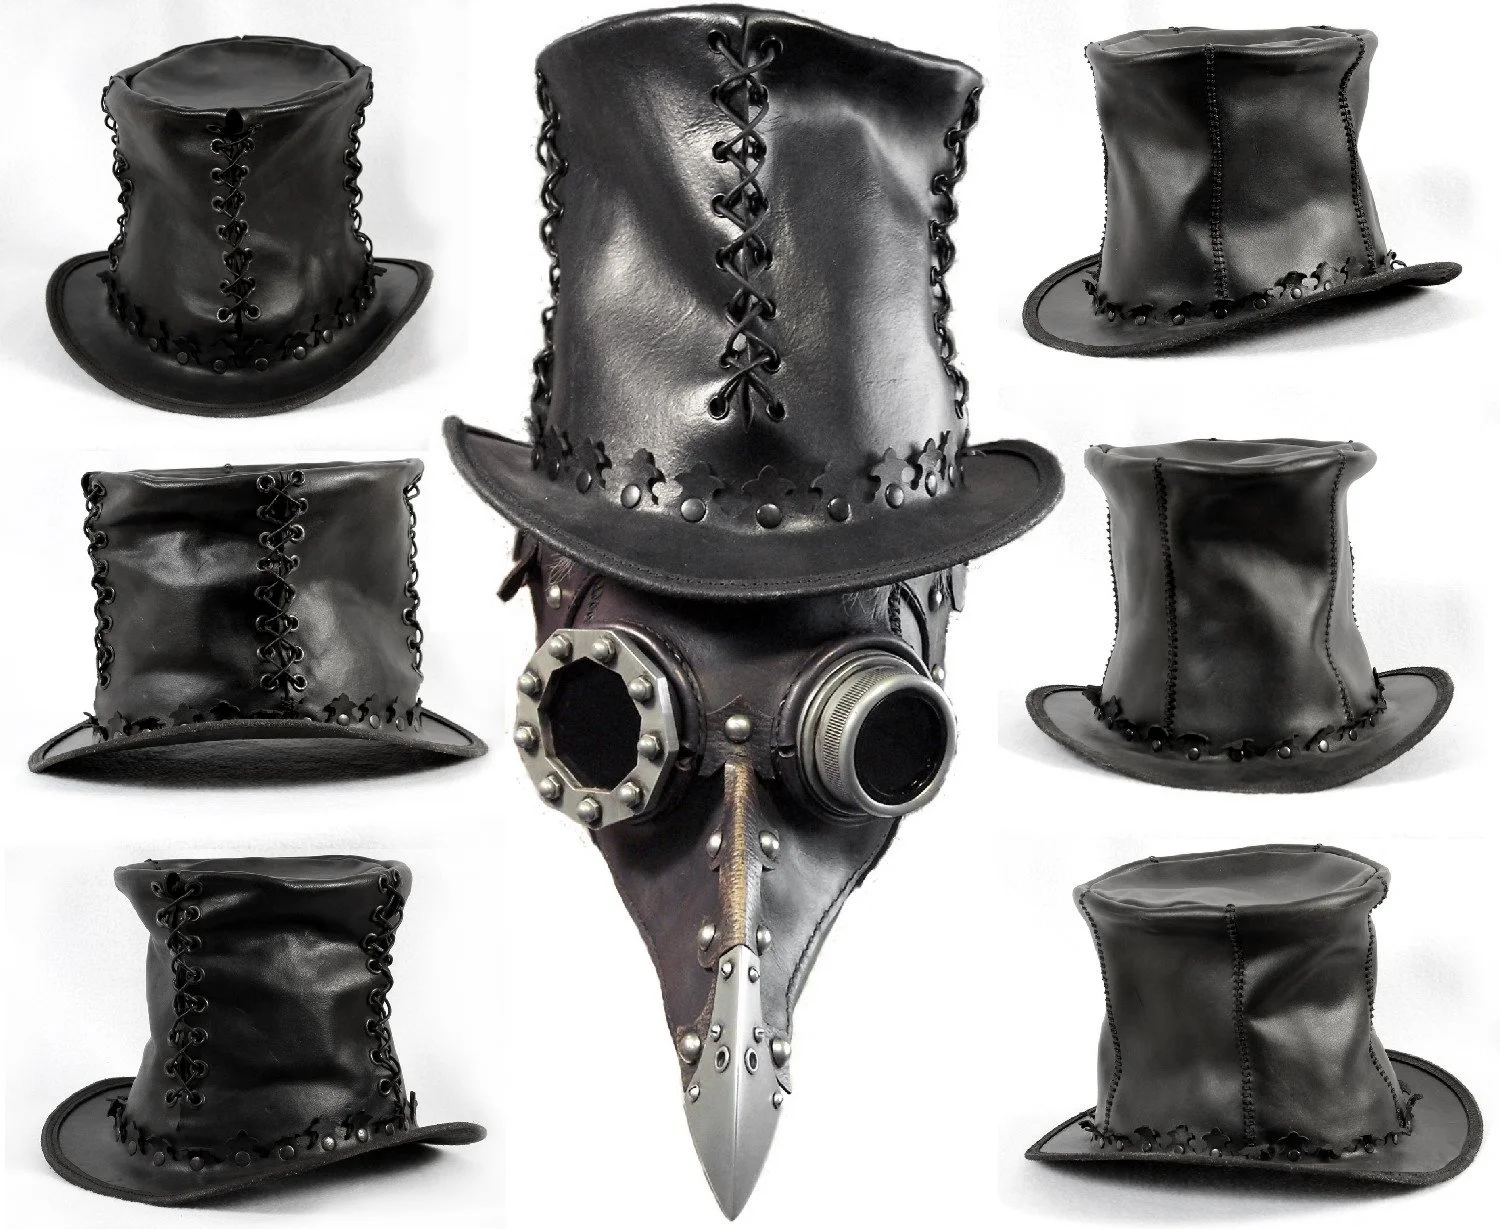
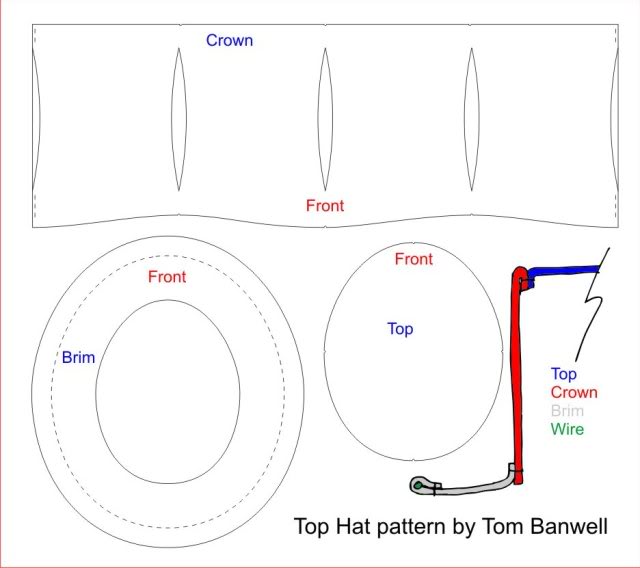
I have received several requests for a tutorial on making my steampunk leather top hat, shown above, and so, here it is. The first drawing shows the three pattern pieces (not to scale). The wave on the bottom of the crown is what gives the brim its distinctive curve.
The pattern below is the one that I used to make my top hat. For a size large, the width of the crown (from side to side) should measure 23.8". You can print it out and enlarge it to get it to lifesize. The crown has four optional darts (butt seamed), which give it the modified hourglass shape. You will need to add lacing holes (which I reinforced with metal eyelets) to the pattern.
The crown joins at the back with a butt seam. The wavy bottom gives the brim the nice shape of down in the front and back, and up at the sides. The dotted line on the brim is where I folded the edge in over a wire. (Hat pictured on the right has the crown separated into four sections which are sewn together with waxed thread).
You should use a lightweight but firm vegetable tanned leather. This will allow it to become malleable when wet and you can form its shape after all the pieces are joined.
See the diagram at the lower right for construction details. First, sew the crown to itself. Then stitch on the top and turn inside out. Then pull the brim down over the crown and glue, then stitch. Lastly sew the brim outer edge over a wire. You can lace up the darts either before or after attaching the crown.