
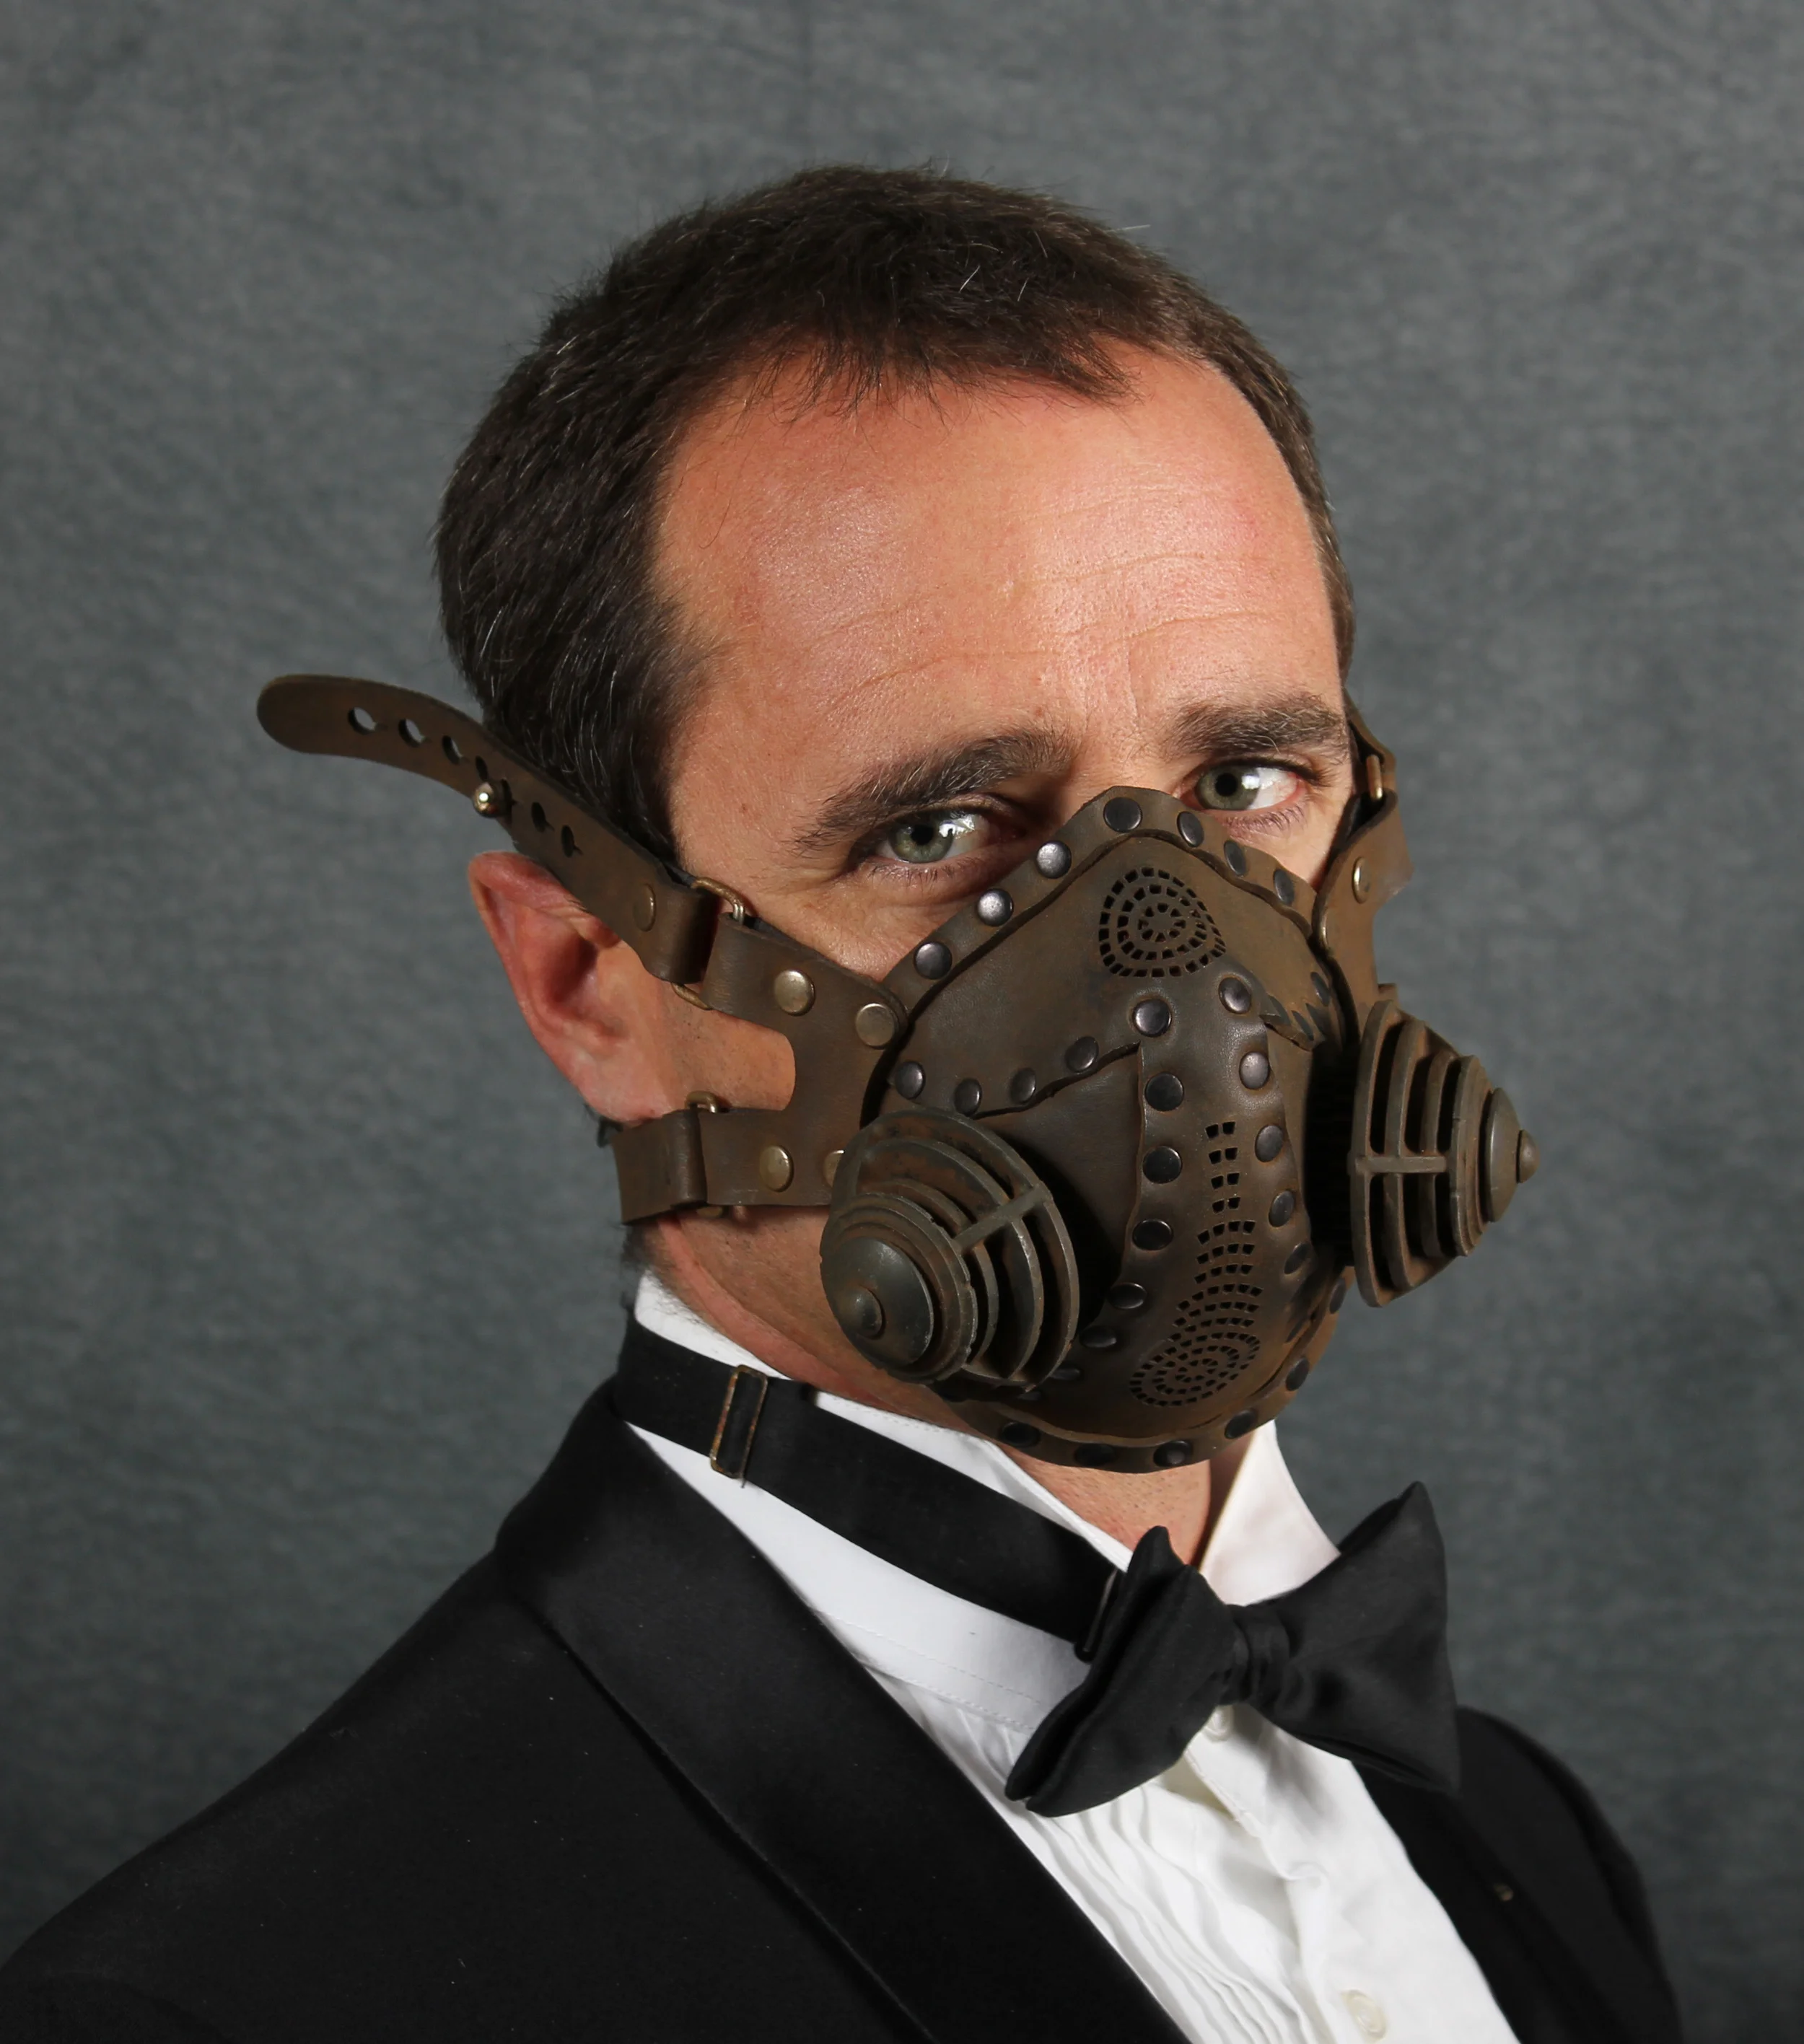
Ronin Respirator

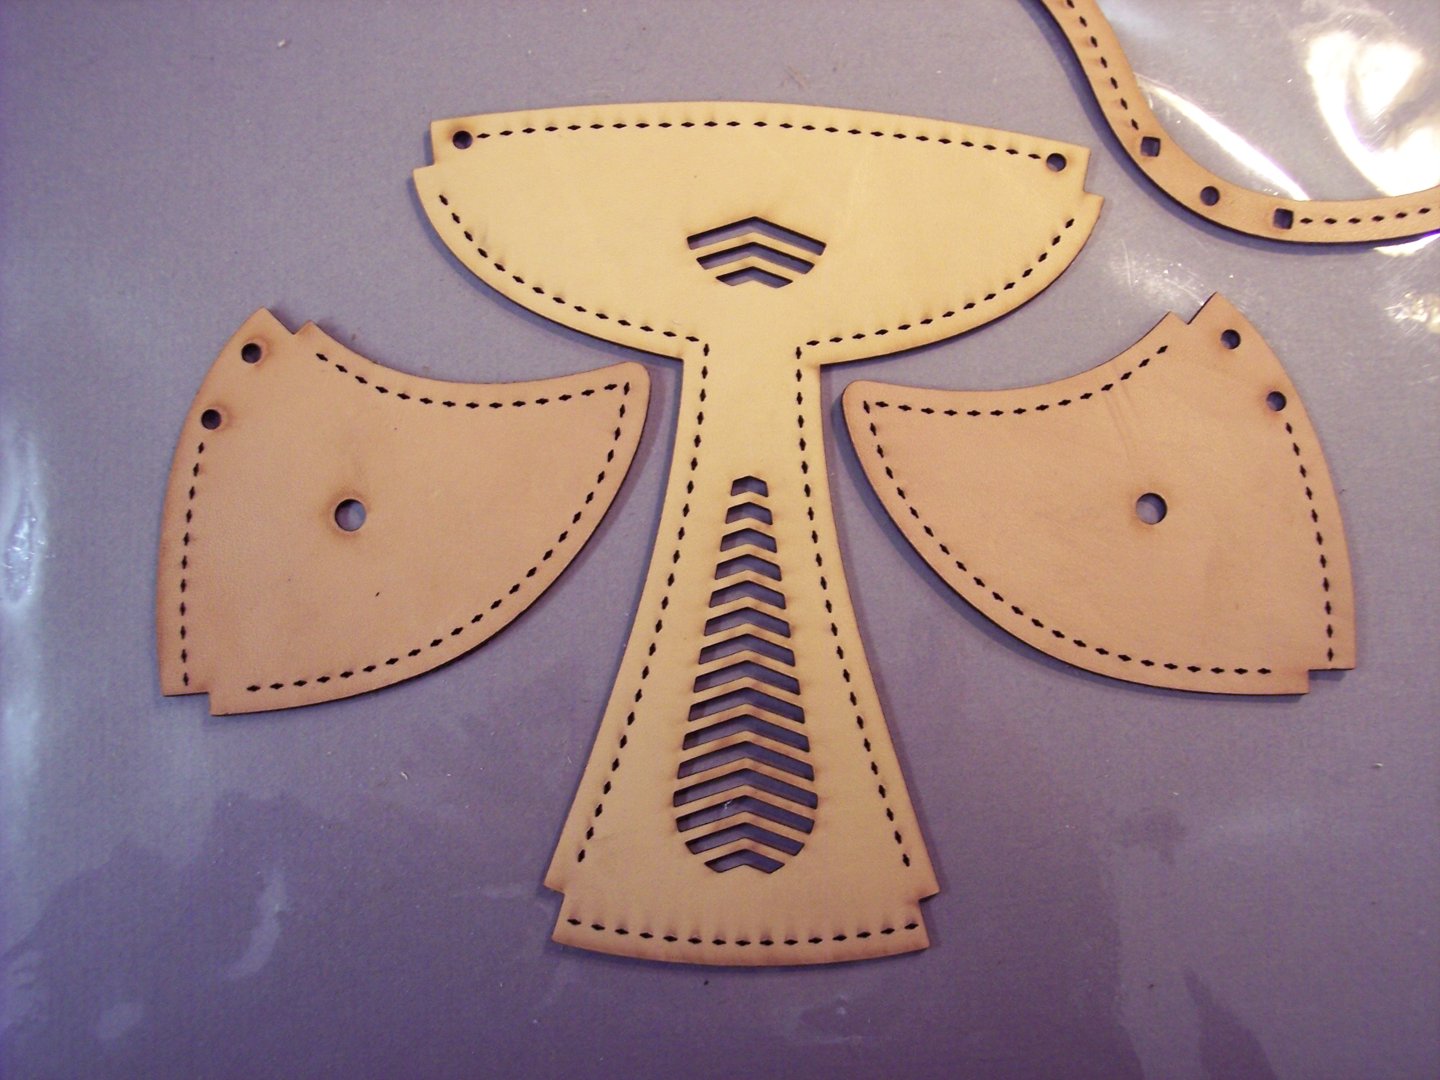
This tutorial is adapted from a workshop I lead at the Nova Albion Steampunk Exhibition in March 2011 in northern California. I am attempting to make this easy to follow and doable even for the novice leatherworker. The pattern pieces are all to scale, and include holes for rivets, slits for thread, holes and slits for buckles and a button stud, plus decorative openings for ventilation.
Materials and Tools needed:
2 square feet of vegetable tanned cowhide, 3-4 or 4-5 oz weight.
Awl or lacing fork
1 stitching needle (Tandy 1195)
4 pieces of 32” long waxed thread
22 medium rivets (Tandy 1373)
4 rectangle rings ¾" wide (Tandy 1137)
2 buckles ¾"
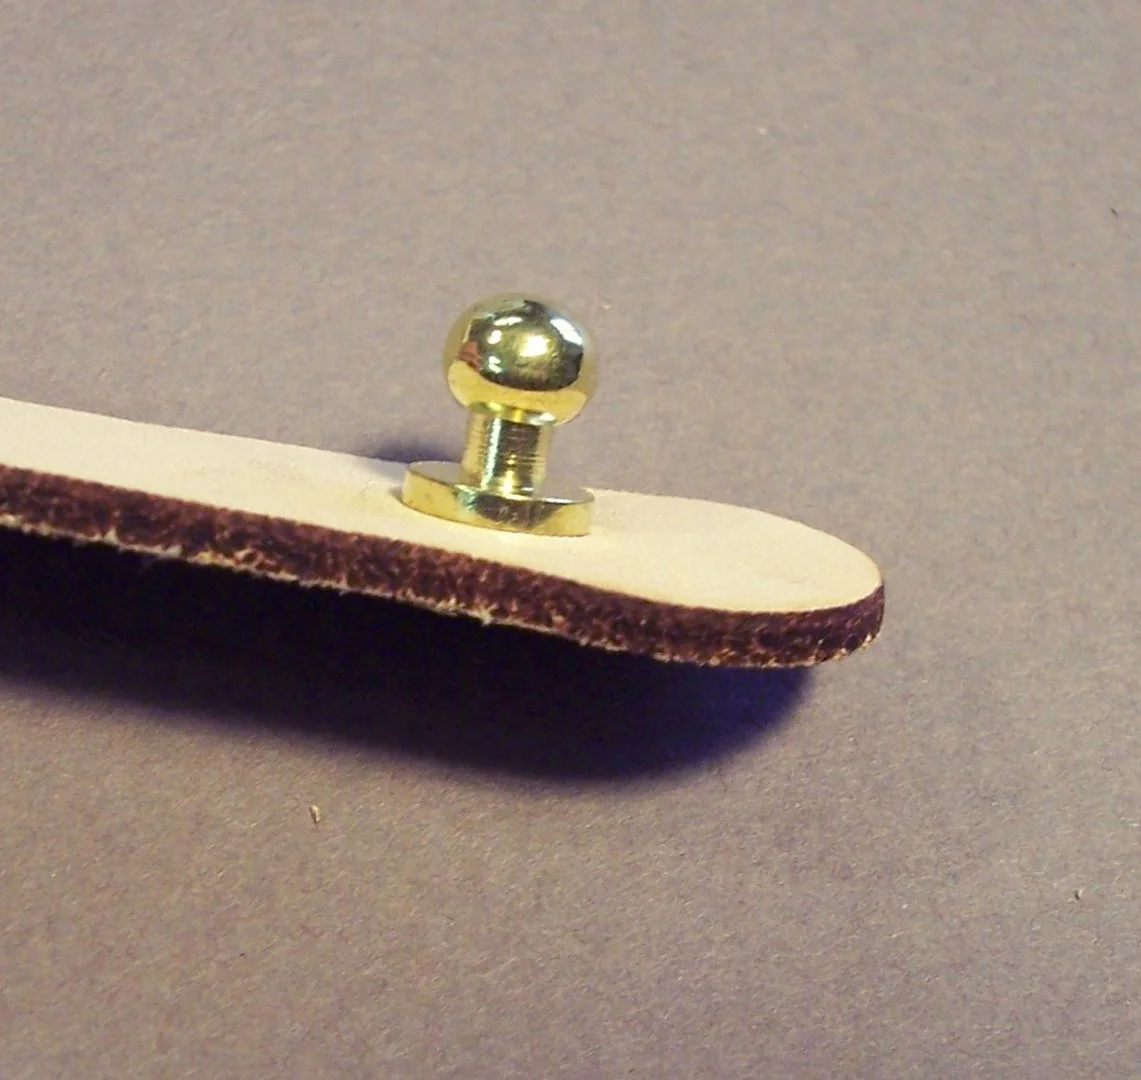
1 button stud
Hammer for setting rivets
Anvil or steel plate
Heavy shears for cutting leather
Scissors for trimming thread
Screwdriver for setting button stud
Leather dye or wood stain or shoe polish to color leather
Contact cement to glue leather

Enlarge the pattern so that the ruler marks are one inch long.
Assembly
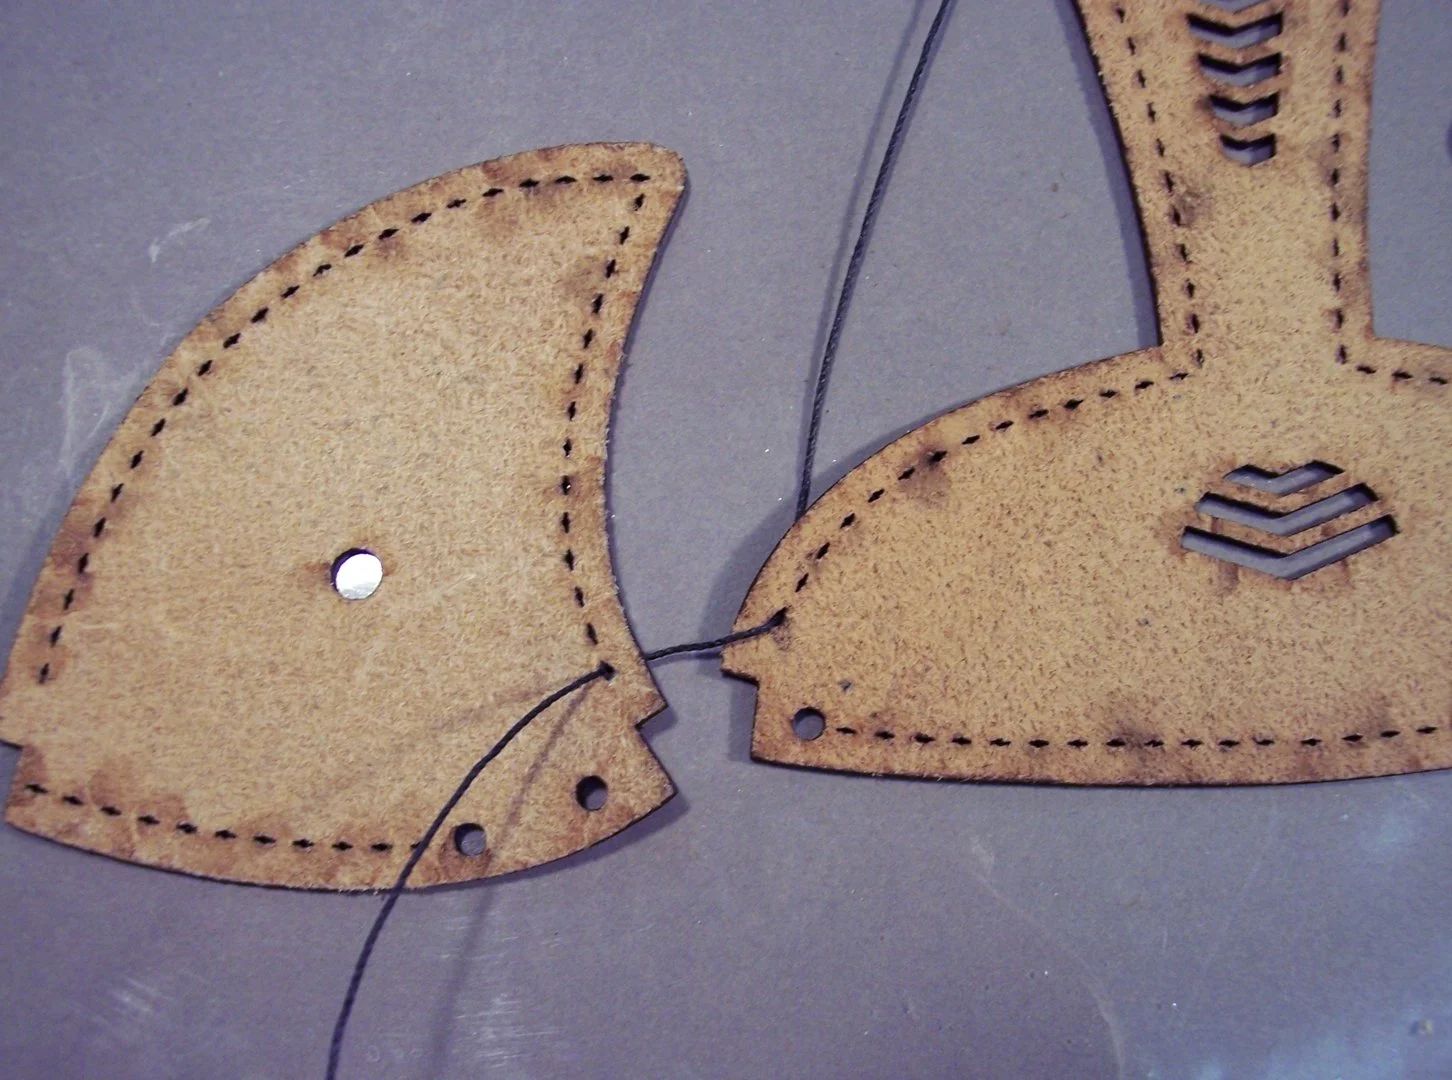
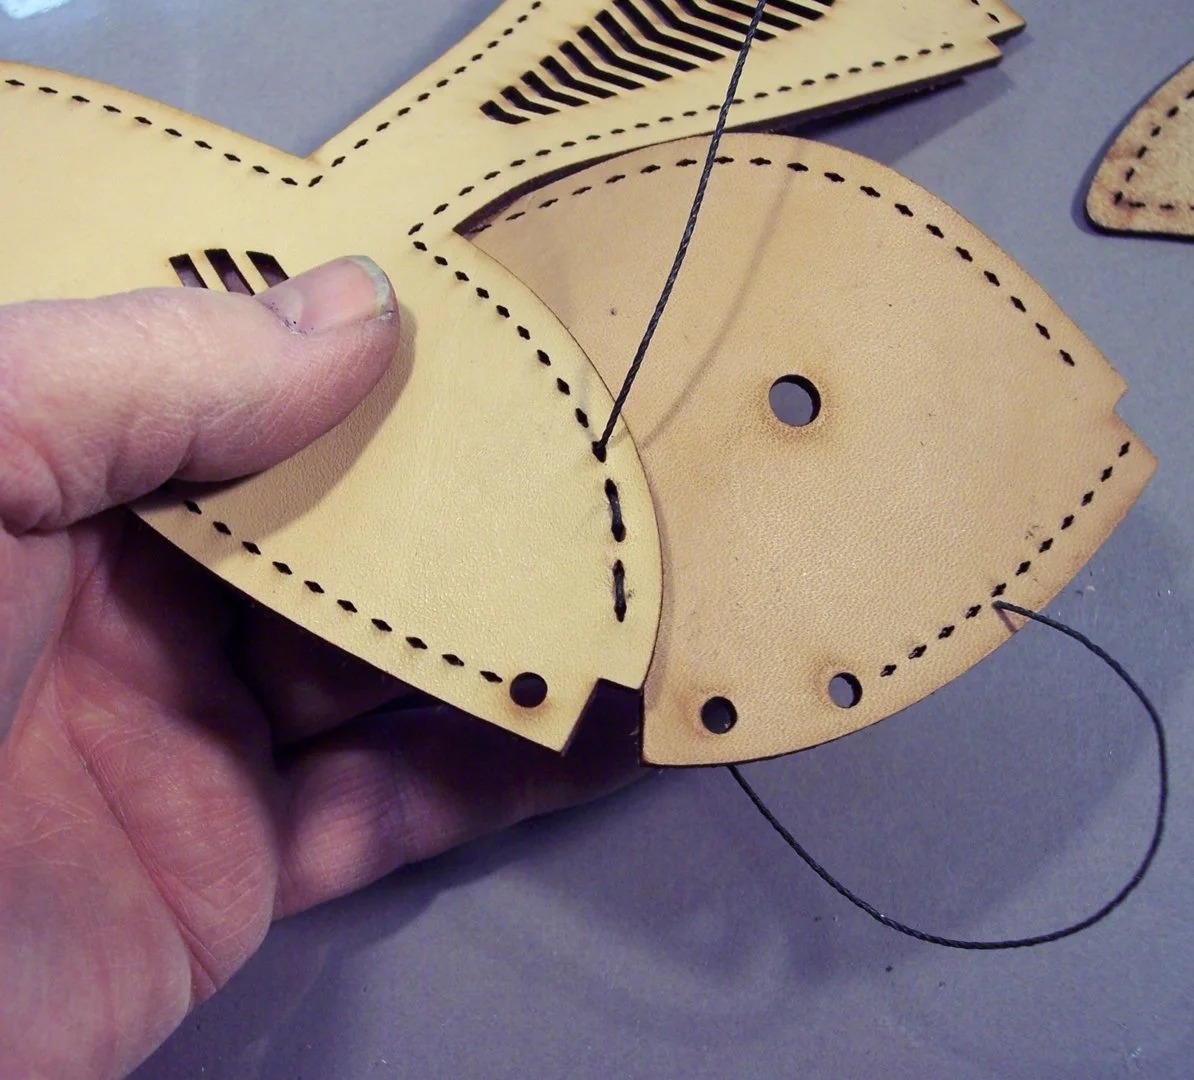
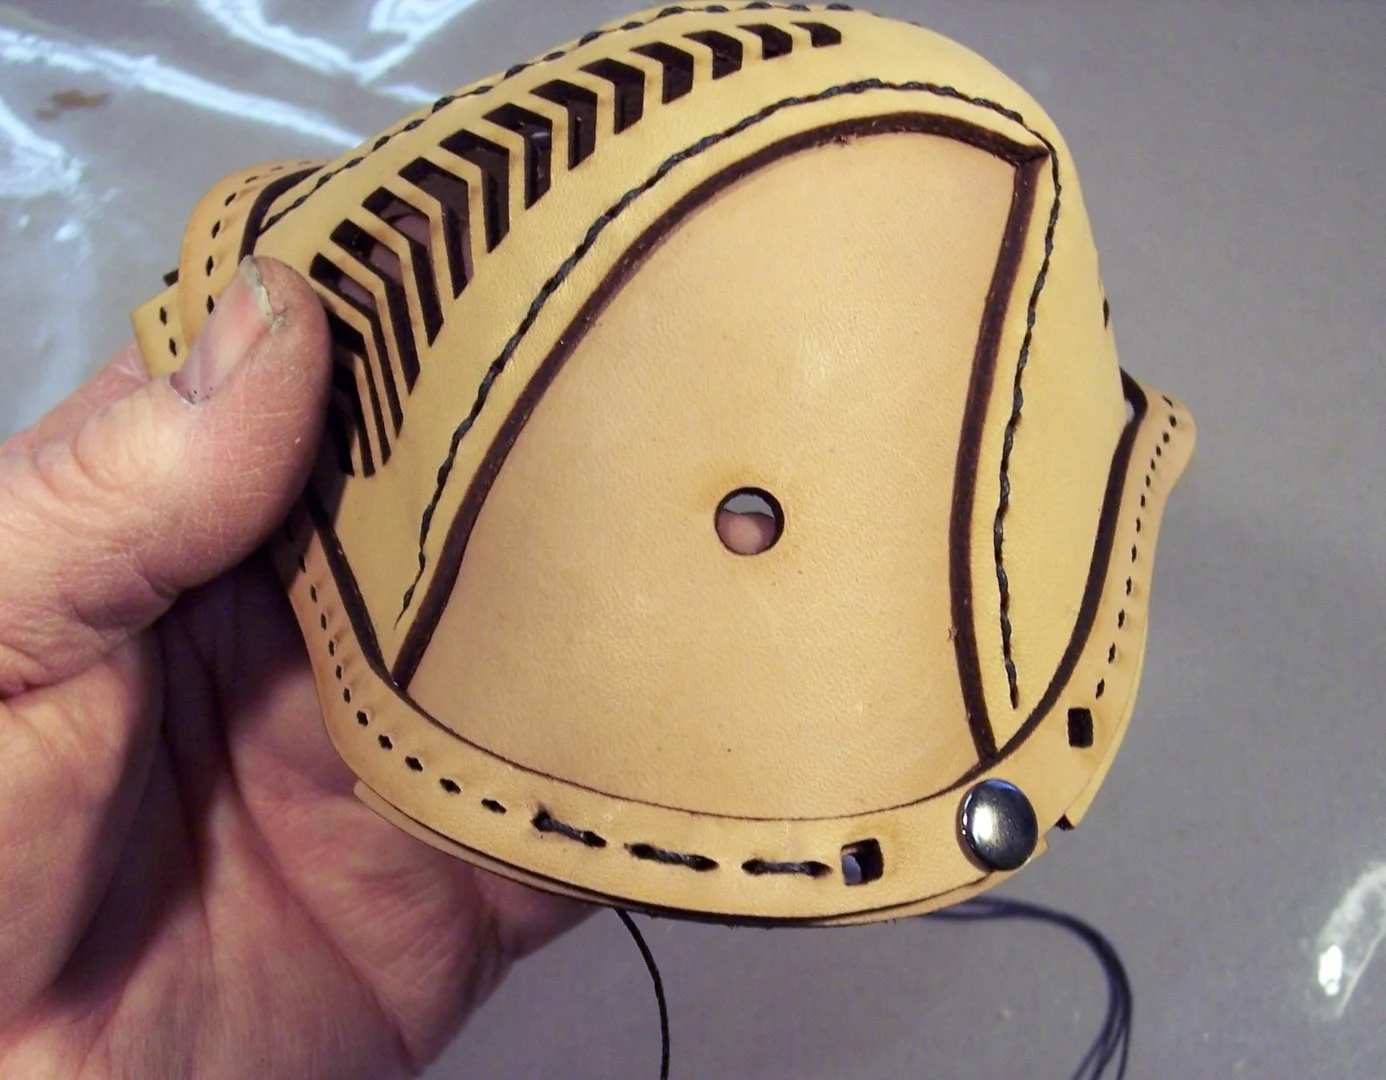
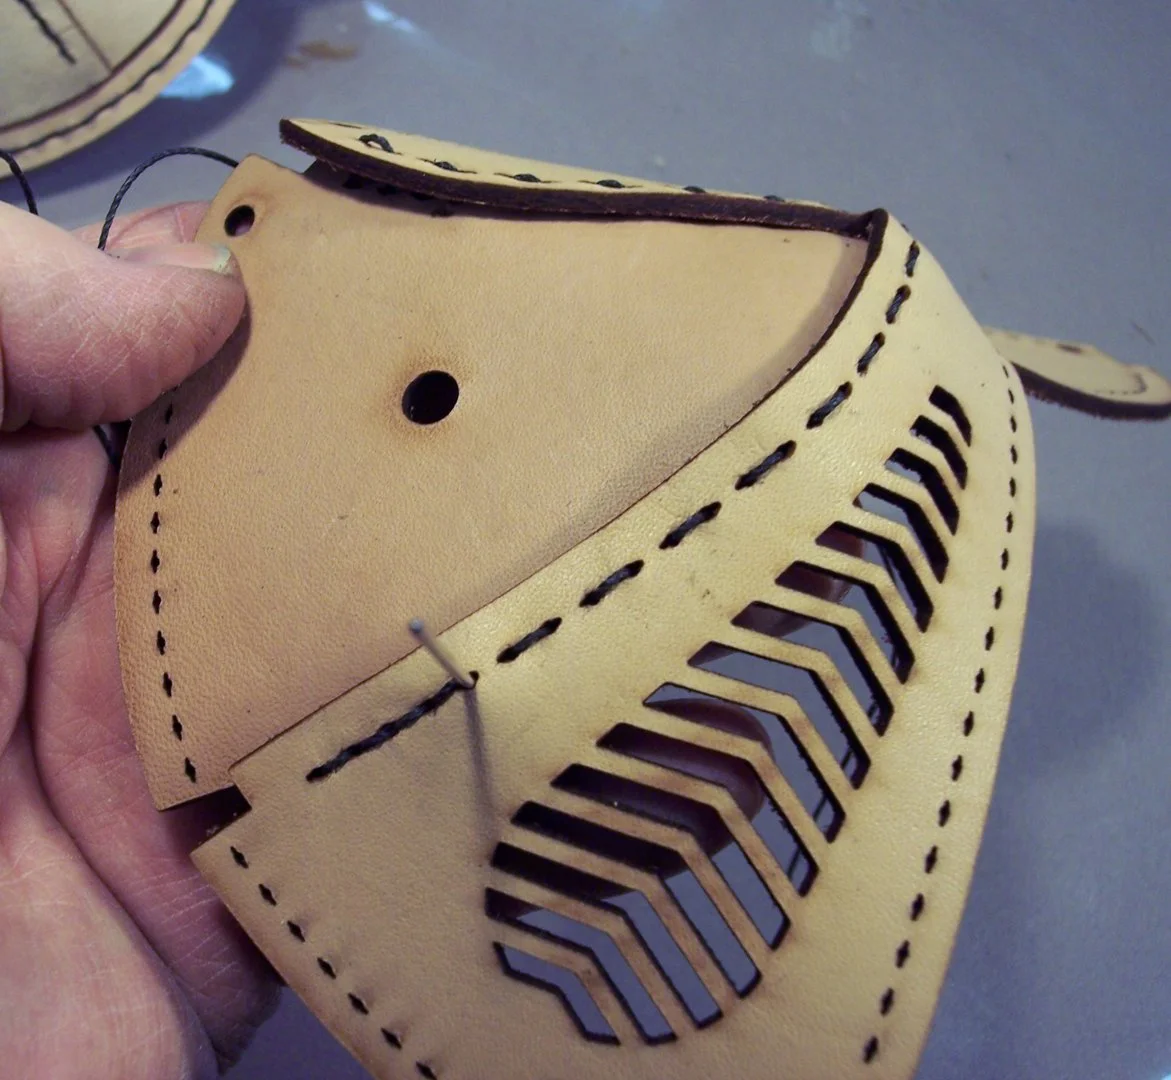
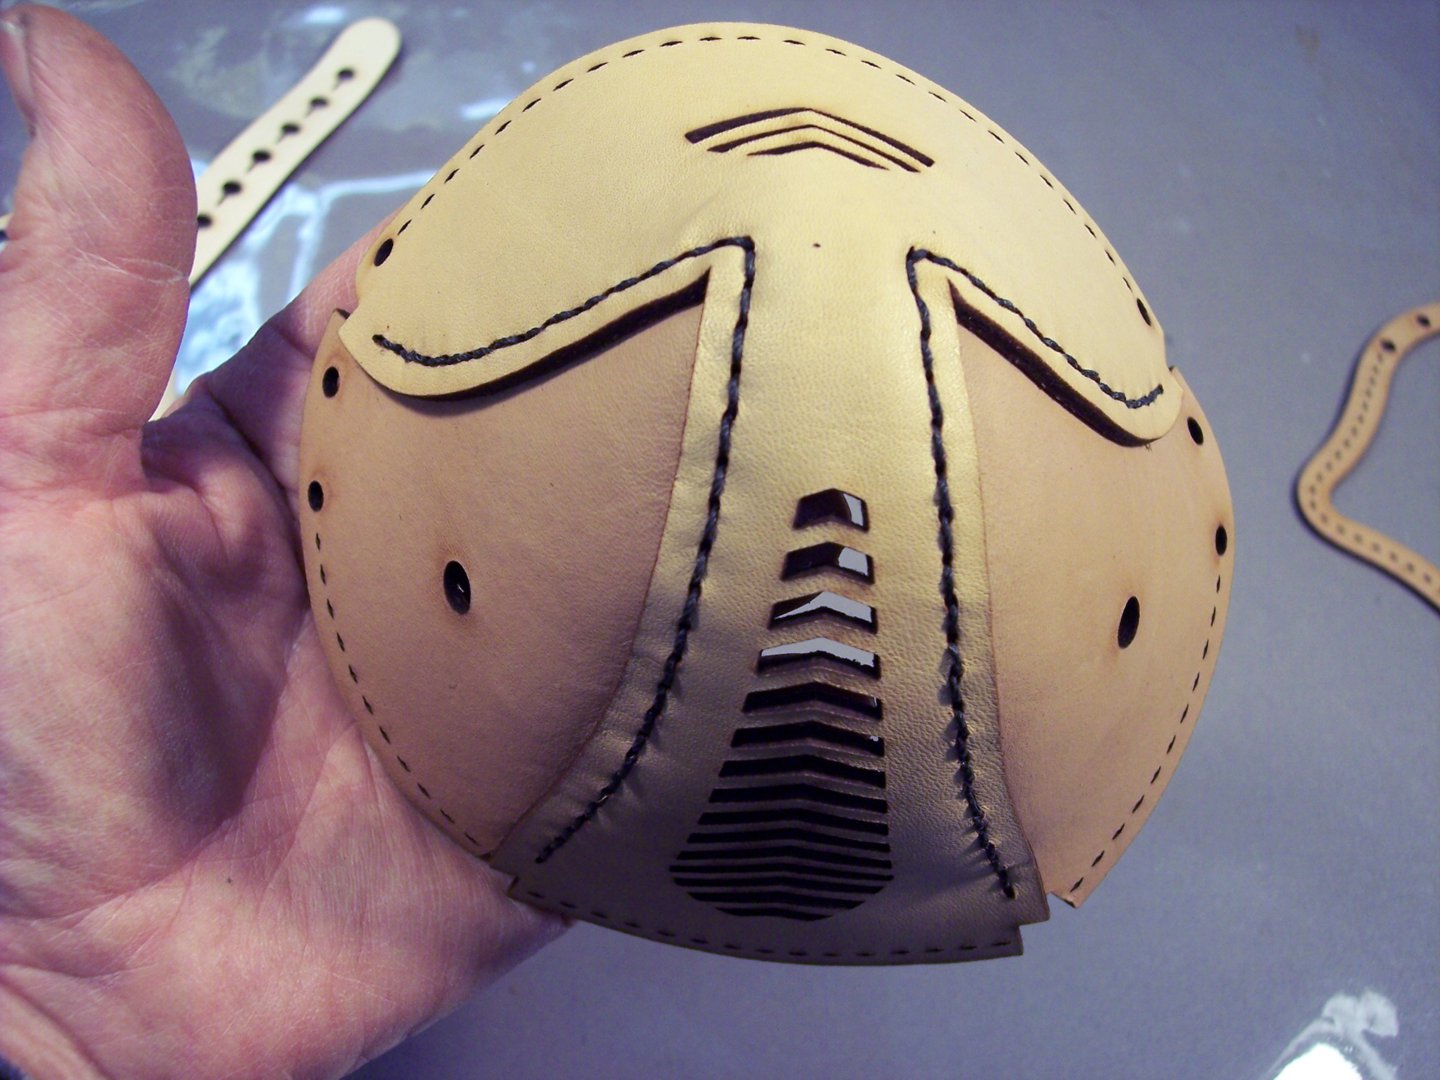
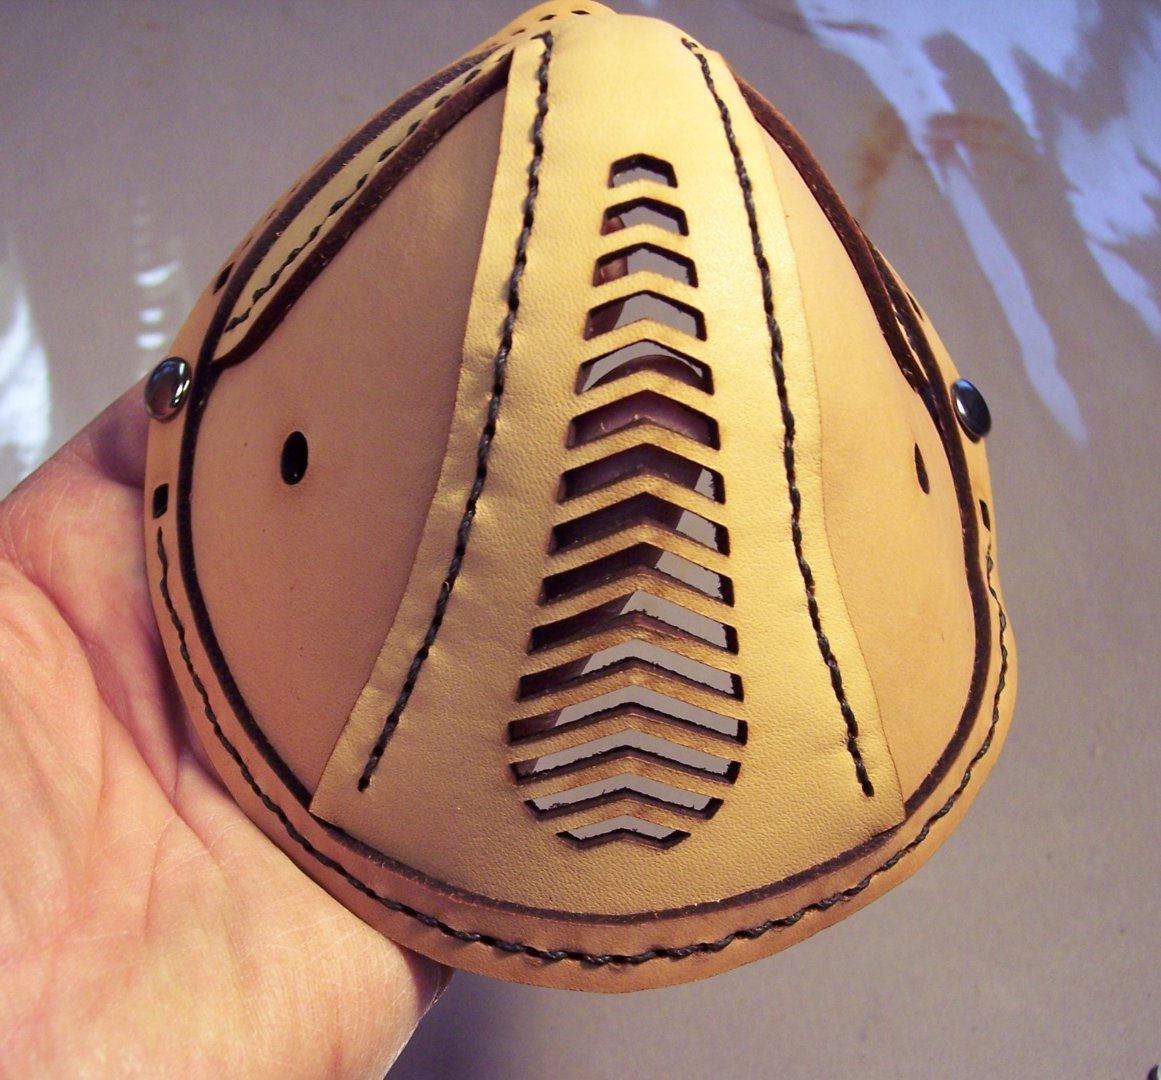
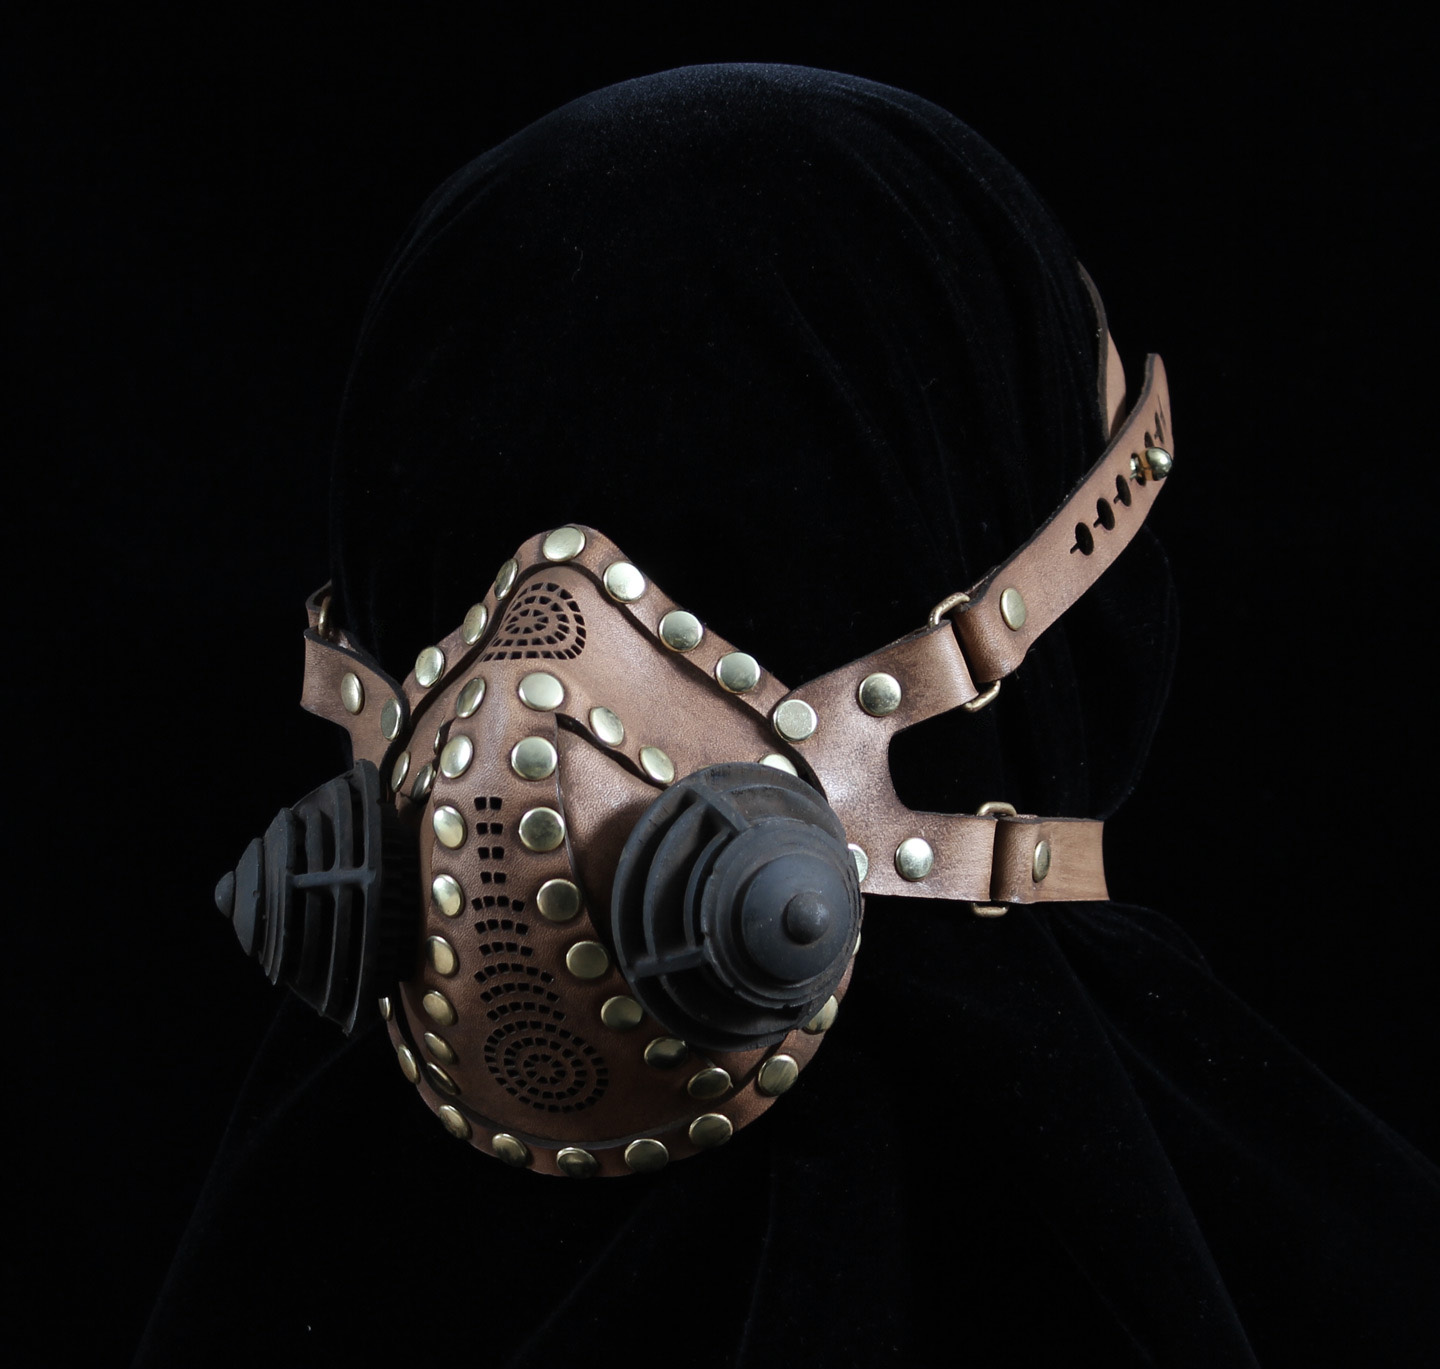
Wet these four leather pieces: Front, two cheeks and surround. Stitch cheeks to the front with needle and waxed thread using a running stitch. Front goes on top of cheeks. Match up colors as shown on diagram, ie. green to green, pink to pink. Begin at one end from the flesh side of the leather (inside of mask).
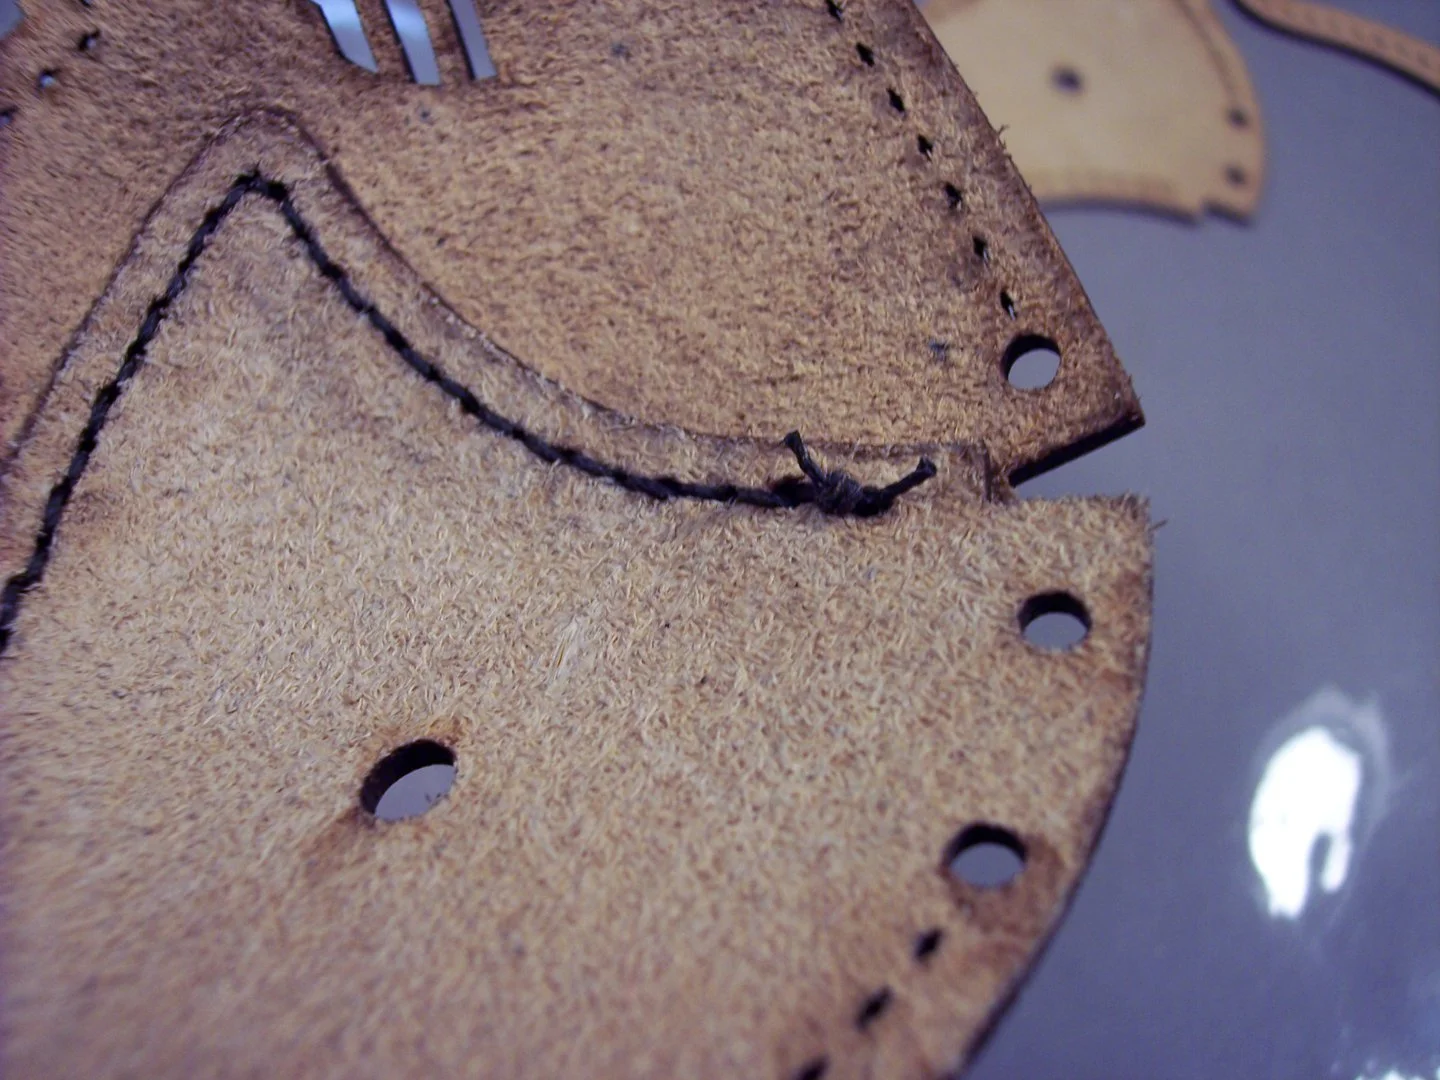
Stitch to the other end going through every hole, then turn around and come back to the beginning.

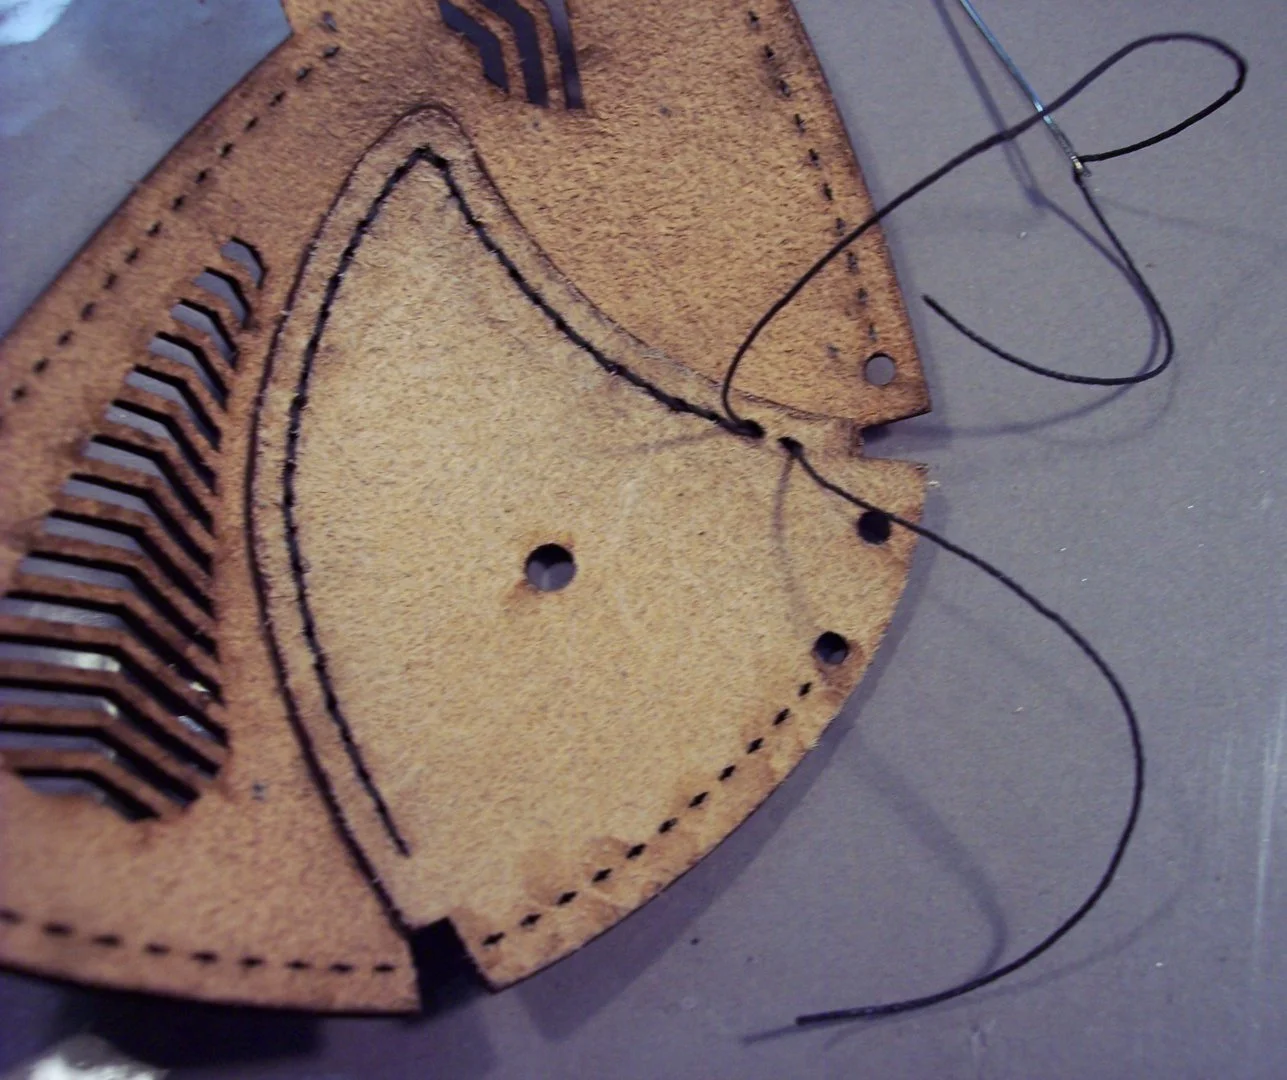
After both cheeks are stitched onto front, place damp surround over mask with pointy end facing up. Take two sets of rivets (male and female) and attach the surround to the mask through the center holes, one on each side. Press rivets together with your fingers till they snap into place. Don’t hammer flat until later. The rivets will keep the parts aligned while you stitch them together.

Stitch the bottom part of the surround to the mask using the same running stitch as before. Tie a square knot, then stitch top half of surround to mask. Tie off, then hammer two rivets flat.
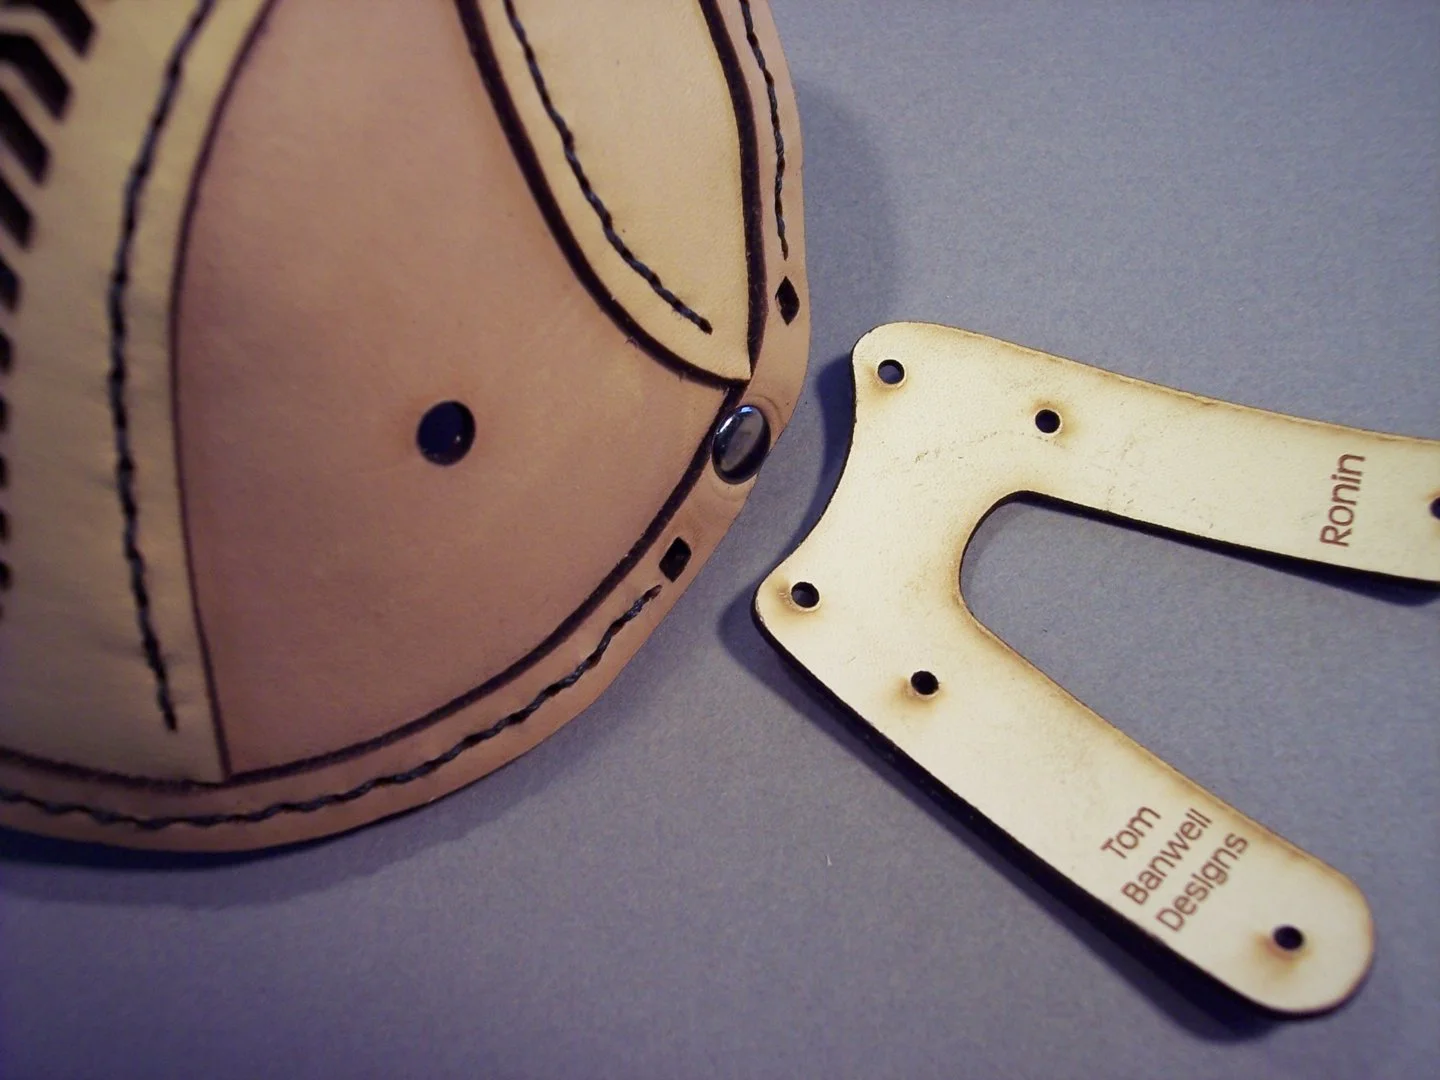
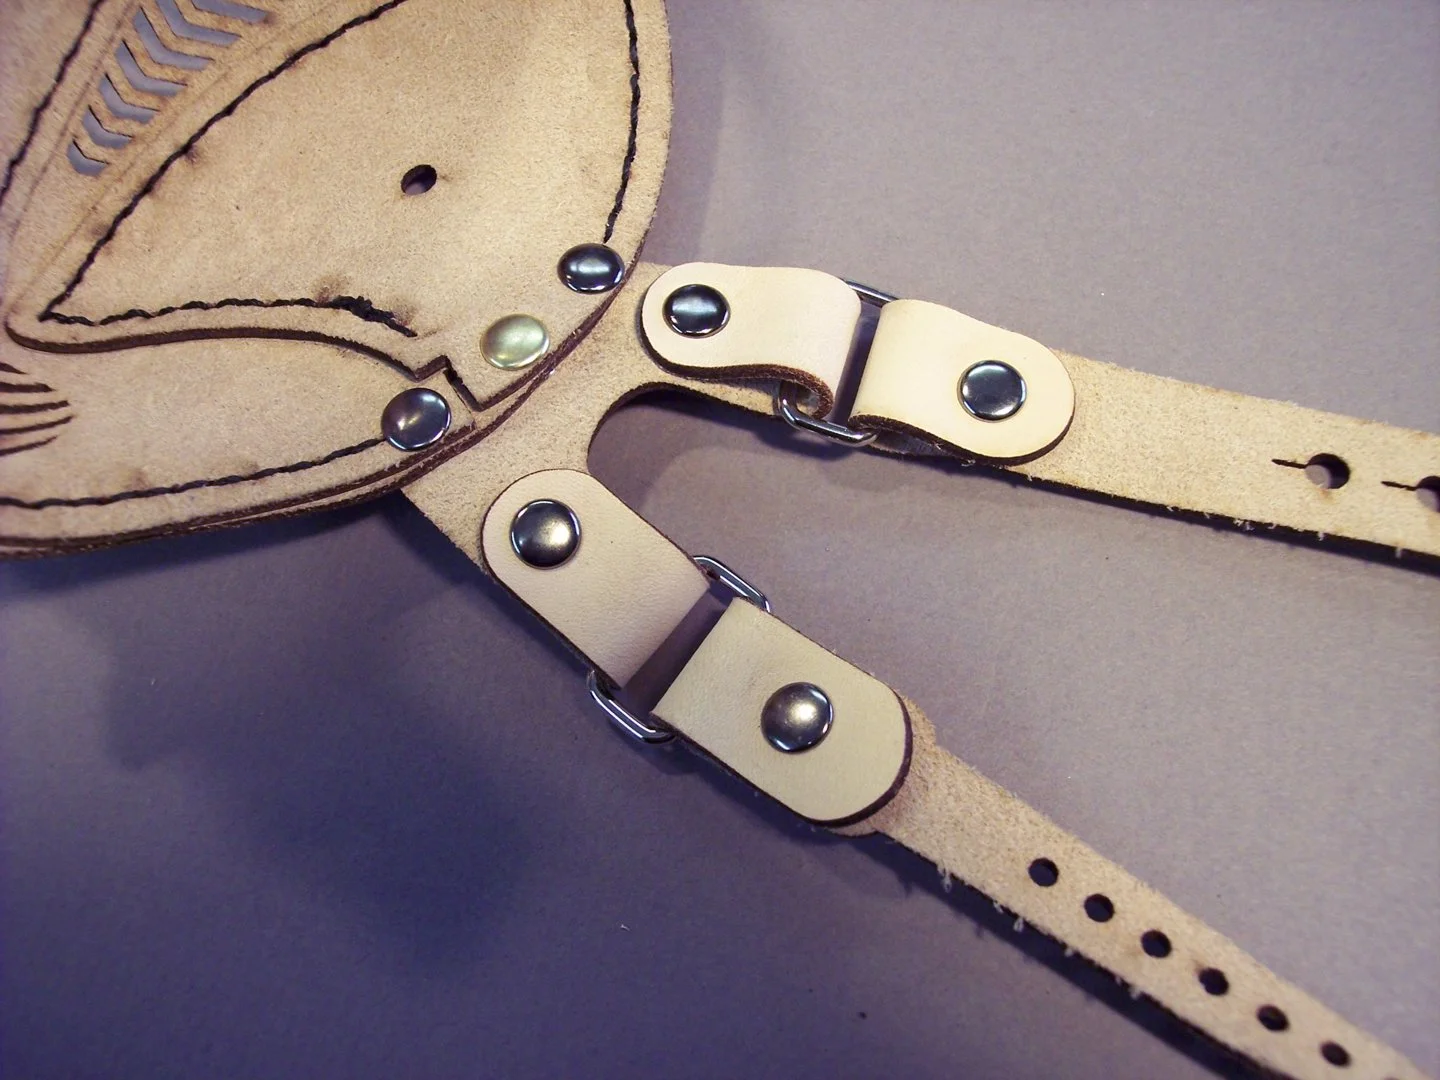
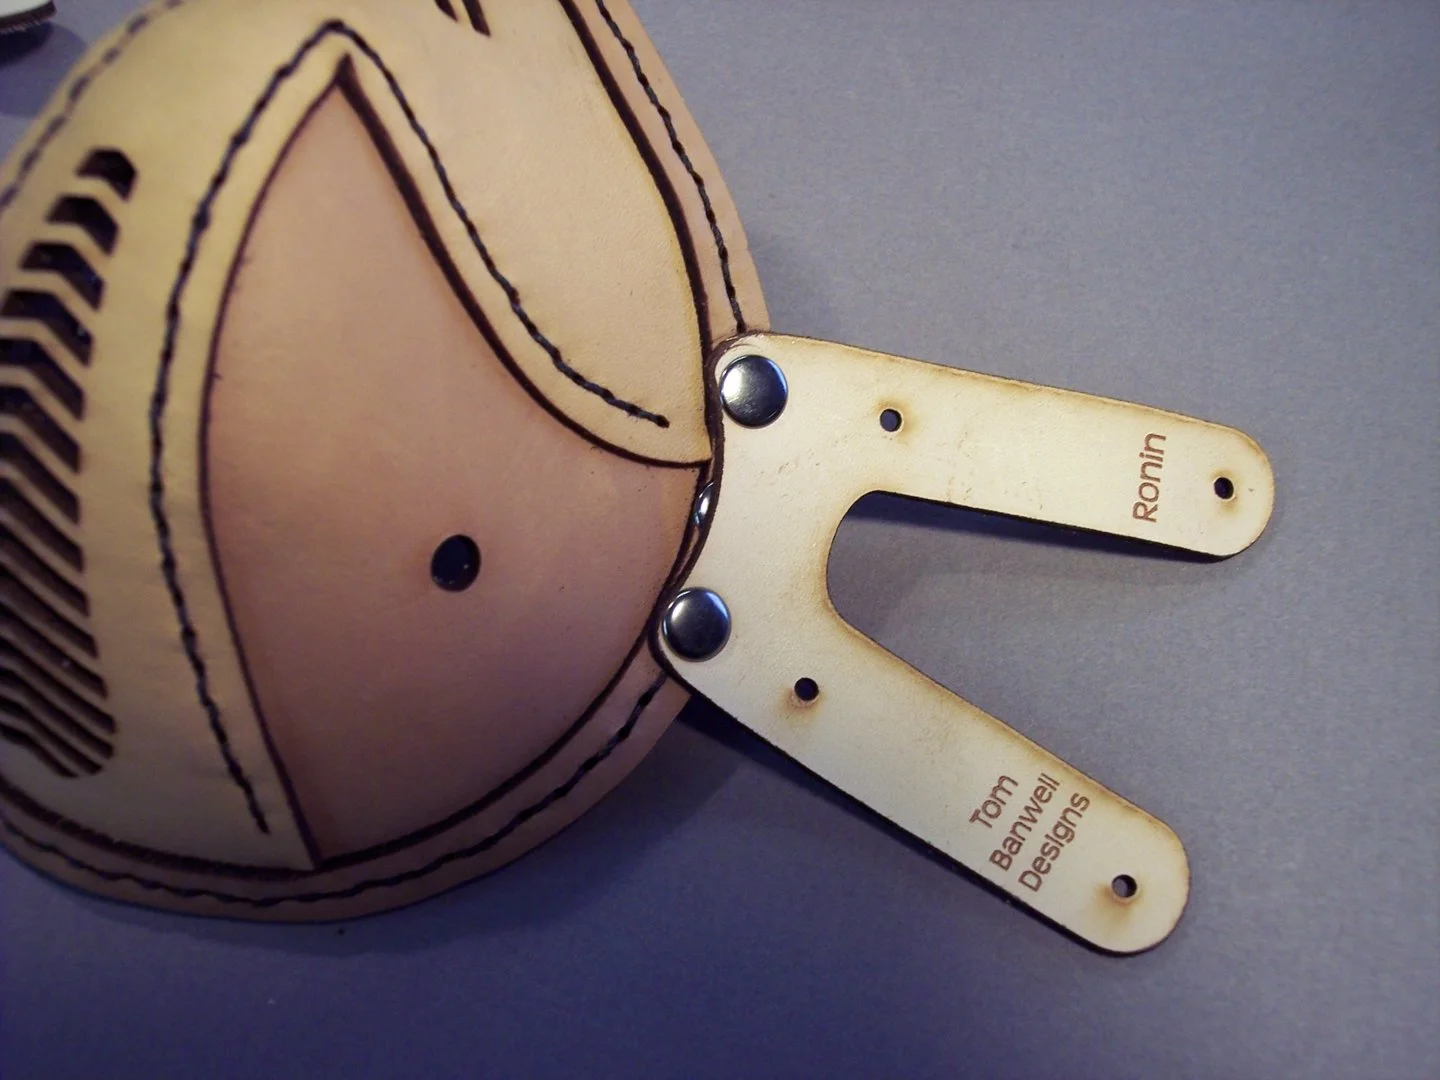
Attach two rectangle ring straps to sides of mask with two rivets each. Pointy part of strap goes up. Place four rectangle rings onto straps (one per strap) and fold straps back, aligning the rivet holes. Hand place the rivets and hammer flat.
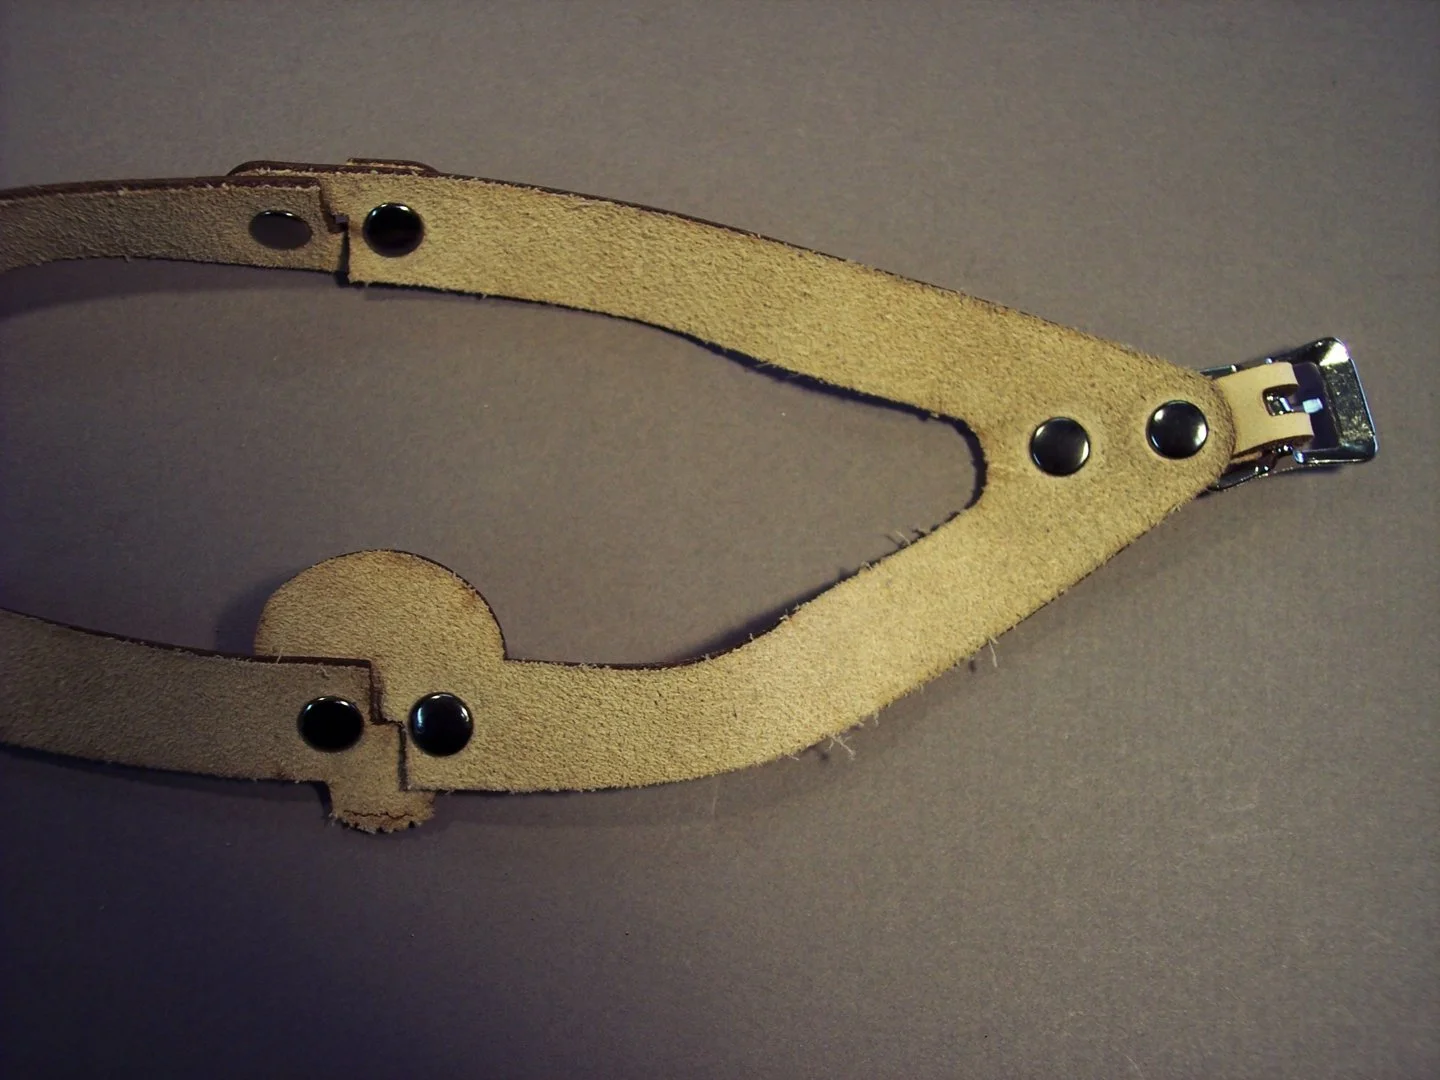
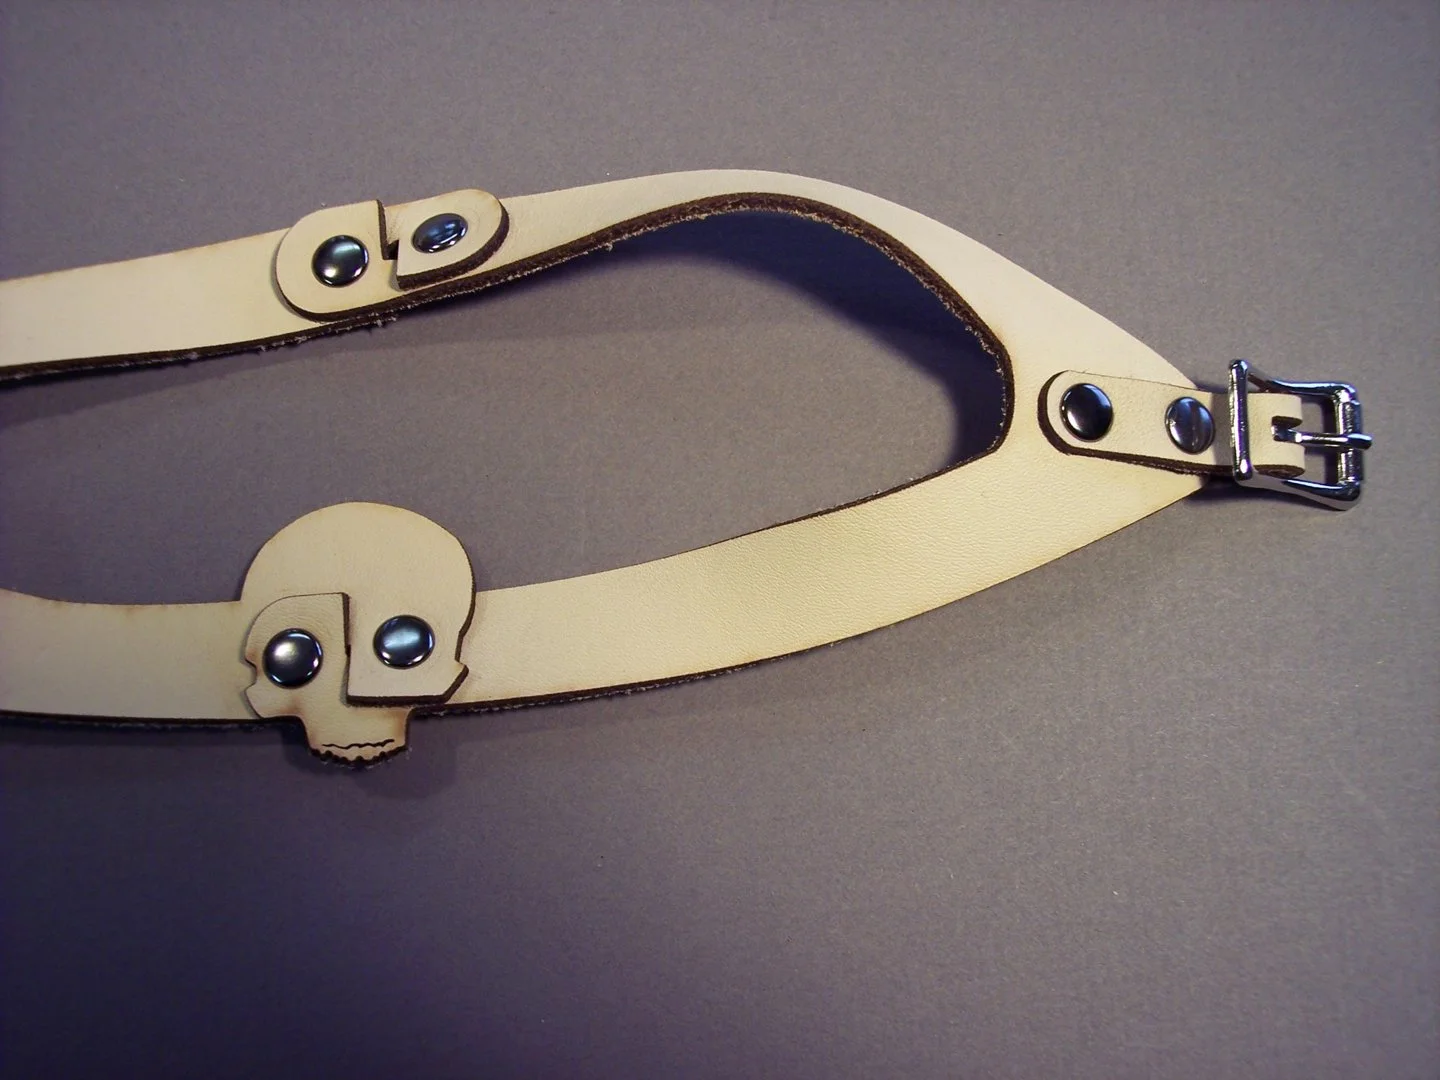
Attach two head straps to each other using four rivets. The free ends go to outside (grain side). Take two buckle straps and attach to ends of head straps. Round end of buckle straps goes to inner holes of head straps. Hand place rivets. Place two buckles over free ends of buckle straps. Fatter end of buckle goes to outside. Place rivets through two buckle strap holes and then head strap holes. Hammer all four rivets flat.
The two resin canisters as shown can be purchased at my Etsy shop, or you can create your own. Mine attach to the mask using a bolt and washer. Attach two canister bolt covers to inside of mask with contact cement.
Buckle upper side straps and adjust to your head. Attach lower side strap to button stud behind your neck.


Shape mask to face and allow leather to dry.
Attach button stud with screw to left lower side strap. Mark where button stud cover goes behind button stud and attach with contact cement. Fold upper and lower side straps over rectangle rings and rivet

This is the Excursionist, which is very similar to the Ronin, but is riveted rather than being handstitched.