Fairy Shoe

A gazillion years ago, in the mid-1980’s, I belonged to my local chapter of the Society for Creative Anachronism. At that time I made several medieval costumes, and a pair of pointy-toed shoes called poulaines.

Resin Last


In order to be able to extract the last from the finished shoes I used a bandsaw to cut the last in two pieces (black arrows), and then held the pieces together with screws (red arrows). By removing the screws, I could pull out the heel section first, followed by the rest of the last.


Since elves and fairies are popular Ren Faire characters I decided to construct a fairy shoe, complete with pointed toe. I began by covering the last with blue masking tape.

Drawing out the patterns onto the masking tape

I used a straight-edge to mark a center line, then aligned the two halves of the uppers to it one at a time. I had to rotate the blue pattern as it extended to the toe. At the right you can see the two straightened patterns marked onto the chipboard.

To construct the shoe, I began with the insole piece of 5 oz veg tan leather. After cutting it out I tacked it to the sole of the last.

I glued it all down with contact cement. Once that was set, I pulled out the tacks. That left a large open area on the bottom which I needed to fill with a piece of similar weight leather.

Poulaines

To make them I built my own lasts. I bought a pair of cheap, used shoes that fit me and filled them full of resin. I cut the shoe off the casting, and built up the pointy toe using Bondo™. By carefully sanding them I had a pair of lasts over which I could make medieval shoes.

Close up of Last

Using markers I drew out the seams and patterns as I envisioned them onto the tape. To get the two sides of the shoe the same, I marked first one side, then held it up to a mirror (as shown in the pic) and marked the second side to match.

Next I used an Xacto knife to cut out the pattern and lay it down onto a piece of chipboard.

I cut the tape off right down the middle top of the last in order to get the pattern pieces to lie flat. But I wanted to make the uppers one large piece, so had to eliminate that middle seam.

And to the left is the finished uppers pattern with seam allowance and stretch allowance marked, ready to be cut and transferred to the leather.

Insole

Next I cut out the uppers in a heavy garment weight cowhide. After sewing up the back seam, I stretched it over the last and tacked it down with ¾” tacks

I glued that in place with contact cement.

I used the insole pattern to cut another veg tan piece for the outer sole, and cemented in onto the bottom.

The finished shoe

Revised Pirate Shoes

New uppers along with the shoe last

I have stretched the uppers over the last, and tacked down the vamp liner. The vamp itself is shown peeled back so that I can smooth out the liner.

A view of the underside of the vamp liner stretched and tacked down

The vamp liner serves to strengthen the front of the shoe to protect the toes. The heel is supported with a counter, as I did in my earlier post. I have spread a shoe paste between the outer uppers and both the counter and the vamp liner to bind them together and make the front and back more rigid.

The welt is glued to the bottom of the uppers

The welt has been hand-stitched to the uppers

A midsole was cut out to glue to the bottom of the welt with contact cement. Once secure it is sewn on with a leather sewing machine

View of the bottom of the midsole after stitching it to the welt

I decided to make my outer sole out of three pieces of 6 oz veg tan, rather than one layer of sole leather as I did on the earlier shoe. This allows me to cut out a channer in the middle layer to hold a steel shank, which is needed to support the sole where it transitions from the heel to the front.

Three layers of leather are wetted and shaped and dried

Sanding the edges of the sole on the drum sander

The shoe is next dyed with a weak black stain that gives it an aged look.

The shoes after dying

The finished shoes

In my last post I altered wooden shoe lasts, making the toes wider and squarer. This post is about the revised pirate shoes I made from them. This is my fifth attempt at these shoes. I have been attempting to improve on the first shoe I made, written up in “Pirate Shoes….Arrgh!” I have made the vamp (the part that goes over the front of the foot) two layers, with a vamp and a vamp liner. They are stitched together at the top.

Stretching the vamp liner over the last

The vamp tacked down over the vamp liner

The uppers are made of veg tan, and are shaped while damp as they have increased stretchiness and compressibility.

Once the uppers are all dry, I added a strip of leather called a welt that encircles the bottom of the shoe. It has been glued in place, then the entire uppers are removed from the last, a series of holes is punched, and the welt was hand-stitched to the uppers.

The uppers are removed from the last and the welt is sewn on

The midsole ready to attach to the uppers

Another view of the midsole glued and sewn on

Three layers of leather make up the sole

After sticking the three layers together with contact cement the edges are sanded on the drum sander.

Binder clips hold the sole to the uppers while the glue dries

I built one heel by layering and shaping five layers of MDF (fiberboard). I molded it in pale blue silicone rubber and cast two heels in black urethane resin.

Rubber mold, original MDF model, and cast heel mounted on shoe

Some of my techniques are not traditional, but that is how I like to play. Now I have shoes I can wear to a Ren Faire.

Altering a Wooden Shoe Last

My pirate shoes were made on a pair of wooden lasts that were a bit narrow for my foot and without the square toe that I was after. Pictured is an extreme extant example of a late 17th century men’s shoe that inspired me.

Next I used my power drum sander to roughly shape the Bondo as I wanted it. It required a second batch to build up the toe area.

After Sanding Bondo Down

The Masking Tape as a Pattern

I then traced the pattern onto a piece of veg tan leather.

Leather Stretched Over Last

The next day I removed the tacks and slipped off the leather piece.

Finished Lasts with New Fittings

I began by taking my existing lasts and taping on a cardboard “dam” to contain the auto body putty (Bondo™) that would carve into the shape I wanted for the toes.

Lasts with hardened Bondo added to the toes

After power sanding I used 120 grit sandpaper to shape the Bondo by hand.

Masking Tape on Front of Last

I applied masking tape to the front of the last where I wanted to build up the shape and to smooth it out.

I wetted the veg tan leather to make it supple, than formed it over the lasts. I used small shoemaker’s tacks to hold the leather in place while it dried.

The Dried Leather Fitting

When leather is applied to a last to change its shape it is called a “fitting”. In this photo you can see there is a leather fitting on the sole of the last as well. I have begun my next shoes by shaping the counters around the heels of the lasts.

Pirate Shoes....Arrgh!


I attended my first Renaissance faire in over twenty years this Fall after discovering that the Northern California Ren Faire in Hollister was just a few miles from where my son lives. I put together a costume consisting of a leather jerkin, leather hat, leather bags, and slops made of upholstery fabric.

For shoes I wore a pair of old water shoes. I considered making something better, but didn’t really have the time, and dreaded the daunting task of making footwear that I could wear all day.

The jerkin especially, and the hat, were a lot of fun to make. The smaller bag on my left hip has a molded leather face on the flap which I find amusing.

After the faire I decided I wanted to make a pirate costume, especially the cocked tricorn hat and the shoes. I looked to prominent 20th century illustrators to study 17th century footwear: N.C. Wyeth, Howard Pyle, and my favorite Frank Schoonover. I was aiming for a low, square-toed shoe with a large, single brass buckle on the top. A common construction worn by pirates and pilgrims alike, along with many others.

I knew that to do this properly I would need a wooden last over which the shoe would be constructed. Finding one with the square toe proved challenging, but on Etsy I discovered a listing for a pair of antique wooden lasts described as a “pilgrim shoe former”. The size was marked 5E ( I wear a 9½ US, 43 European), but the measurements given seemed quite close to my foot size. So I bought them, figuring I could alter them as needed. Note that they come in two parts, which allows them to be removed from the finished shoe.

Lasting Pliers at upper Right in front of box of Nails. Last Extraction Tool to its left at Upper Center.

I began by covering the right wooden last in masking tape. Then I used a felt marker to delineate the two main pattern pieces: The vamp, which covers the toes, and the quarters, which covers the heel. I used an Xacto blade to cut the pattern pieces out and stuck the tape down onto chipboard. I added on a seam allowance, the straps, the tongue, and the extra leather needed to wrap around the toes and heel to get my finished patterns.


As I was concerned about the ability of the leather uppers to wrap around the toes, I chose a thin 2-3 oz. milled veg tan leather for the vamp. For the quarters I went with a sturdier 4 oz veg tan. First I made a heel support called a counter and shaped it damp around the heel.

After it was dry I pulled the damp stitched-together uppers over the last and began tacking down the leather on the bottom, stretching it as evenly as I could, with 4/8 clinching nails.

For the sole I used a piece of 12 oz veg tan sole leather, tracing the pattern and cutting it out oversized with a bandsaw. This leather measures about ¼” thick (7mm).

Once the cement was cured after about ten minutes, I marked where the heel would go on the bottom of the sole, scuffing up both surfaces to better hold the cement.

Back to the Drum Sander for Smoothing Out the Heel

I made just the single right shoe as I expected many mistakes as I learned about shoemaking. No need to make the pair. Before starting I bought a tool that I would need: Lasting pliers for stretching the leather over the toes and heel.

I also built a last extraction tool for removing the last after the shoe was done, by buying a large nail, adding a wooden handle and bending the end of the nail over. It just fits into the holes on my last that are made for this purpose.

Masking Tape on Chipboard

Final Patterns in Chipboard

Damp 4 oz Veg Tan Counter Drying Around the Heel of the Last. Note the Clinching Nails Holding it in Place.

Hand stitching the welt to the uppers.

Once the uppers were dry, I cut a welt, which is a narrow strip of leather that runs around the outside of the sole, and holds the uppers to the midsole. I punched holes along its length and after cementing it down, hand-stitched it to the uppers. Next I cut the midsole out of 5-6 oz veg tan and cemented it onto the  welt. Then I sewed the two pieces together using my industrial sewing machine, a Cobra Class 4 from Leather Machine Company.

The sole was cemented to the midsole using contact cement designed for shoes. After hammering together to strengthen the bond, the excess sole material was bandsawn off, and the edges were sanded flush on a drum sander.

For the heel I used nine layers of 5-6 oz veg tan, cemented together with two wooden toothpicks aligning the layers and helping to hold them together. Historically wooden pegs were often used for this purpose in place of metal nails.

Gluing Up the Heel in Many Layers of Leather

Lastly I dyed and painted the shoe black, then installed a colonial style brass buckle which I got from Military Uniform Supply.


Given that I bought the lasts sight unseen from the Internet, I am quite pleased with the sizing. It is tight on me as I have a wide foot, but I am able to walk around in it comfortably enough.

Victorian Batman Mask Pattern

Pattern for Victorian (Steampunk) Batman Leather Mask.

Bat Masked Man portrait.jpg
Victorian Batman pattern page 1.jpg
Victorian Batman pattern page 2.jpg

This pattern is fairly difficult to make and I do not recommend it for anyone unfamiliar with working and shaping veg tan leather.

Batman-mask-inside.jpg
Batman-mask-side.jpg
Batman-mask-front.jpg

Remote Automobile Keyless Fob Carrying Case

Many late model cars come with remote keyless entry by means of a small fob. Since unlocking and starting the engine of your car no longer requires a metal key inserted into a lock, you only need to carry the fob somewhere close to the car.

If you carry a purse, then it is a simple matter of tossing it inside, but if you’re like most guys you need another way to carry it. Of course a pants or shirt pocket will work, but I felt it would be more convenient to carry it on my belt.

key-fob-0.jpg

Here is my design (after several other attempts) for a simple but effective leather fob case. It is sized to fit my 2020 Honda CRV (2½” x 1.4” x ½”), and can be adjusted easily to accommodate other sizes as it is made up of just two rectangles.

key-fob-1.jpg

First step is to print out the pattern and cut it out of 4/5 oz veg tan leather. Bevel edges with #0 edger.

key-fob-2.jpg

Tool the pieces if desired and dye or paint them while they are flat.

key-fob-3.jpg

Attach line 20 snaps as shown, with the female side attaching both pieces together.

key-fob-4.jpg

Fold shorter piece over onto itself and rivet together top and bottom with small rivets as shown.

key-fob-5.jpg

Fold narrow strap over the wider strap and rivet together as shown. Strap to left of rivet in lower image slides over your belt.

key-fob-6.jpg

Insert key fob into case and close snap. Slide your belt into the narrow vertical strap on the back.

key-fob-7.jpg

This pattern was designed for a belt 1½” wide. I made several cases with a spring holster clip but found the metal against my skin uncomfortable.

key fob plans.jpg

An Historical Plague Doctor Hood

Paul Furst Engraving from 1656

Paul Furst Engraving from 1656

How do we know what historical plague doctor masks looked like? There are three different ways: Contemporary engravings, contemporary written descriptions, and extant examples.

Plague doctor masks as we know them today are based primarily on an anonymous engraving from around 1656 and copied several times, including by Paul Fürst.

The writings we have credit Charles de Lorme (1584-1678), personal physician to various members of the French royal household, as having invented the mask. The description of his outfit was published in 1682 by the Abbot Michel de Saint Martin some 63 years after de Lorme is credited with creating it, so it is second-hand information. He wrote:

‘He was never without his own design of (goatskin) leather coat, and dressed from head to toe with pantaloons and a mask of the same leather to which he attached a long nose half a foot in length in order to keep out the bad air.’ 

‘The outfit in which the doctors in Rome go to medicate in defense of the infectious disease is of waxed canvas, the face with eyeglasses, & the nose full of perfumes against the infection. They hold a staff because of their reduced vision and to demonstrate their operations.’

From German Medical History Museum, front view

From German Medical History Museum, front view

From German Medical Historiy Museum, side view

From German Medical Historiy Museum, side view

Regarding extant examples of plague doctor masks, it is likely that none have survived the ±365 years since they were used. There are two quite similar masks in German museums which might be from the 17th century, but the provenance on both is non-existent and I suspect they are 19th century reproductions.

Nevertheless, I have made a copy of this mask, using split leather in place of the velvet in the German example. It differs from most plague doctor masks currently available (including my own) in that it is a hood and covers the entire head.

The nose and eyetrim are made of veg tan leather, shaped while wet.

The hood is made of split chap cowhide which is machine sewn.

The lenses are clear acrylic, and the leather trim has been hand-stitched with waxed thread.


For more information on the history of plague doctors you can read two good articles here and here.

Bubonis, a Plague Doctor Mask for Eyeglass Wearers

Krankheit Plague Doctor Mask

Krankheit Plague Doctor Mask

In order to make a mask that will fit over eyeglasses it is necessary to move the lenses away from the face. The further the lenses are from the eyes, the more restricted one’s vision becomes, so to counter this I make the lenses larger for eyeglass wearing masks.

Before making this mask—which I am calling Bubonis—the only plague doctor masks that we made which could accommodate eyeglasses were Maximus and Jackdaw. Both of them have larger lenses than Classic, Krankheit, Stiltzkin, and Schnabel.

Bubonis Plague Doctor Mask

Bubonis Plague Doctor Mask

To sum it up, Bubonis (named after the bubonic plague) is a riveted leather plague doctor mask similar to Krankheit but with larger lenses and a longer beak. It has two rows of ventilation holes (one on the upper beak, one on the lower beak), hand-stitched acrylic lenses, and an adjustable strap. We offer it in both black leather with gray lenses and white leather with red lenses.

Bubonis Plague Doctor Mask 

Bubonis Plague Doctor Mask


I recently received a request to make a Krankheit mask that could accommodate eyeglasses. As I felt that such a mask would be desired by other eyeglass wearers I decided to make one and add it to our line of plague doctor masks.

The Krankheit mask--like its cousin Schnabel--is assembled primarily with rivets. This makes it faster to make than our hand-stitched masks and therefore less expensive.

Bubonis Plague Doctor Mask

Bubonis Plague Doctor Mask

Another design consideration when moving the lenses forward is the effect it has on the beak. The same length beak will look shorter as the tip is now closer to the lenses, and so I have lengthened it a bit to keep the right proportions.

Bubonis Plague Doctor Mask

Bubonis Plague Doctor Mask

We are offering Bubonis at a reduced introductory price. You can order it here.

Steampunk Judge Dredd Helmet

The Current Judge Dredd Helmet that I based mine on

The Current Judge Dredd Helmet that I based mine on

The watercolor sketches to the right are my design of how I thought it should look.  The gray color represents an antiqued black leather, the red color would be out of veg tan leather that is painted, and the yellow color would be out of cold cast brass.

Veg tan leather pieces sewn together by hand with waxed thread

Veg tan leather pieces sewn together by hand with waxed thread

To create the helmet I began with a life-casting of a head, covering it in Plasticine to form the shape of the finished piece. Next I brushed a fast-setting resin over the clay so that tape would adhere to it, and proceeded to cover it in masking tape. With a felt marker I laid out the seams and cut the tape along those marks to create my individual patterns for the leather pieces. 

The client wearing the finished helmet with the rest of his costume

The client wearing the finished helmet with the rest of his costume

I don't have time to accept many commissions, but when this one was offered I jumped at the chance because it sounded like fun. The job was to create a Judge Dredd helmet in a steampunk look. The client provided several sketches, and I took it from there, attempting to envision how Judge Dredd would have looked in the 19th century.

My preliminary sketches for a steampunk version of the helmet

My preliminary sketches for a steampunk version of the helmet

Custom made cold cast brass parts

Custom made cold cast brass parts

For the shield I studied pictures of 19th century eagles and flags and combined the two into a pleasing shape. I laser engraved this design into a piece of acrylic sheet. Then I molded it in silicone rubber and cast it in cold cast brass. After demolding, while the part was still warm and pliable, I gave it a slight curve by draping it over a bucket. 

The ear covering was made by laser cutting the cross bars into a piece of veg tan leather, wetting it and stretching the leather over a drawer pull to get the concave shape. Then I molded it and cast it the same way as the shield.

Waking Crow Wins the Competition


I want to thank everyone who entered the Miasma Photo Manipulation Competition. It was difficult for me to choose among the fine entries, but ultimately I chose Waking Crow's entry. Here are some of my other favorites.

Nicky La Sanctionne'

Nicky La Sanctionne'

Vincent Mattina

Vincent Mattina

Terry Taplin

Terry Taplin

 
Waking Crow

Waking Crow

Terry Taplin

Terry Taplin

Tony

Tony

The Making of the Miasma Mask

I constructed my first plague doctor mask in 2010 after several requests, and I made it as historically accurate as I could. I had already made several steampunk masks and helmets, as well as a top hat and a raygun, and while I was working on the plague doctor mask I kept thinking about how I could make a very nice steampunked version of a plague doctor mask, combining the two elements.  A week after it was finished I created Dr. Beulenpest, a steampunk plague doctor mask. It took me only five days.

Dr. Beulenpest

Dr. Beulenpest

A year or so later I made Ichabod. I had spent a lot of time studying Dr. Beulenpest and thinking about another version of a steampunk plague doctor mask. I decided to make a longer, slimmer beak with a larger cold cast tip.  The aluminum parts have a relief pattern of stylized vines, and I reduced the number of straps from five to three to make it easier to put on and off. It took eleven weeks to complete.

Constructing the beak

Constructing the beak

Once the beak was complete I sculpted the mask in clay and drafted the leather patterns. Getting the correct length and angle of the leather beak proved challenging. I photographed the sculpture from a side view, and scanned it into Photoshop where I tweaked those two components into about a dozen versions. Again, it just wasn’t coming together easily, but I finally chose my favorite and made the pattern.


Ventilator and beak

Ventilator and beak

Finally I made the eyes. I had wanted to make domed acrylic eyes, and I did a lot of work towards that until I realized that the lenses would be susceptible to scratching, and I was faced with either building a protective cage around it, or doing something different.  I agonized over this for weeks. Eventually I settled on two different versions of eyepieces. One would keep the dome but eliminate the acrylic lenses, opting instead for a cold cast cage which could be looked through. The other—for those who didn’t want to be seen—was flat gray acrylic lenses encompassed in new hexagonal lens caps. It took about a year and a half to complete Miasma.

As a young man I had little patience. Now I find that without patience I wouldn't be able to create work that I am proud of.


Etching of Plague Doctor

Etching of Plague Doctor

I started with the classic leather plague doctor mask and added cold cast aluminum eyepieces and beak tip. I put decorative domed rivets around the perimeter, and an interesting piece of trim leather down the bridge of the nose. I thought it came out nice, and it has sold well ever since. 

Ichabod

Ichabod

Three years later I started on another steampunk plague doctor mask. I felt that a third mask would round out the line, and that I could make one with a more masculine cold cast beak. I named it Miasma. I wanted a strong raptor, or dragon, look. I began three or four times to fashion the beak to my liking, but it always fell short, and I would put the project off to another time. After about a year of this I finally created a beak that I liked. It combined the look of a fierce dragon with that of steel machinery, like a living breathing fantasy piece of steampunk equipment. 

Sculpted in clay

Sculpted in clay

Wanting to make Miasma different and special, I conceived of making a pair of ventilators that lay alongside the beak, behind the cold cast tip. I felt this was the perfect opportunity to use a stretched leather technique to add visual interest. It took me many more weeks to work out just how to execute and attach these so that they were a component that made a better mask.

Domed cage eye

Domed cage eye

Flat gray acrylic eyes 

Flat gray acrylic eyes


Miasma Photo Manipulation Competition

Announcing a competition in photo manipulation using images of my steampunk plague doctor mask Miasma. I am providing twenty five high resolution photos of the mask from varying angles, all shot on a white background to make them easily extractable. Your job is to choose one or more of the images and incorporate it into a photograph that will showcase the beauty of the mask.

I will be using the image to advertise the Miasma mask, which I sell at my Etsy store. What I’m looking for is originality and drama. Think of it as an advertising poster that grabs the viewer’s attention and promotes the Miasma mask.


The competition will run through April 18, 2015 after which I will choose a winner. The prize is a Miasma mask  valued at $475.  Each entry must contain the word “Miasma” in the image. Minimum size of submissions is 1200 pixels by 1200 pixels. You can make it horizontal or vertical in any ratio. Feel free to add your own watermark. Multiple entries are welcome.


By submitting photos to me you assure me that you own all rights to the images and are granting me the right to use them on my blog, Etsy store and wherever else I like. I am providing these extractable images for use in this competition only, and for no other use. You are free to publish your submitted images online as long as you give me credit for the mask.


The images are located in a zip file here:  https://www.yousendit.com/download/UlRRblFBcG9iV3hESjlVag

Email me your submissions here using the subject "Miasma entry".


Miasma, a Steampunk Plague Doctor Mask

It's been several years since I introduced Dr. Beulenpest and Ichabod, my existing steampunk plague doctor masks. I felt it was time to create a third one, which I am calling Miasma. Years ago, people believed that the Black Death was caused by noxious air called Miasma, which came from decaying organic material. Thus the mask Miasma guards against this "bad air".

beullenpest and ichabod
The new Miasma mask

The new Miasma mask

I wanted to create something similar to Dr. Beulenpest and Ichabod, made mostly of veg tan leather with cold cast beak and eyes. I decided to go for a dragon or raptor look to the beak, rather than the pointy bird beak of the earlier two pieces. I began with a lifesize sketch from which to work. I played around with several ideas of how to construct this part, and wasn't happy with them, until I built it as shown in the photos.

beak construction

Once again I molded it and cast another copy. Then I shaped the angled base of the beak, and added some rows of copper balls to accentuate the steampunk look. Again I molded it, and cast it in a lavender color to use in the mask sculpture. To create that I took a lifesize face form and built up Plasticine on top of it, working around the eyepieces and upward to where I attached the resin beak.  

It took quite a bit of shaping and reshaping until I created a profile that I felt worked. Once I was satisfied I sealed the clay with resin, and covered it all with masking tape. I spent some time deciding where to place the seams, which I then marked with a Sharpie.

paperprototype

After a few further adjustments I laser cut the pieces from veg tan leather, and handstitched them together for my first leather prototype. It definitely had some problems which I had to correct. The middle buckles lay right over the ears, so I moved them down and eliminated the fourth and fifth buckles and straps. I also decided that the leather staples holding together the bottom seam wasn't right, and I converted it to being handstitched. The fit around the beak needed some tweaking as well.

prototype2

I tried several different eyepieces, and wasn't terribly happy about how they were looking. The photo shows some of them constructed in fiberboard and acrylic. Ultimately I elected to go with a cold cast aluminum eyecage (not shown), and for those who want lenses, the hexagonal lens cap shown on the far right.

On the right are four orange Pony clamps, used to wet-form the leather ventilators. The clear acrylic top with the elliptical hole in the center is forcing the red leather around a resin form. Once the leather is dry it will hold its shape, and I can then cut it in half, making a pair of ventilators. The completed ventilator consists of the shaped red leather piece capped off with a cold cast crescent.

assosrtedparts

Here is the mask all assembled and stained. You can see the domed eyecage, the ventilator with cap, the chin strap, and the 12mm domed rivets running across the top of the mask. The leather mask is finished with a black/brown stain that allows some of the underpainting to show through.

Miasma with plague doctor hat

Miasma with plague doctor hat

Back of Miasma shown over a balaclava

Back of Miasma shown over a balaclava

sketch

 I laser cut fiberboard sheets into the different levels, and stacked them and glued them together. I made a silicone rubber mold of that piece (on the far left) and cast it in urethane resin. Next I sanded it, bandsawed it in half to distinguish the top and bottom sections of the beak, and added some found metal bits. I was attempting to achieve just the right balance between animal and machine.

claysculpture

I cut off the masking tape with an Xacto knife along the seam lines, laid each piece out flat and scanned them. Using CorelDraw I cleaned up the lines, and added seam allowances and stitching holes. Then I laser cut the parts in card stock and taped them together. As you can see from the photo I had also cast the beak in cold cast aluminum (the final material) and polished it.

prototype1

My second prototype--shown here painted black--has the previous changes plus a few other goodies. I attached a chin strap, mostly for looks, but also to add an interior neoprene foam pad for comfort. On both sides of the leather beak I added in leather "ventilators", and I also tried out a large telescopic eyepiece.

eyepieces

The photo on the left shows some of the jigs I built along the way. On the far left with the alligator clip is an airbrushing mask that I vacuum-formed to protect the red color of the ventilator while the purple undercoat is being painted.

To the left are the mask pieces before they are stained and assembled. At the bottom are the two ventilator pieces. Leaning against the mask is the cold cast domed eyecage. At the bottom left are the two black neoprene foam pads that go inside the mask.

closeupright

To put  a lens under the domed eyecage would be impractical because it would be difficult to clean, so I am also offering Miasma with a flat gray lens with the hexagonal lens cap. We can also make these with either red or clear lenses. The gray or red lenses hide the wearer the best. The eyecage allows for maximum air exchange.

frontview
Miasma with leather hood

Miasma with leather hood

Leather Staple


I have recently discovered a new piece of hardware for use with leather: The leather staple. They resemble a regular staple used in a stapler for holding papers together, only wider and with super sharp points.

I have drawn blood more than once  from handling them, and I suggest you treat them with respect.

Cap-with-staples.jpg

In order to try them out I made this cap made of 4 - 5 oz. veg tan leather. Since I like to make things that look old I photoshopped the cap into a 19th century photograph.

Our plague doctor masks have a dart on the bottom of the beak, and on both the Krankheit (shown below) and the longer Schnabel that dart is closed by means of a strip of leather that goes on the inside of the mask attached with two rows of rivets.


Unlike rivets, the two pieces of leather being attached do not have to overlap. In fact the legs of the staples are so short (about ¼") that unless the leather is really thin you can't overlap them. Instead I used them with a the two pieces butted up to each other.

After playing around with the leather staples it occurred to me that they could be used to close up the dart. In the photo you can see the old way with rivets on the left, and the new way with staples on the right. I think it is an improvement, and will soon be converting our patterns over to use the staples.

Media Coverage of the IFL Opening

Here are three newpaper articles on my show at the Idea Fab Labs in Chico, California

The Mask Man

Internationally known steampunk artist brings his leather creations to Chico


By Ken Smith, Chico News & Review

Tom Banwell has been a working artist for most of his life, parlaying his self-taught leather-working and resin-casting skills into a living by making hats and trophies since the 1970s. But it wasn’t until 2008, at the age of 60, that he found true creative success and recognition in an unexpected place—the retro-futuristic fantasy world of steampunk.

Steampunk is an emerging aesthetic rooted in late 19th-century science fiction of the Jules Verne/H.G. Wells variety, complete with its own subculture known for elaborate costumes and homemade machinations, mixing Victorian and Old West-era fashion with a touch of post-apocalyptic devolution. Banwell, known mainly for his elaborate masks, is currently one of its brightest stars, with his work featured in numerous television shows (SmallvilleOnce Upon TimeWonderland to name a few), films (indie feature After the Fall), more than half a dozen books on the genre, and international art shows. Though his name is now associated with steampunk, Banwell wasn’t even aware it existed until six years ago.

“I bought a laser engraver for the trophy business, and during a slow time I started wondering if I could use it to cut leather,” Banwell said in a recent phone interview from his home in Nevada County’s Penn Valley. “It worked well, so I went online to see how other people were using that technique, and saw many artists were using it to make masks.”

Banwell decided to try his hand at mask-making, and fashioned a leather mask of a bulldog’s face that he posted on the Internet, with encouraging results: “It was the first thing I’d put online that people actually liked,” he said. “So I thought, ‘Well, I better make some more masks.’”

While looking at the work of other mask-makers, he noticed one artist who used the word “steampunk” to describe her work and, unfamiliar with the term, Googled it.


“I thought, ‘Wow, man, this is something that works for me,’” Banwell recalled. “It involves history, costumes, mechanics and of course the whole fantasy element, all things that I love, so I thought this might be a great genre for me to work in.”

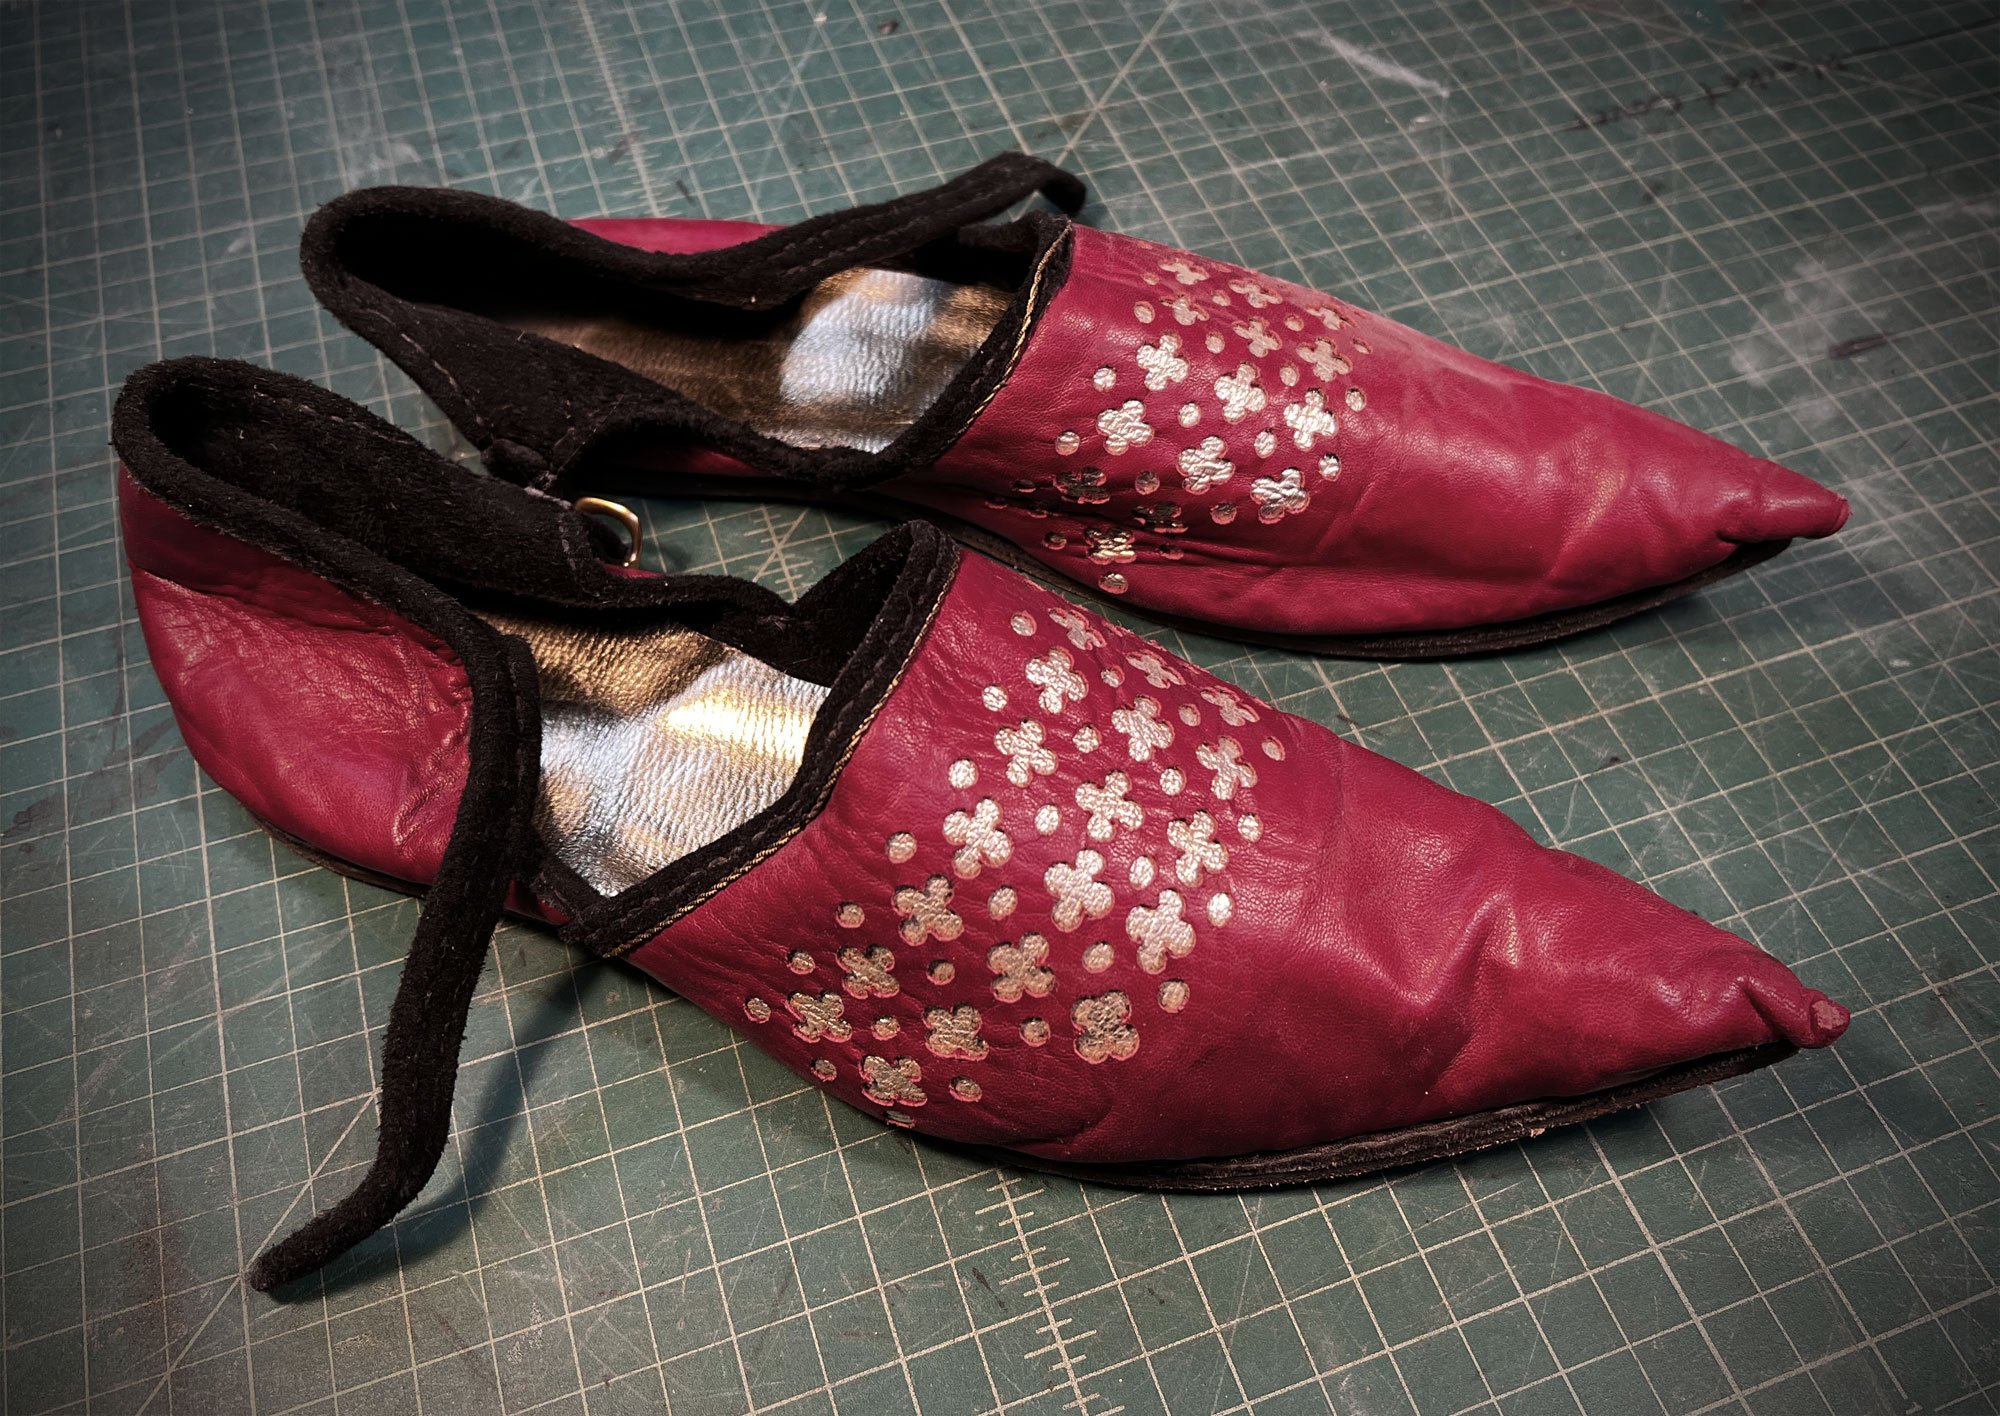
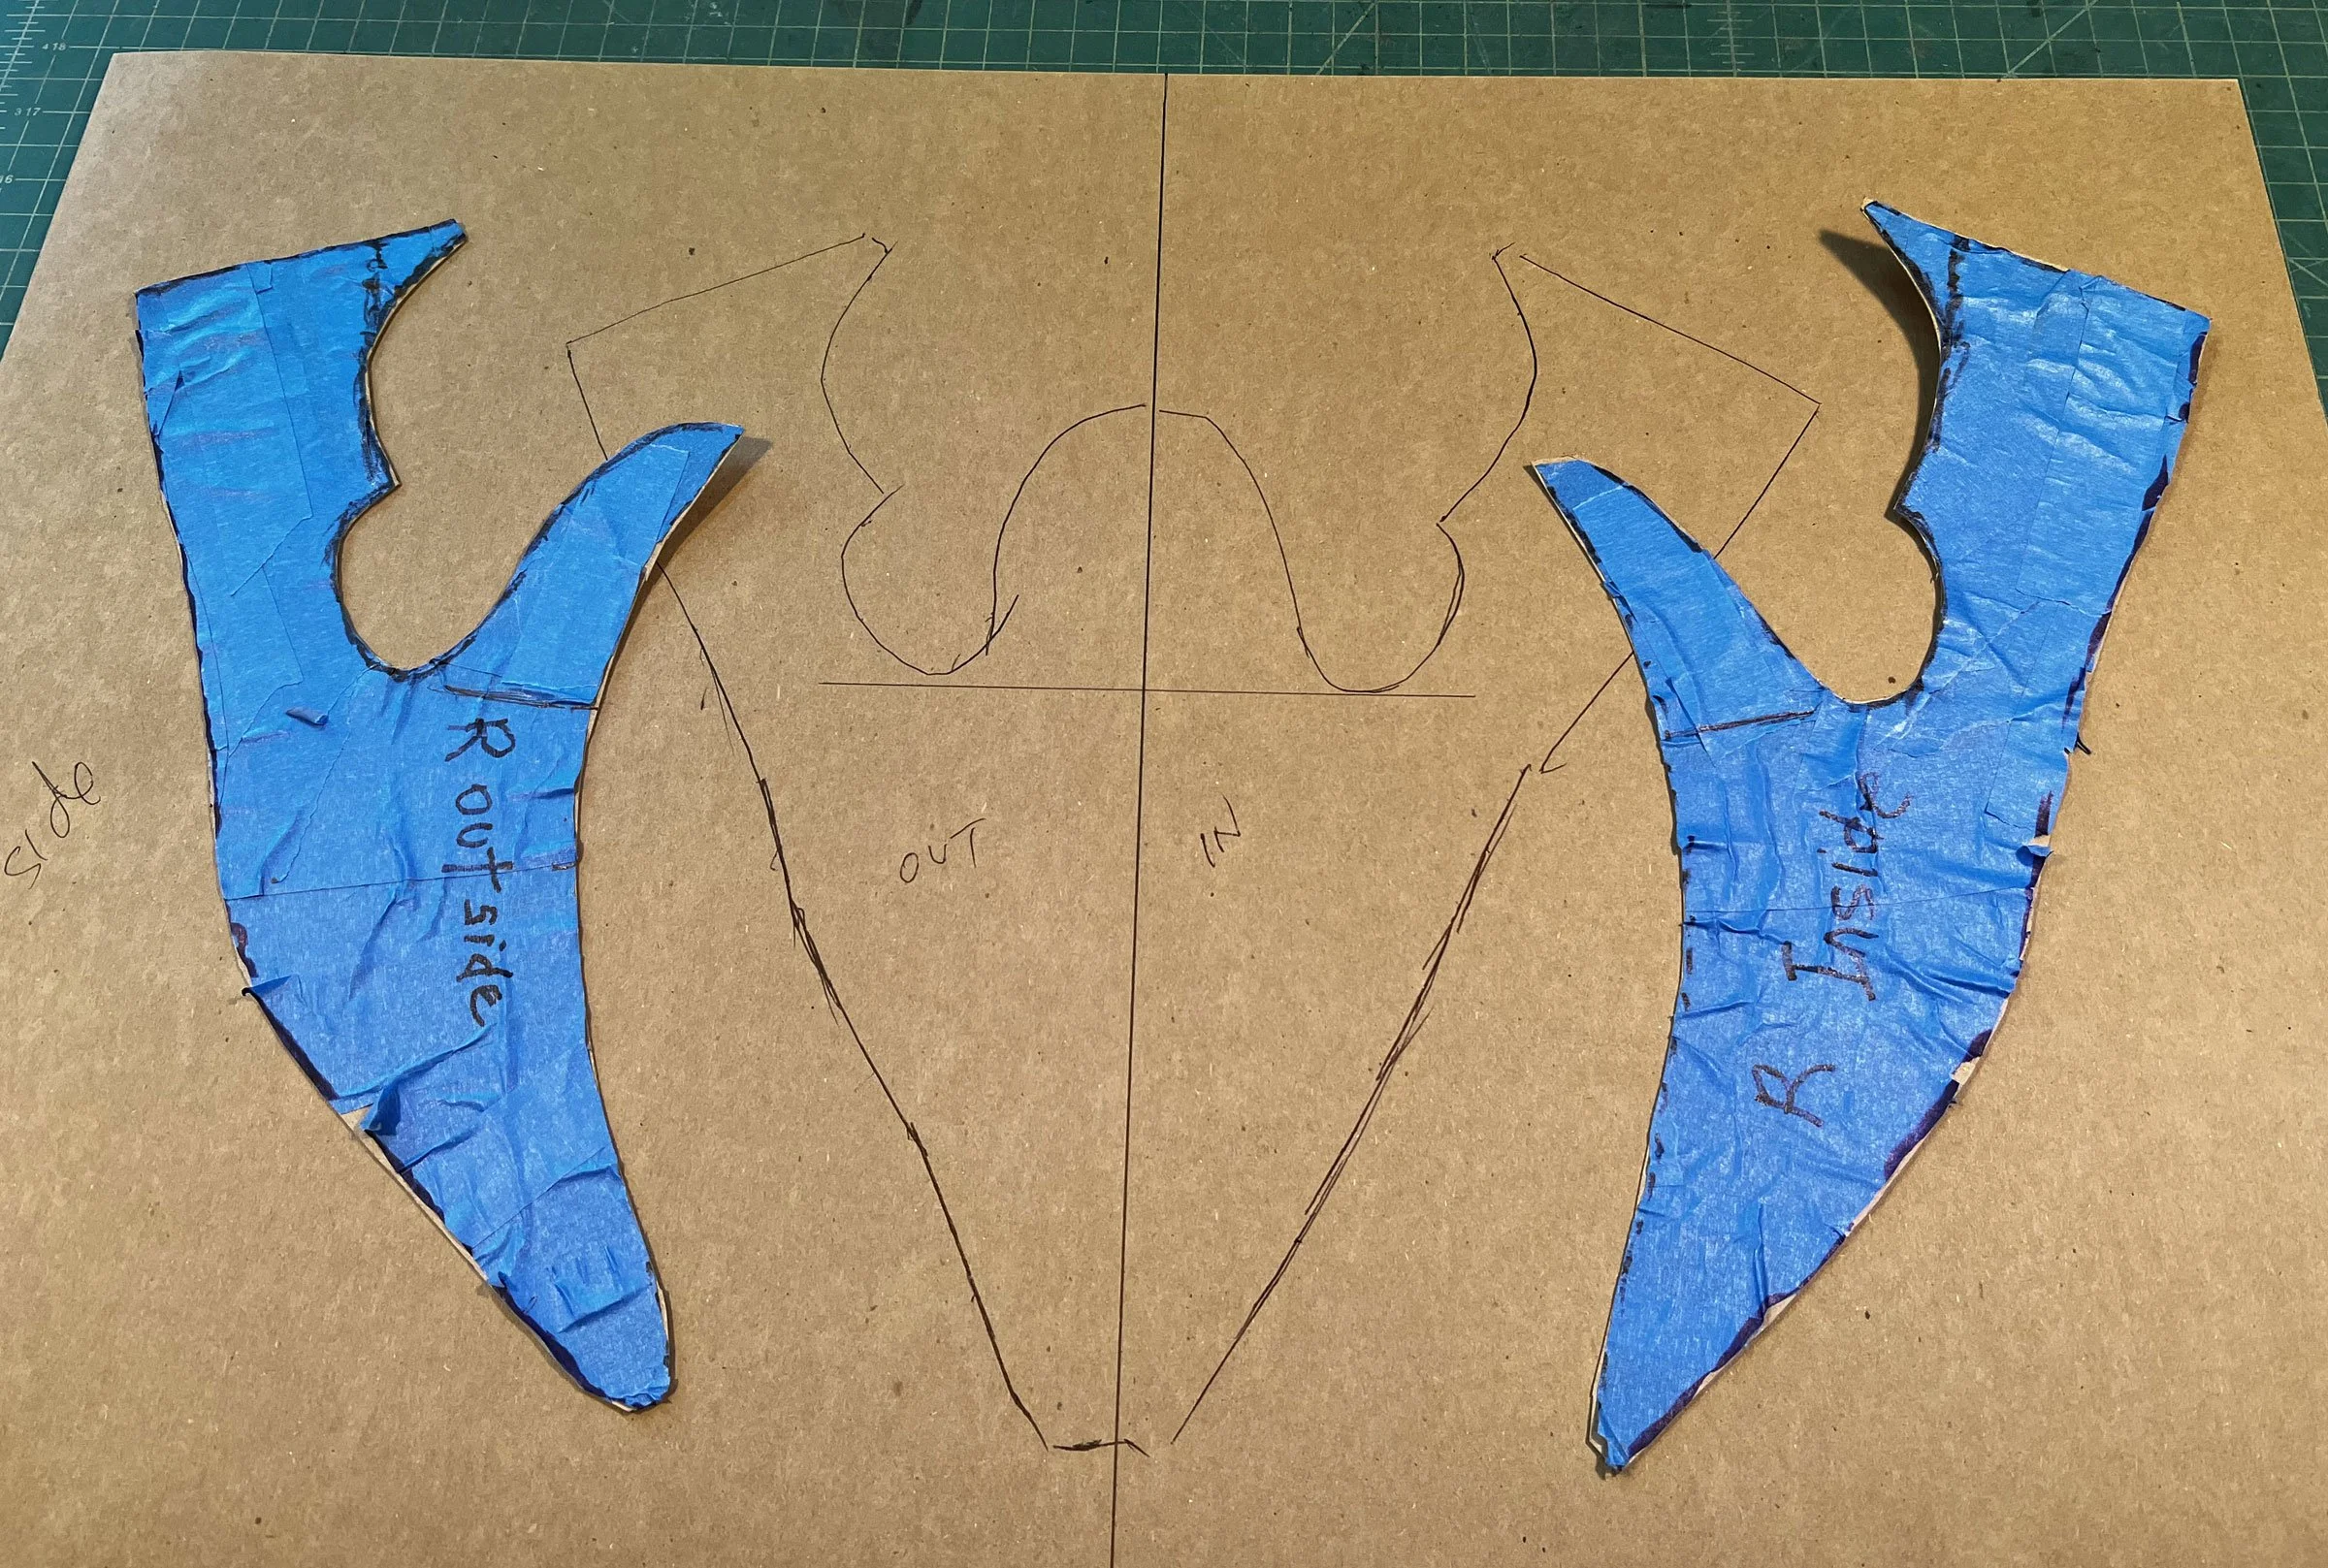
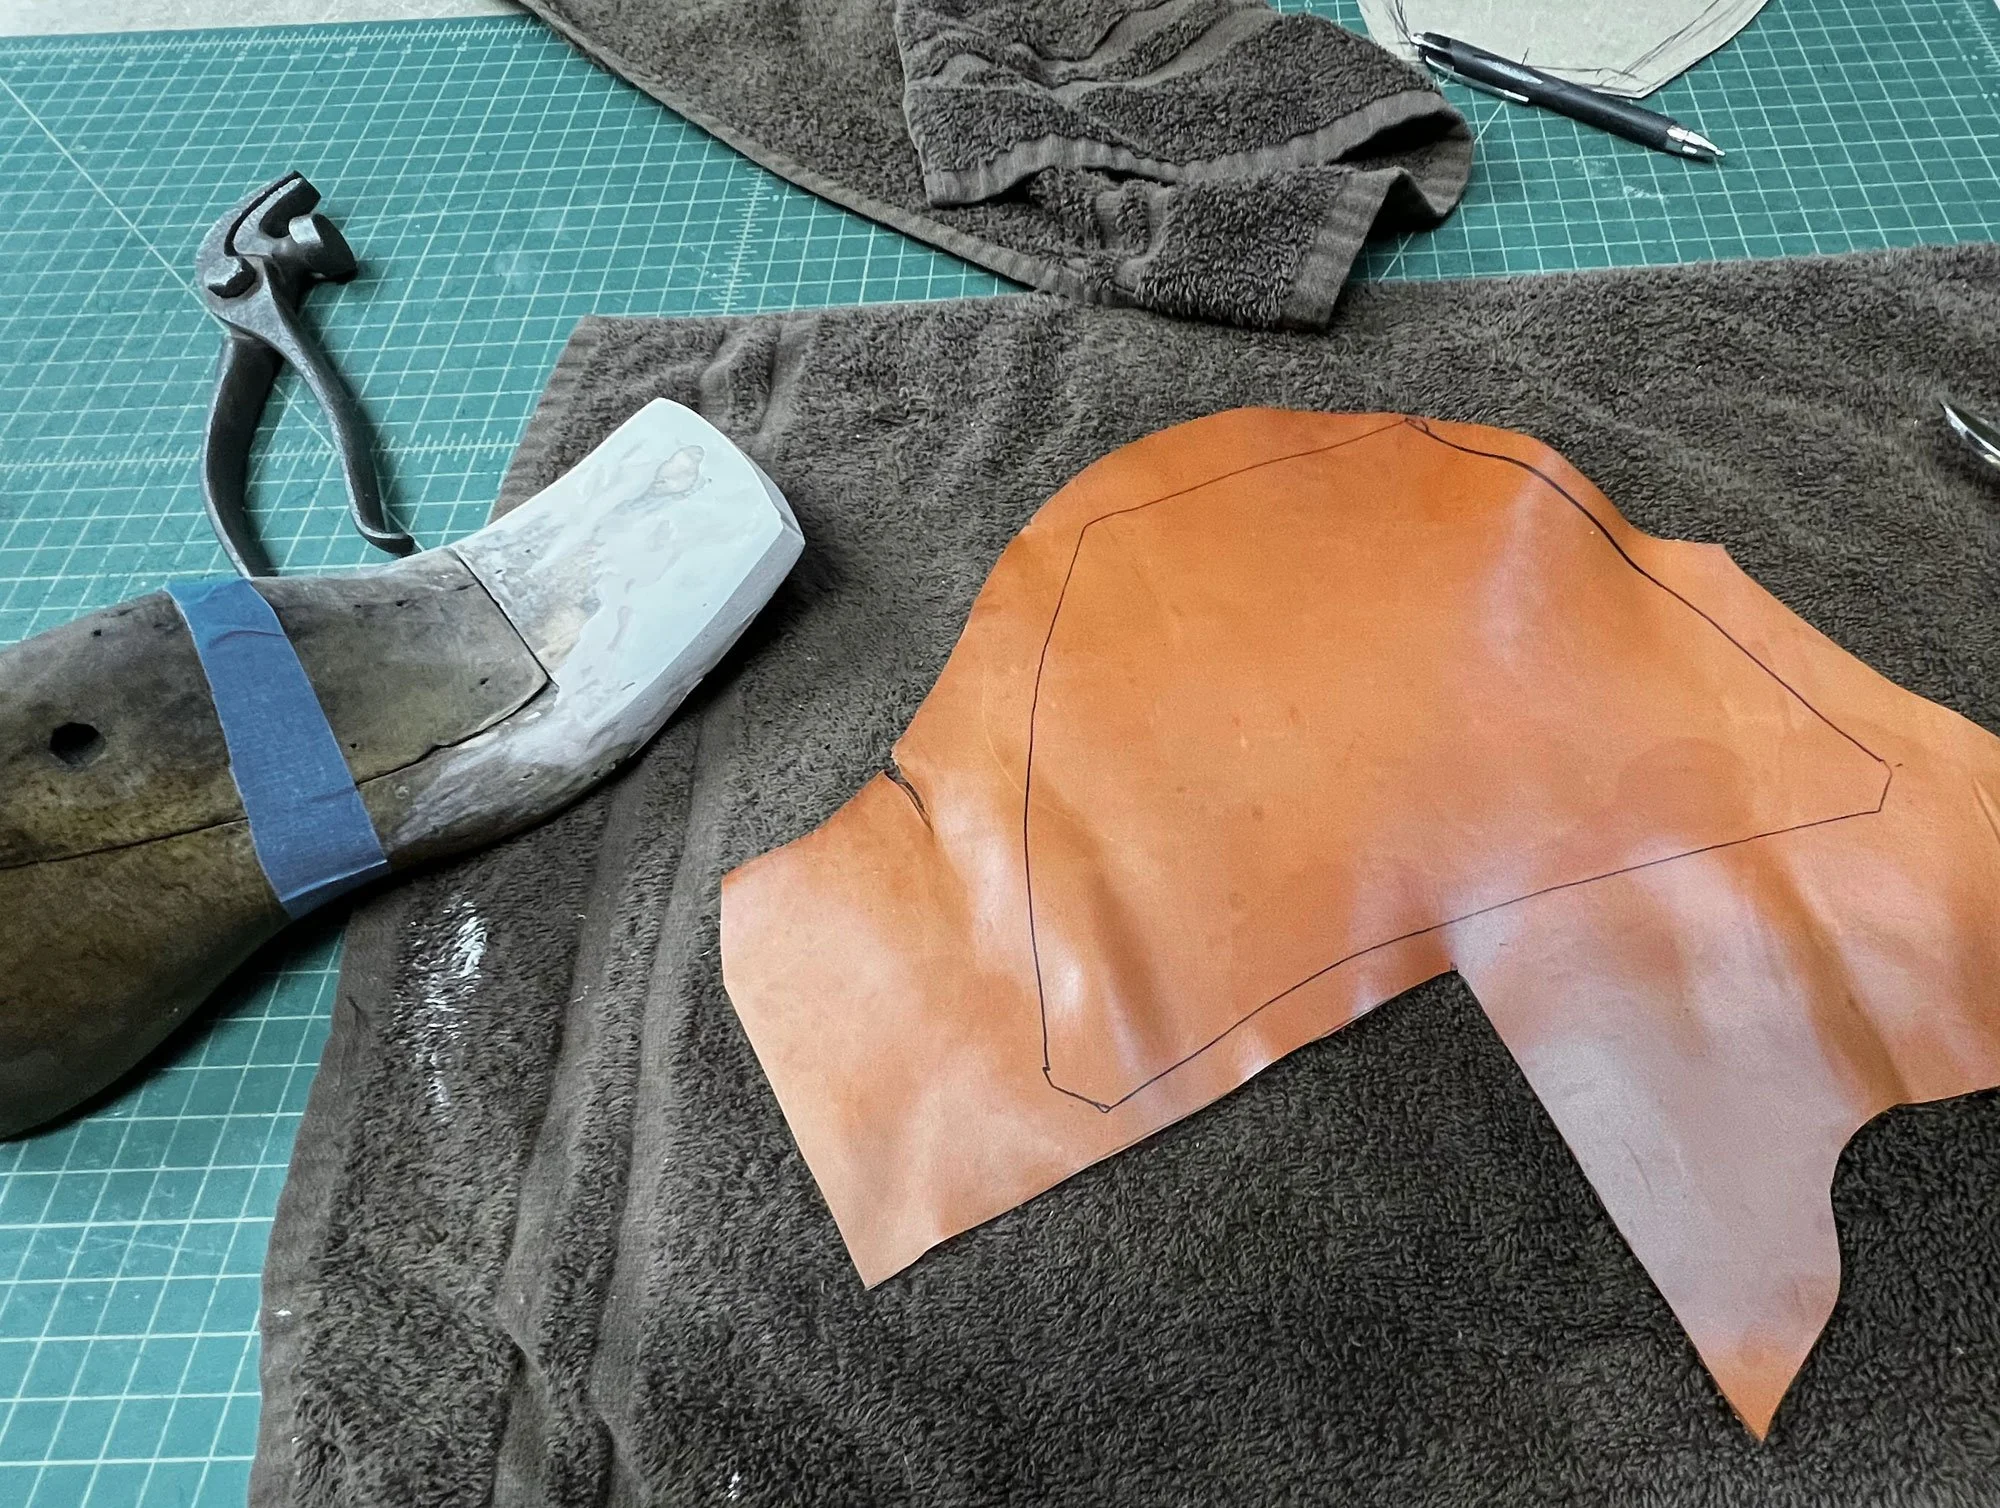
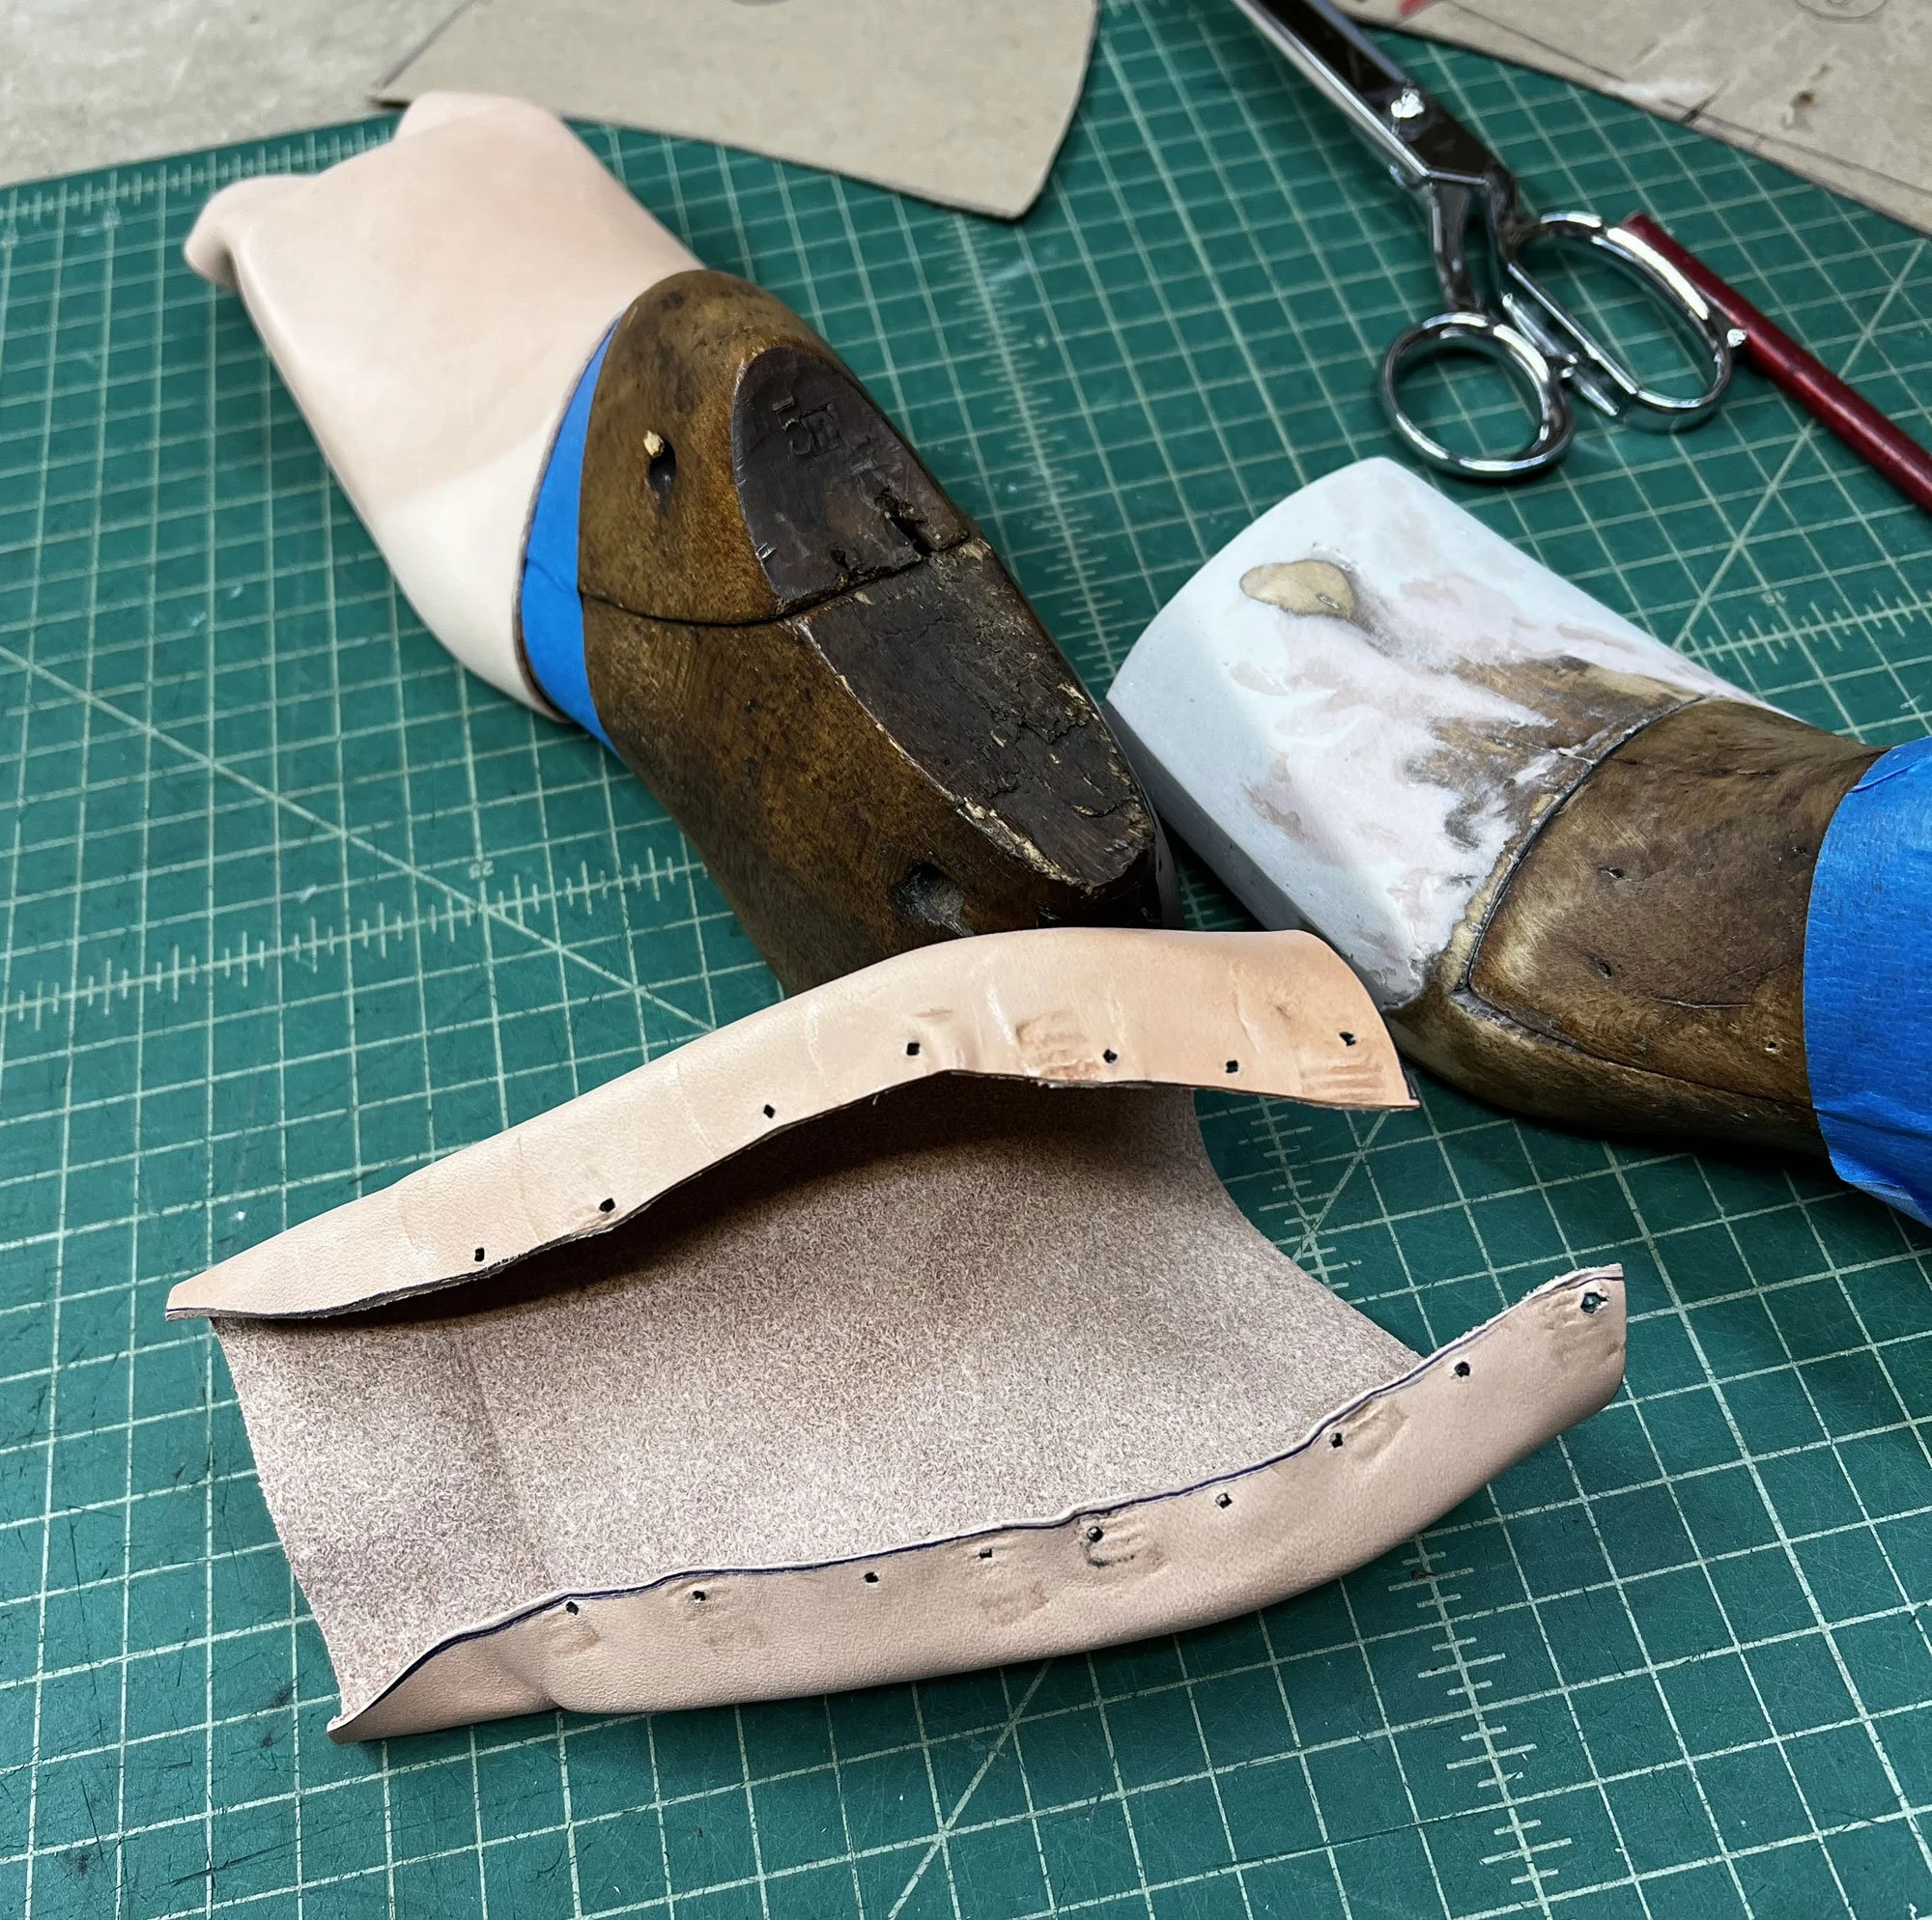
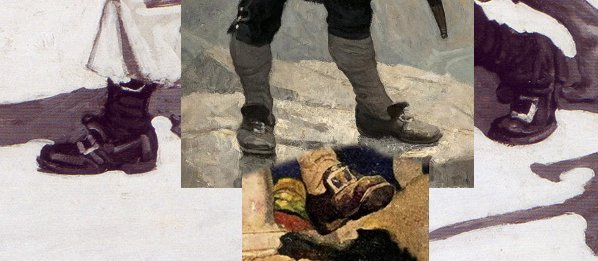
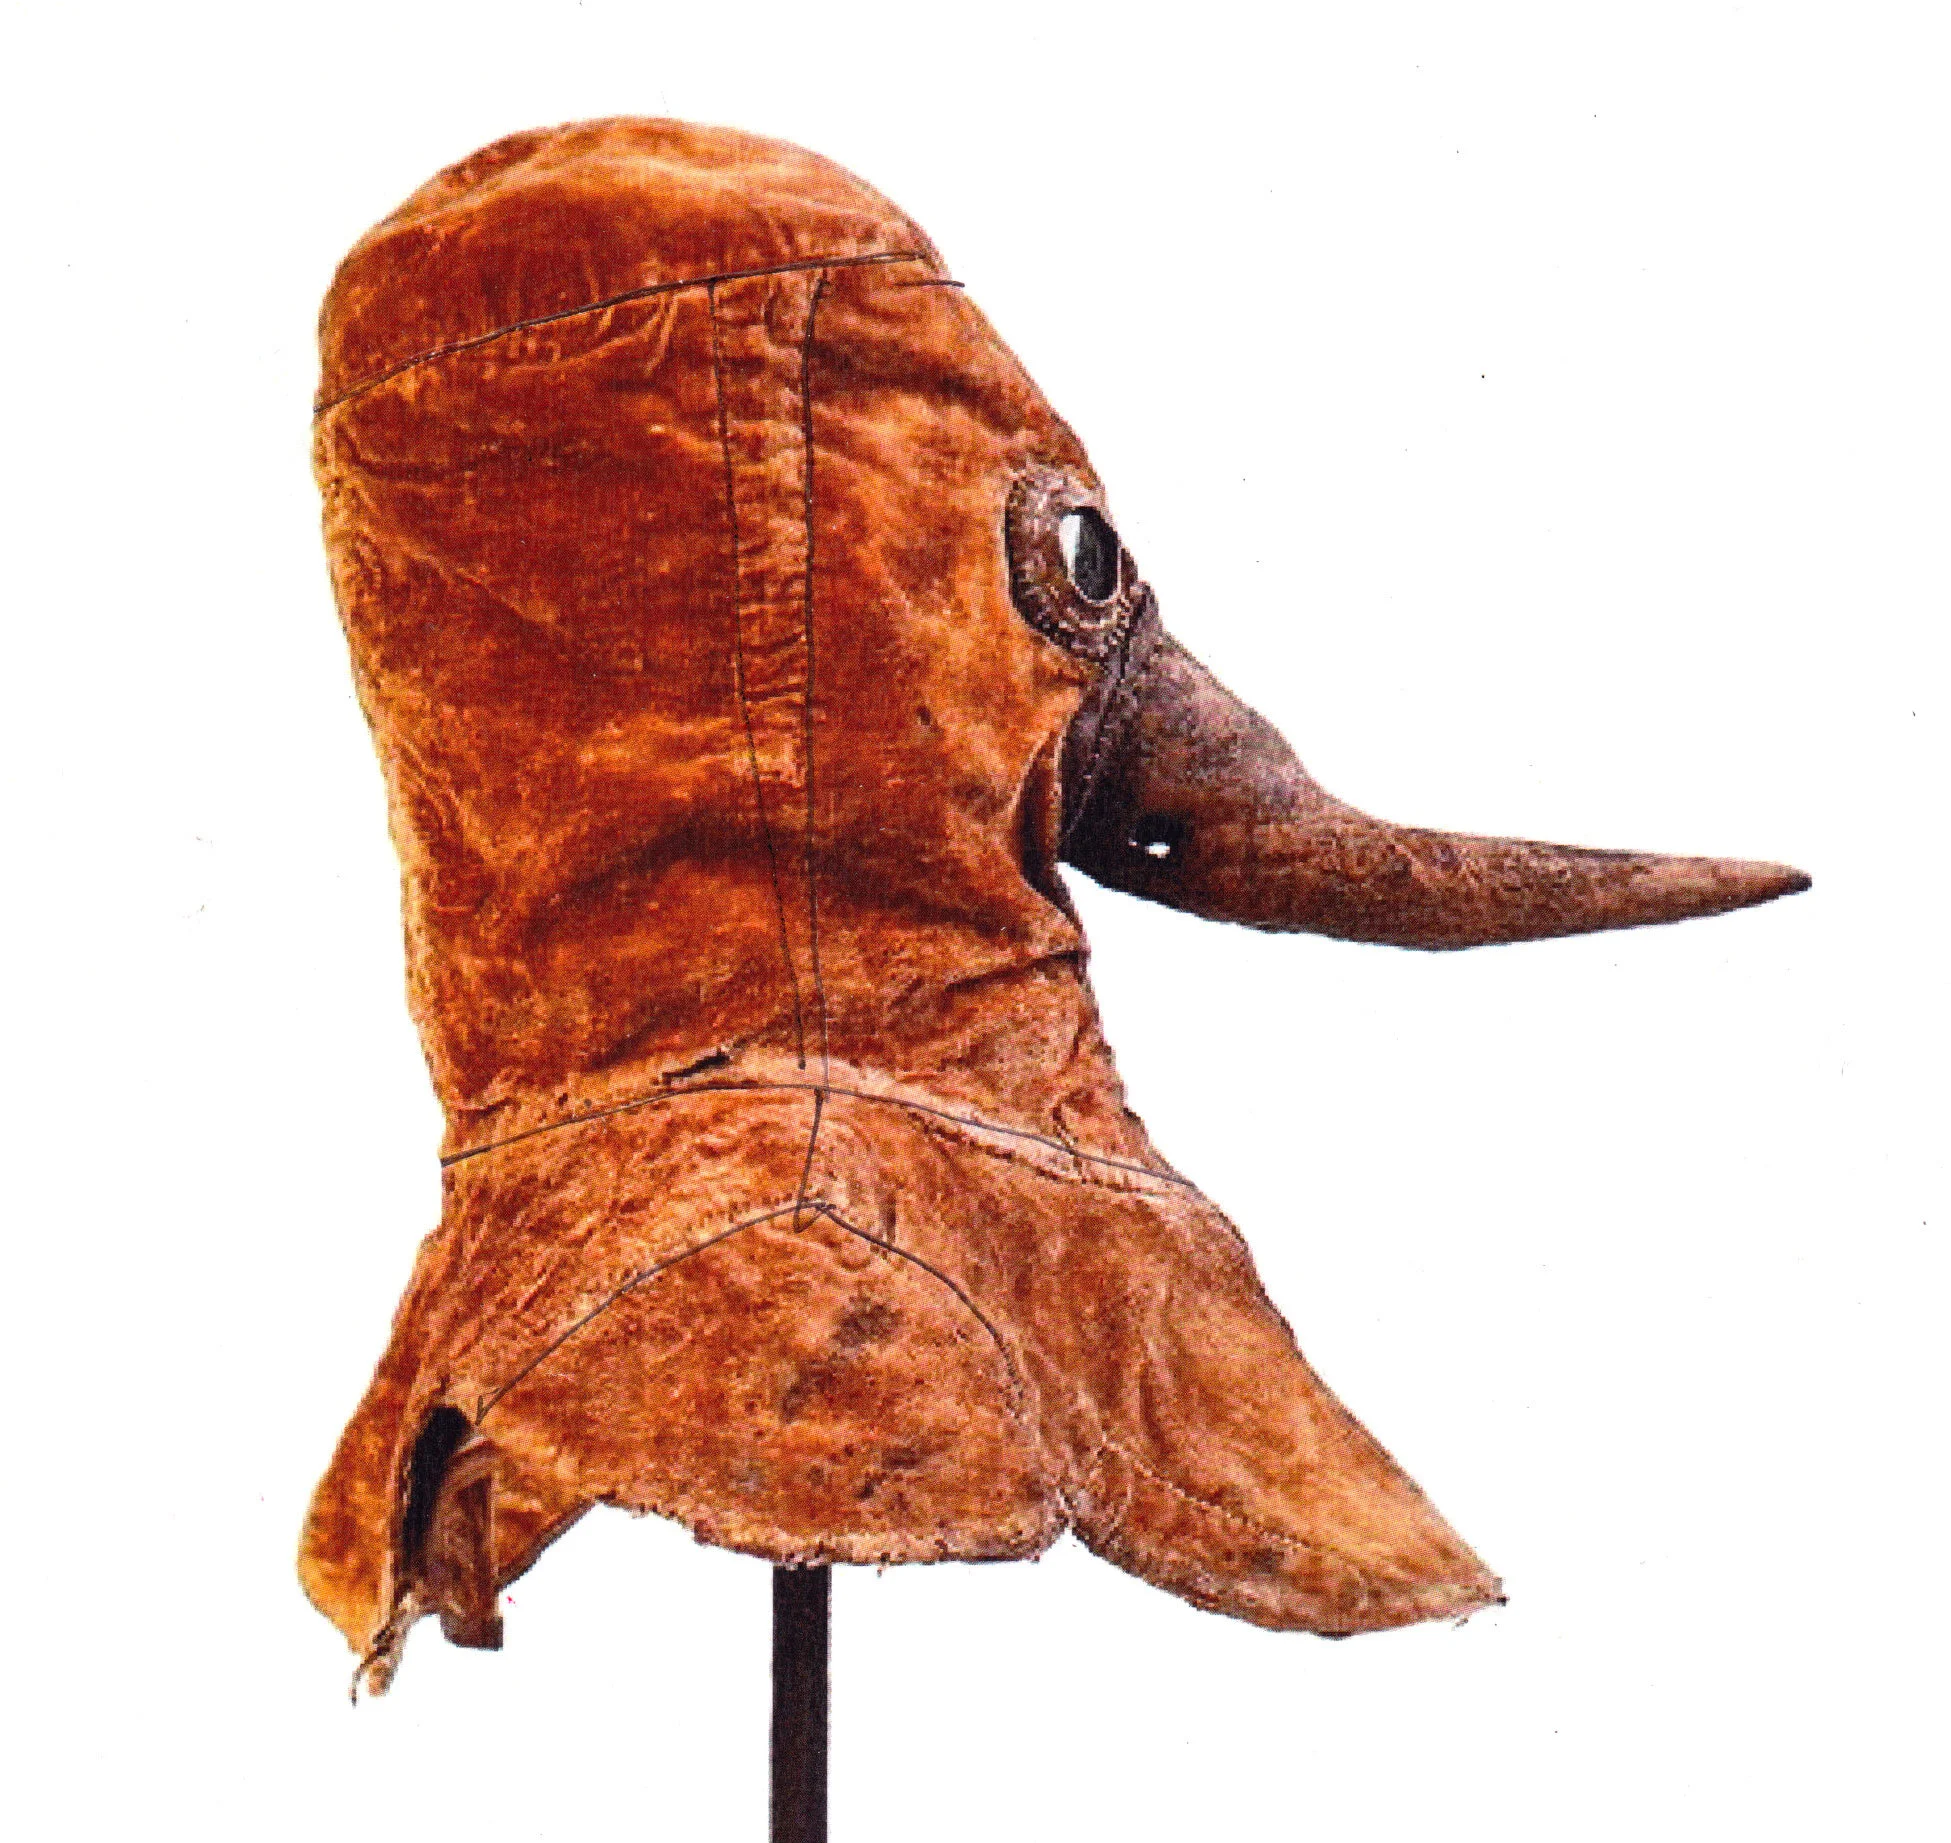
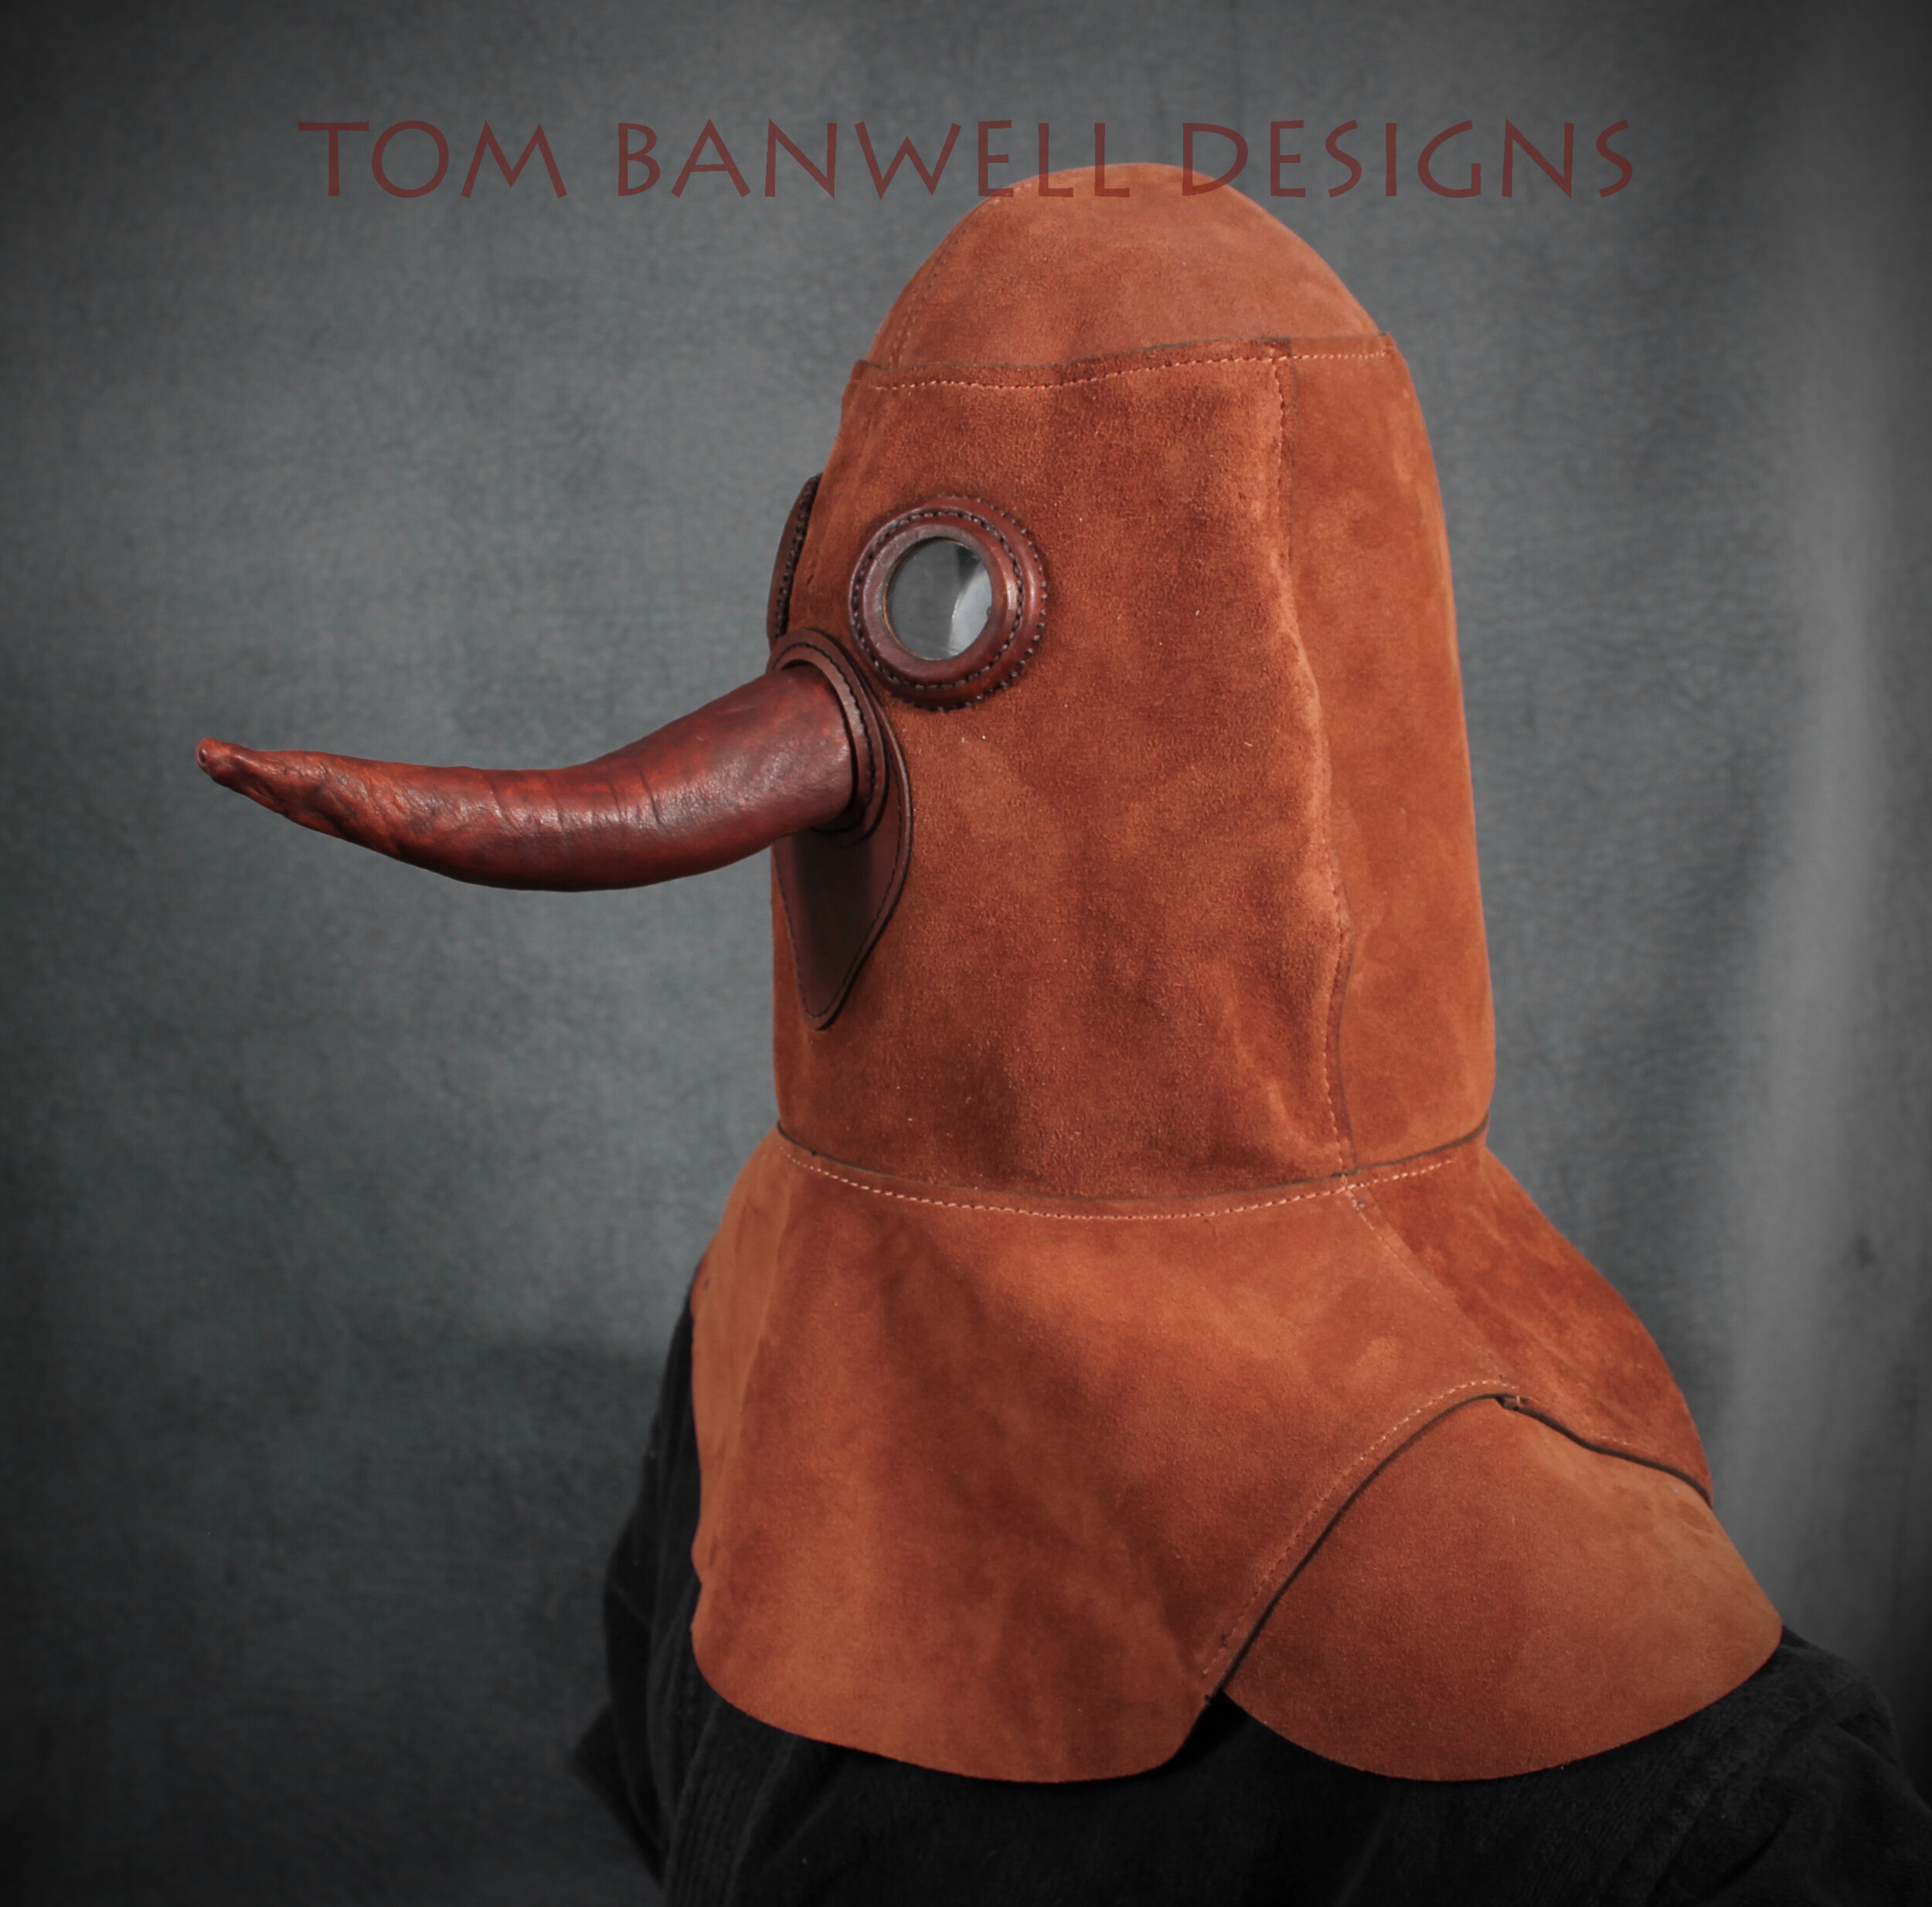
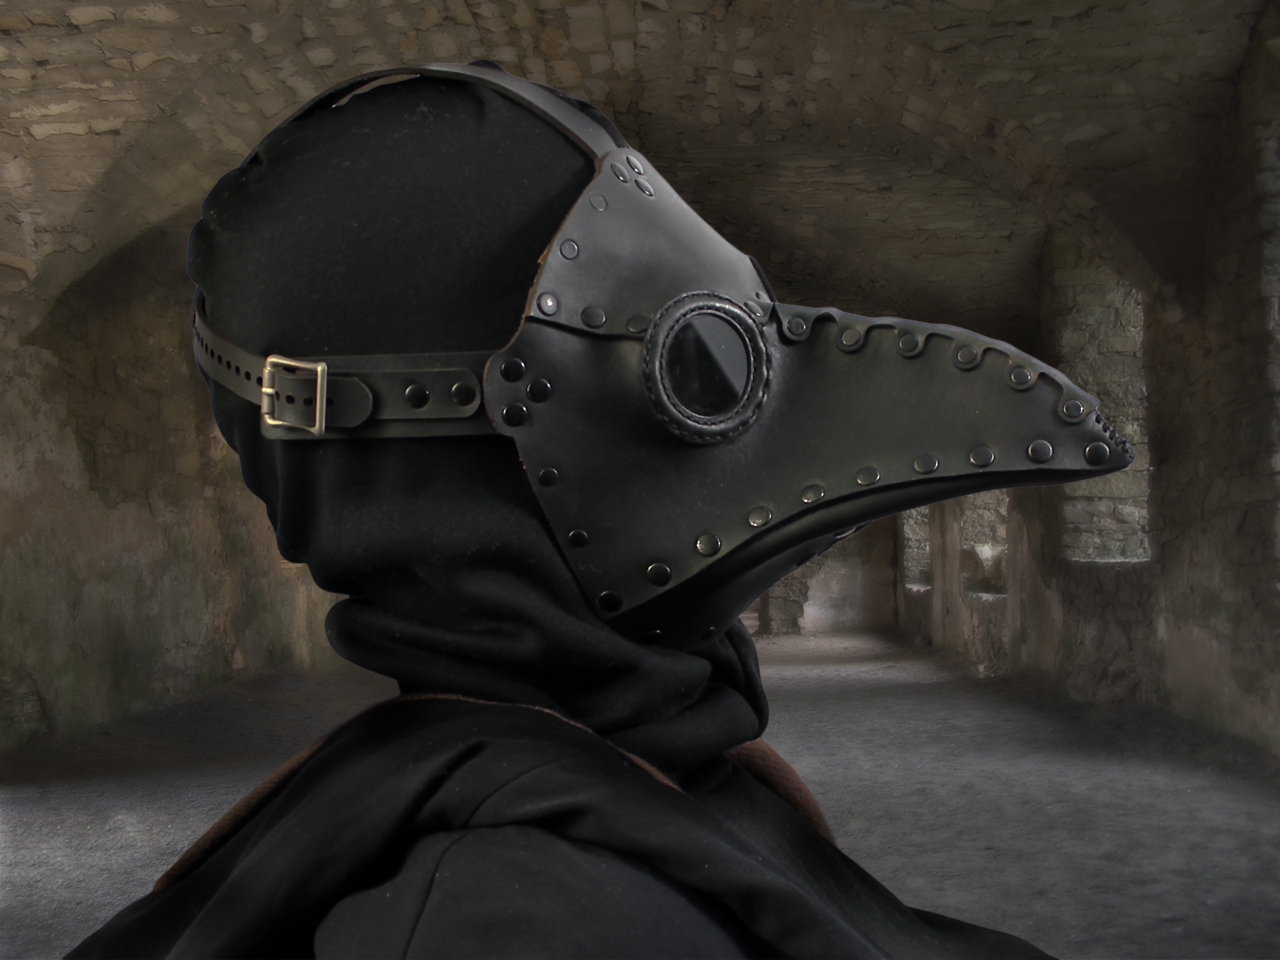
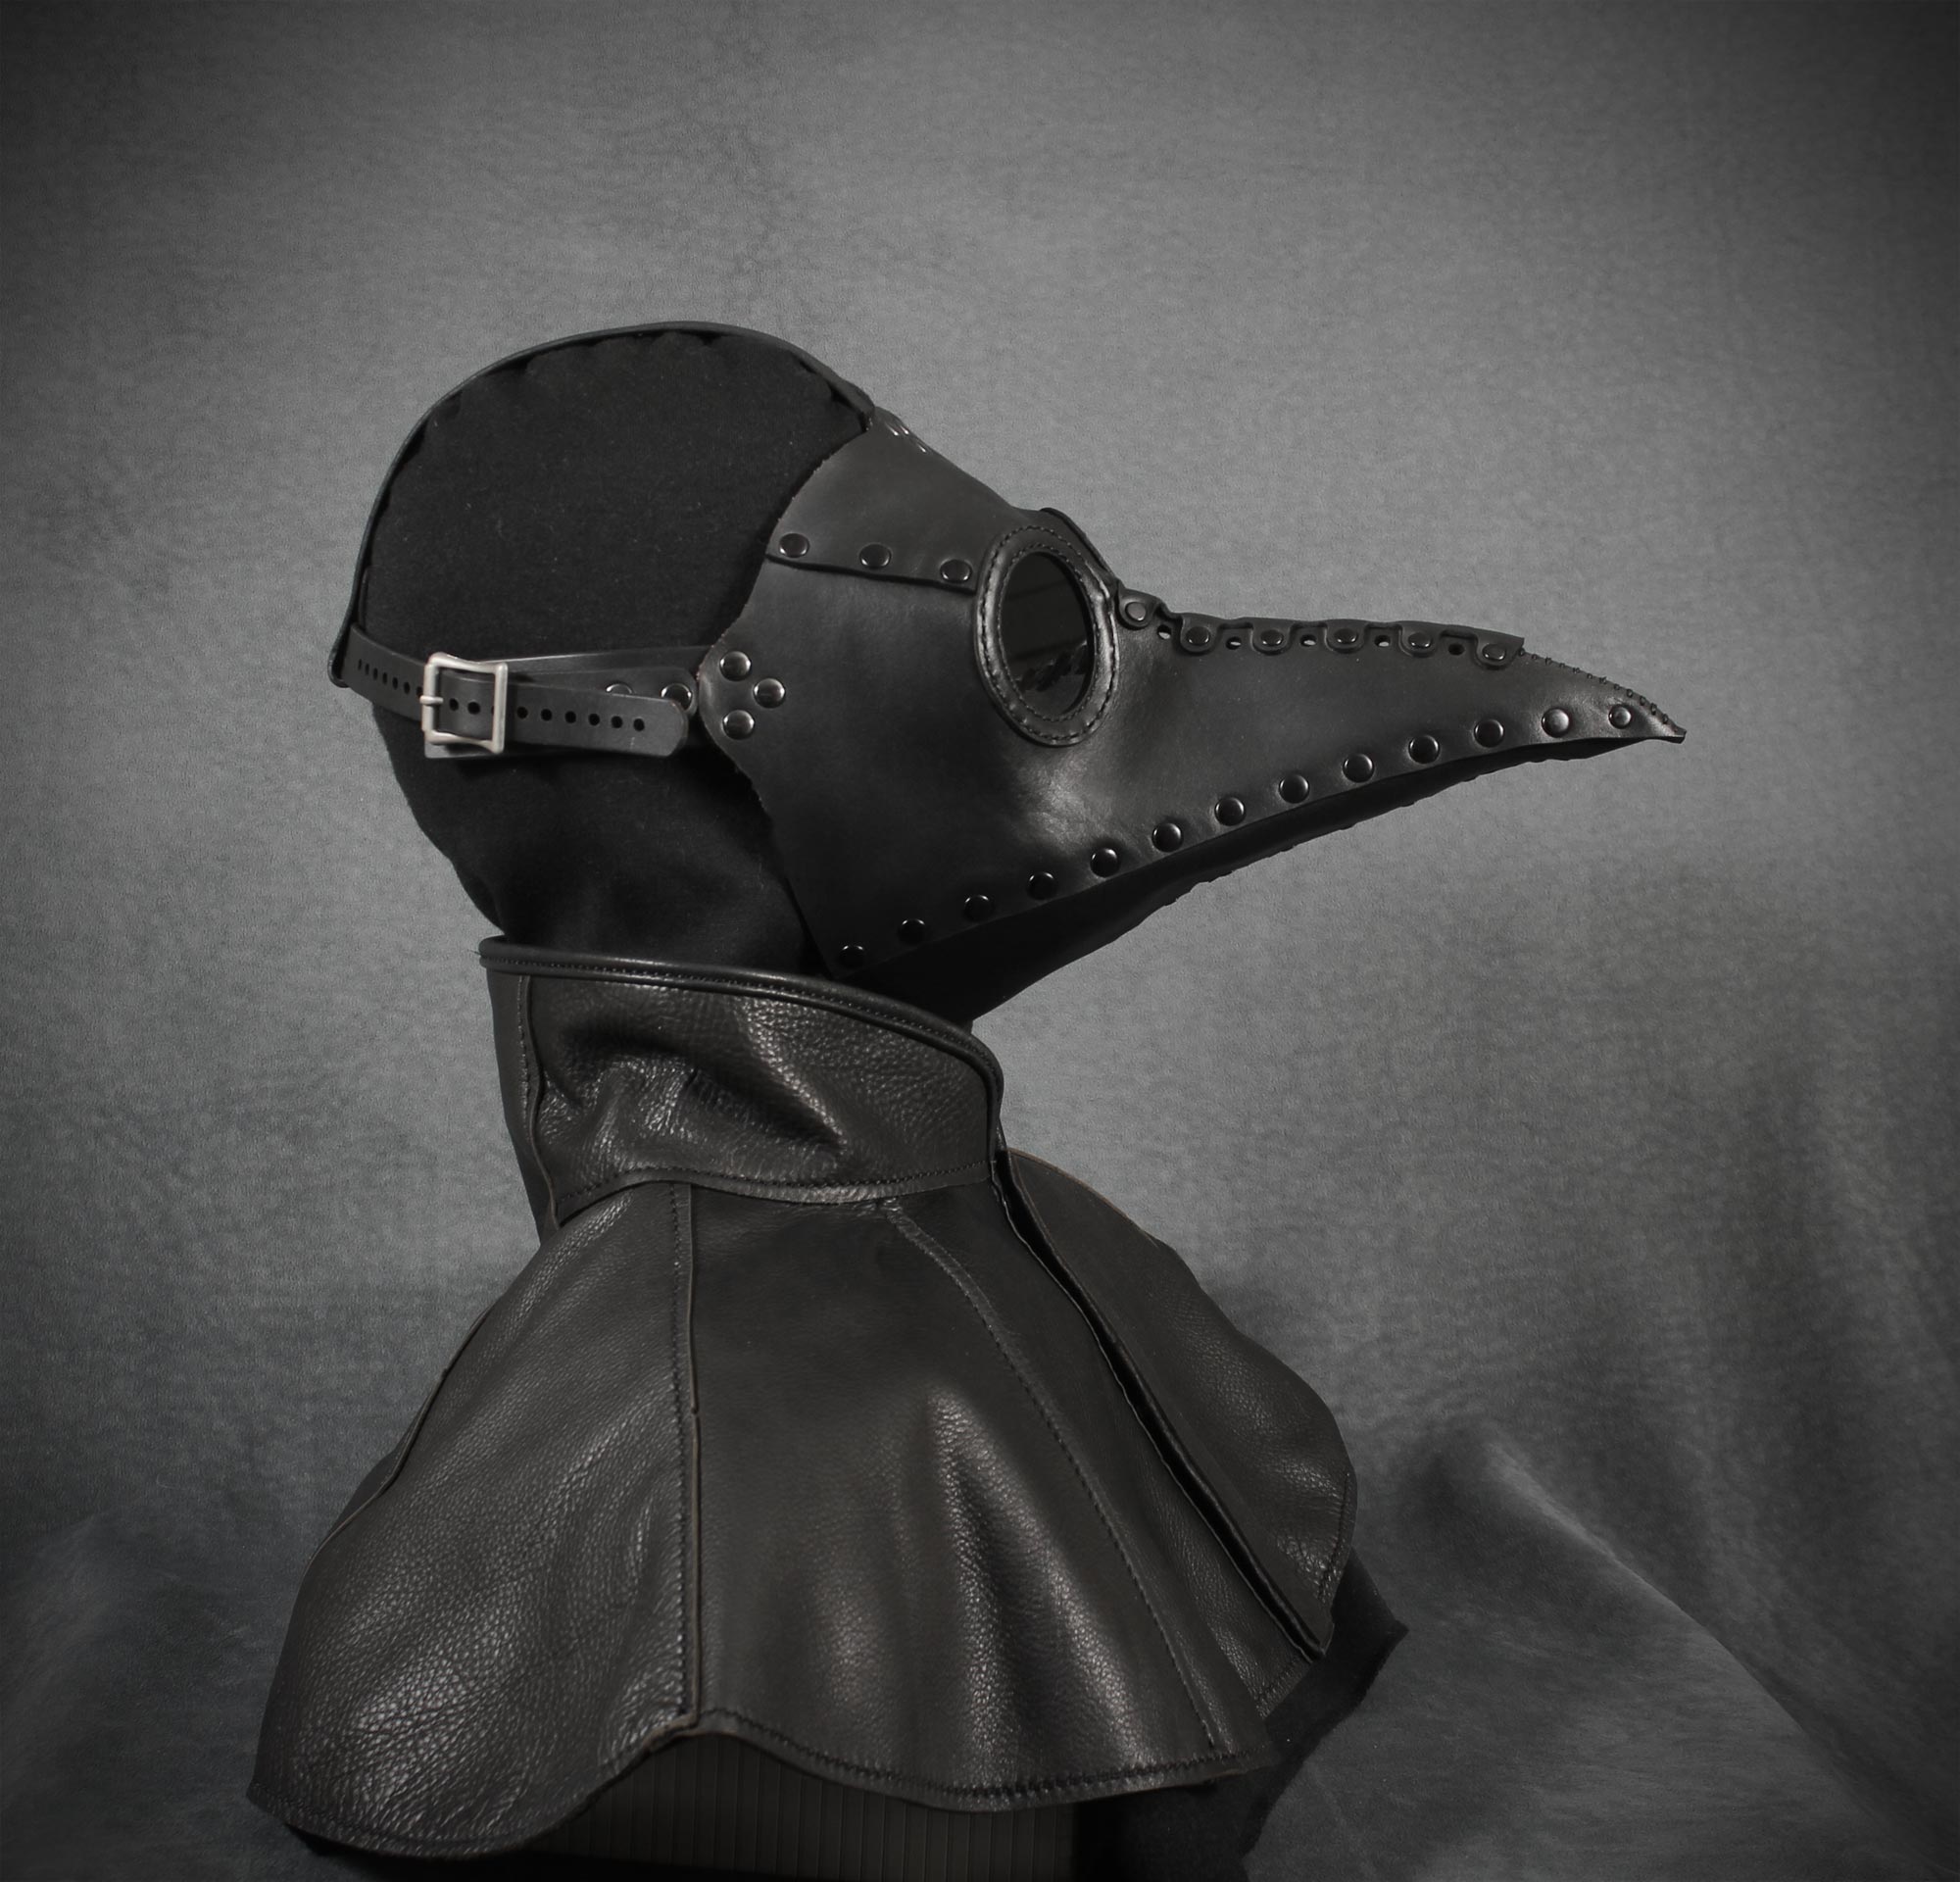
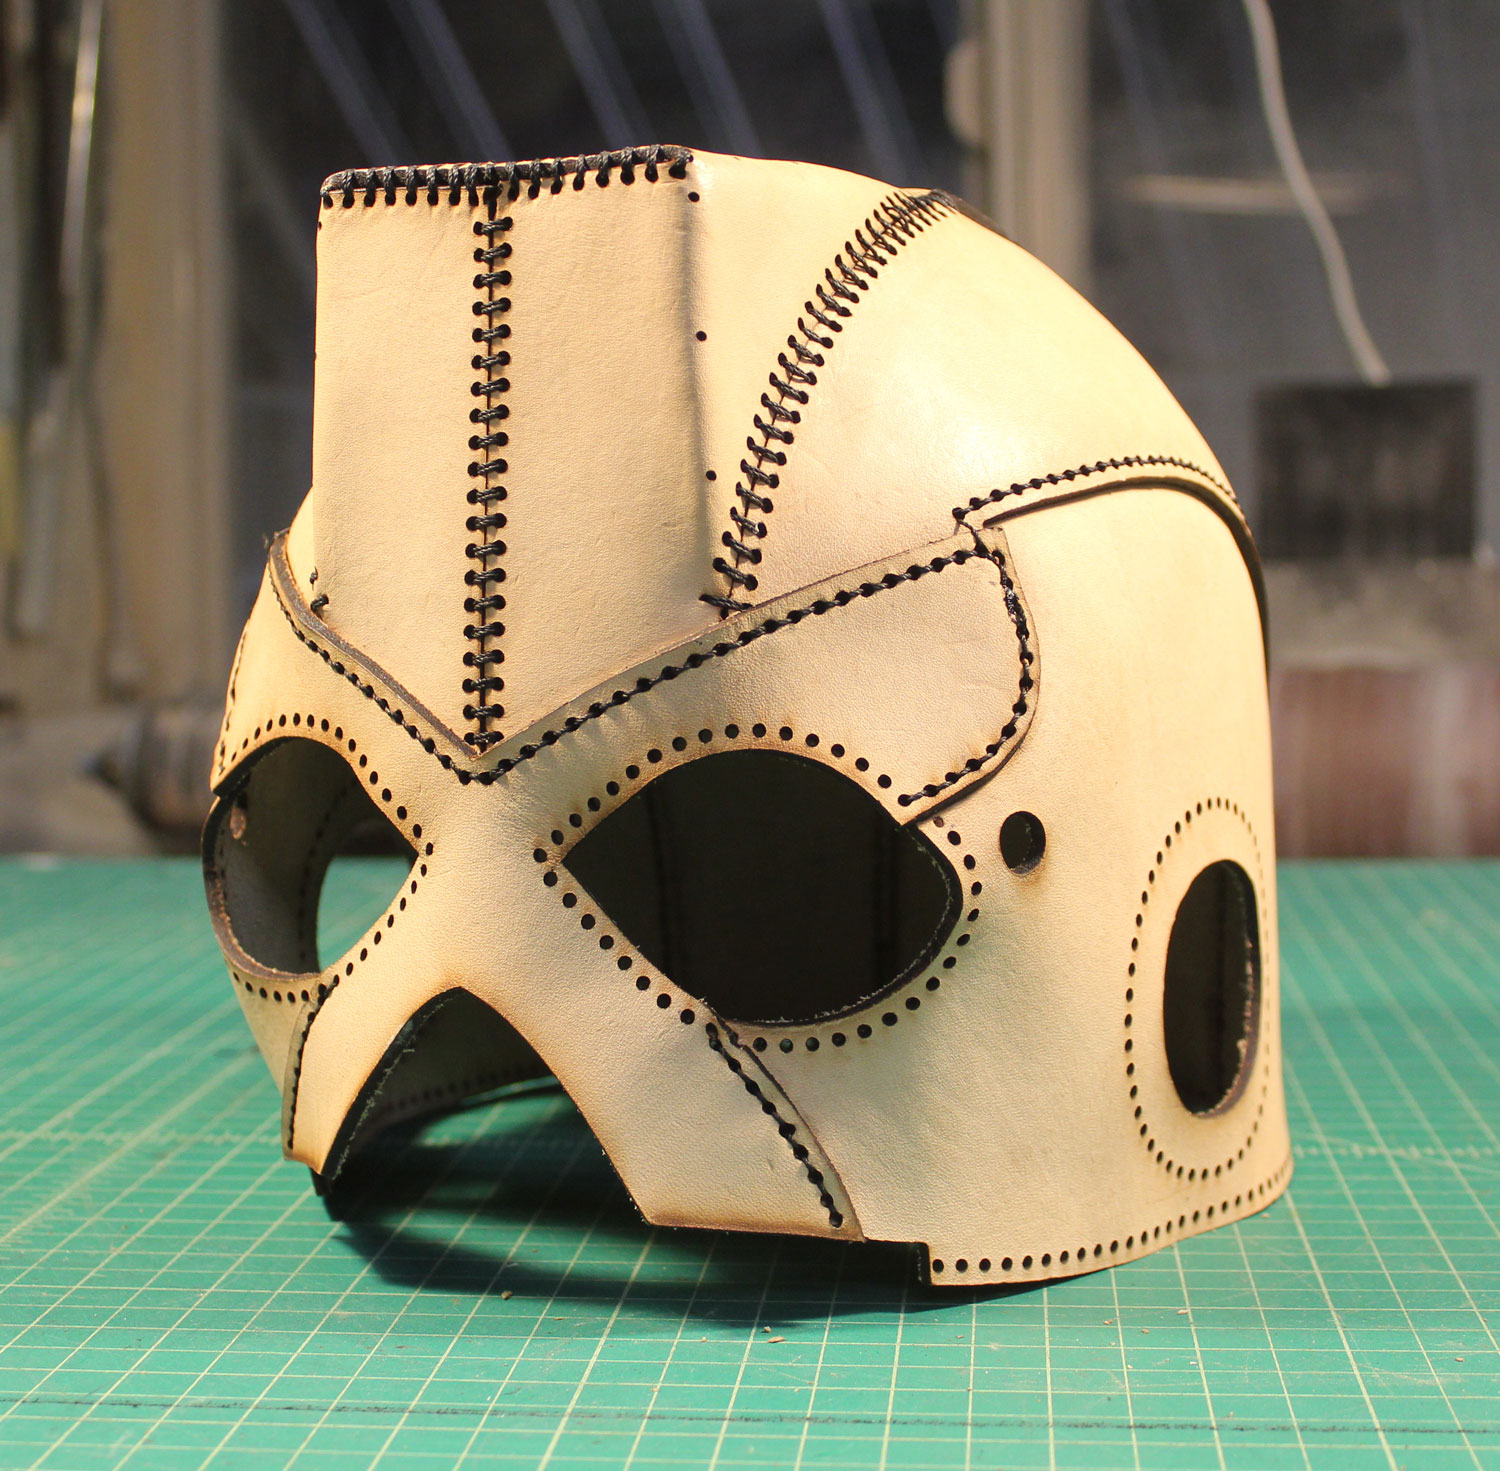
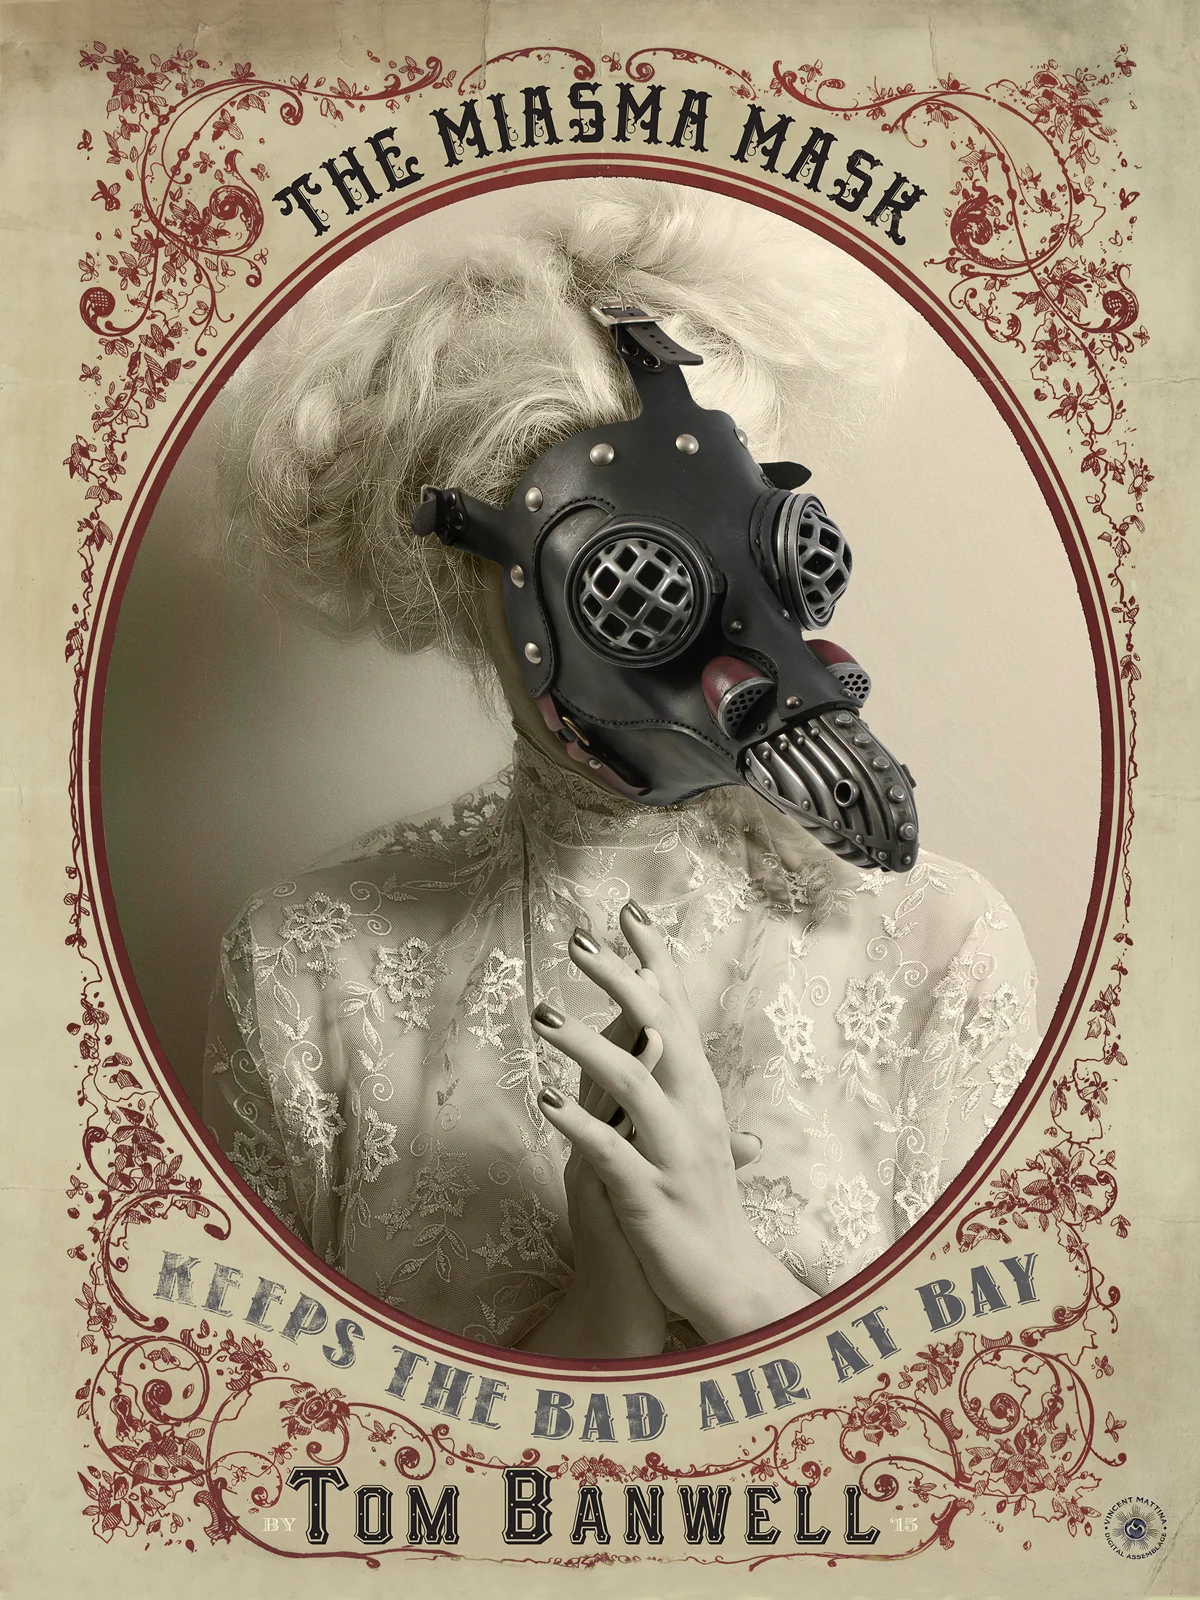
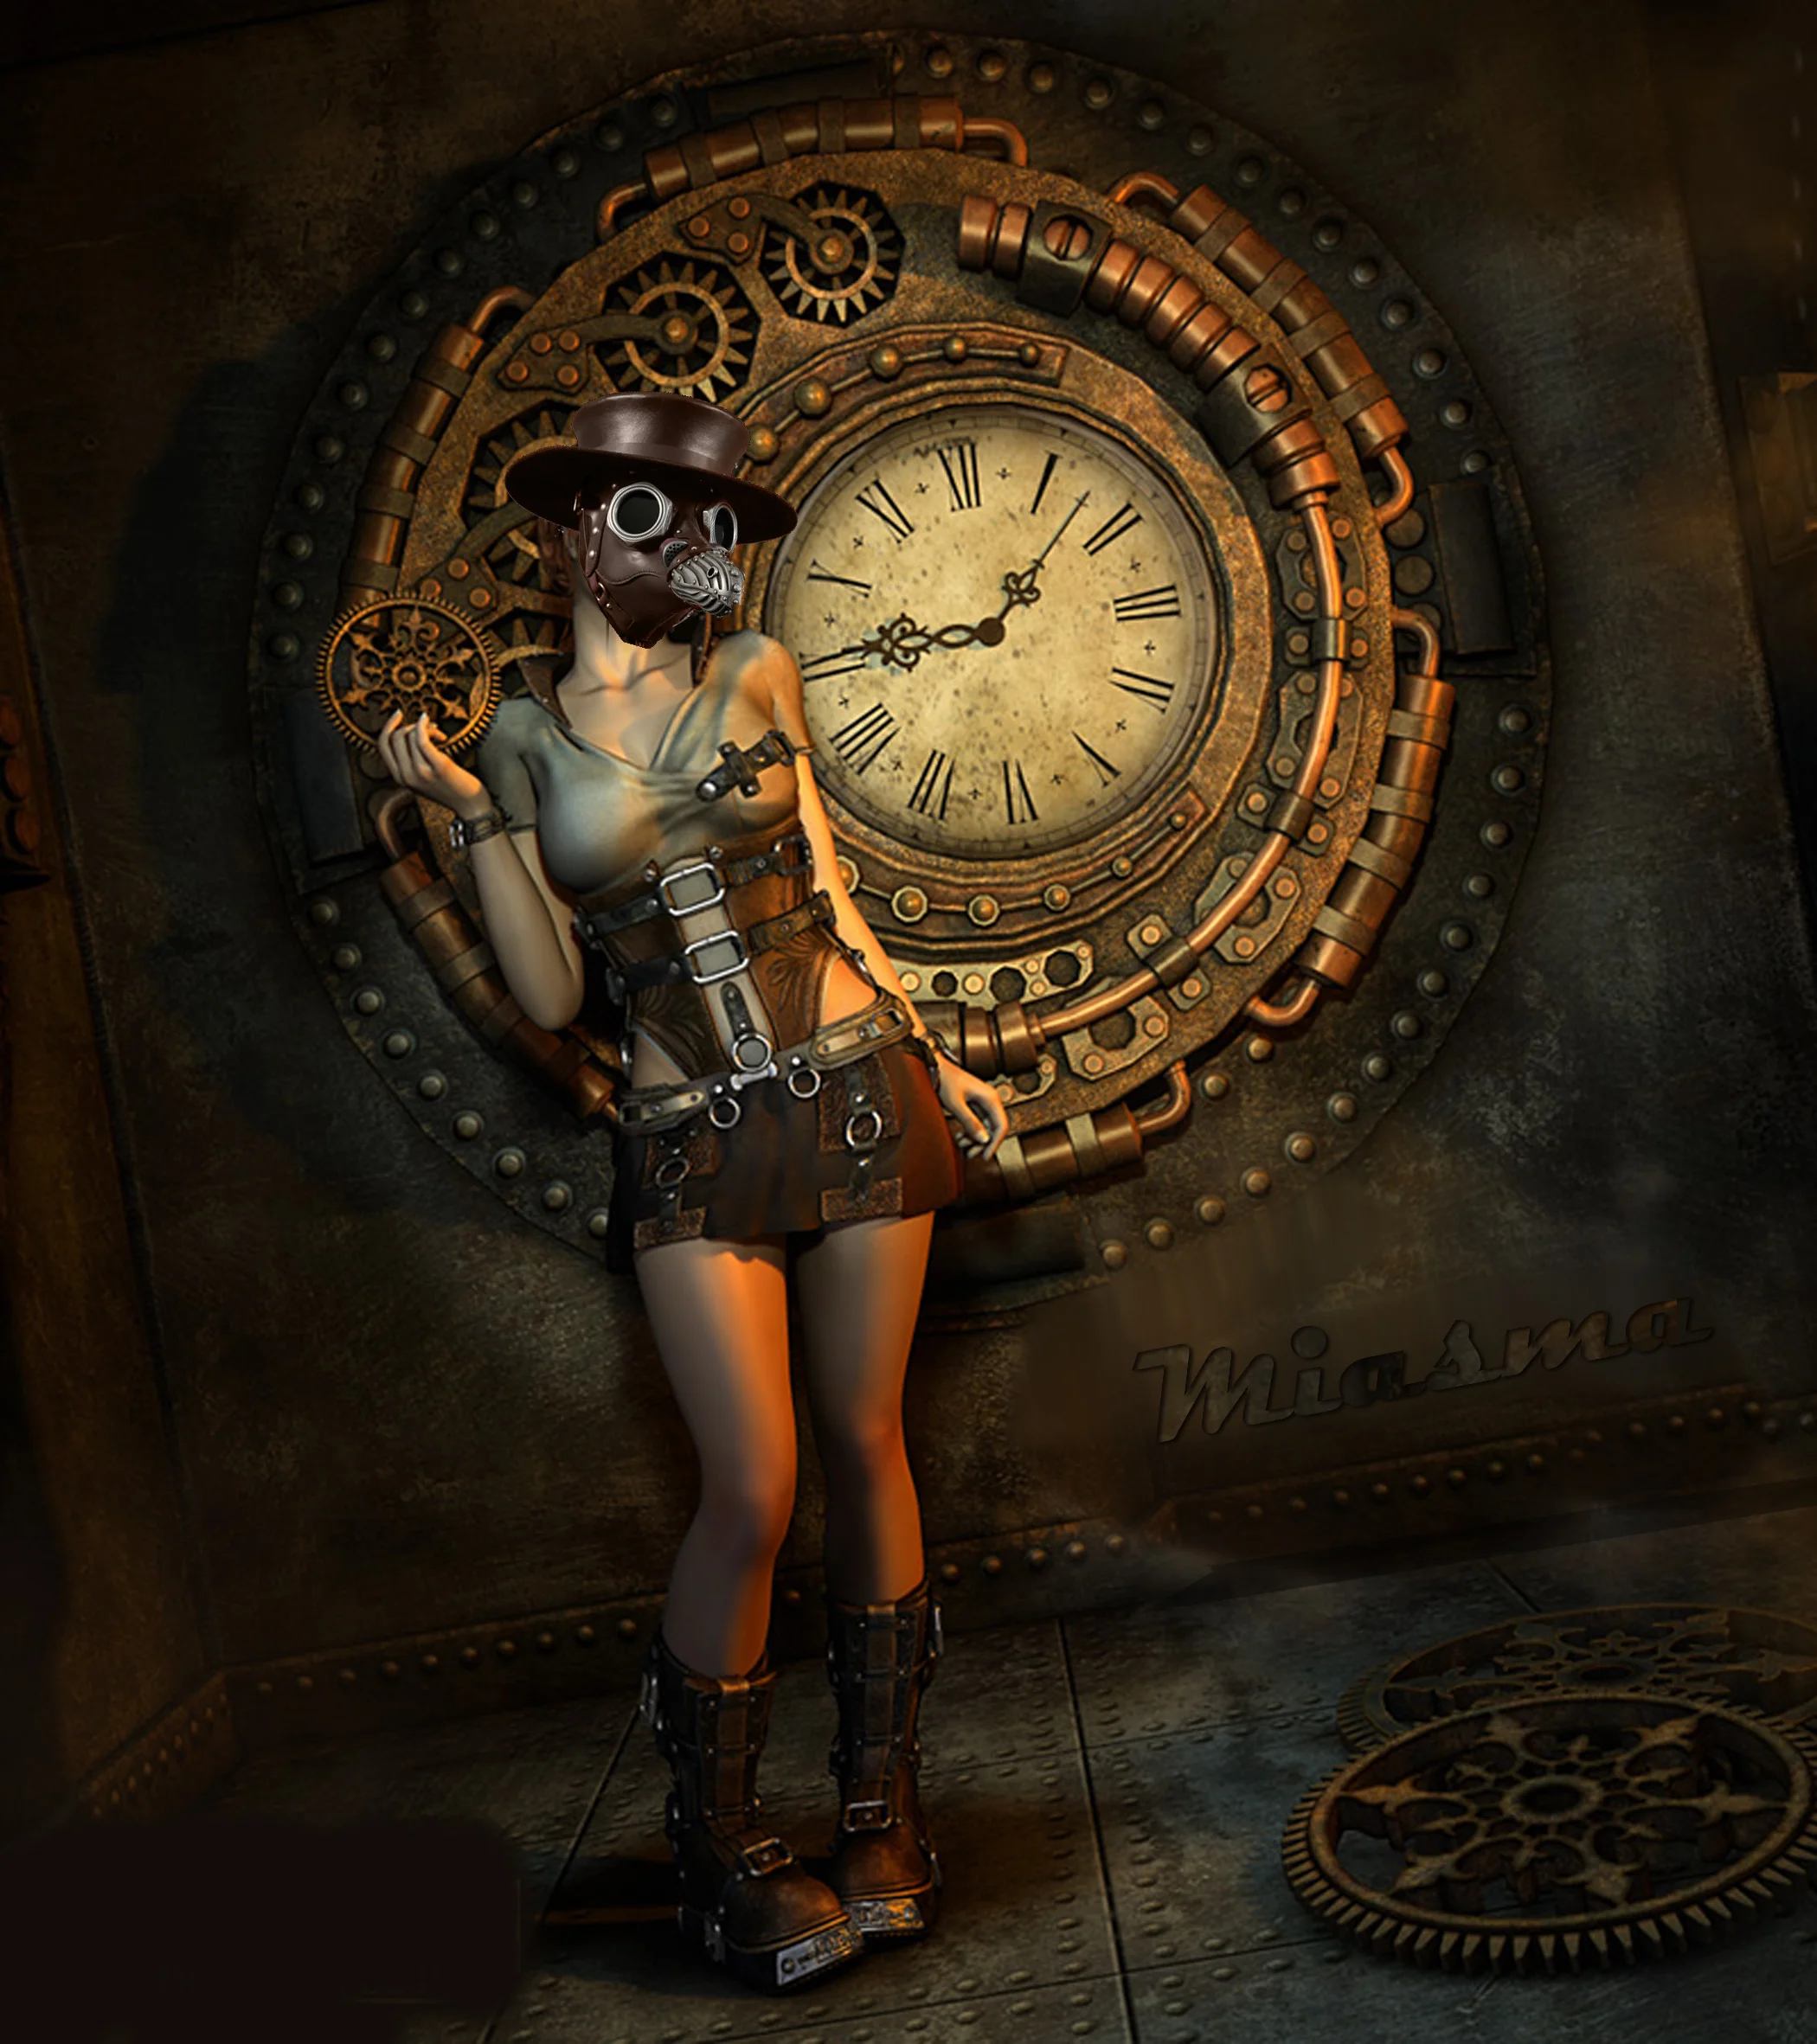
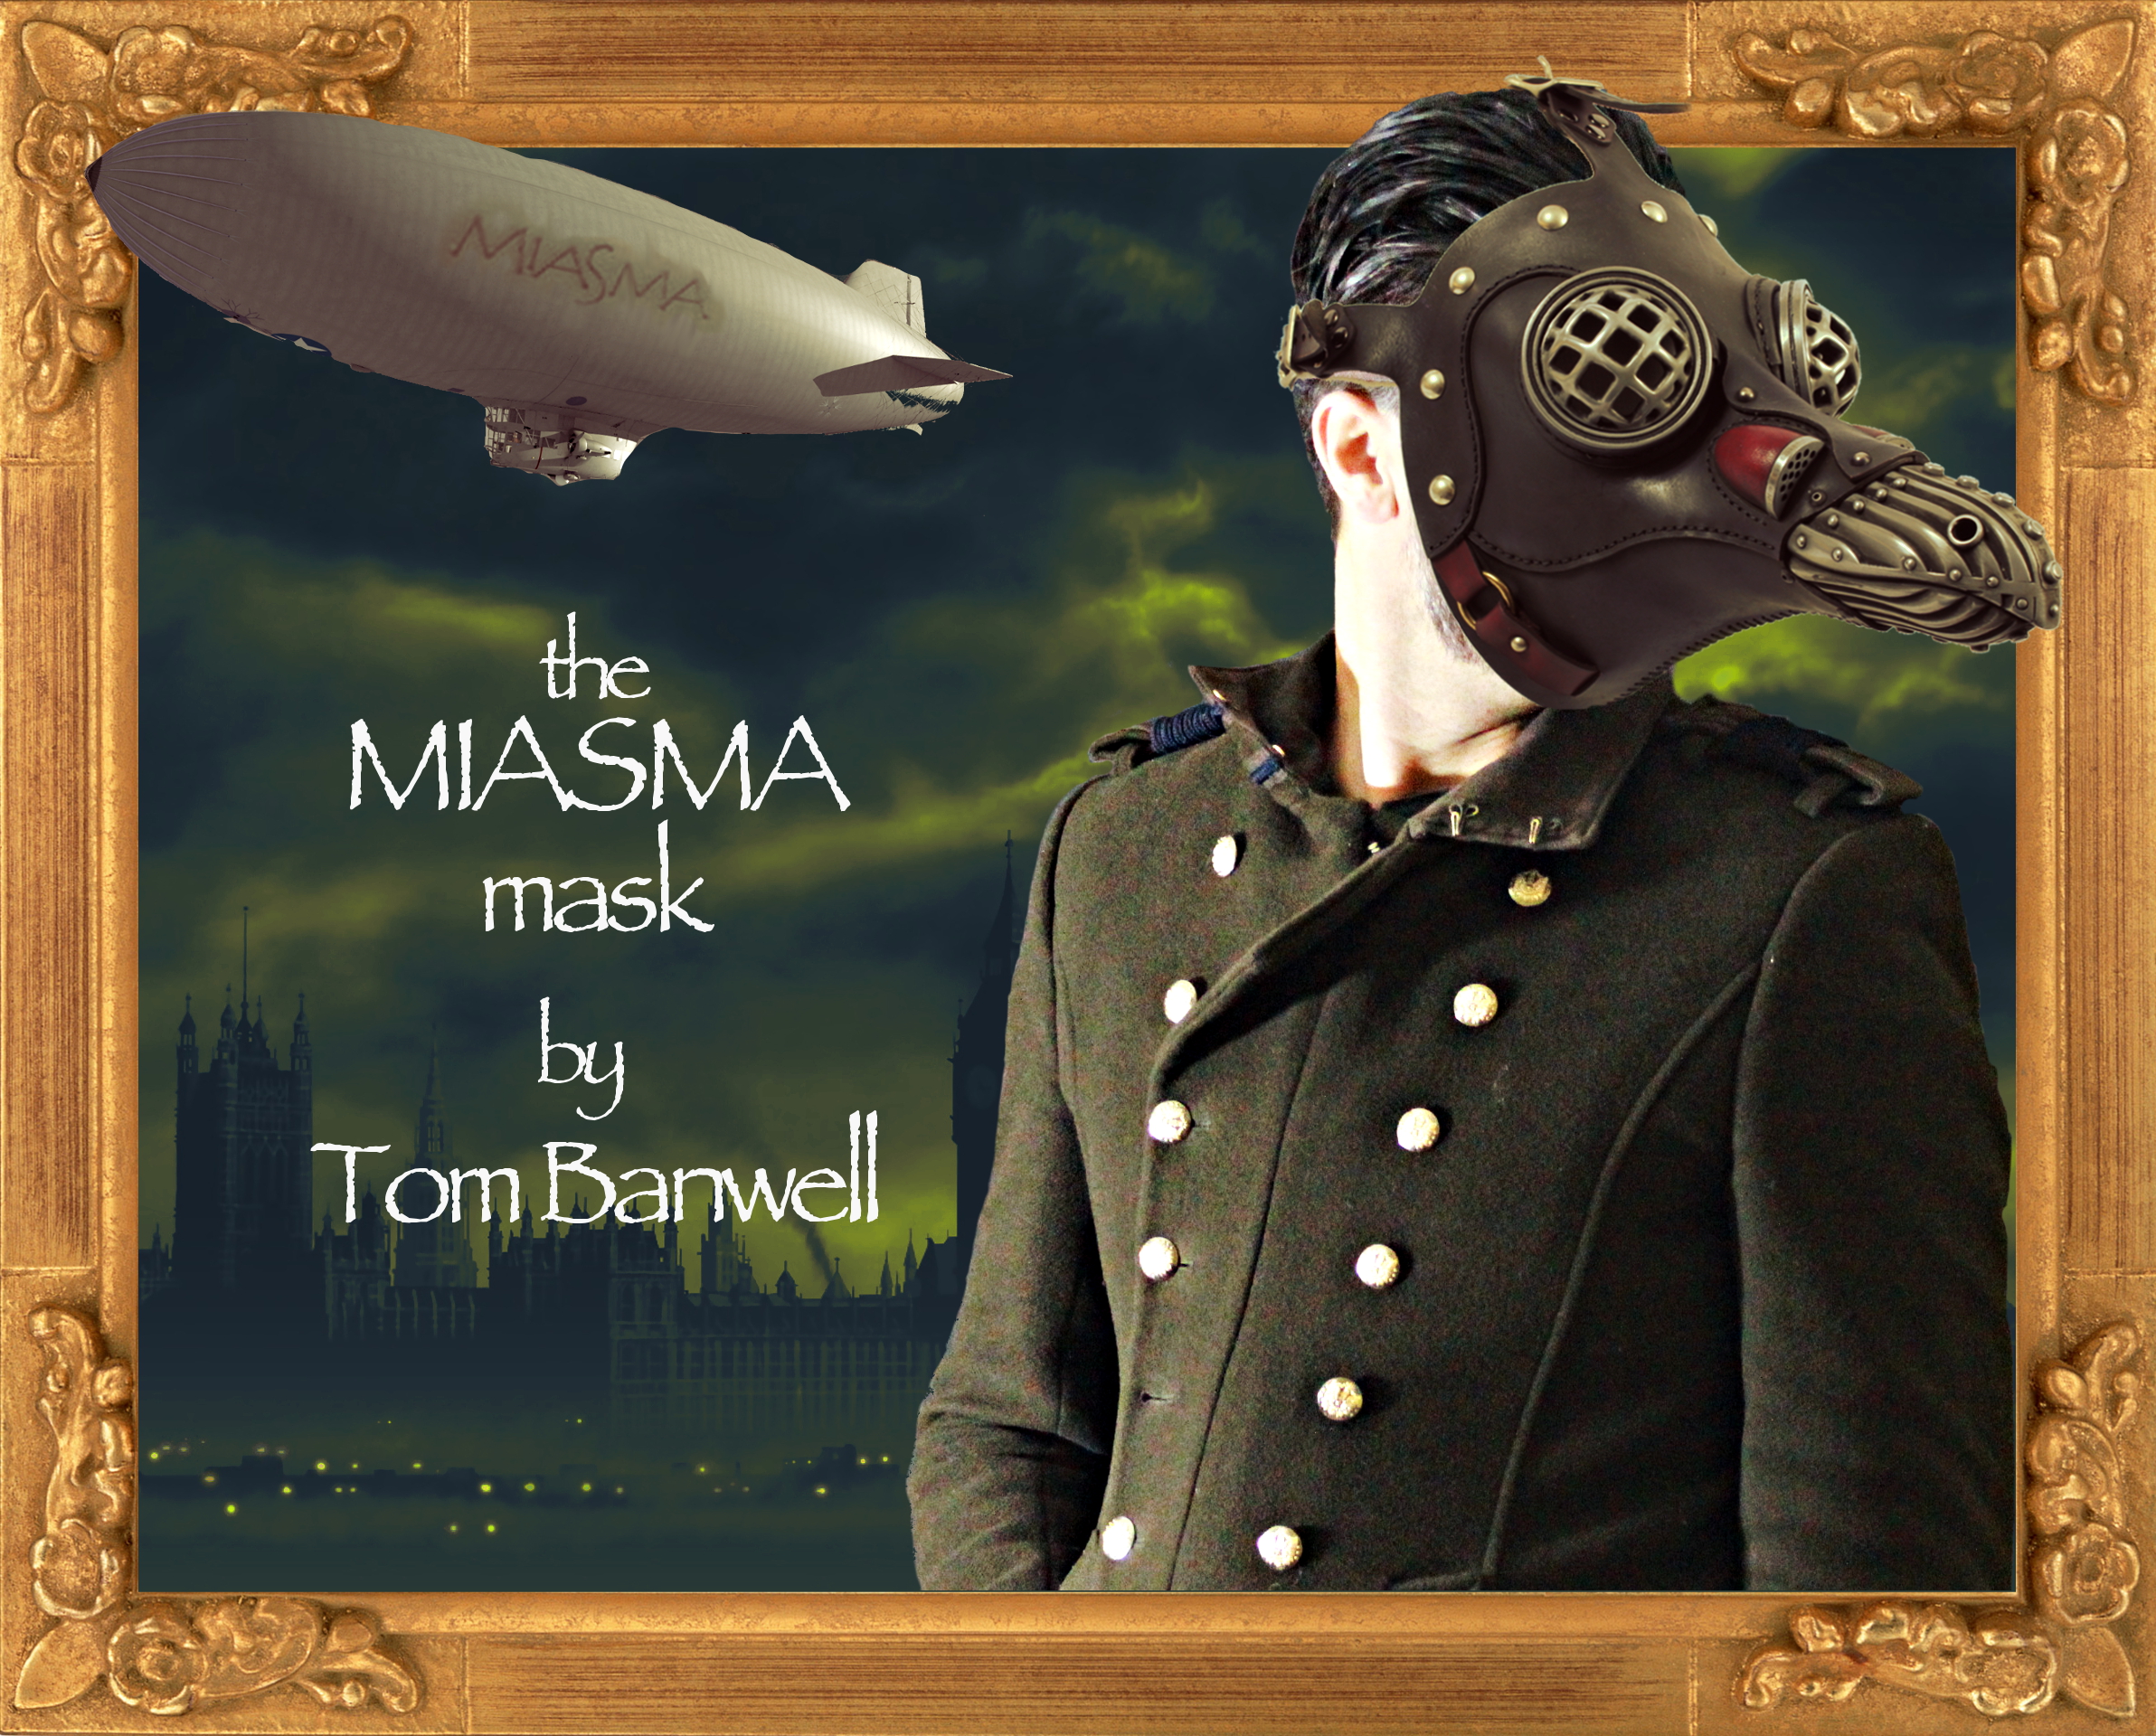
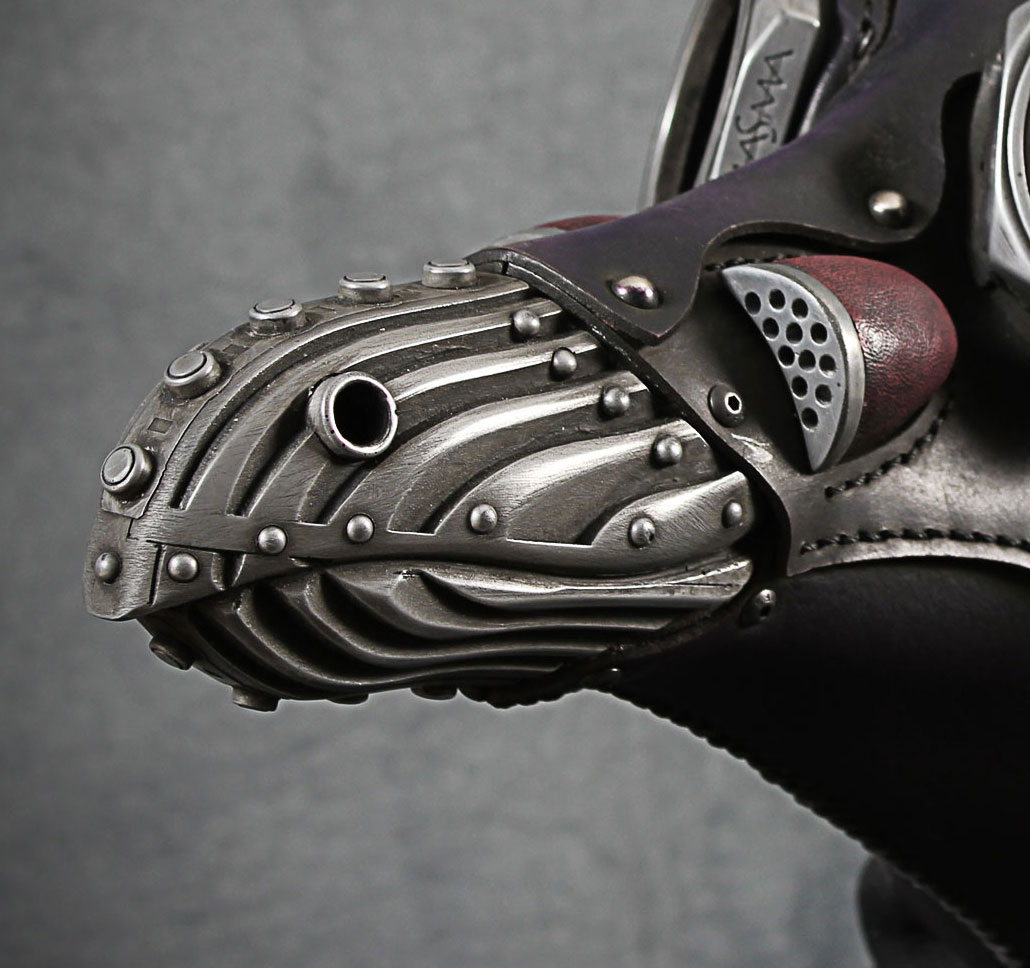
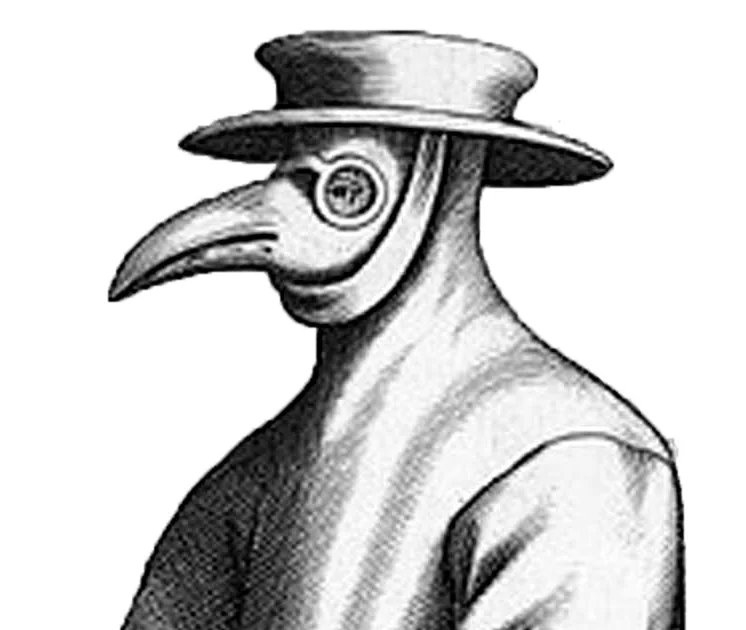
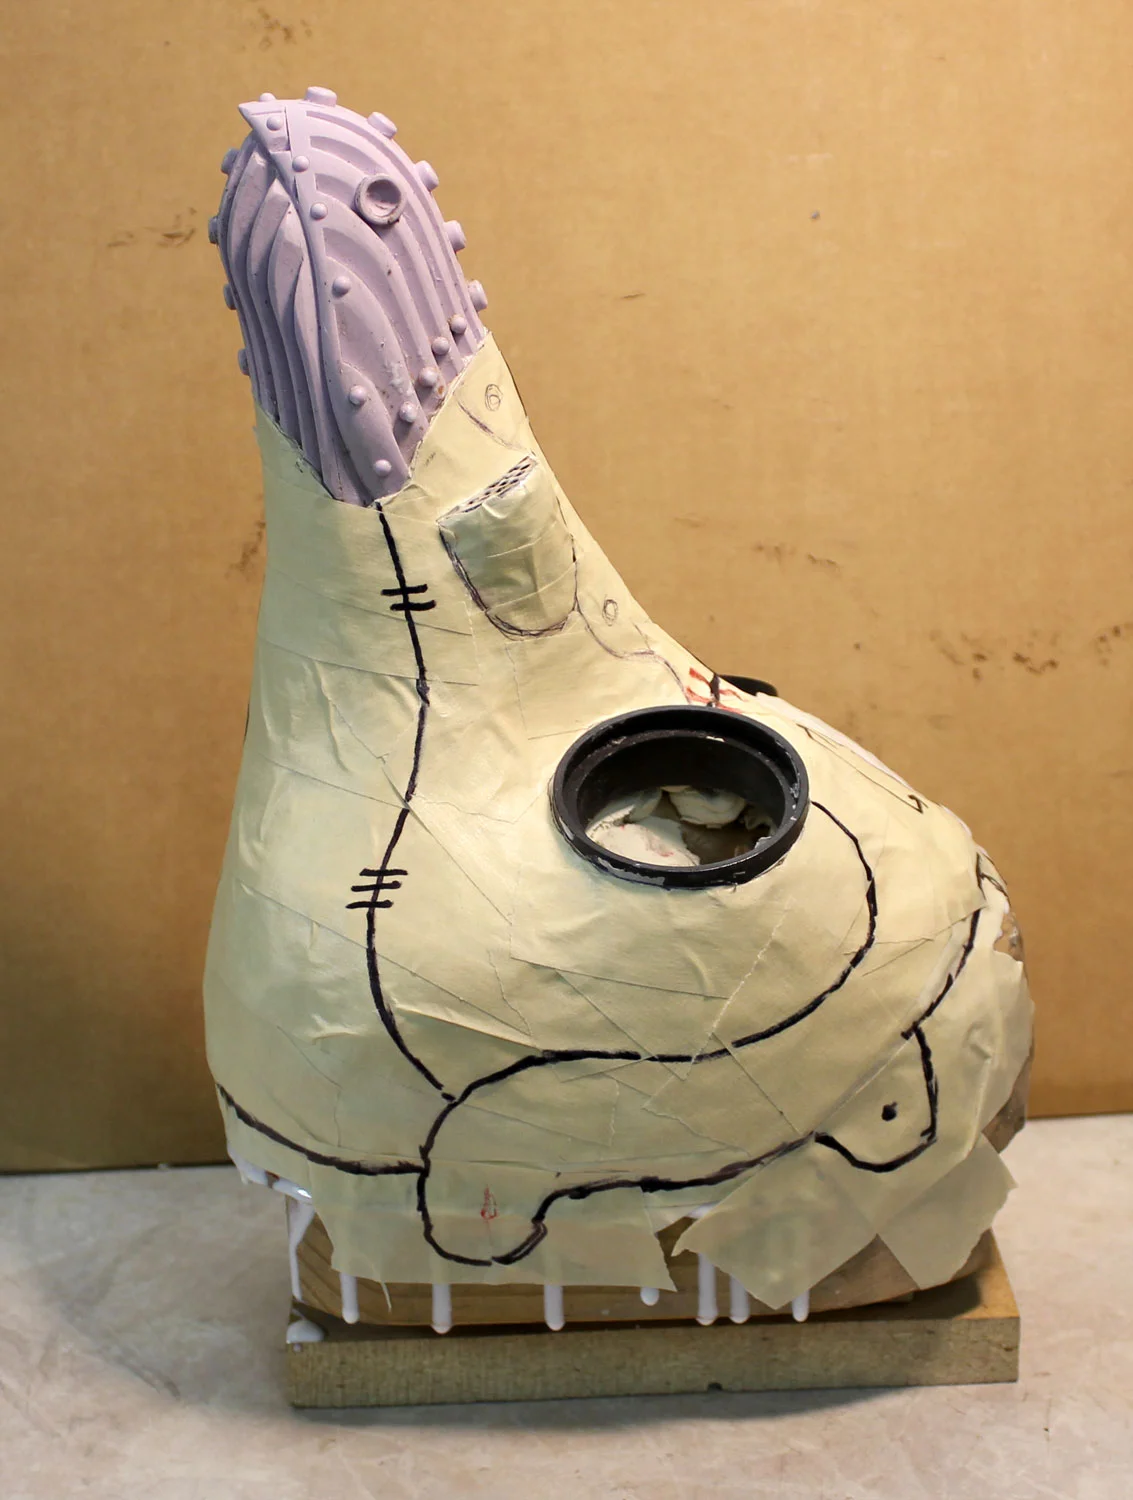
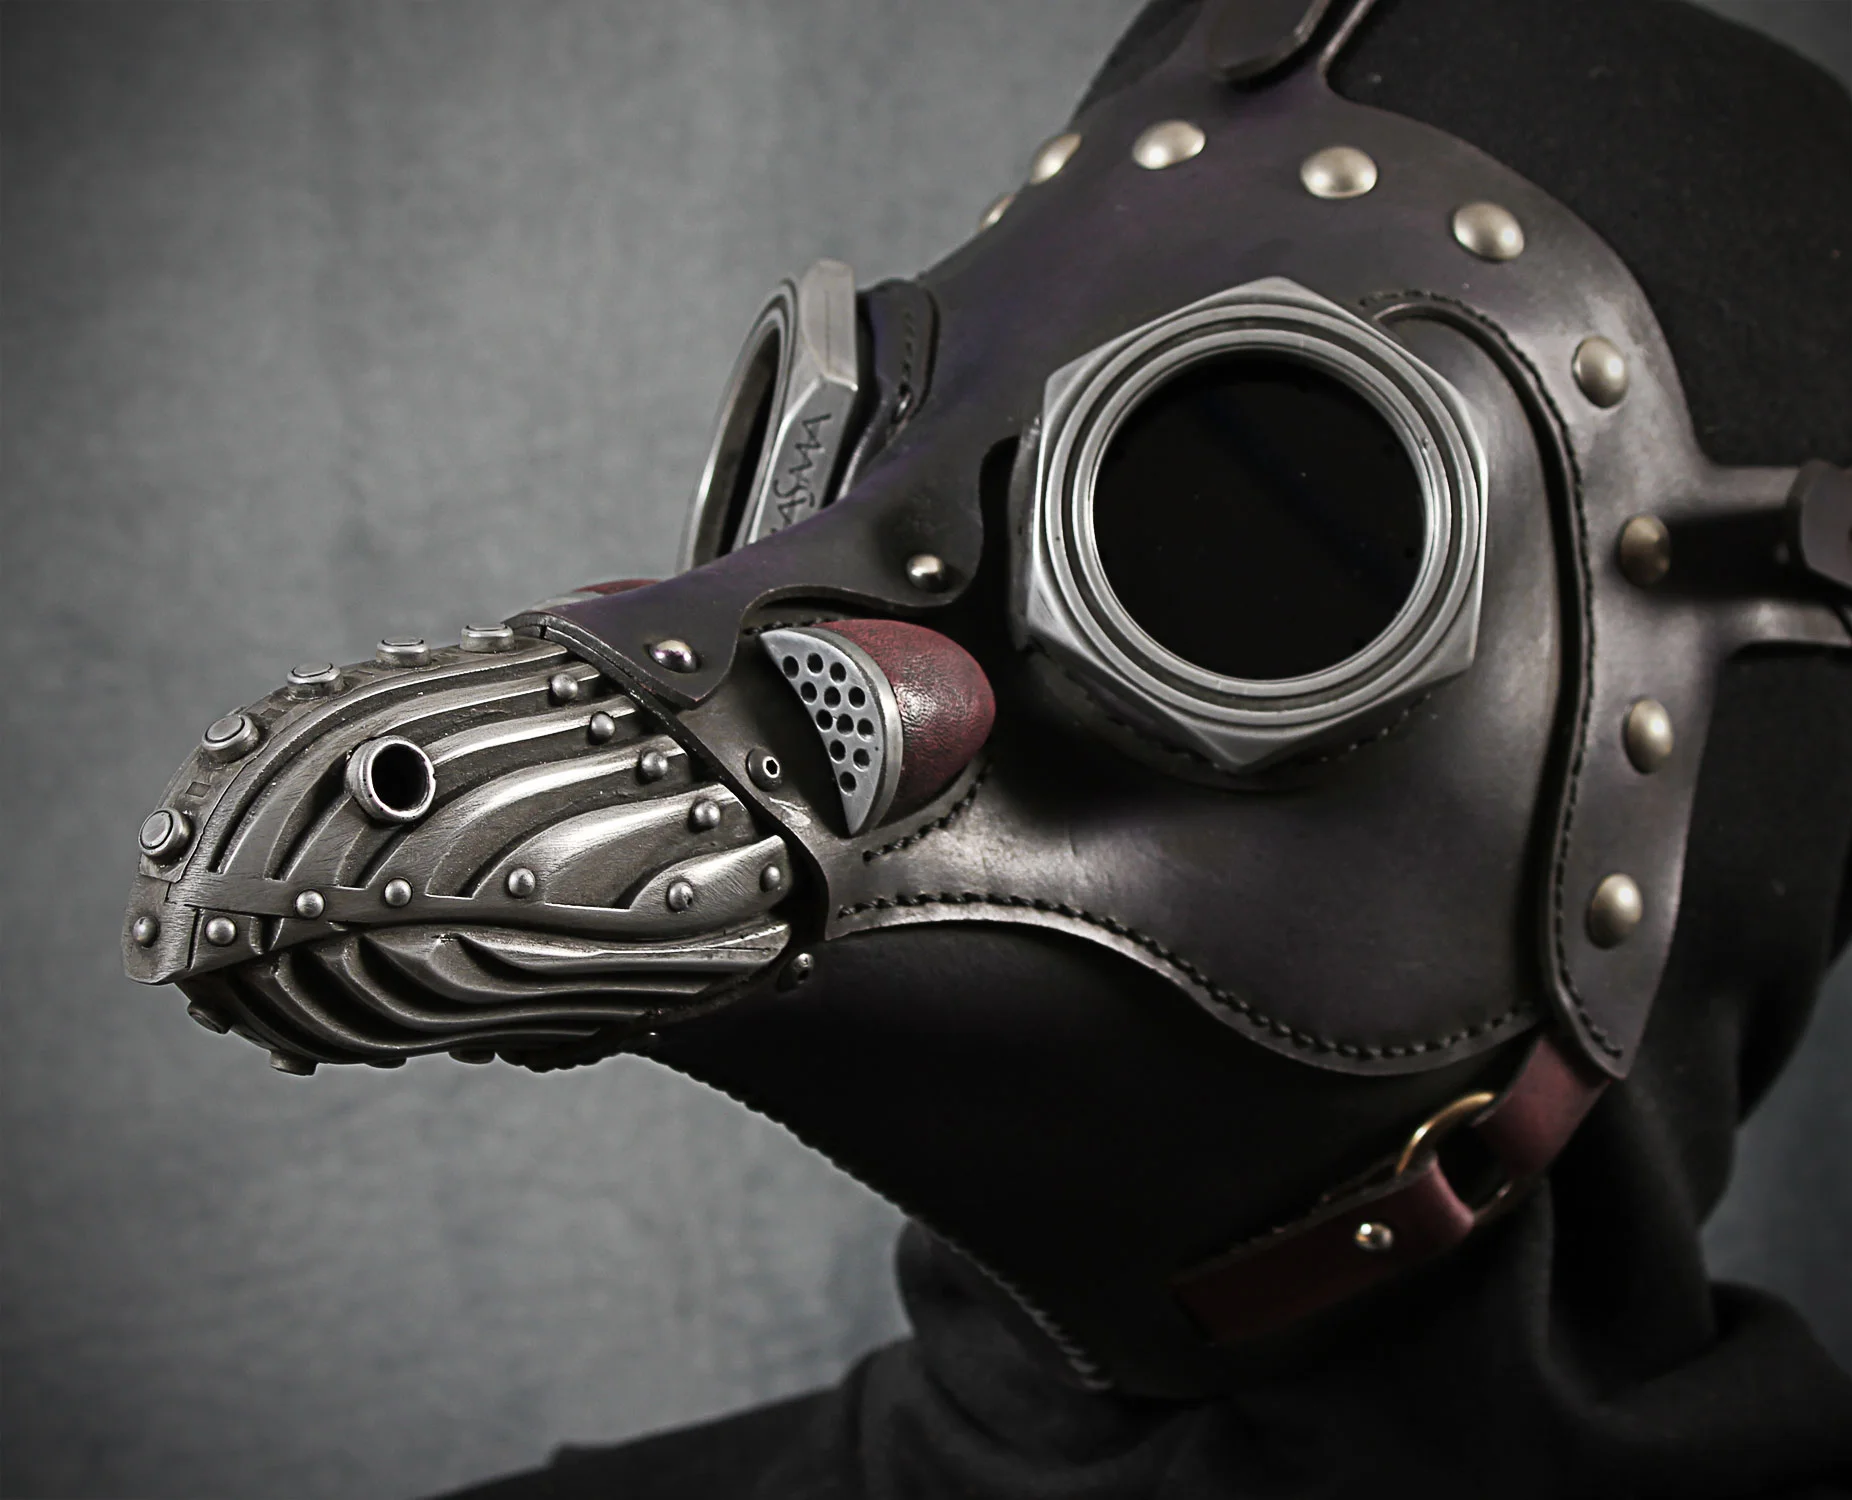
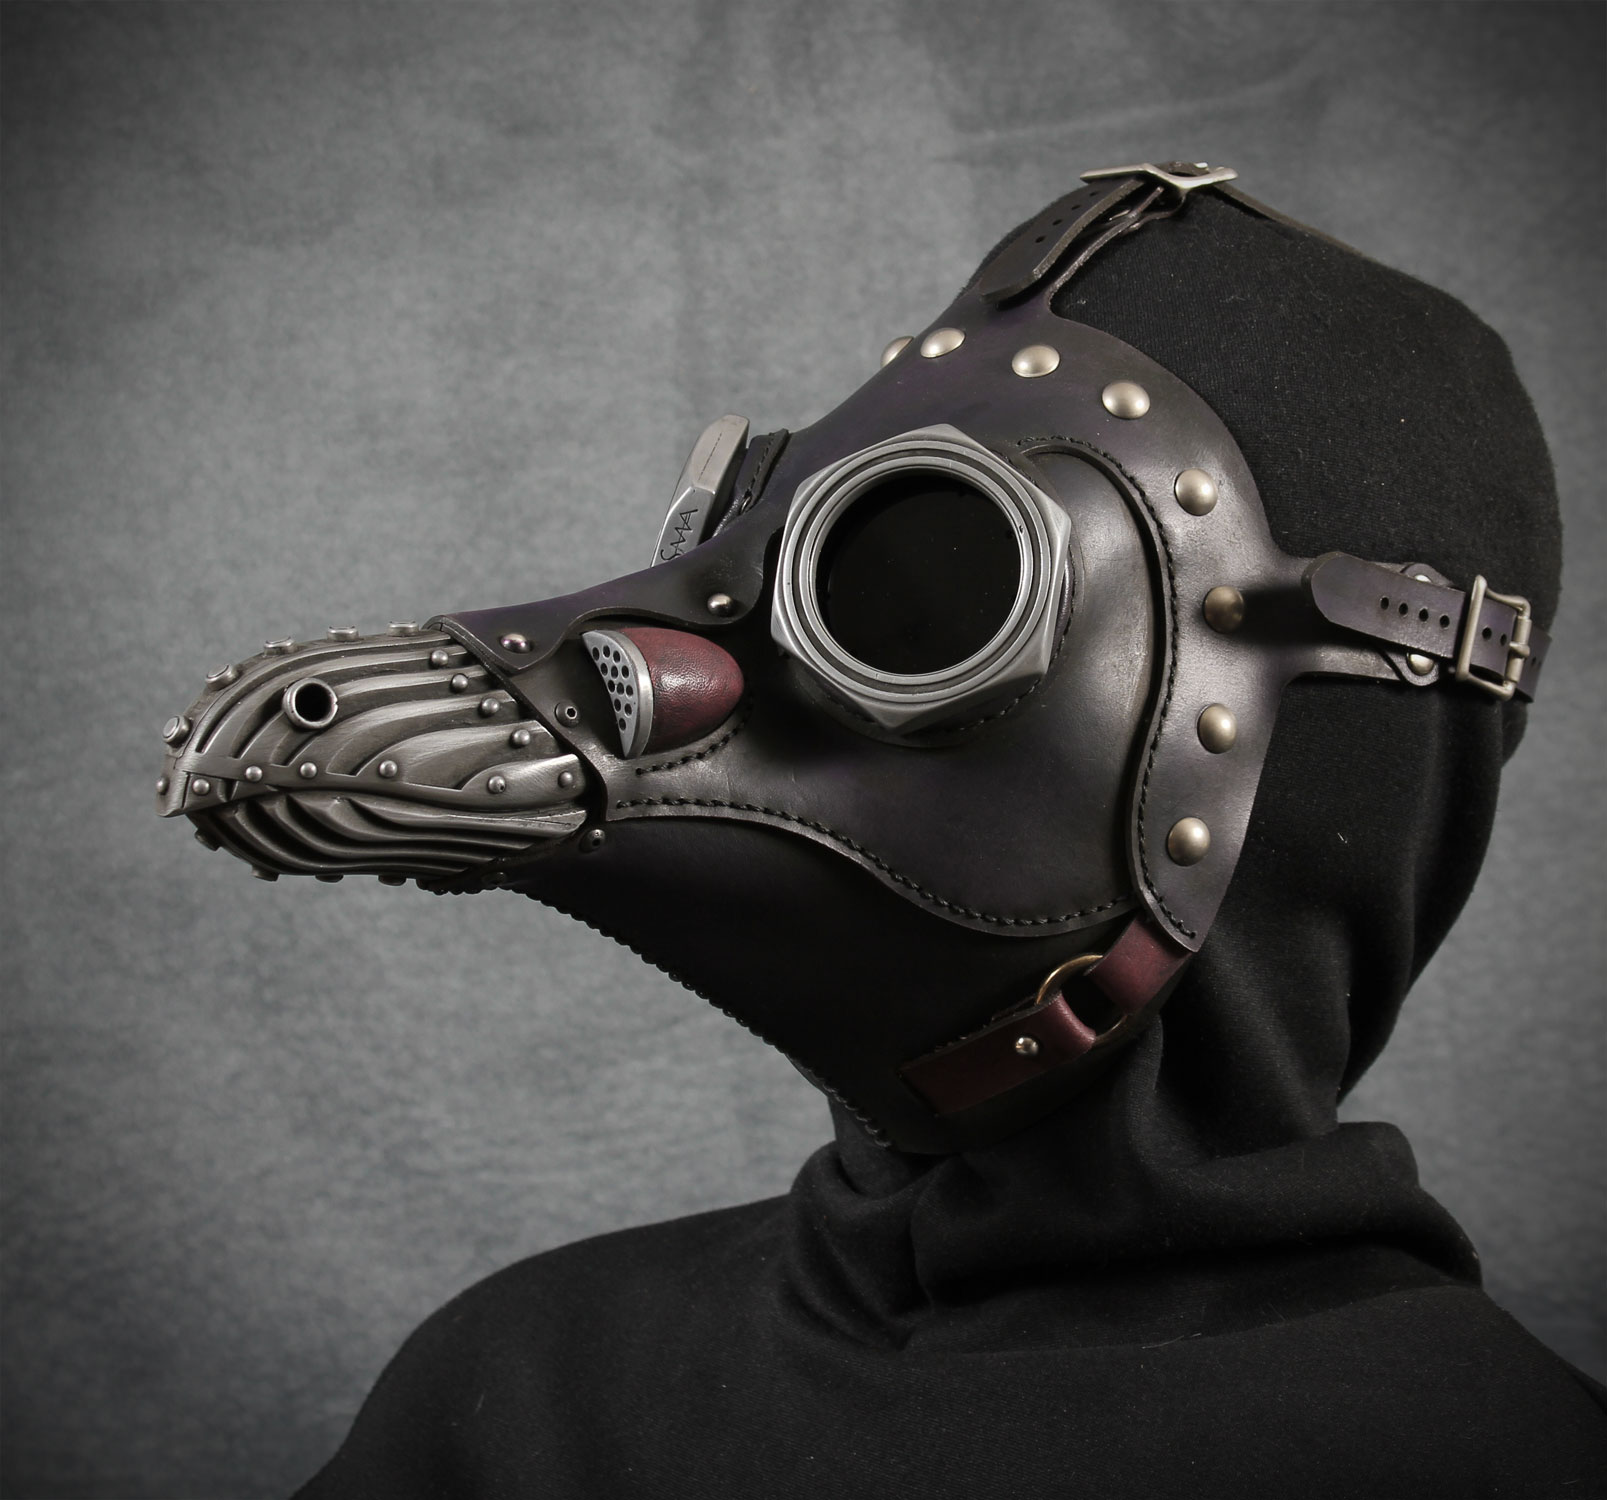
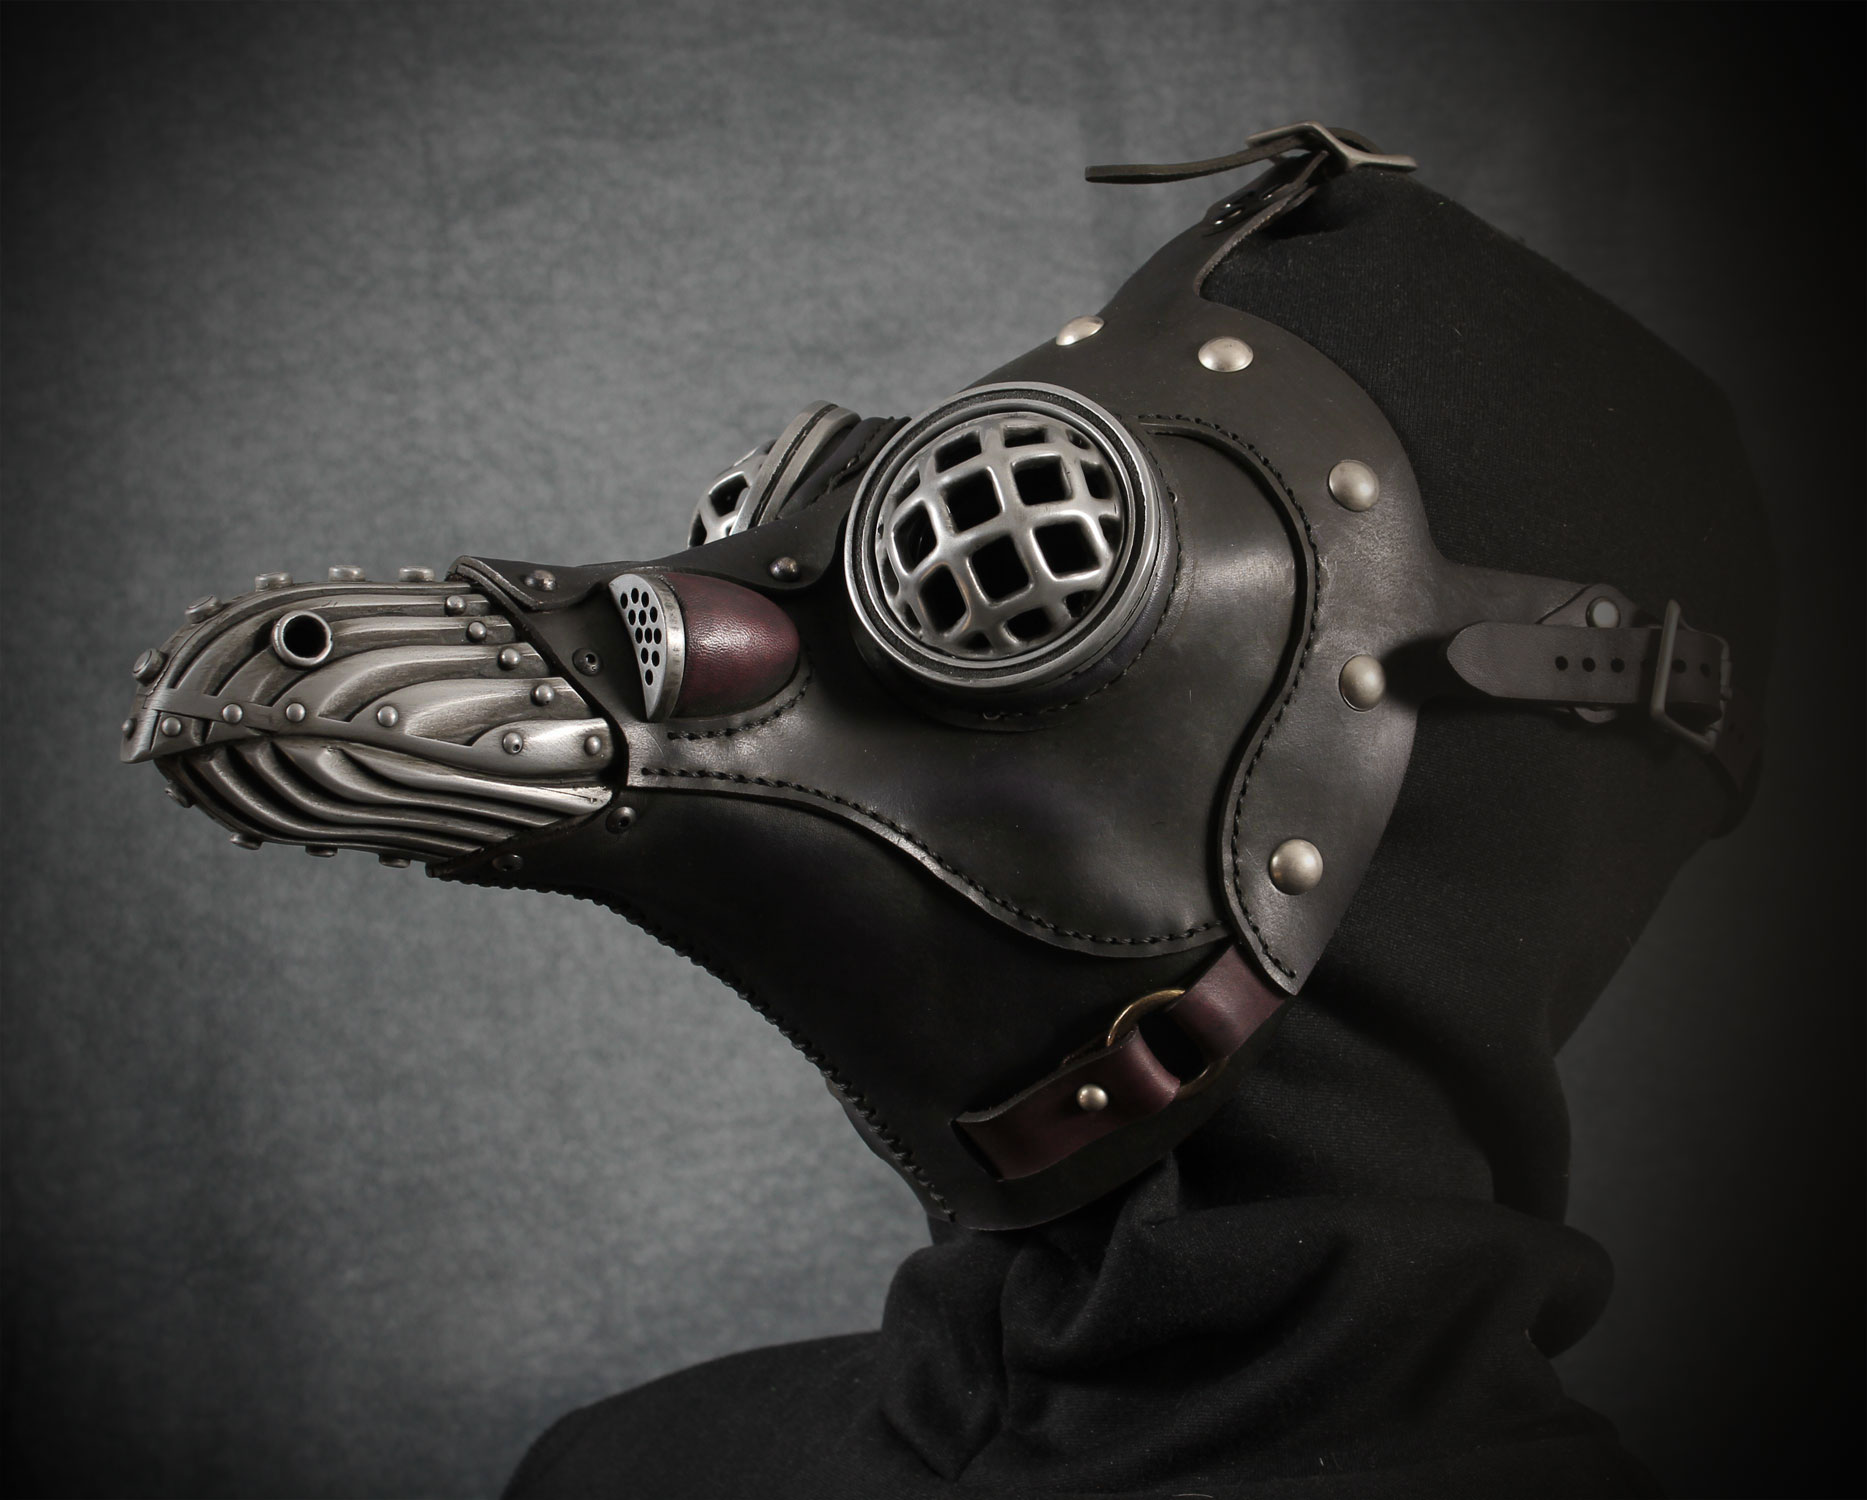
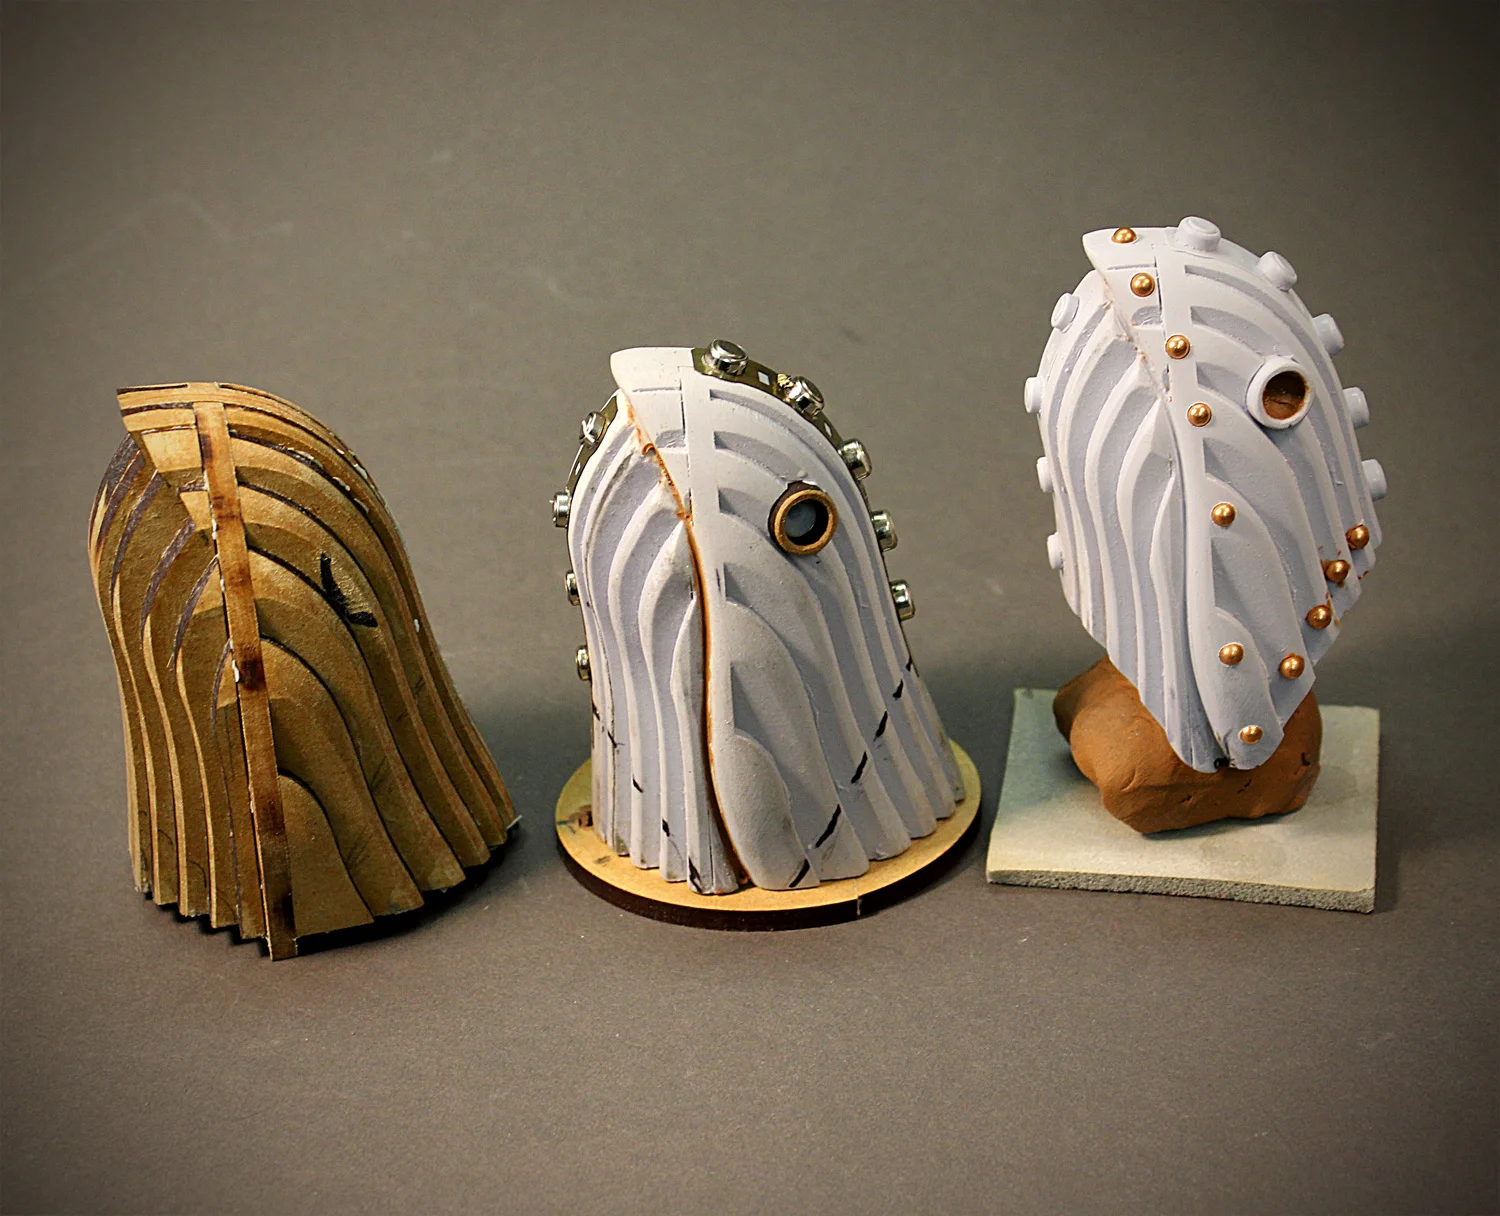
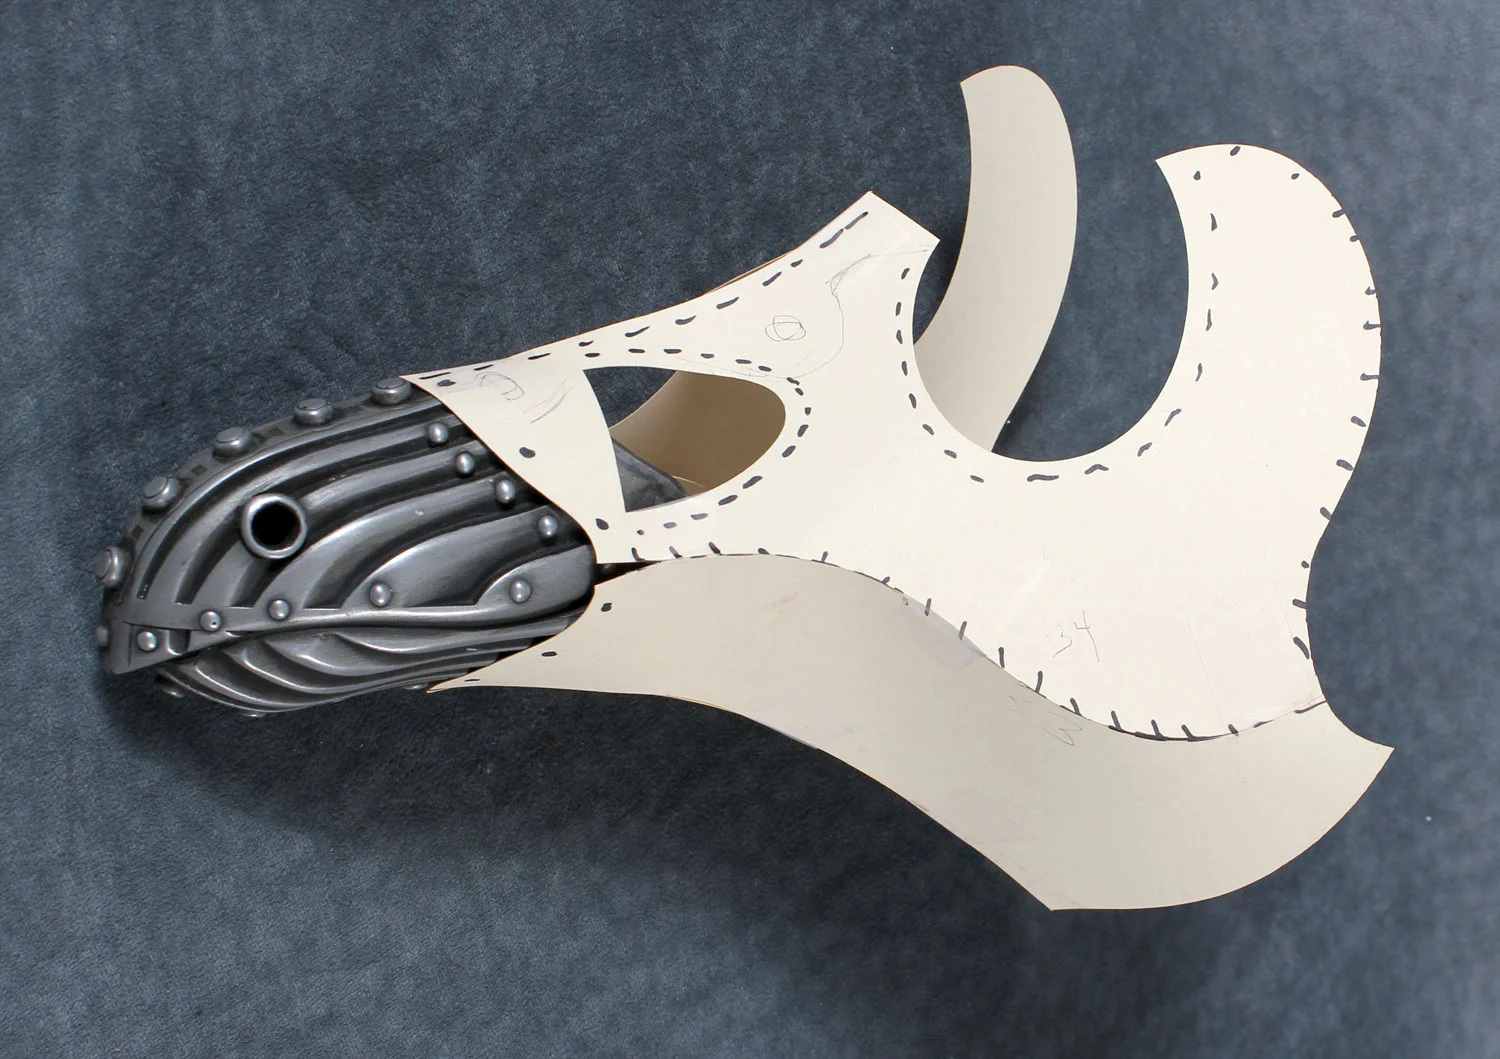
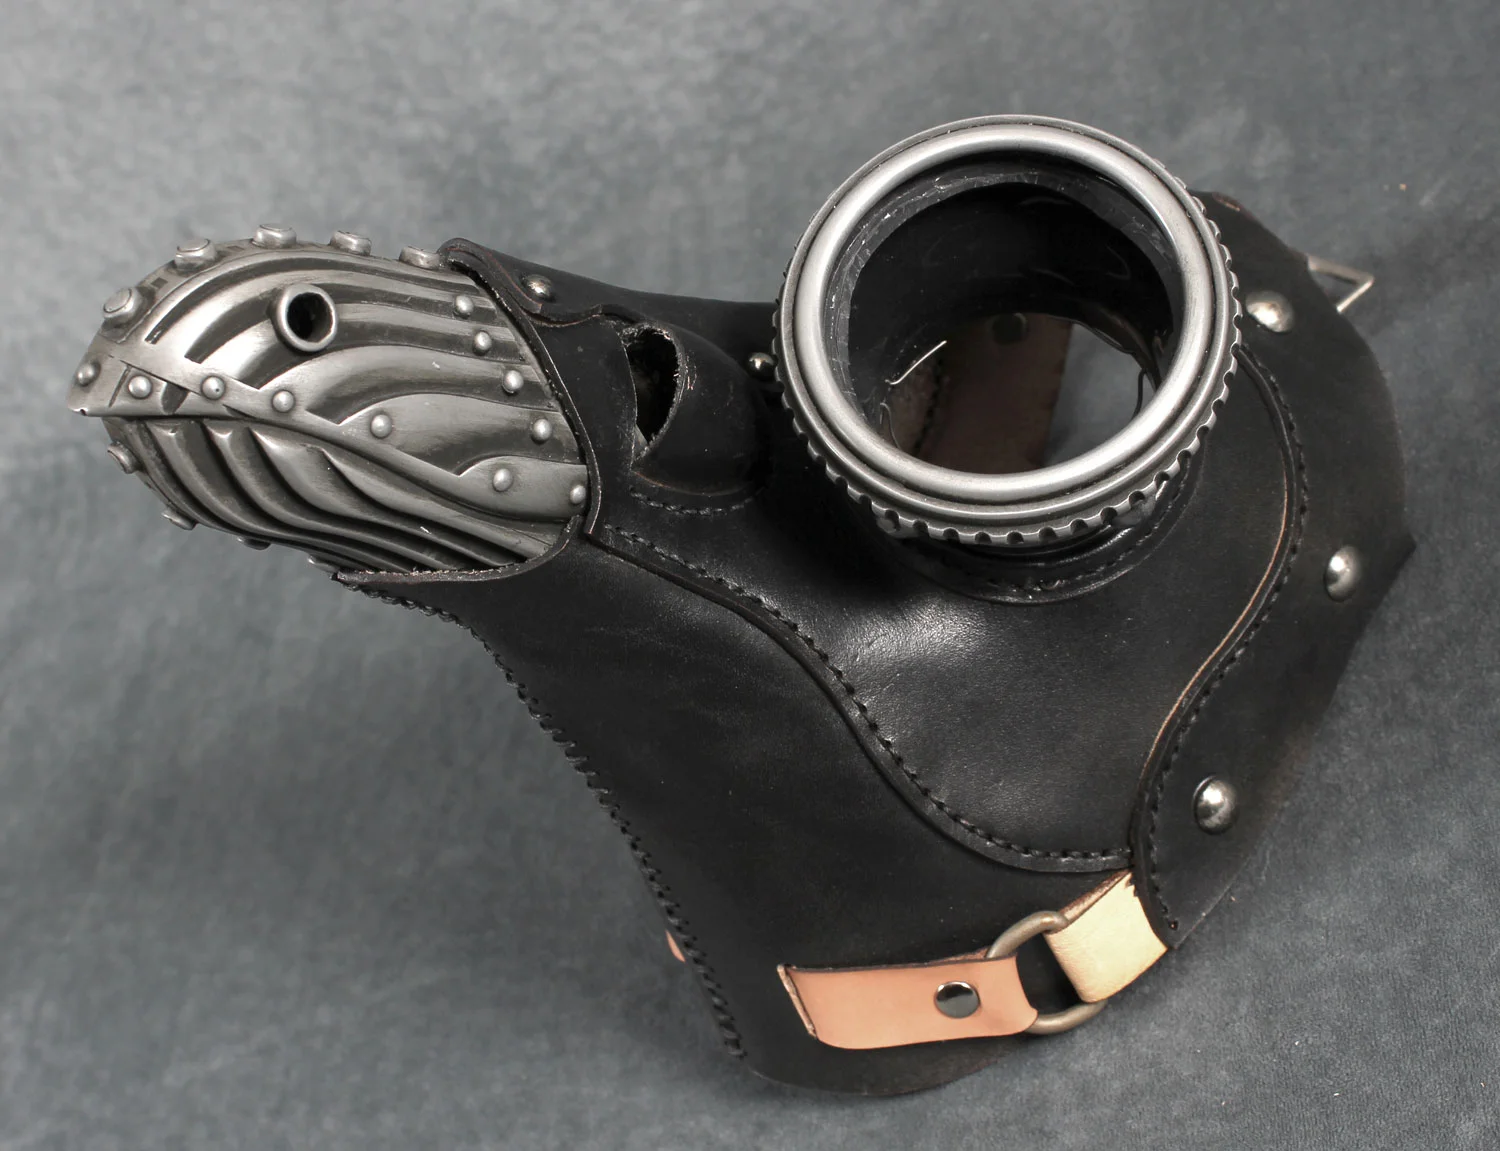
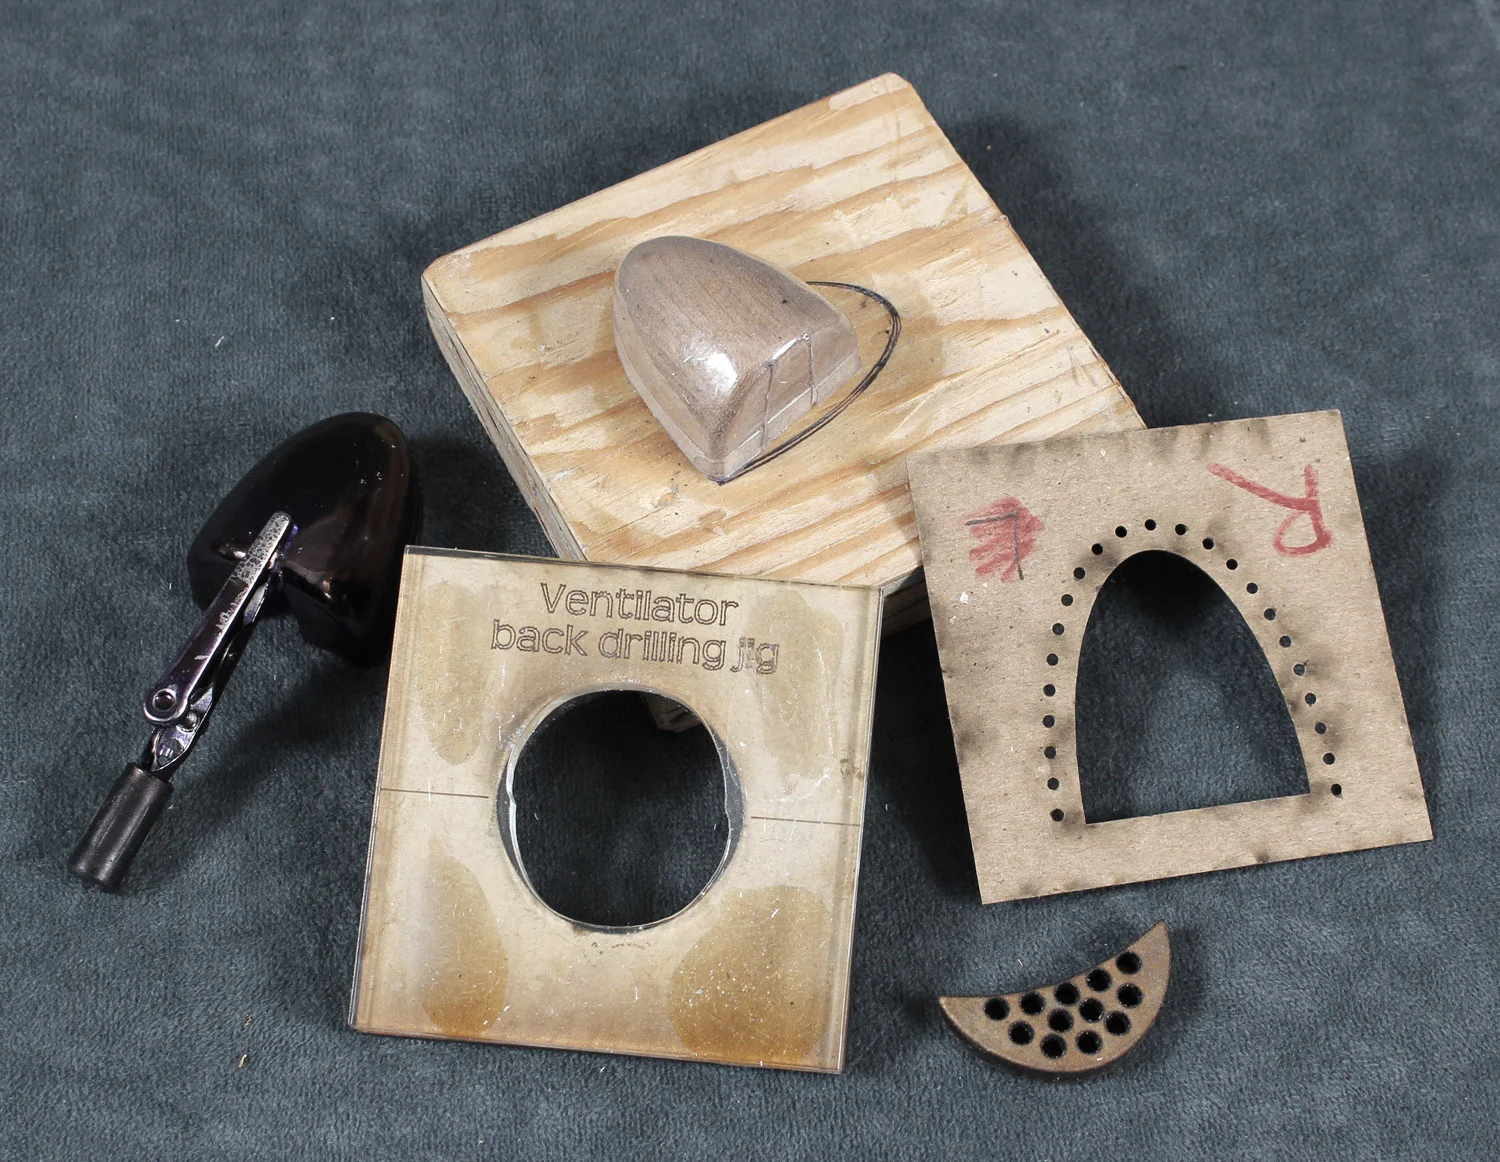
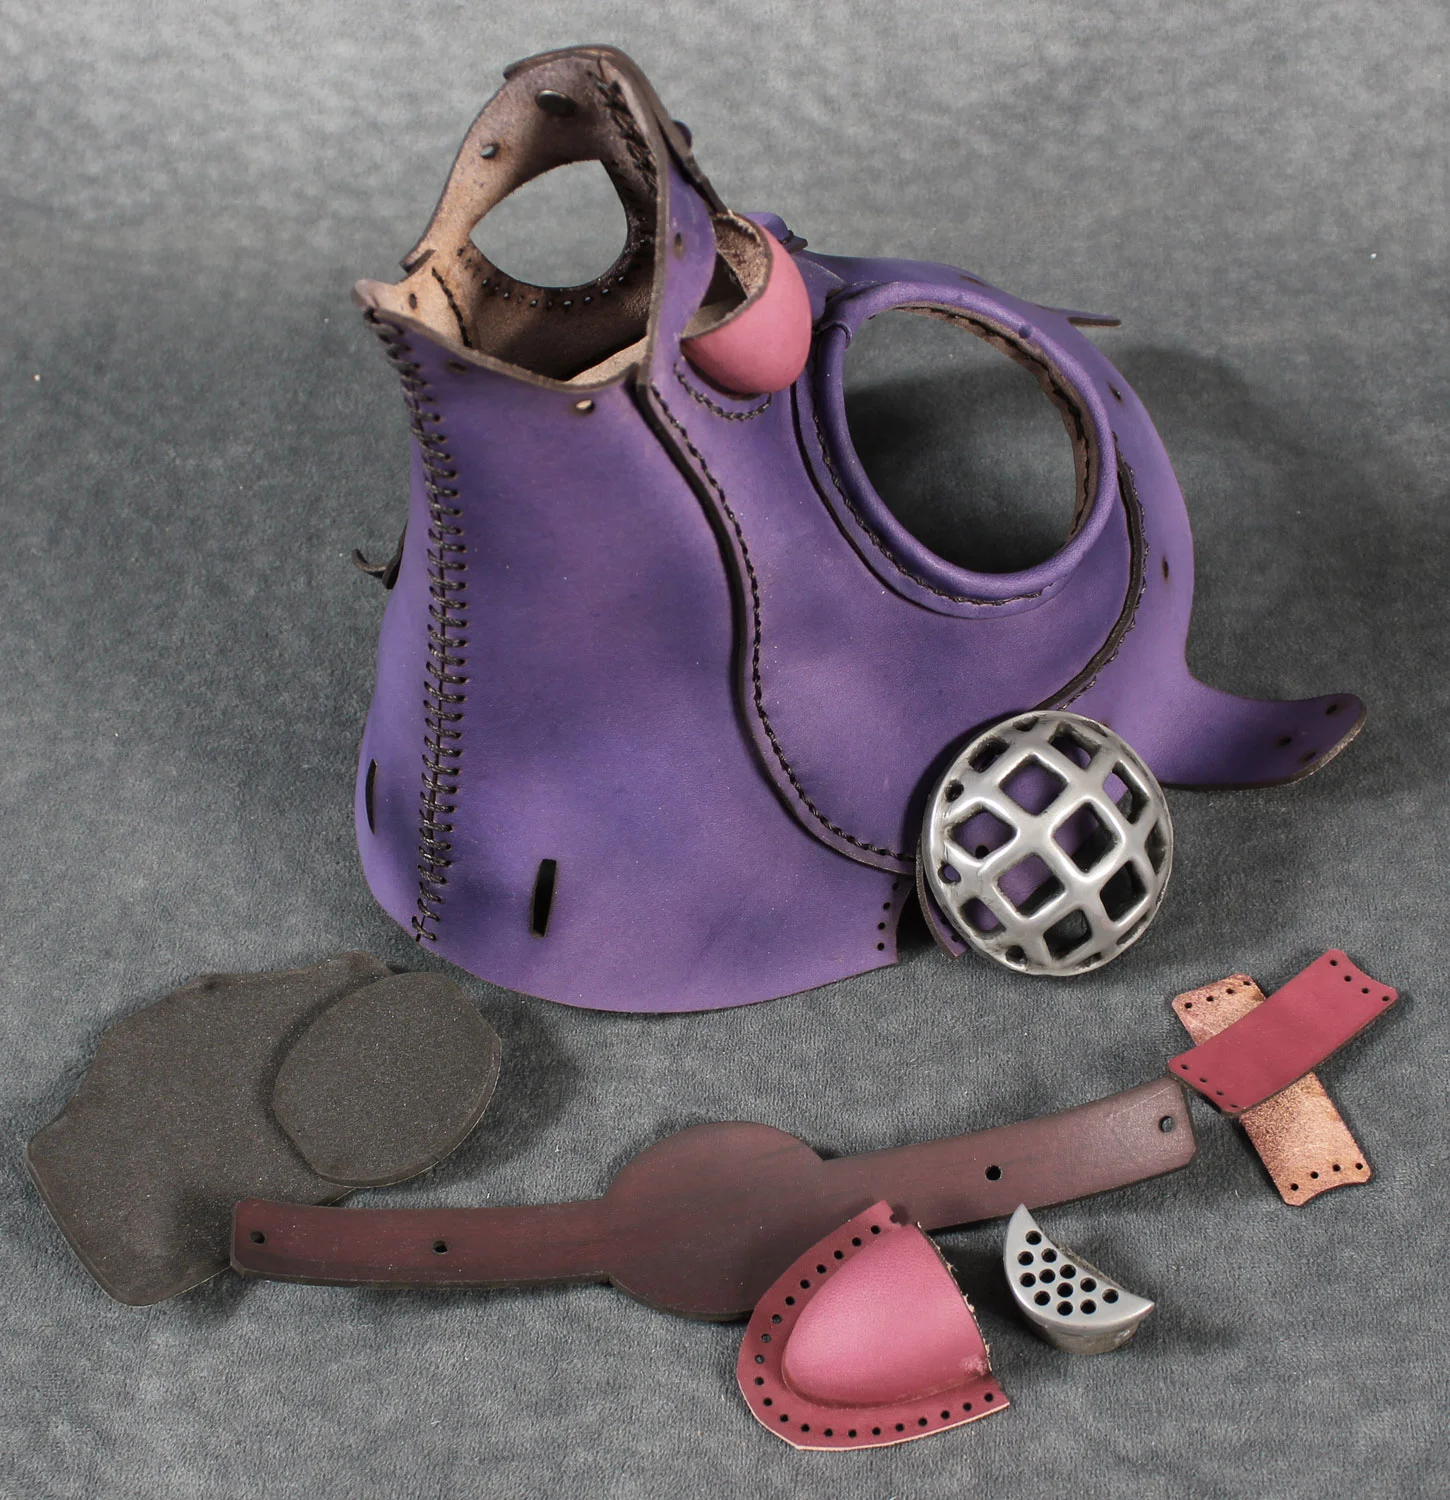
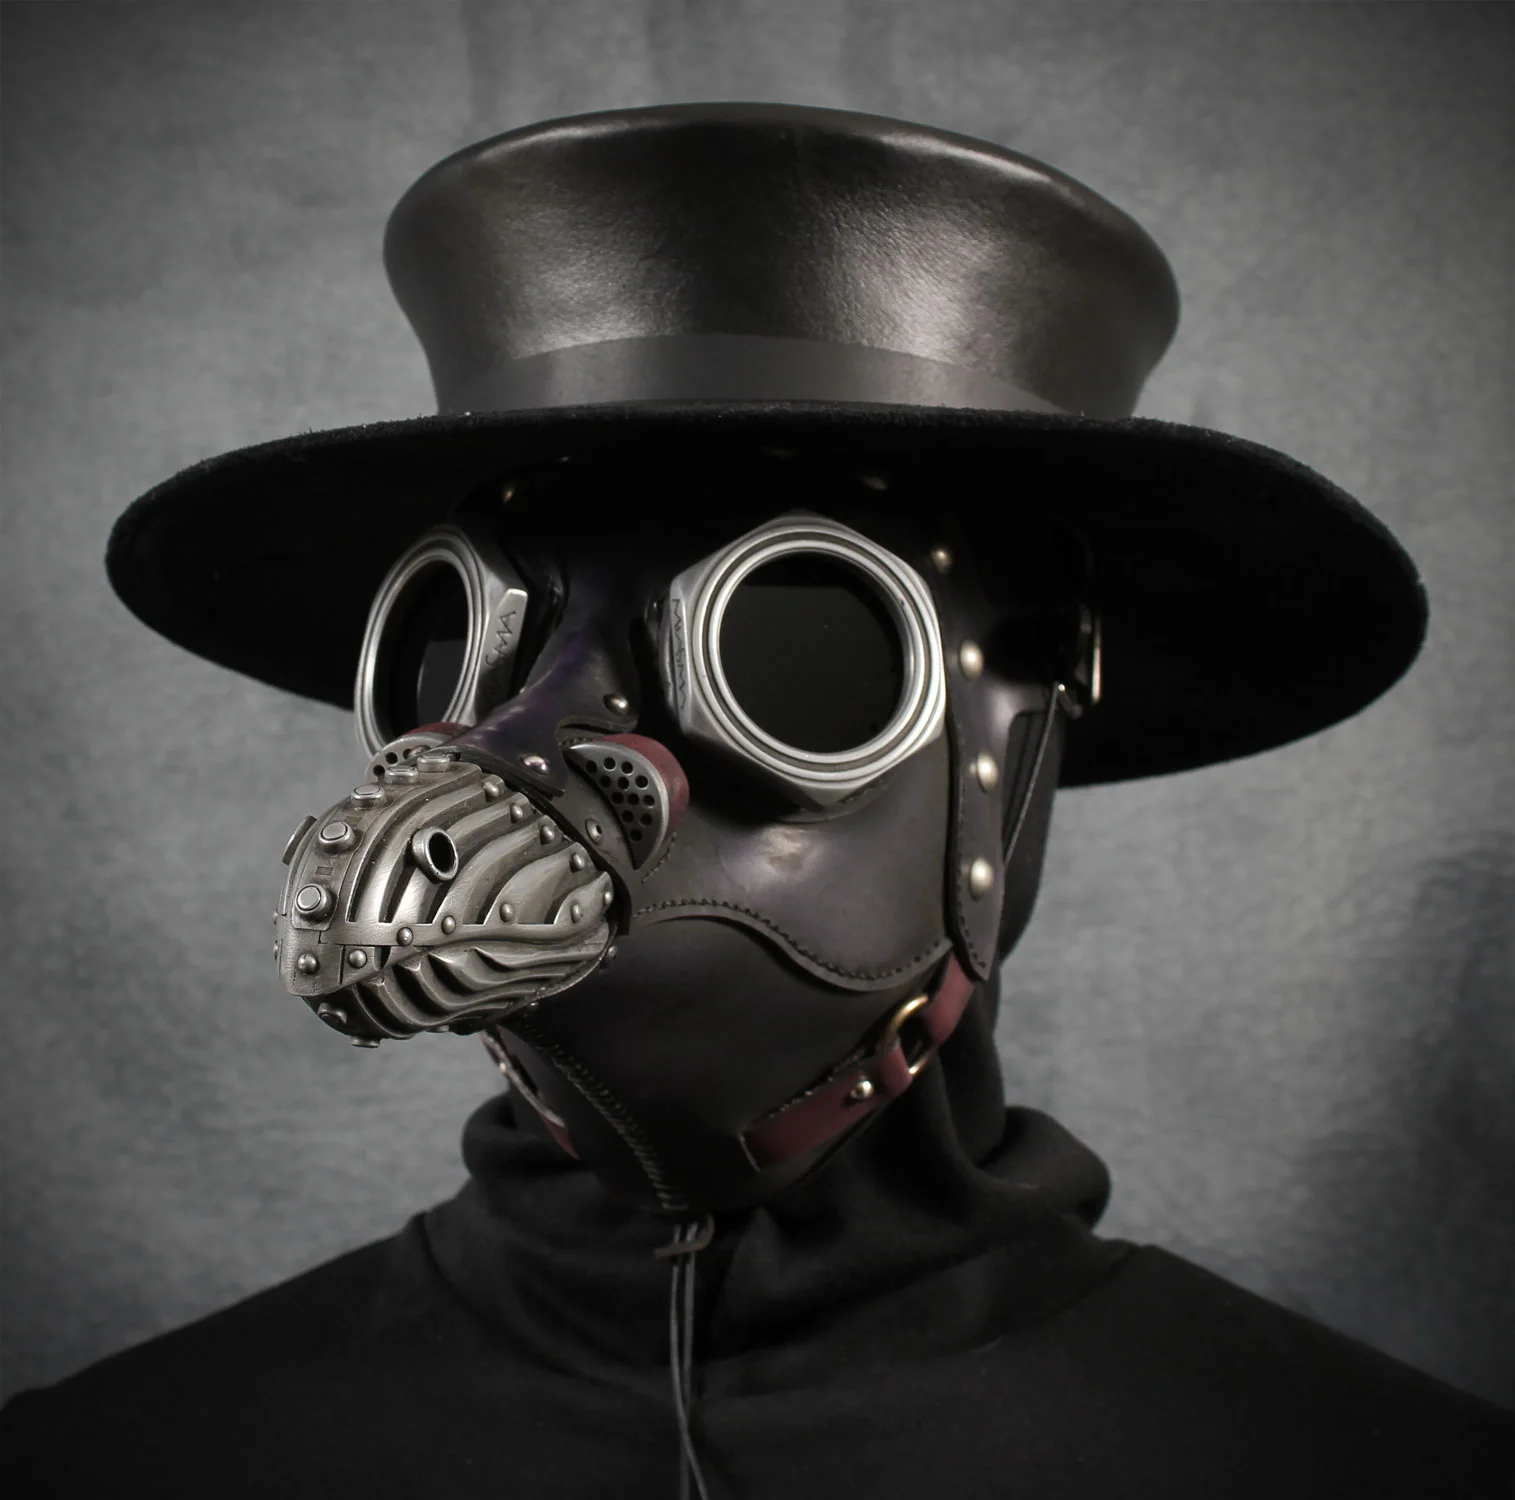
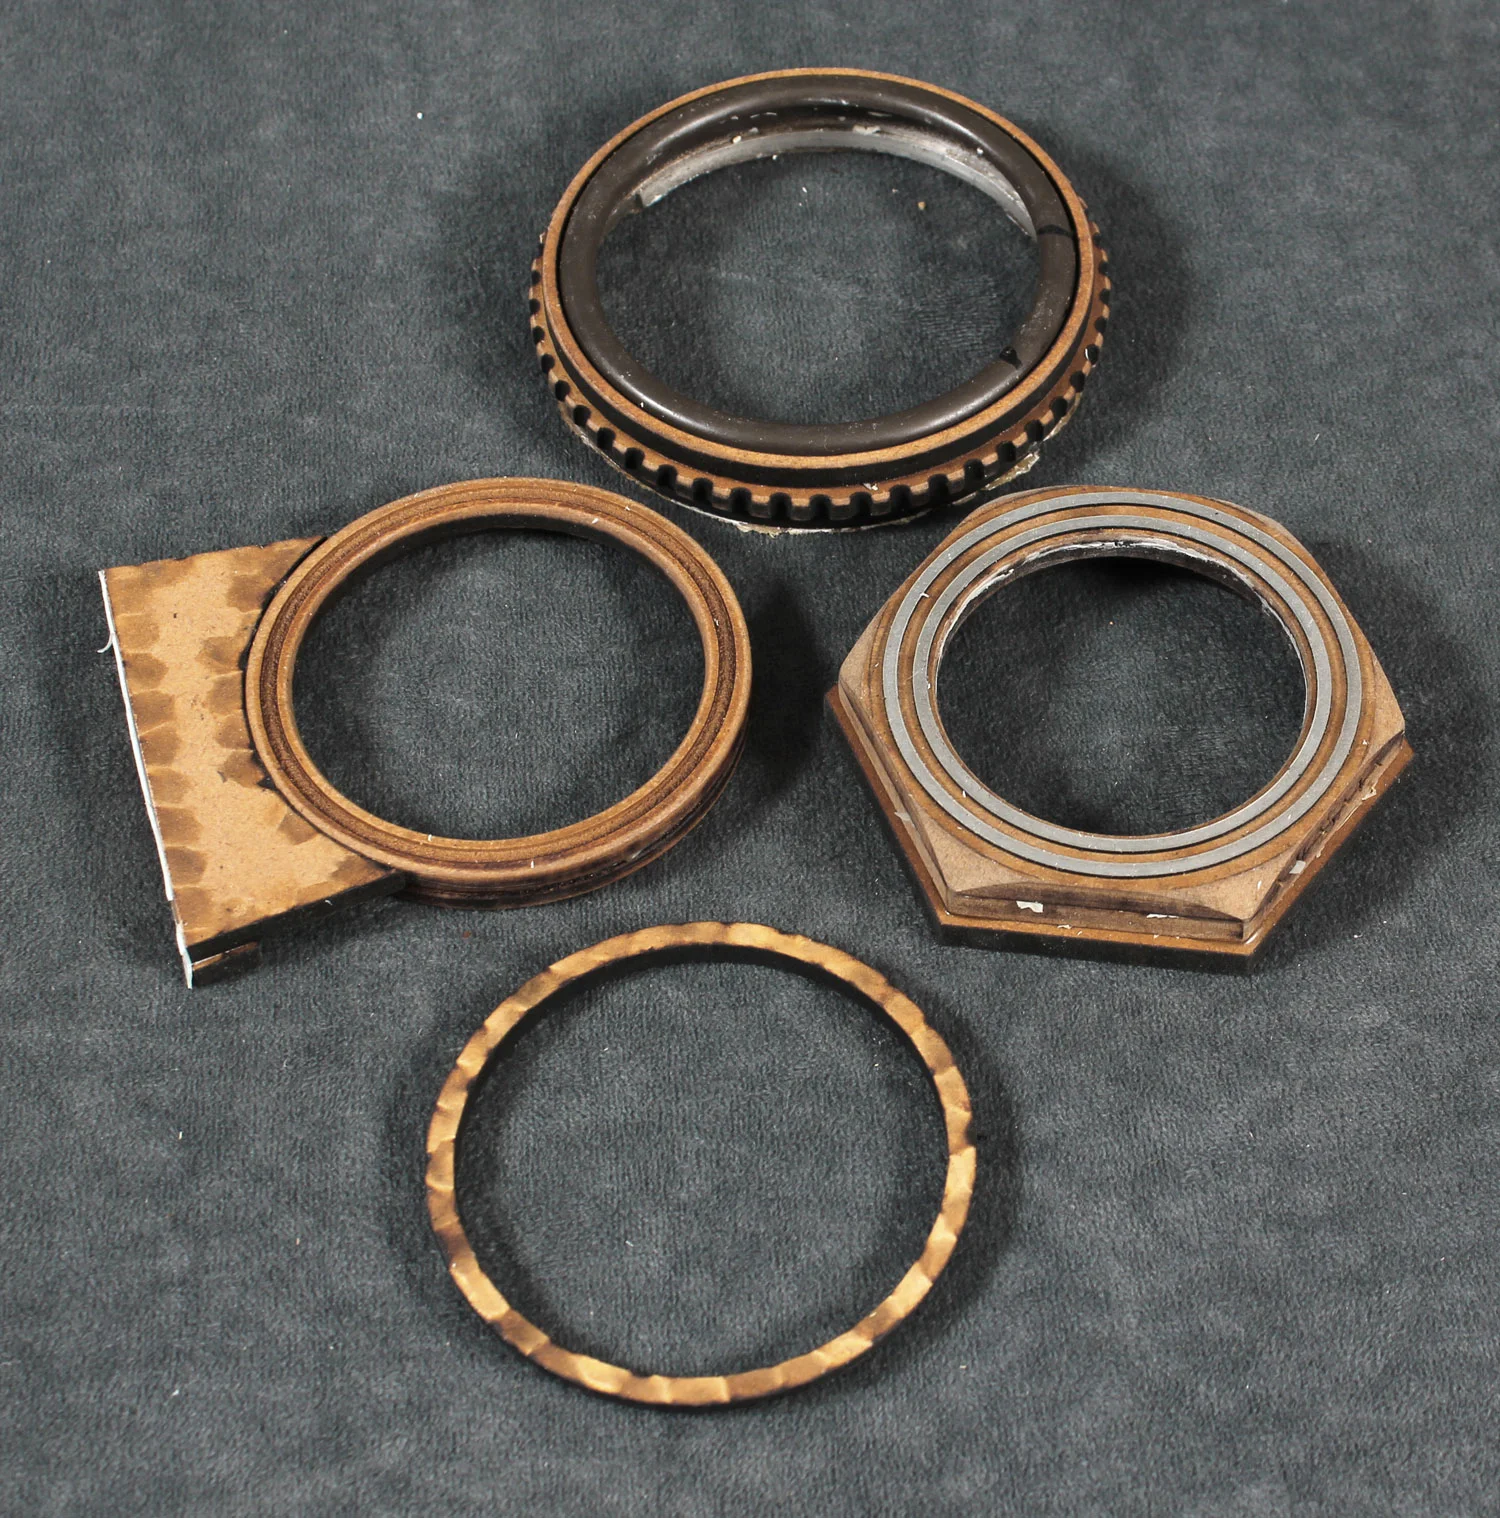
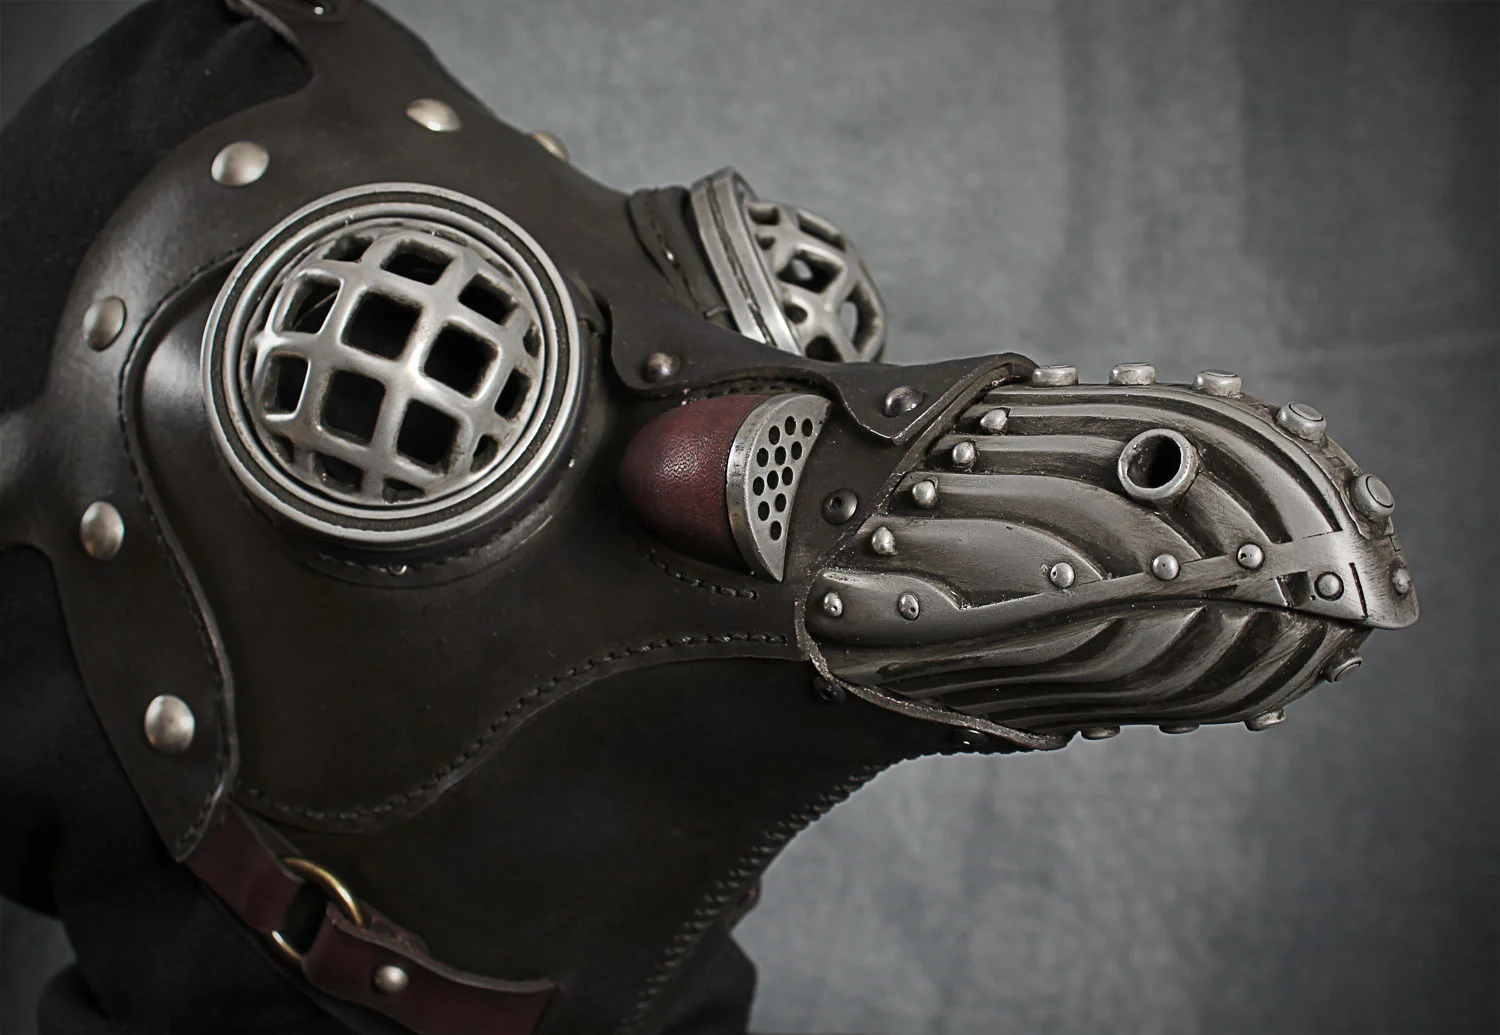
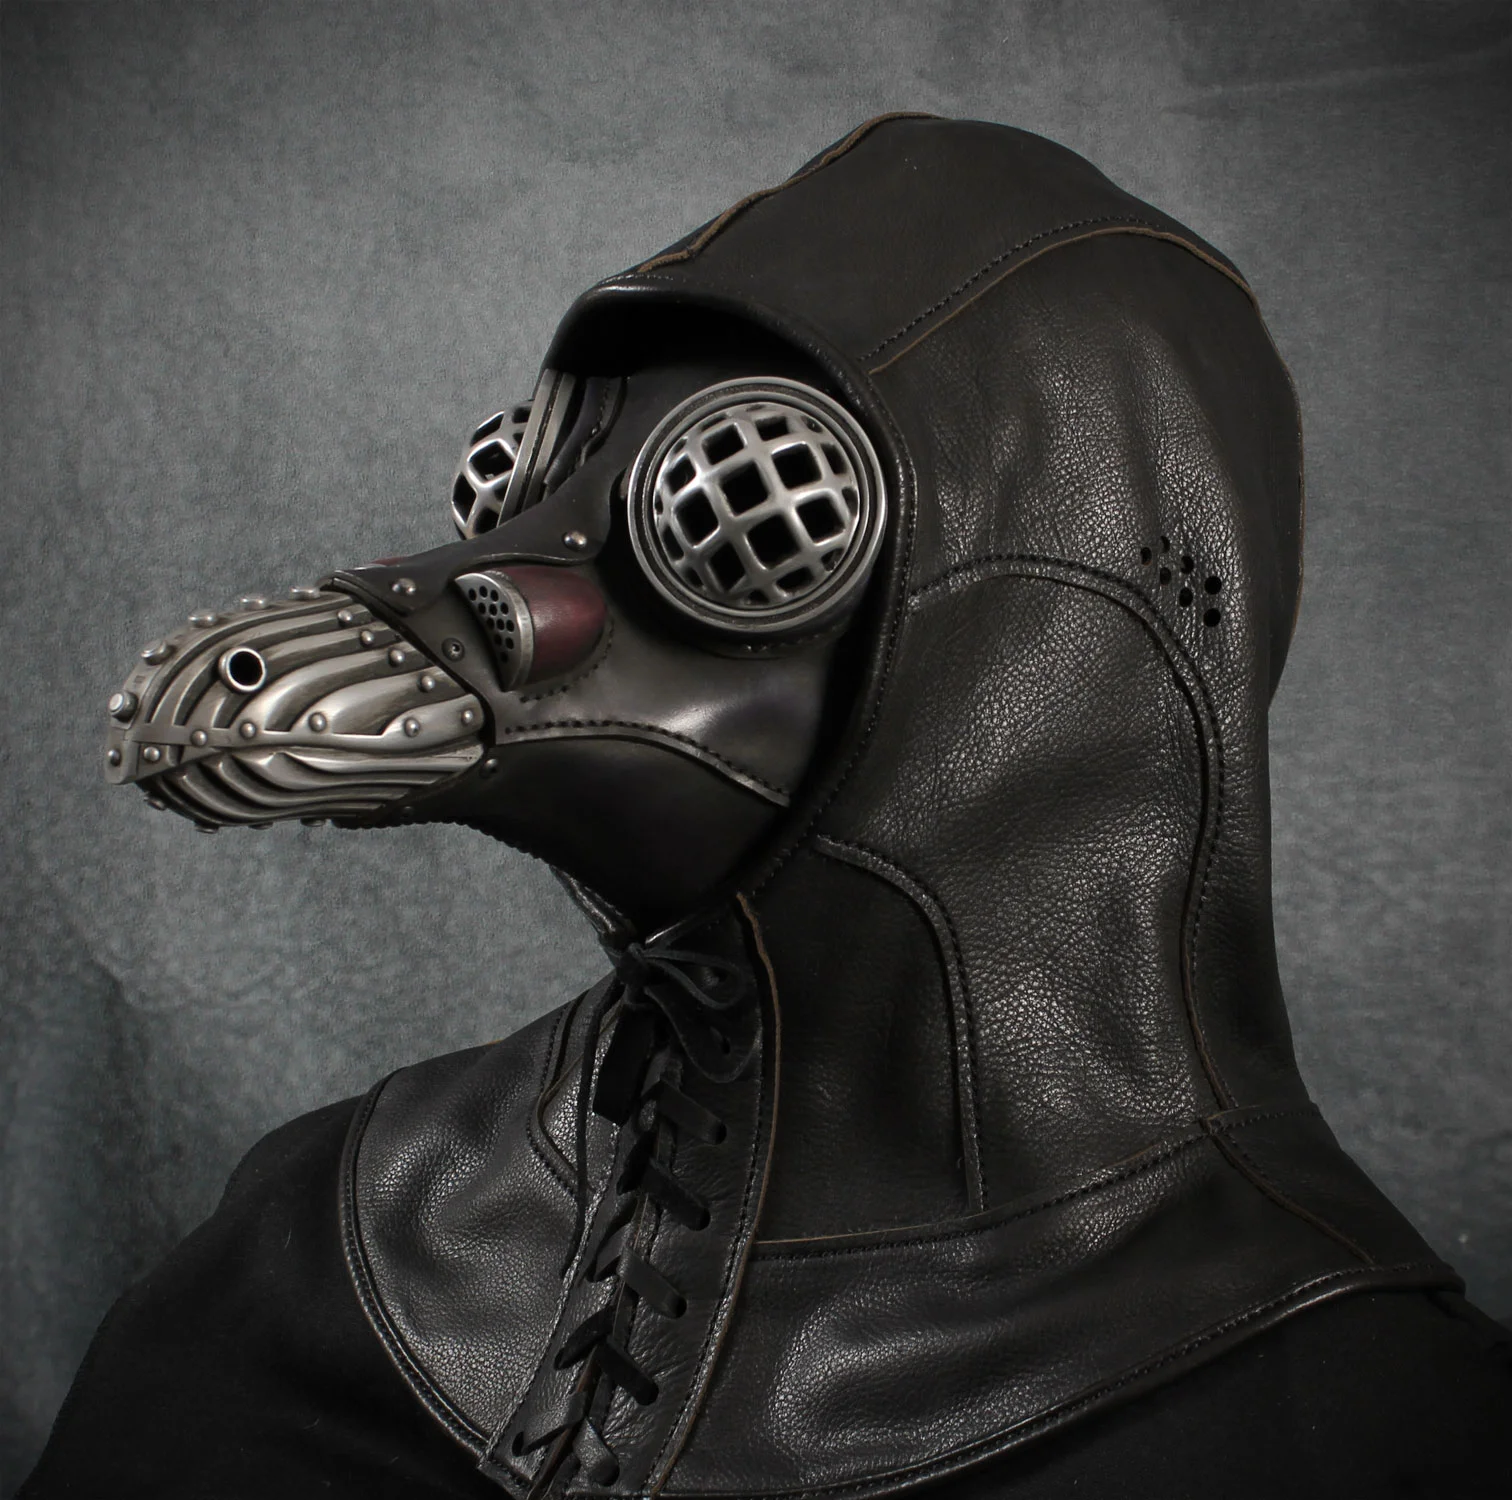
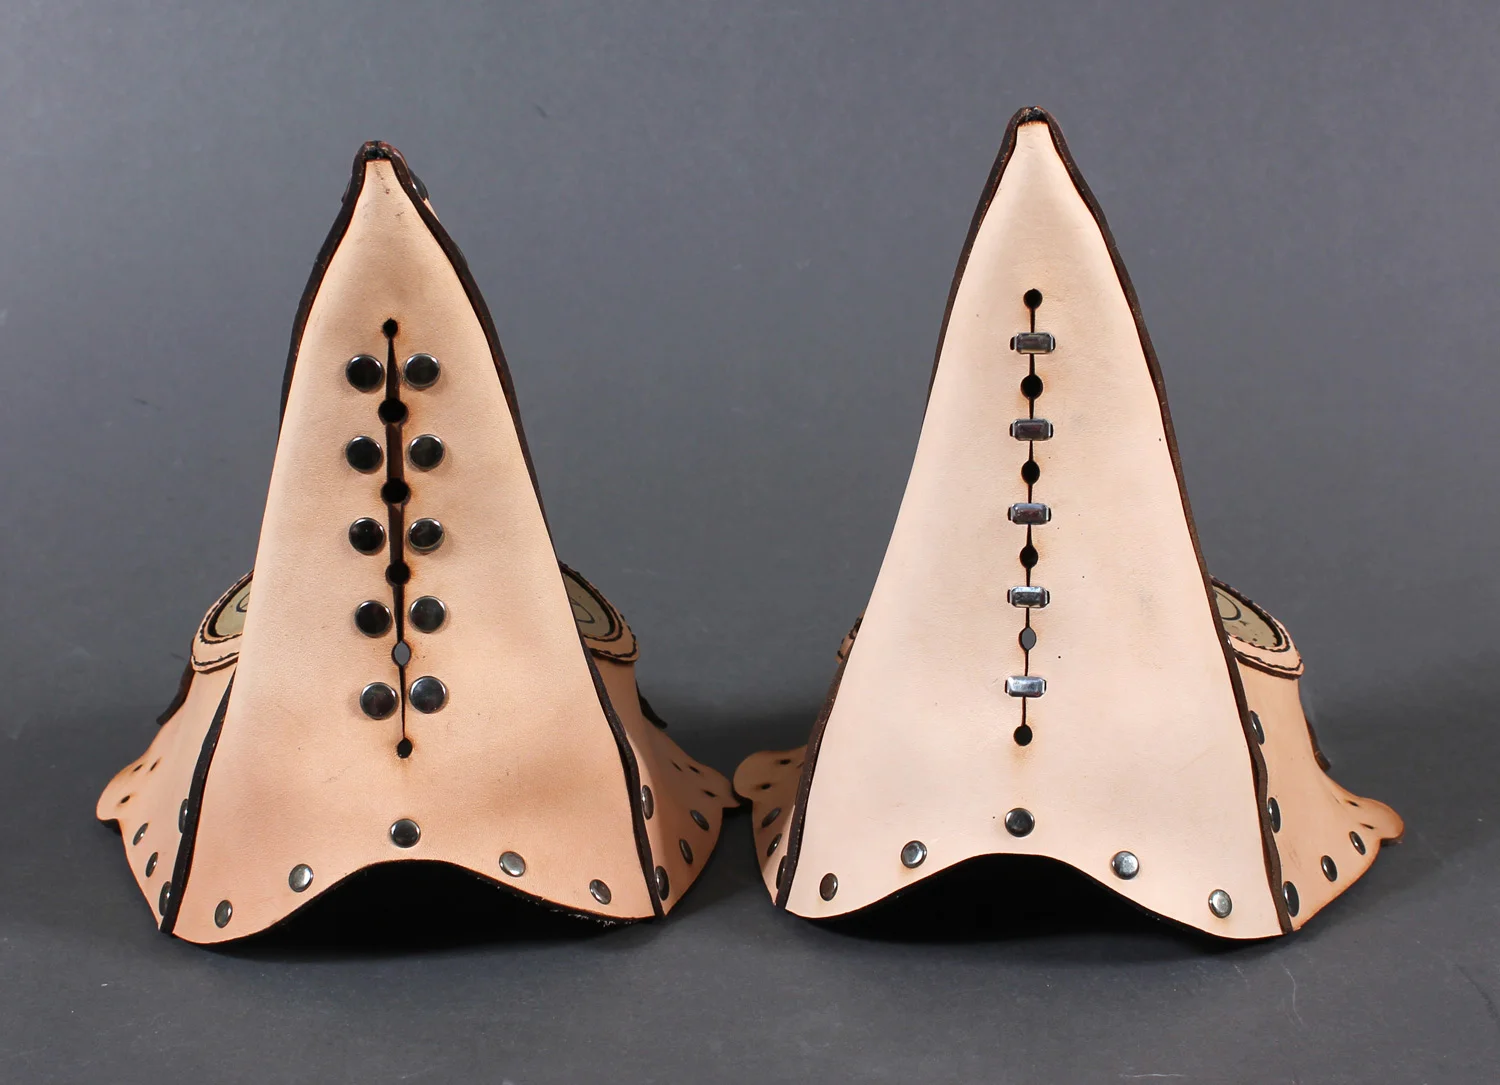
Soon after, Banwell stumbled across a World War II gas mask, and decided to take a shot at the genre, casting components based on the mask’s respirators and goggles, adding bits of metal, and tying it all together into stitched-leather head gear straight from a land of nightmares. He now makes gas masks in various designs, some resembling animals like elephants and aardvarks, and his signature, bird-billed “plague doctor” masks. He also makes filigreed, lacy-looking leather-cut masquerade face coverings that are as feminine and elegant as his darker works are terrifying.

Banwell started selling his masks through his online Etsy store, and business remains brisk—his creations ranging from about $40 for the masquerade-style pieces up to around $400 for gas masks. Critical acclaim also came fast, and less than a year into mask-making, his creations were featured in the first European steampunk art show, at England’s Oxford University, in 2009. Another recent show in which his work appeared—in Seoul, South Korea—was the first steampunk-themed display in Asia, and was so well-received it is now engaged to move to Beijing soon.

Because decades of Banwell’s career were focused more on commercial ventures, and success came late and fast, he missed a few major pit stops along the way, one of which he’ll be achieving with his upcoming local showing at Idea Fabrication Labs—his first solo gallery opening.

Though Banwell said he communicates with other artists in the genre, he rarely attends conventions or other public steampunk-themed gatherings. “I’m 66 now and kind of slowing down, so to me traveling is not that much fun anymore,” he said. “But what I really enjoy is making the stuff and having other people appreciate it, so the more time I spend in my shop, the happier I am.”

Banwell admits it’s been strange to find a following and “be discovered” at the age of 60, and credits his late success largely to the Internet.

“If I’d been born 20 years later, maybe I’d have been this successful 20 years earlier,” Banwell mused. “I kind of wish it happened earlier, but life is good now.”


Leather is the new black in steampunk-inspired show

By John Riggin, Chico Enterprise-Record

An array of mounted heads will adorn the walls at The Idea Fabrication Laboratory, 603 Orange St., on Saturday.

It's not as macabre as it sounds, but Tom Banwell's "Masked Machinations" isn't without it's decidedly macabre inspirations. Banwell, 66, is bringing an impressive offering of nearly 70 of his steampunk-inspired headpieces and leather masks to Chico's cutting-edge art space.

Steampunk style and culture pulls from an alternate timeline of possibilities — a Victorian-style reinterpretation of the world, where ornate craftsmanship and a fascination with early machines meet and prosper. In a steam-powered world, gadgetry resembles clockwork and nothing is without it's own flair.

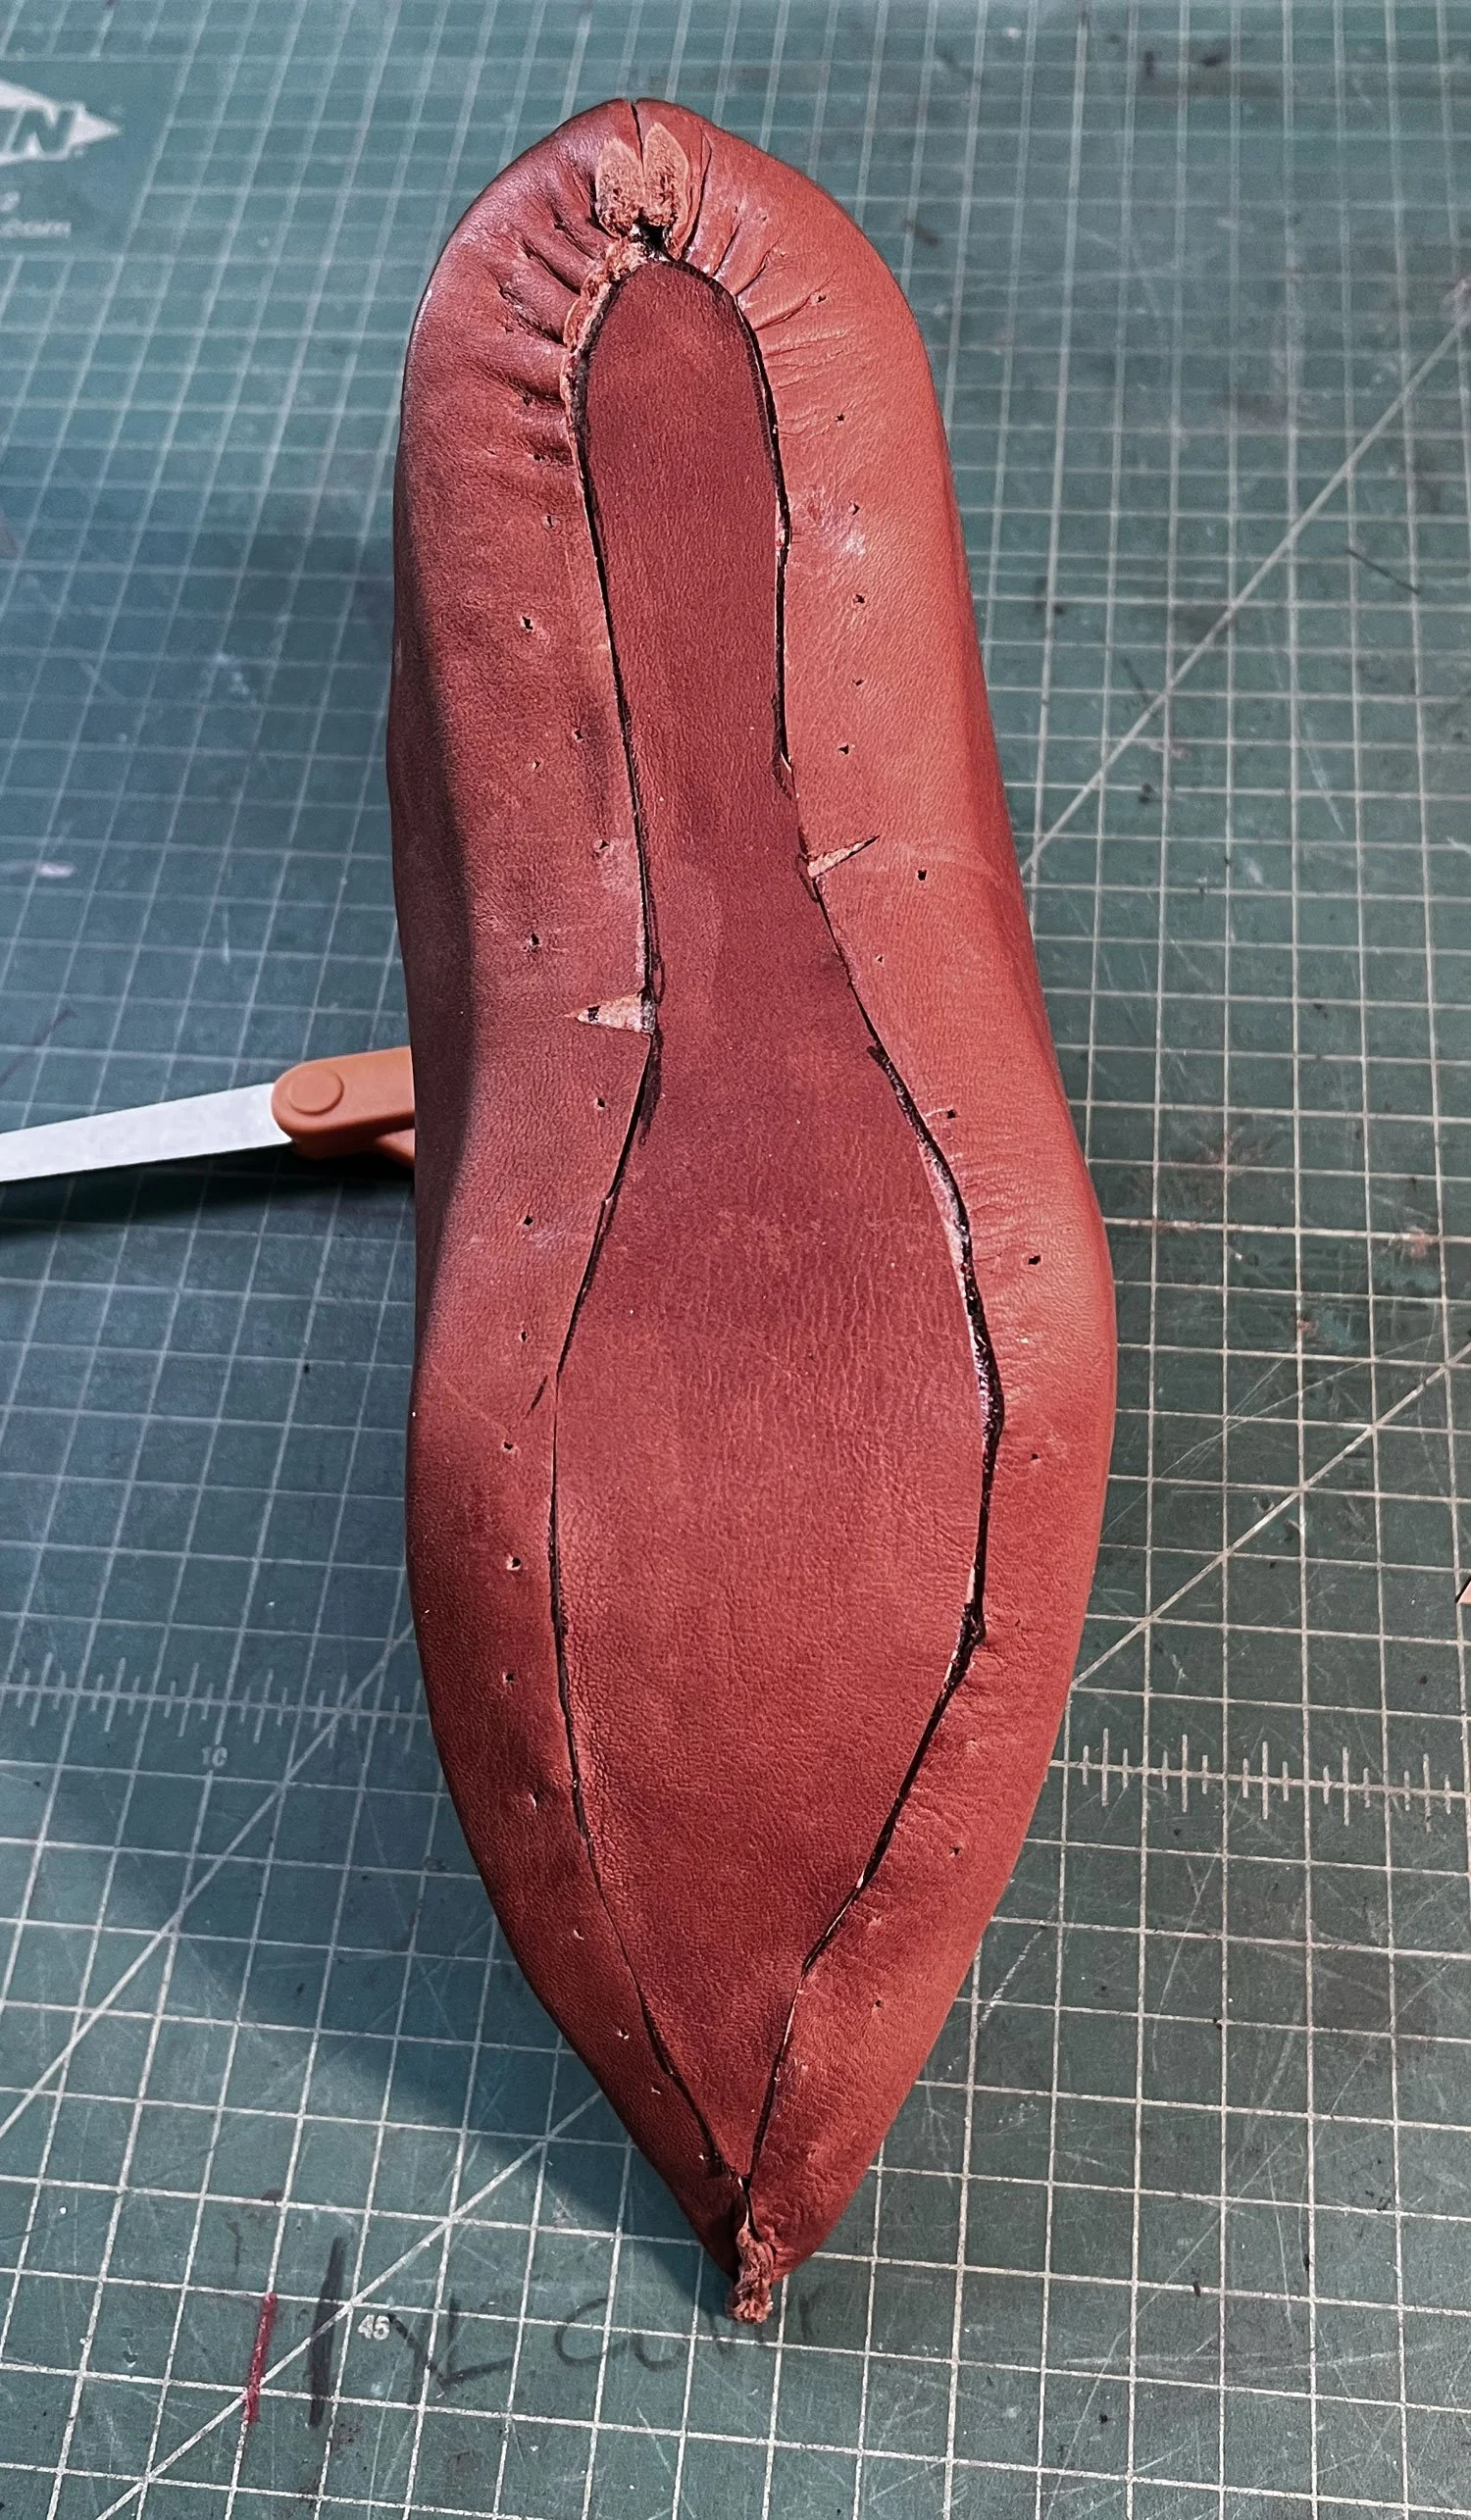
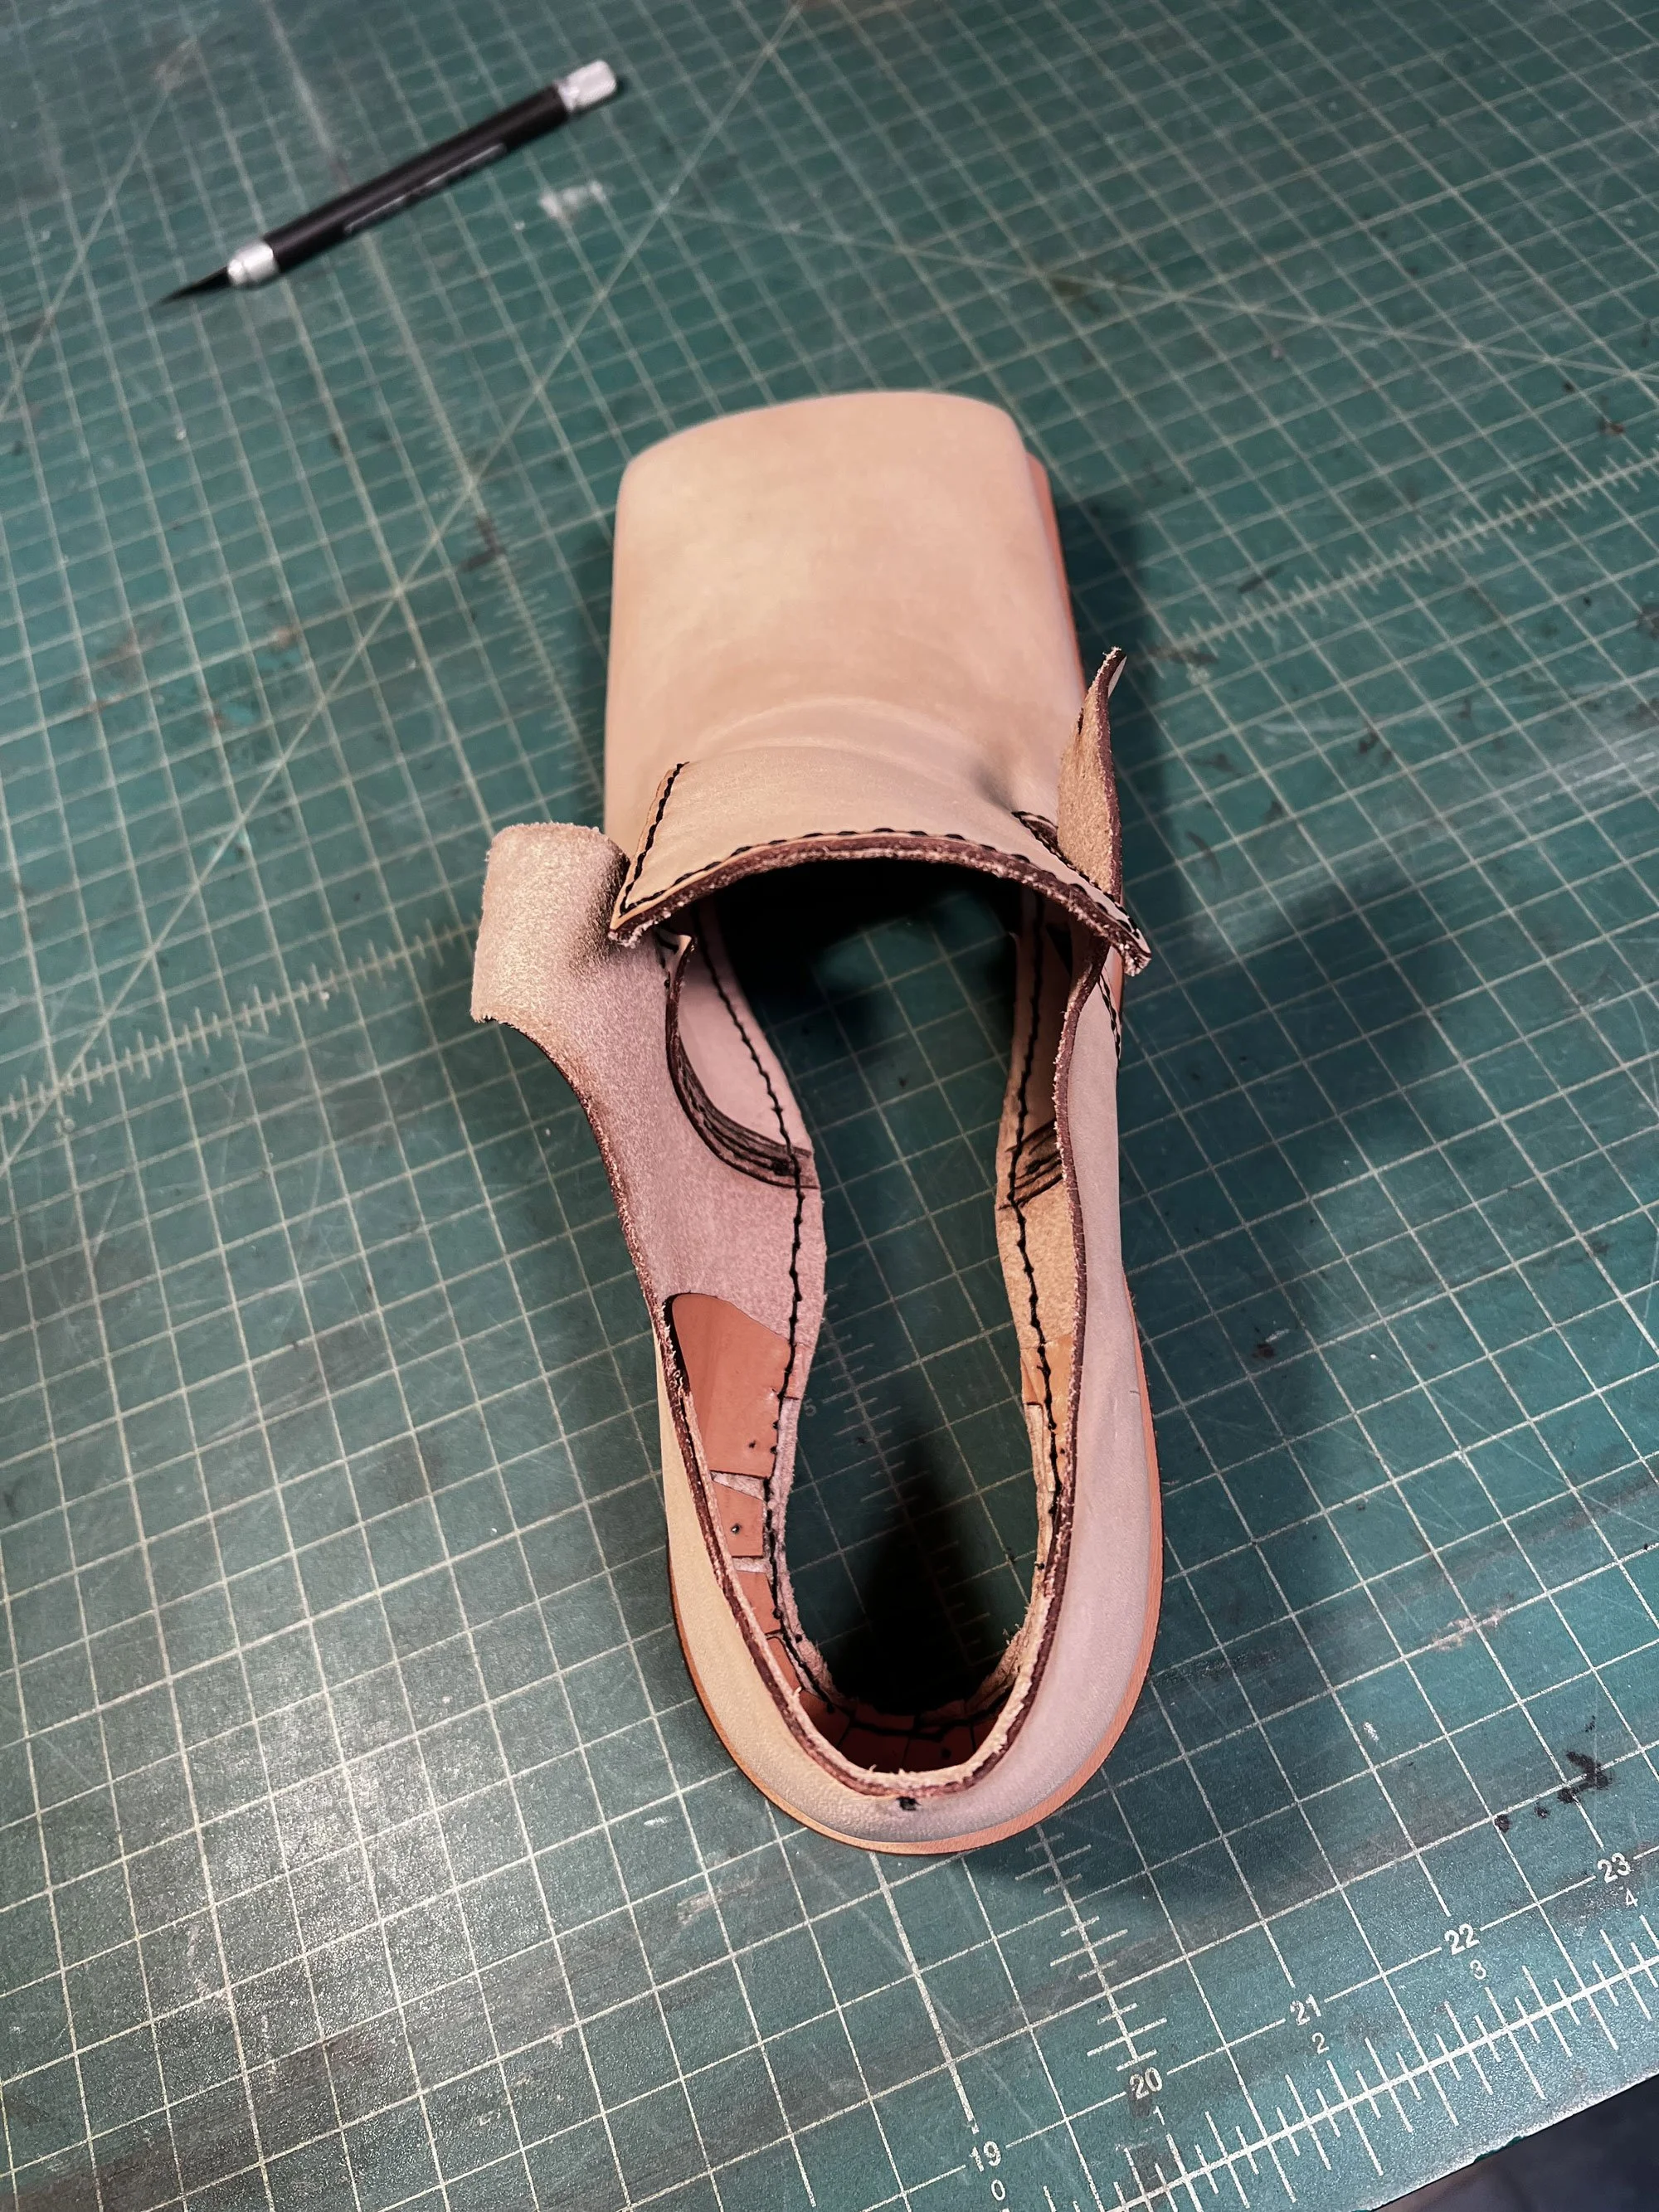
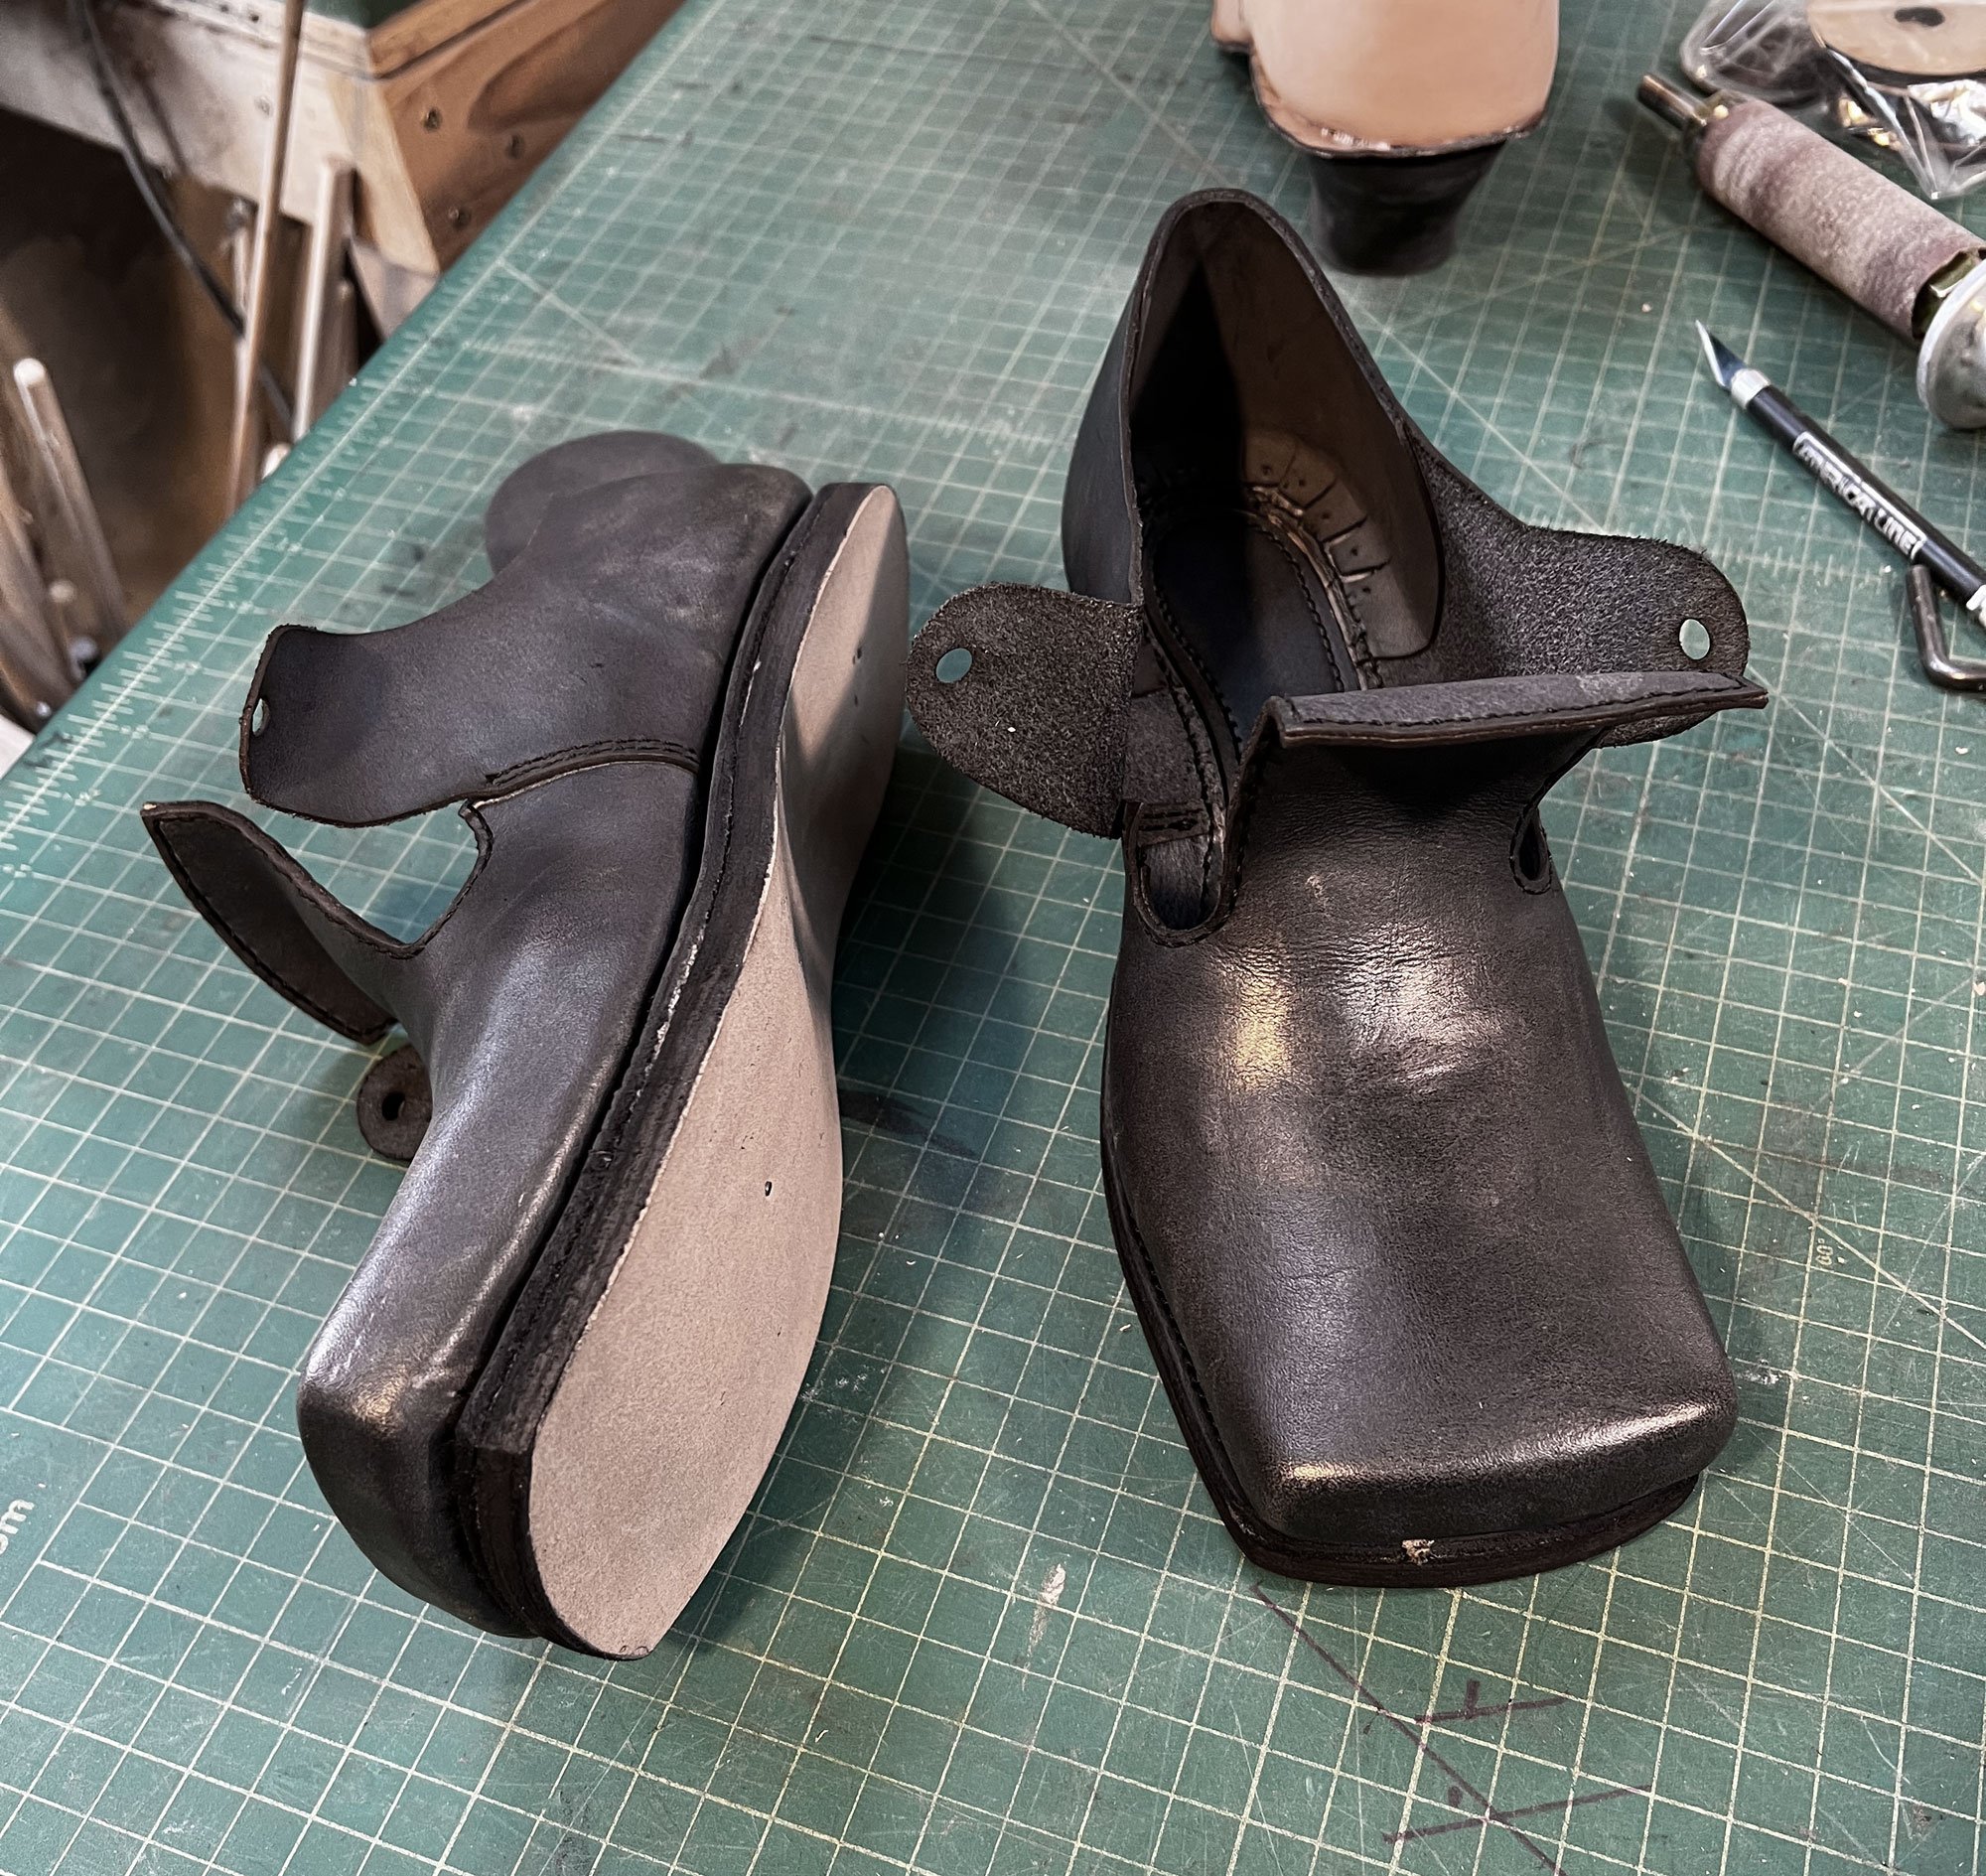
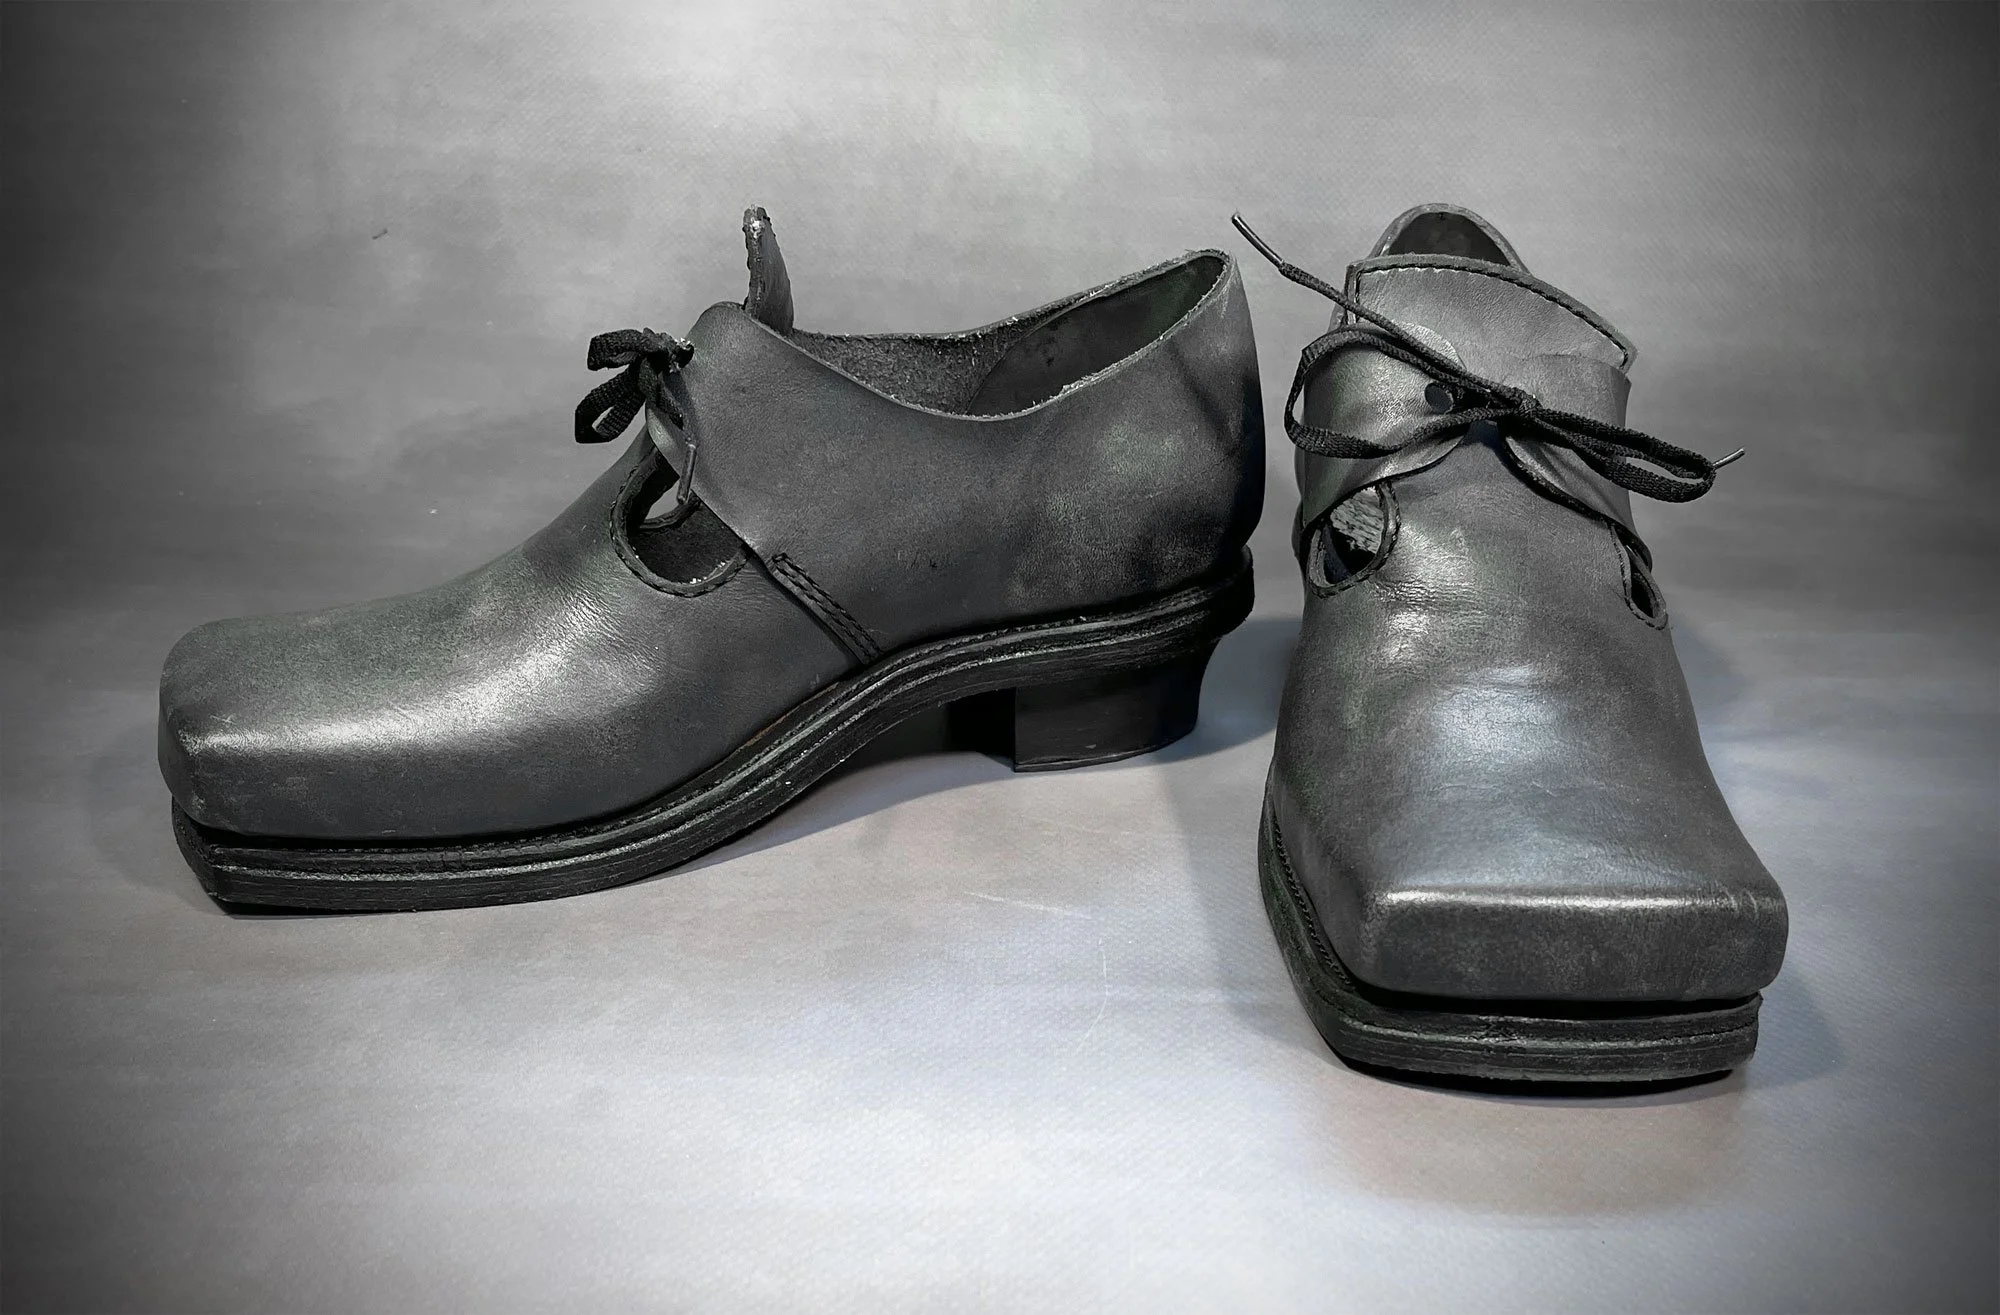
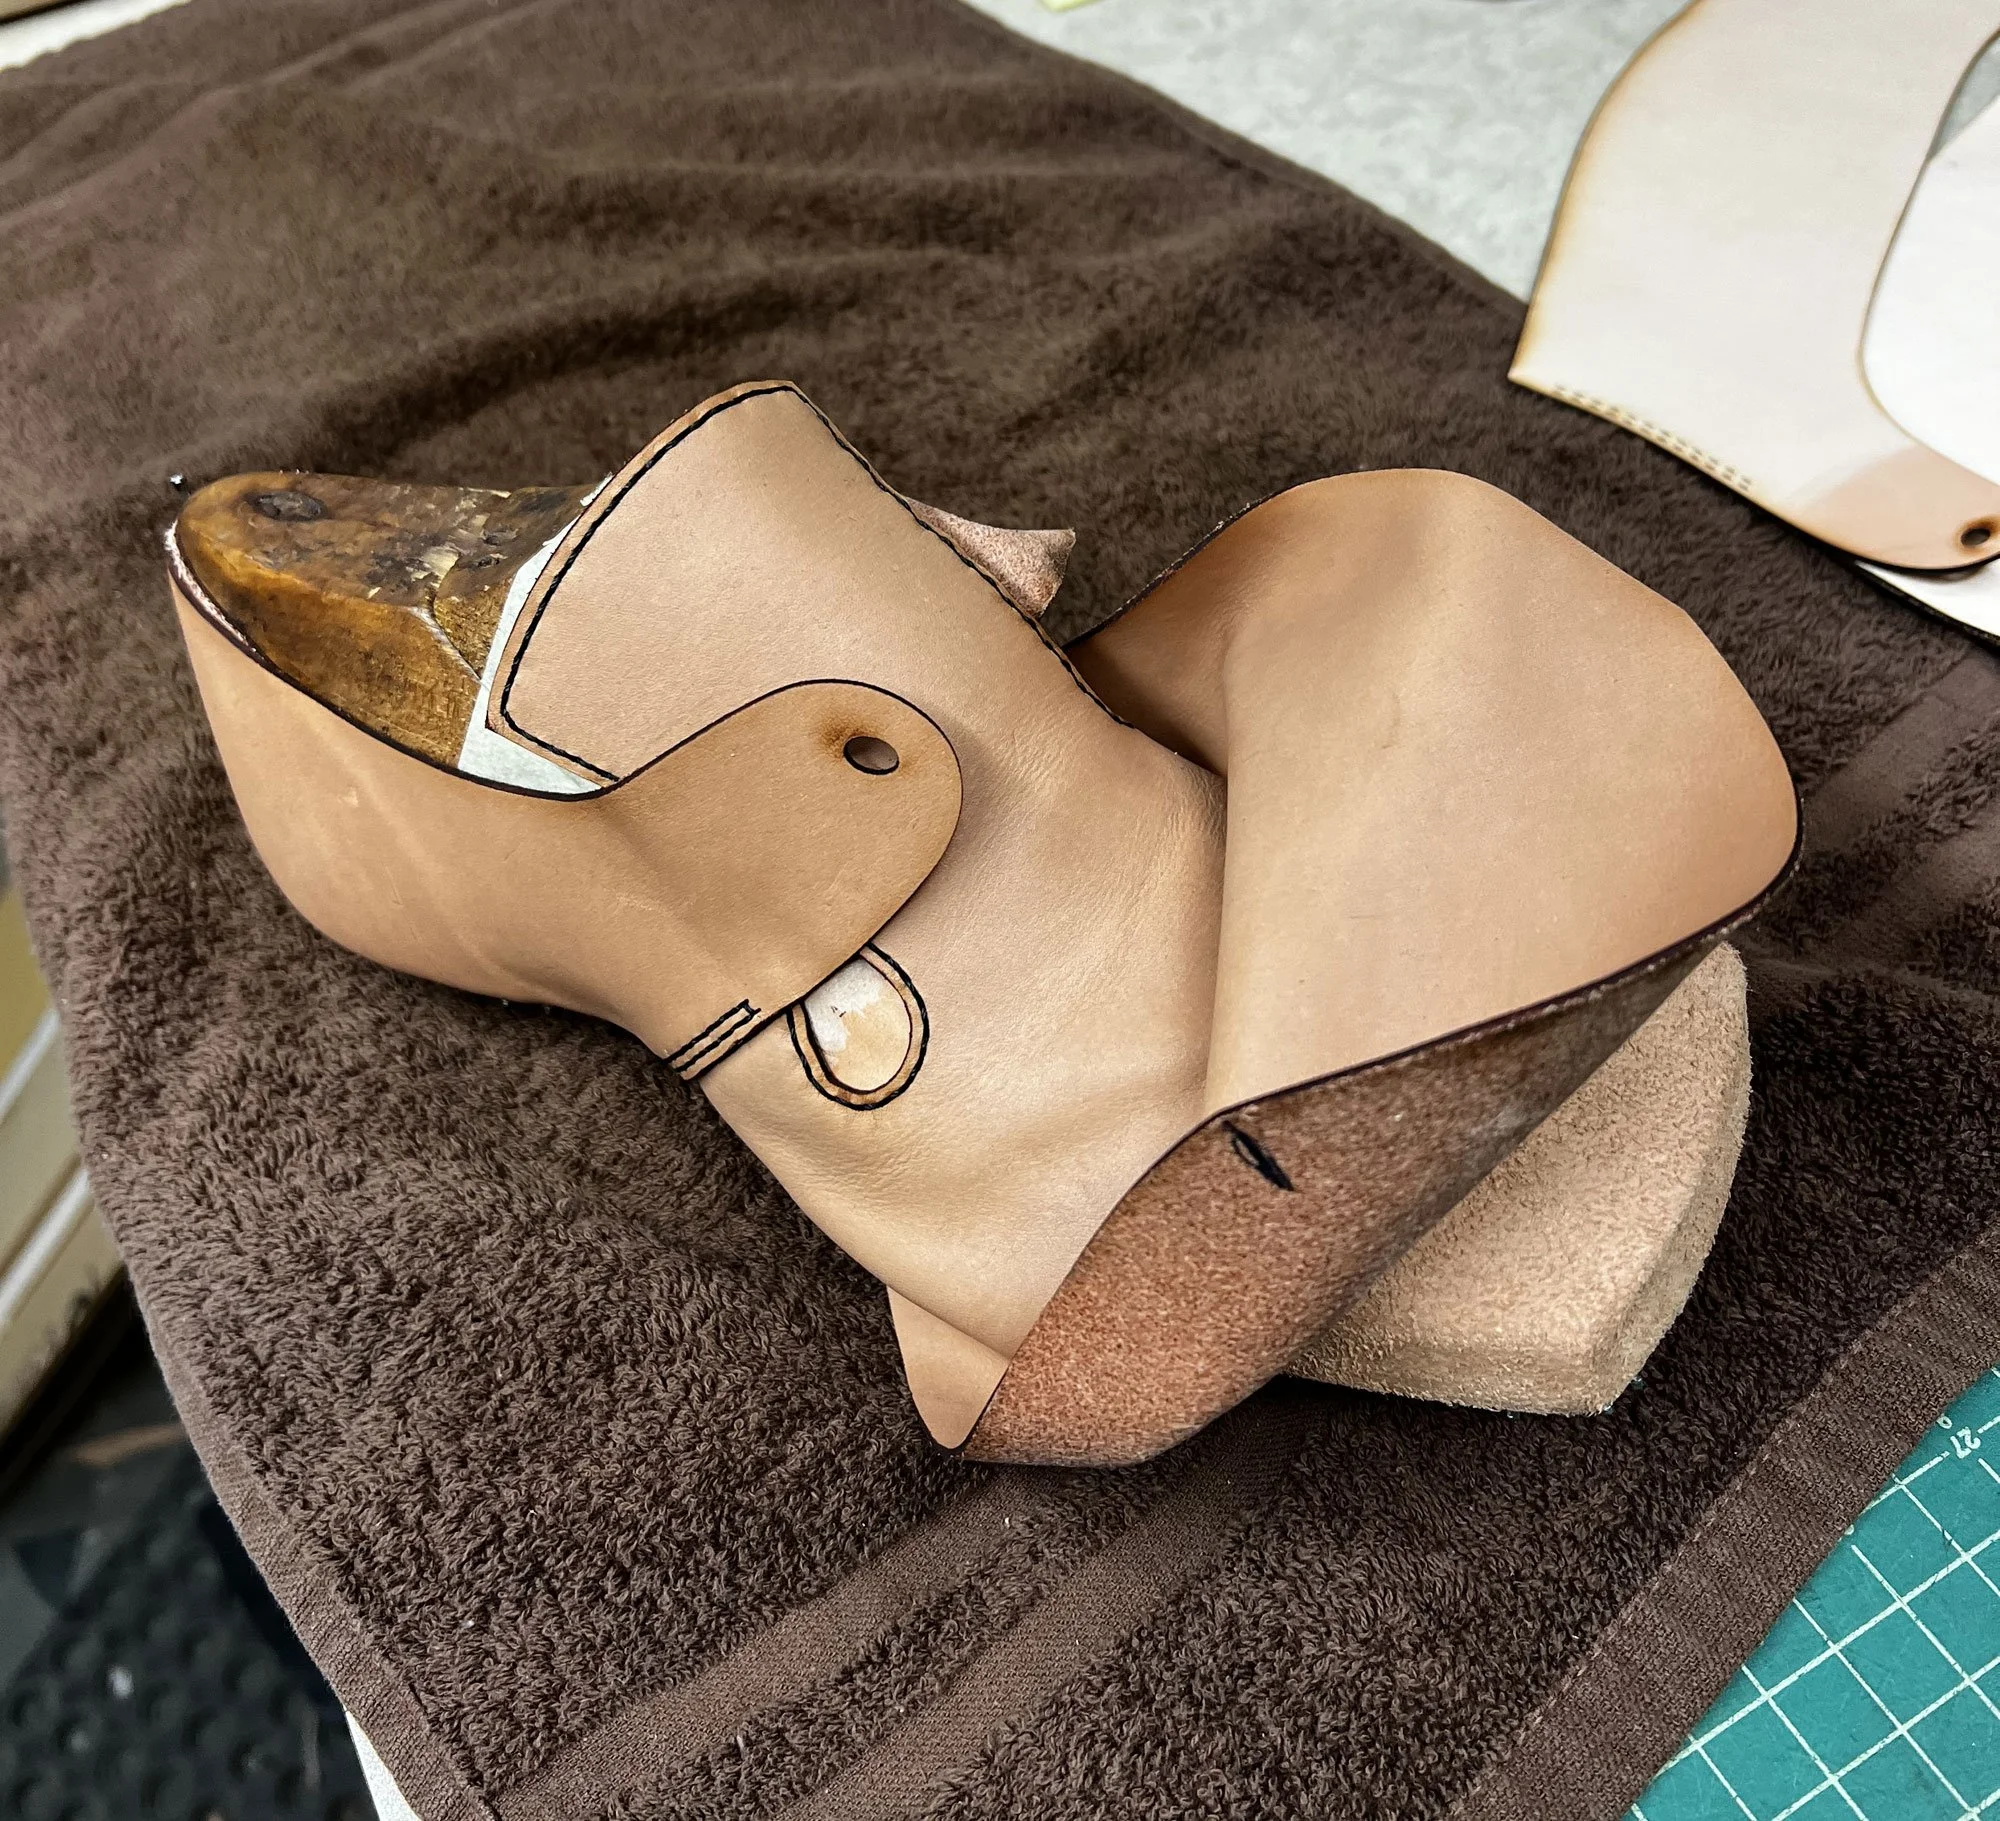
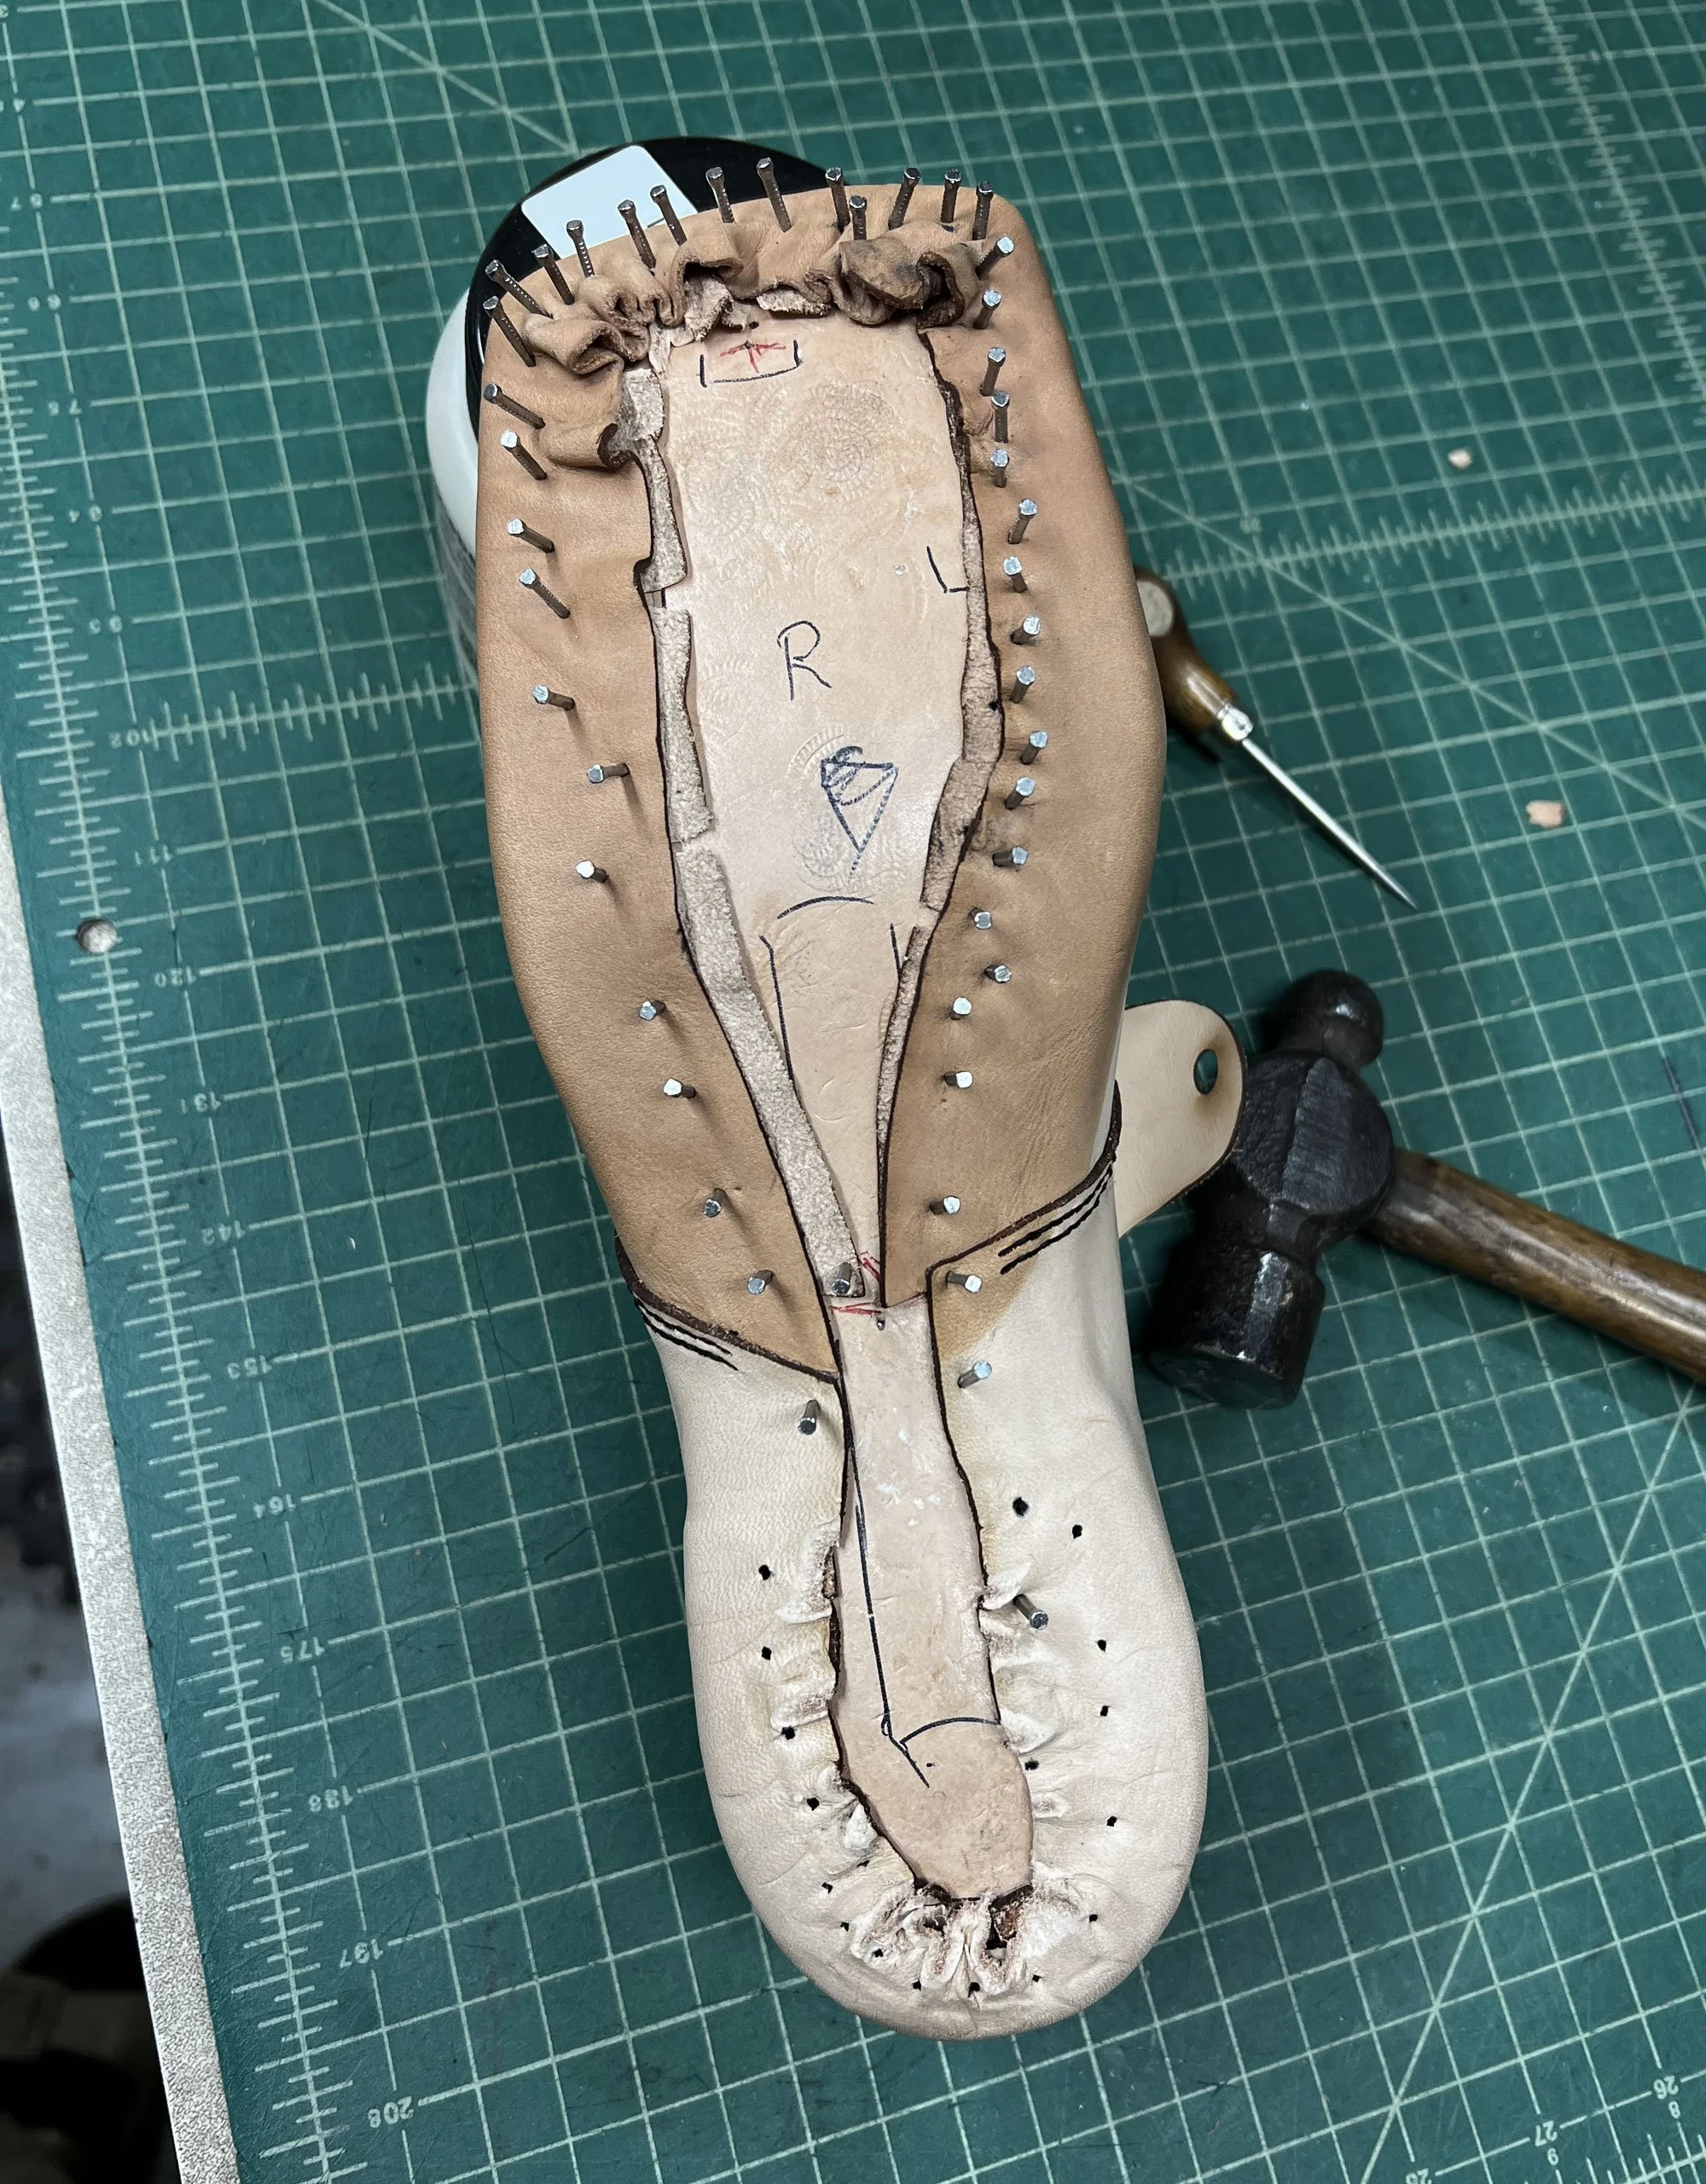
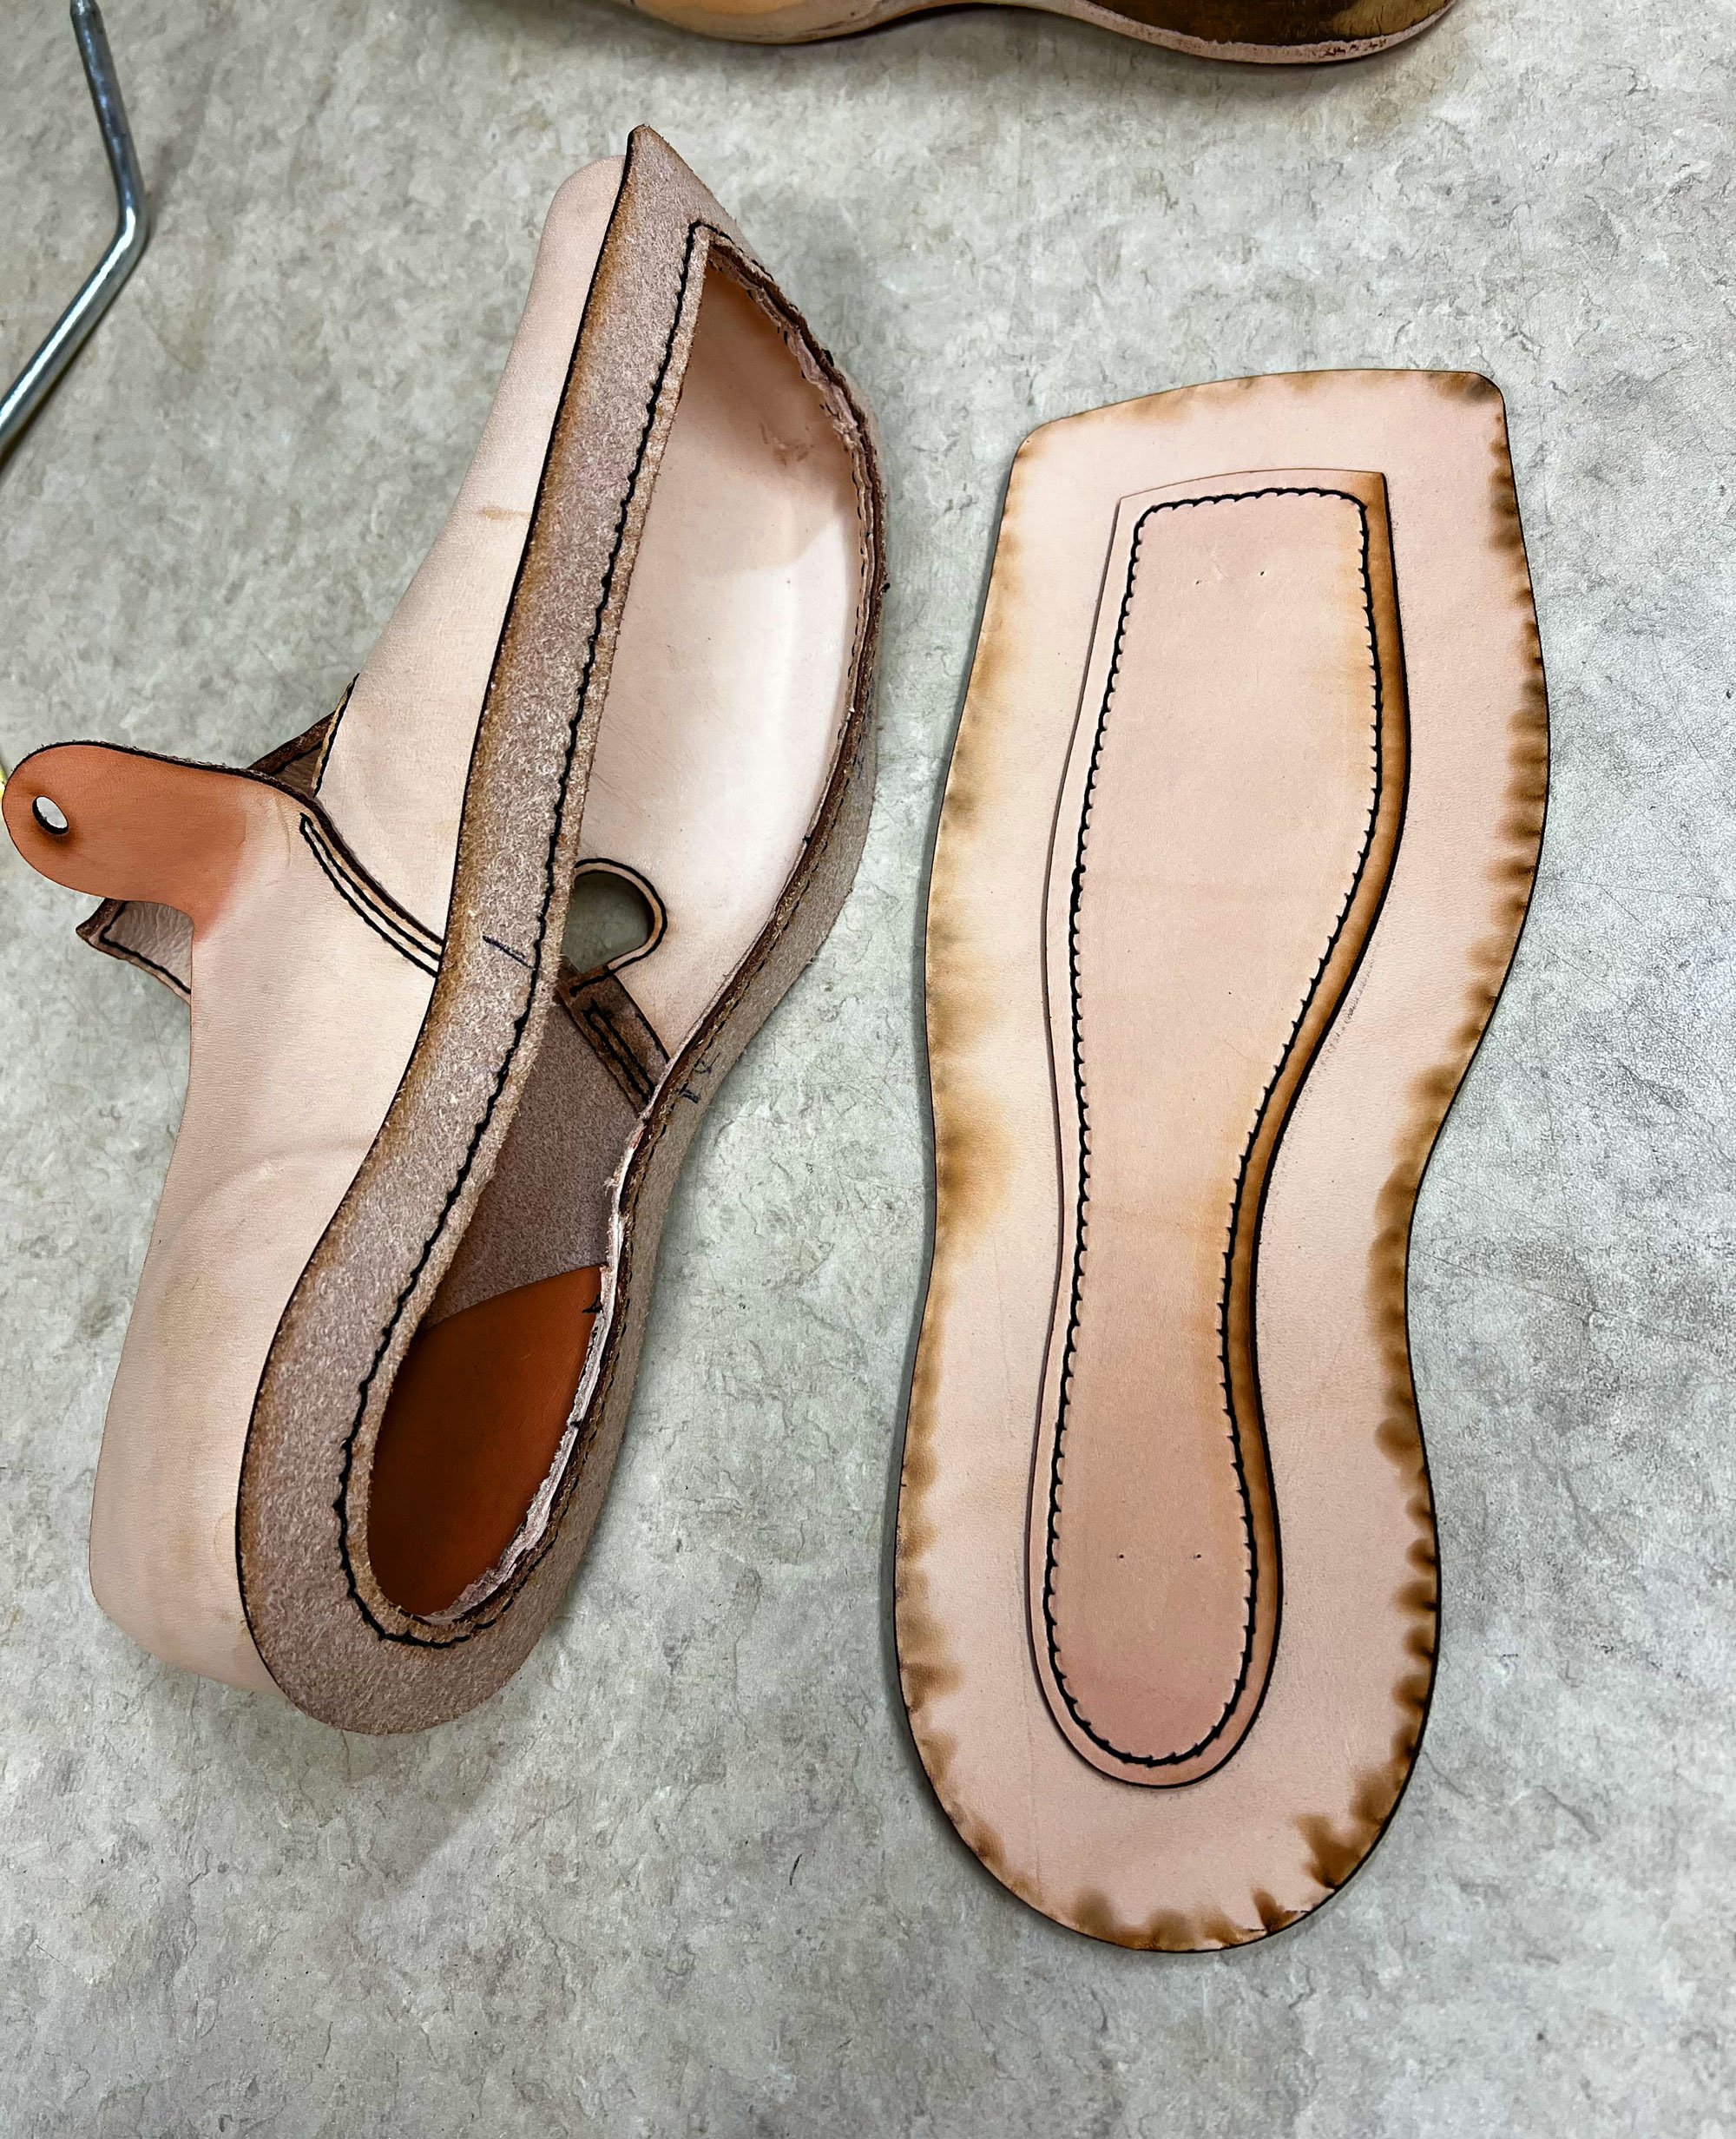
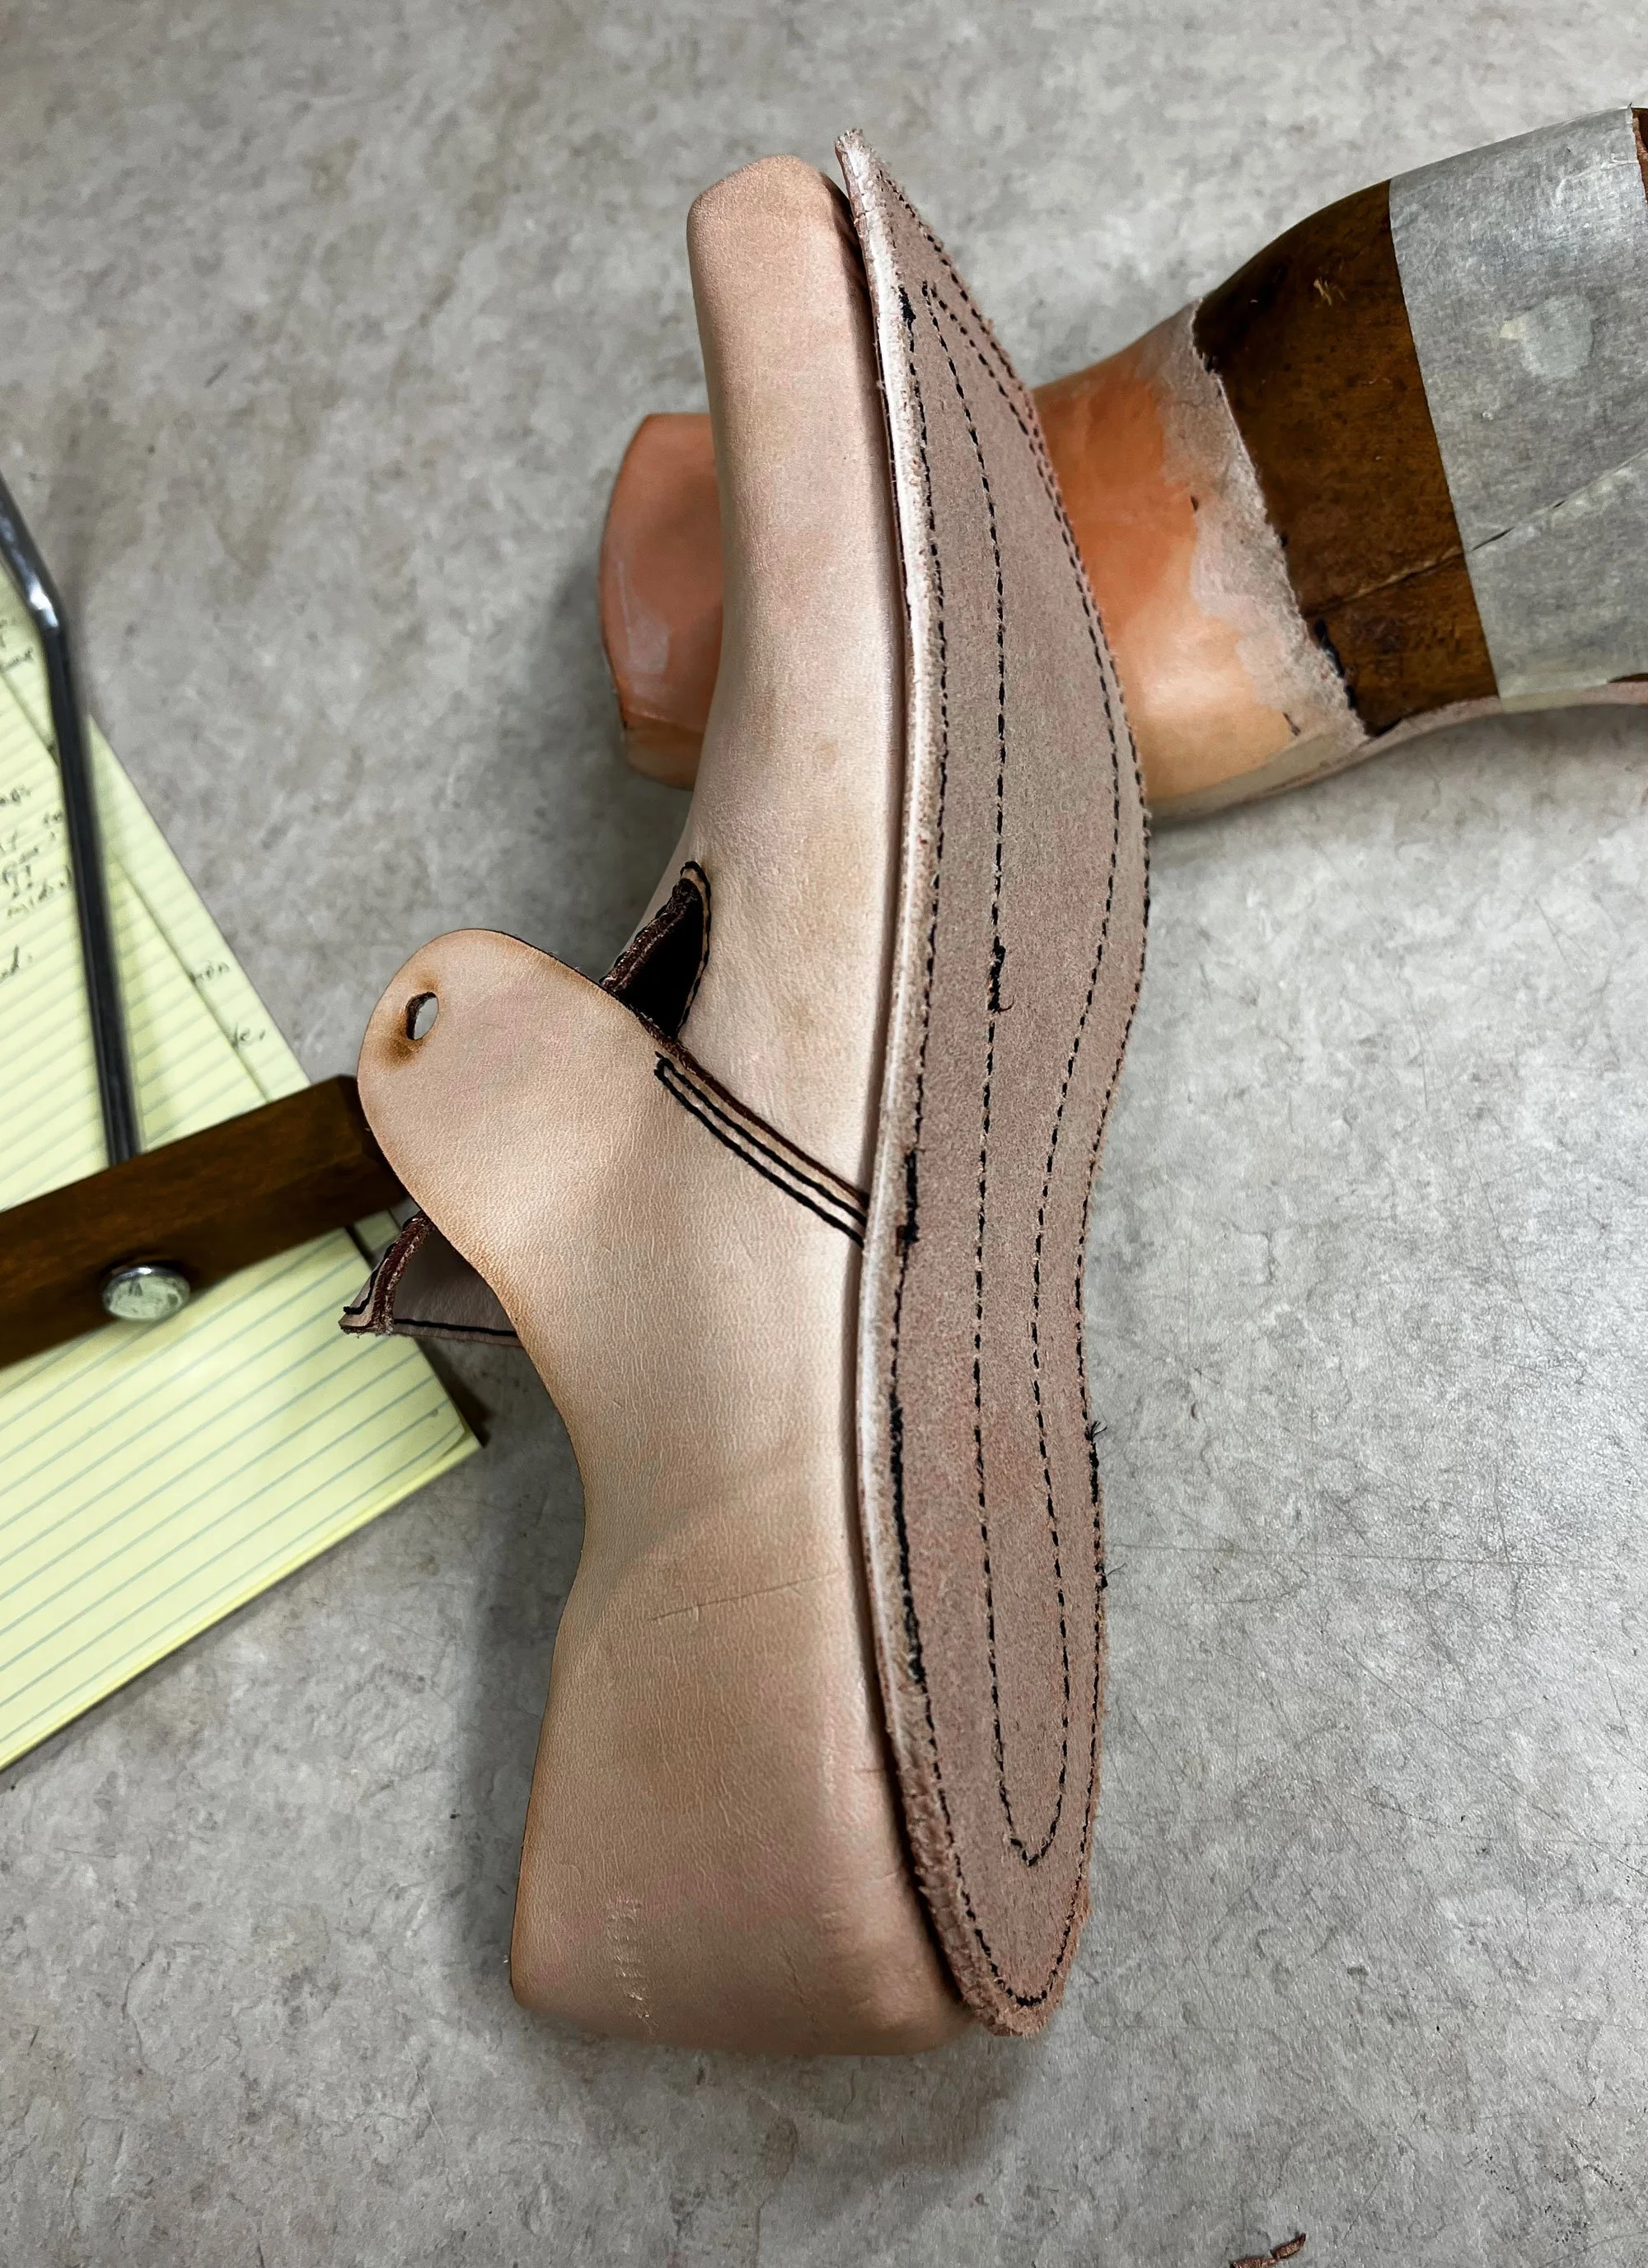
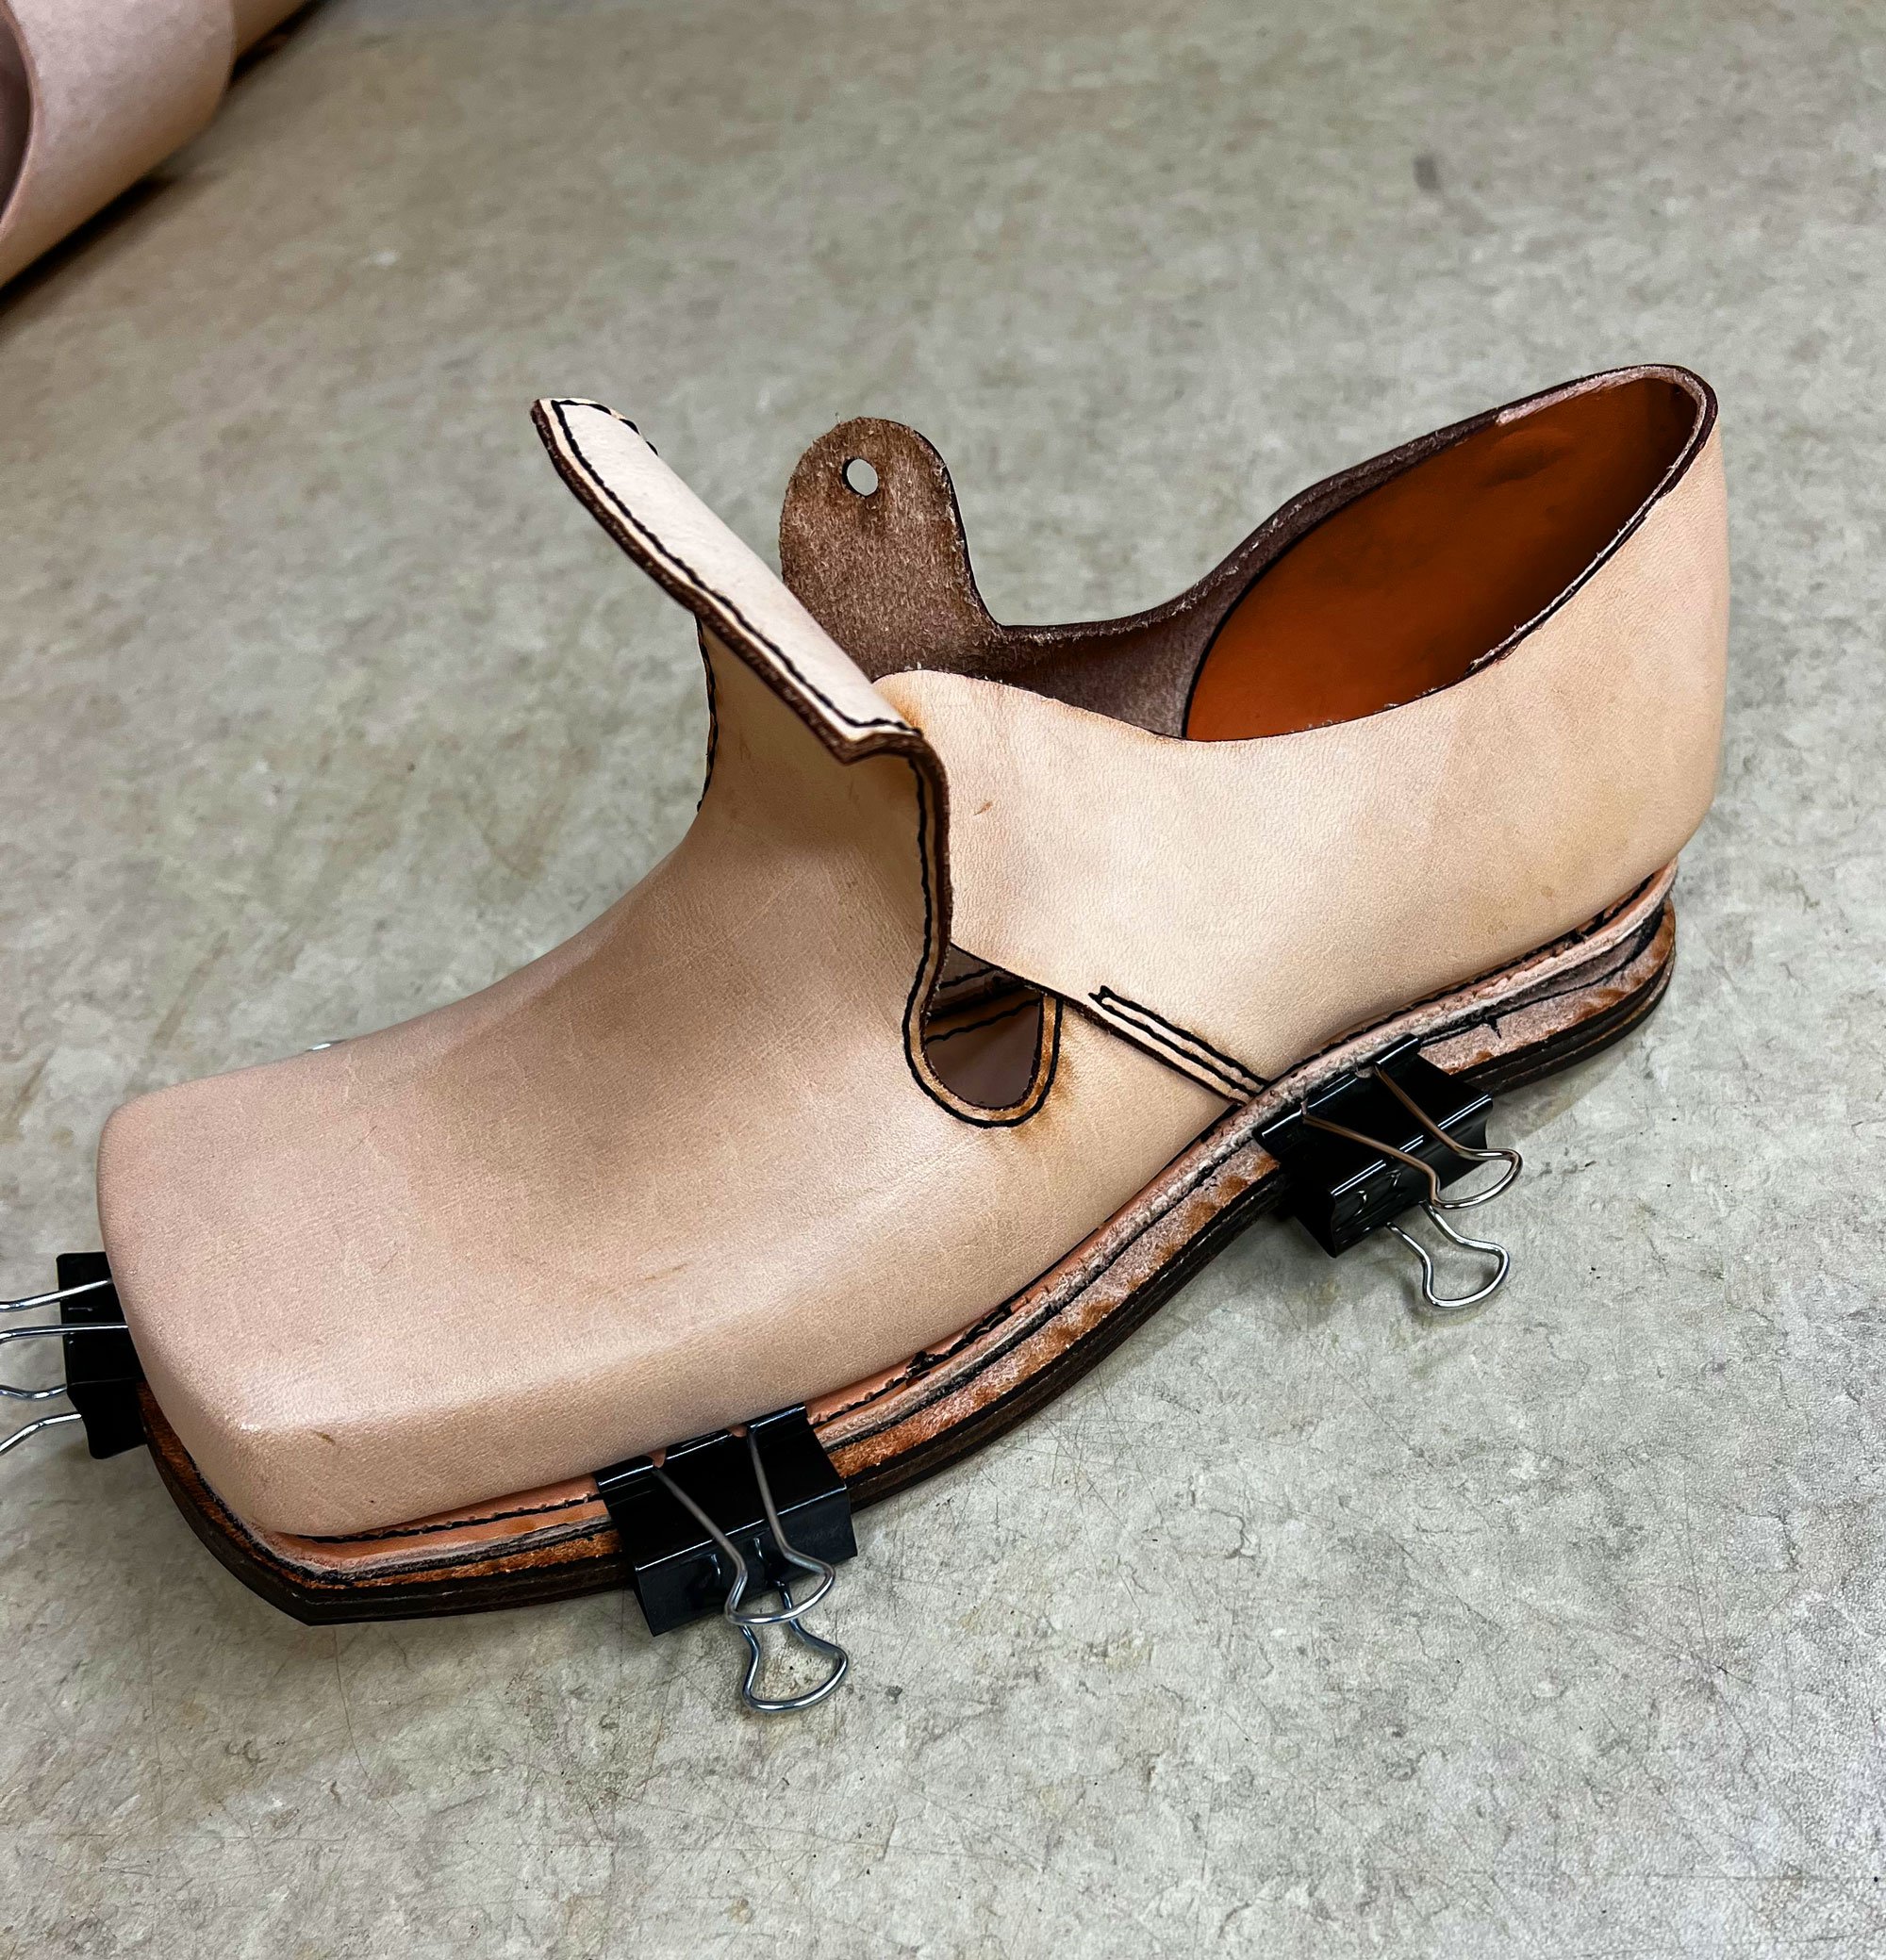
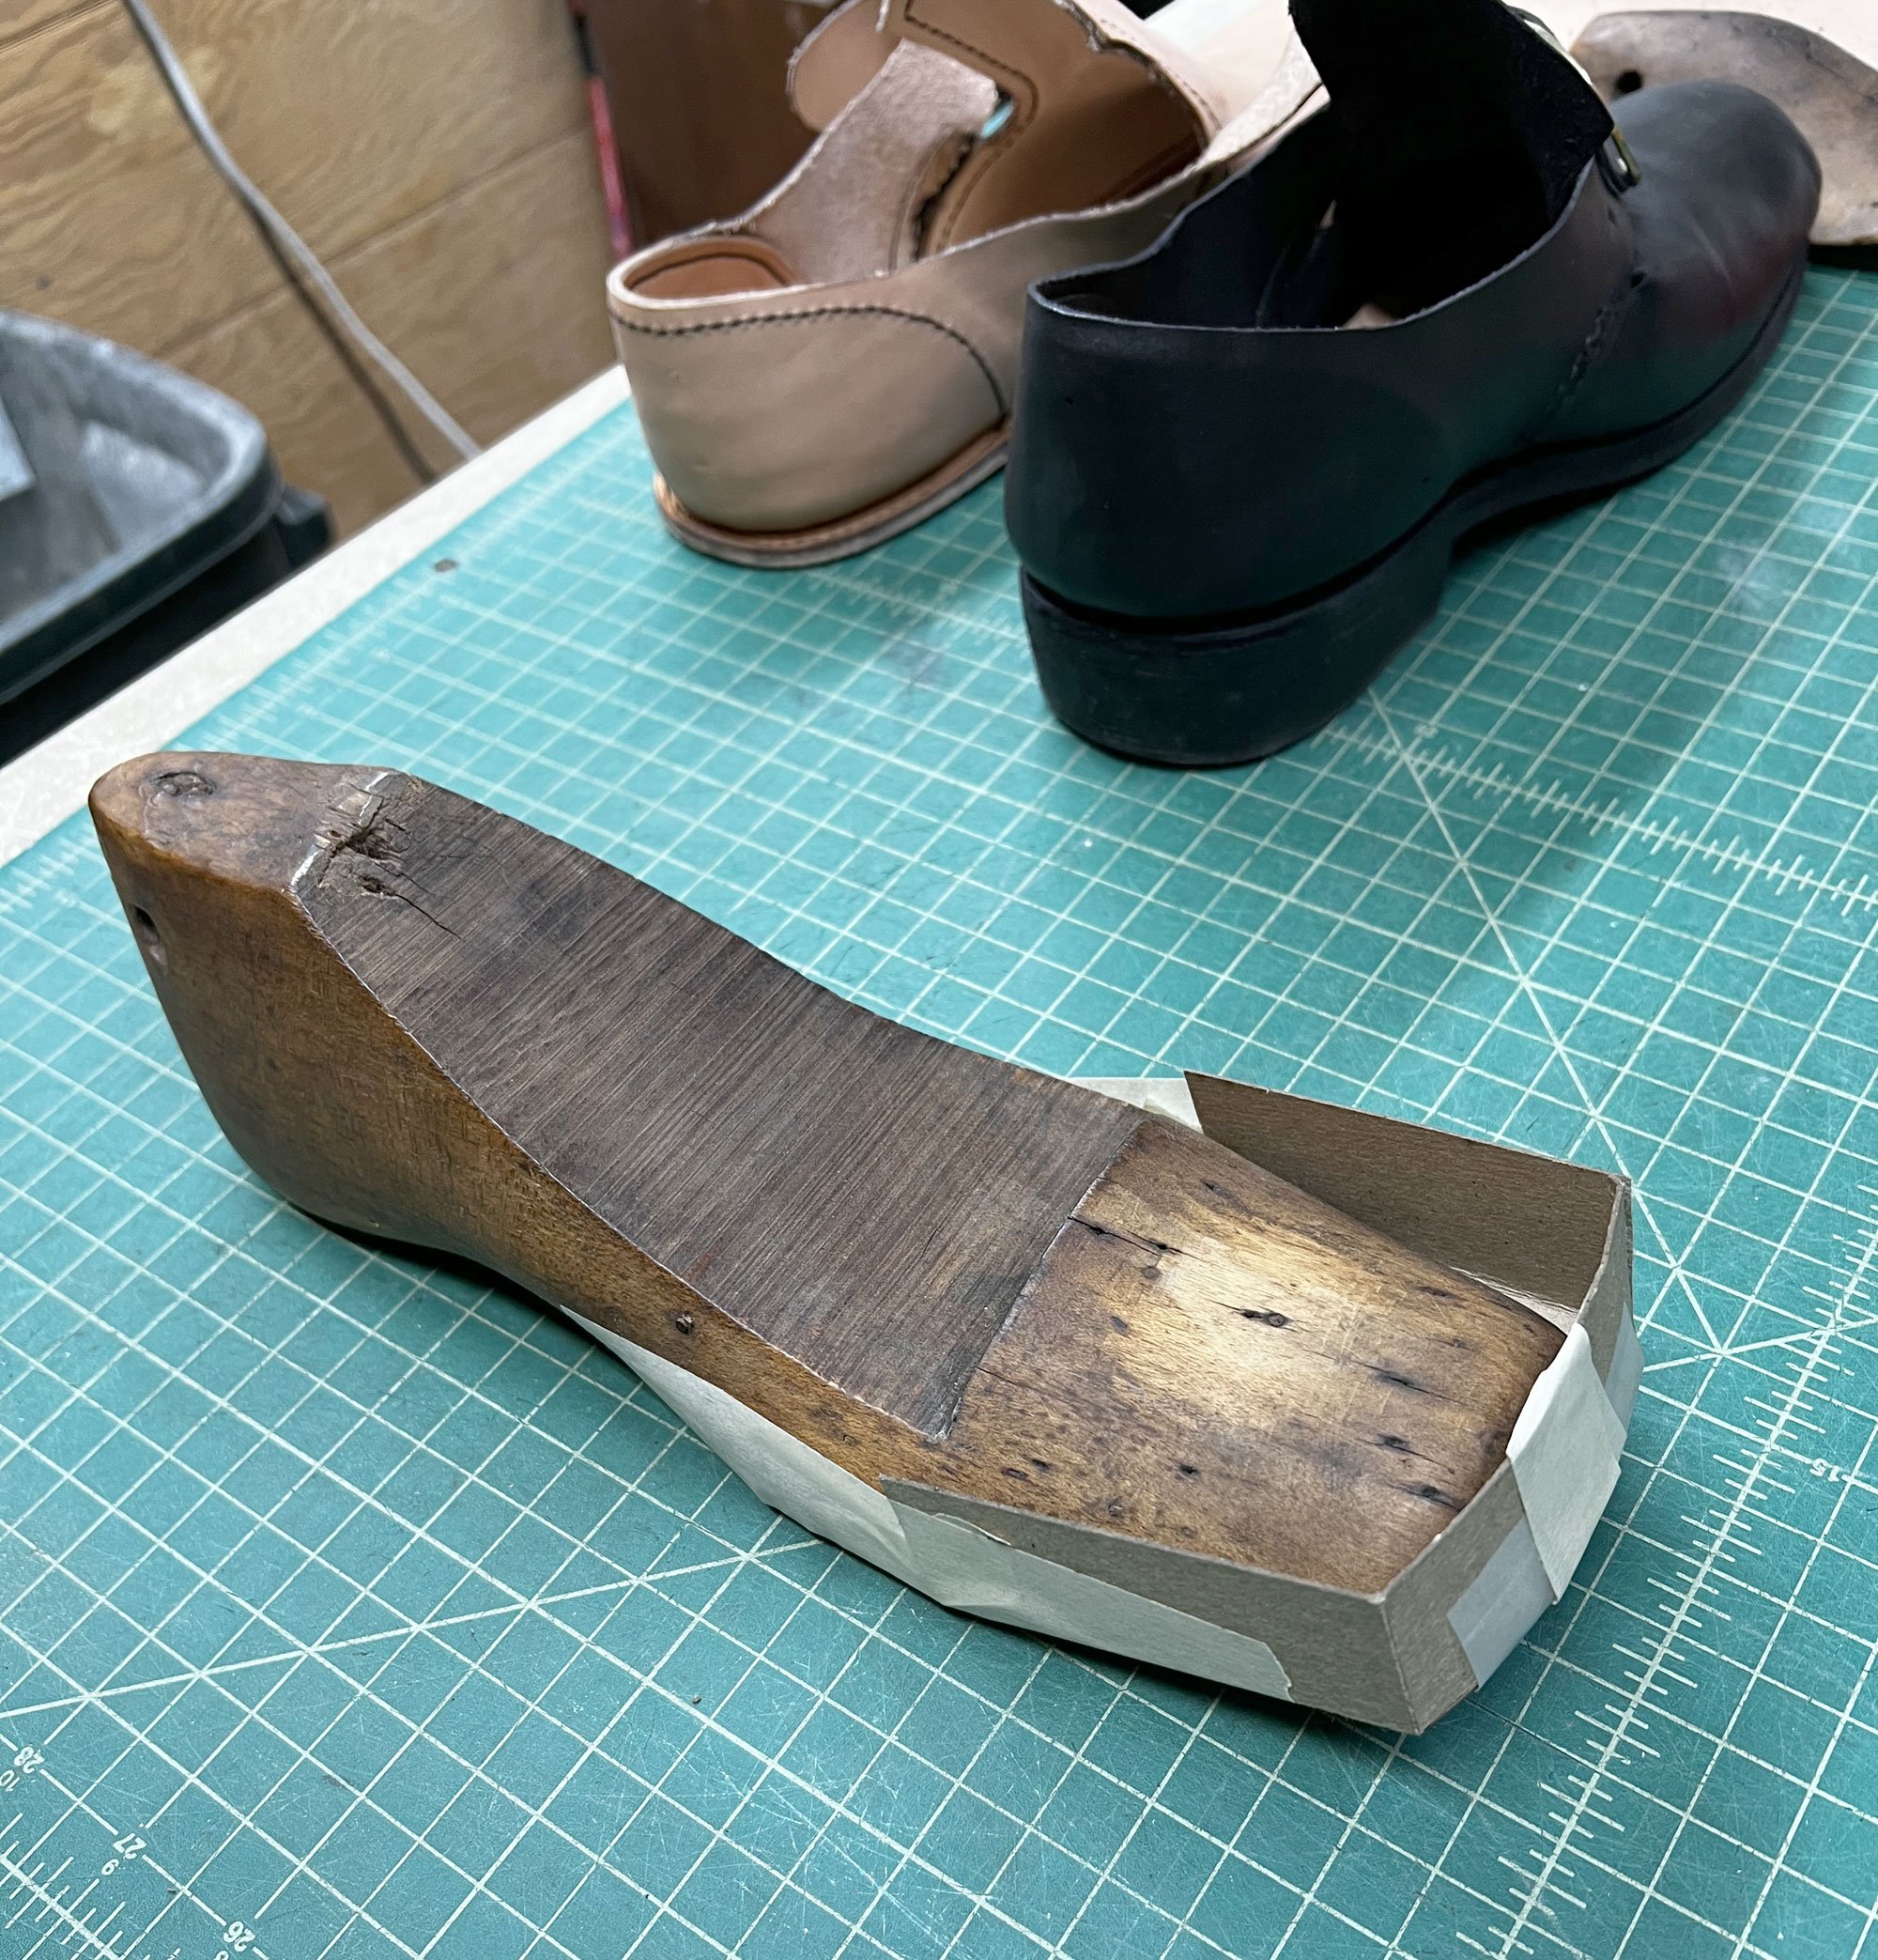
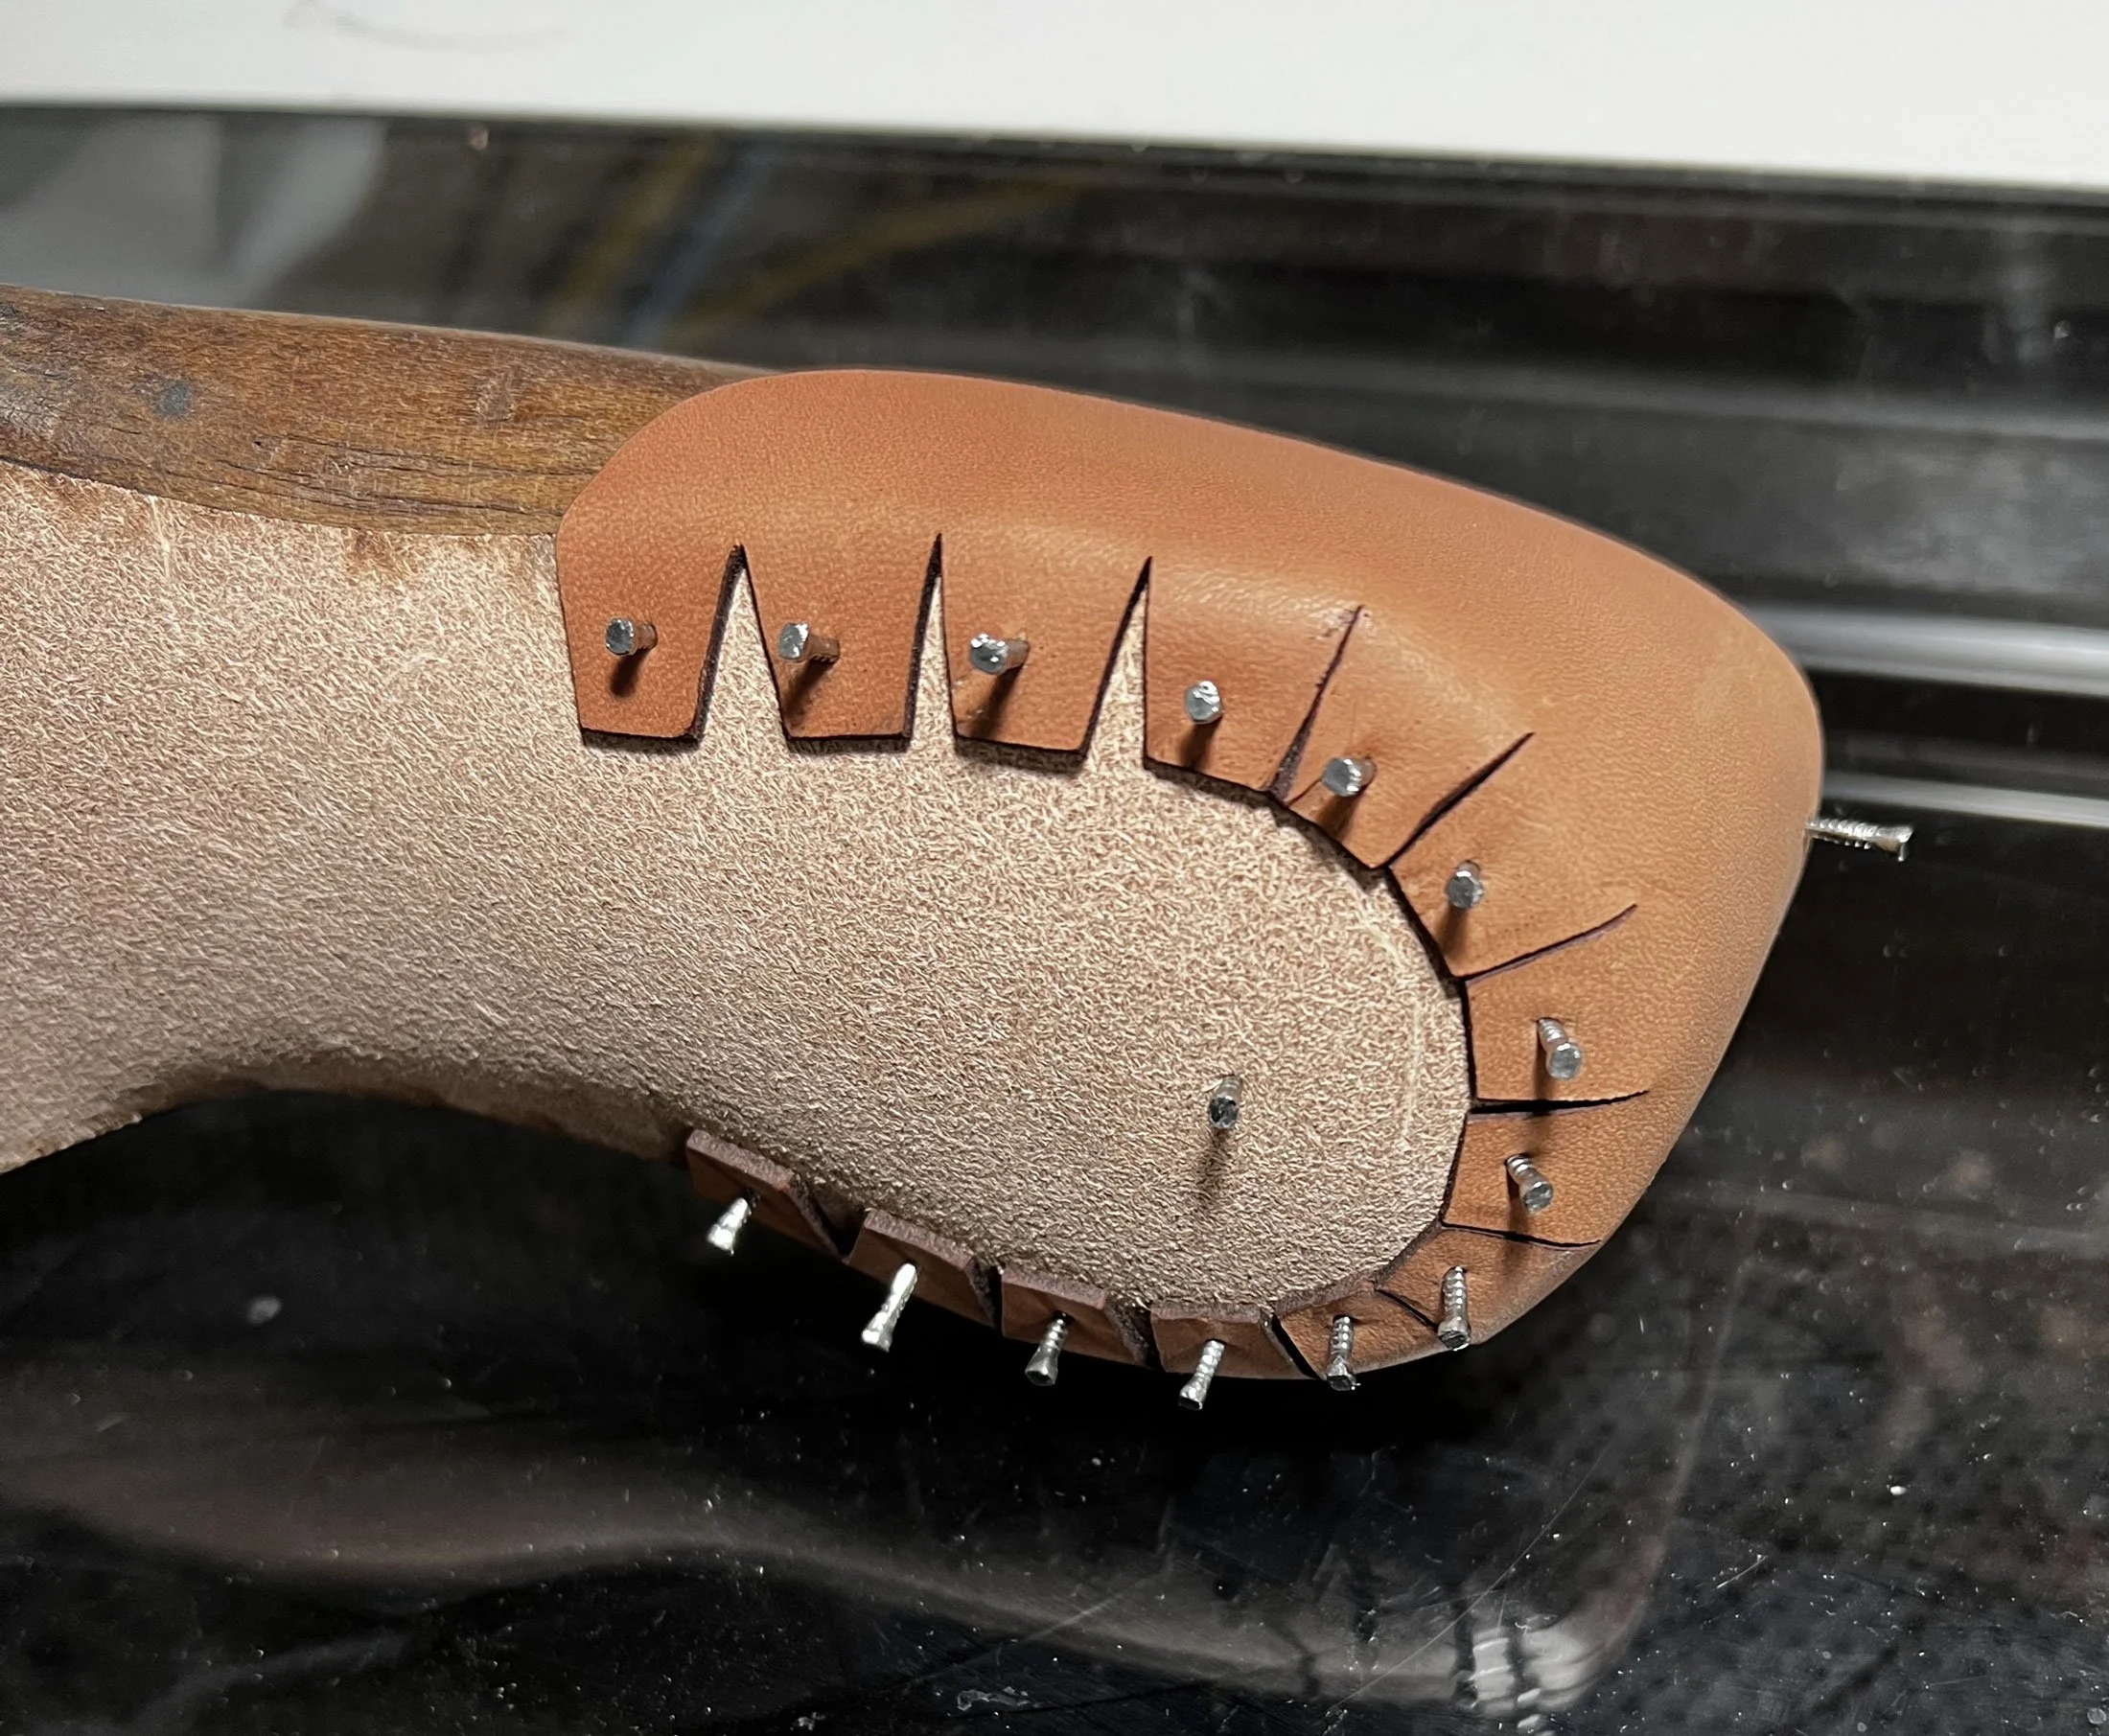
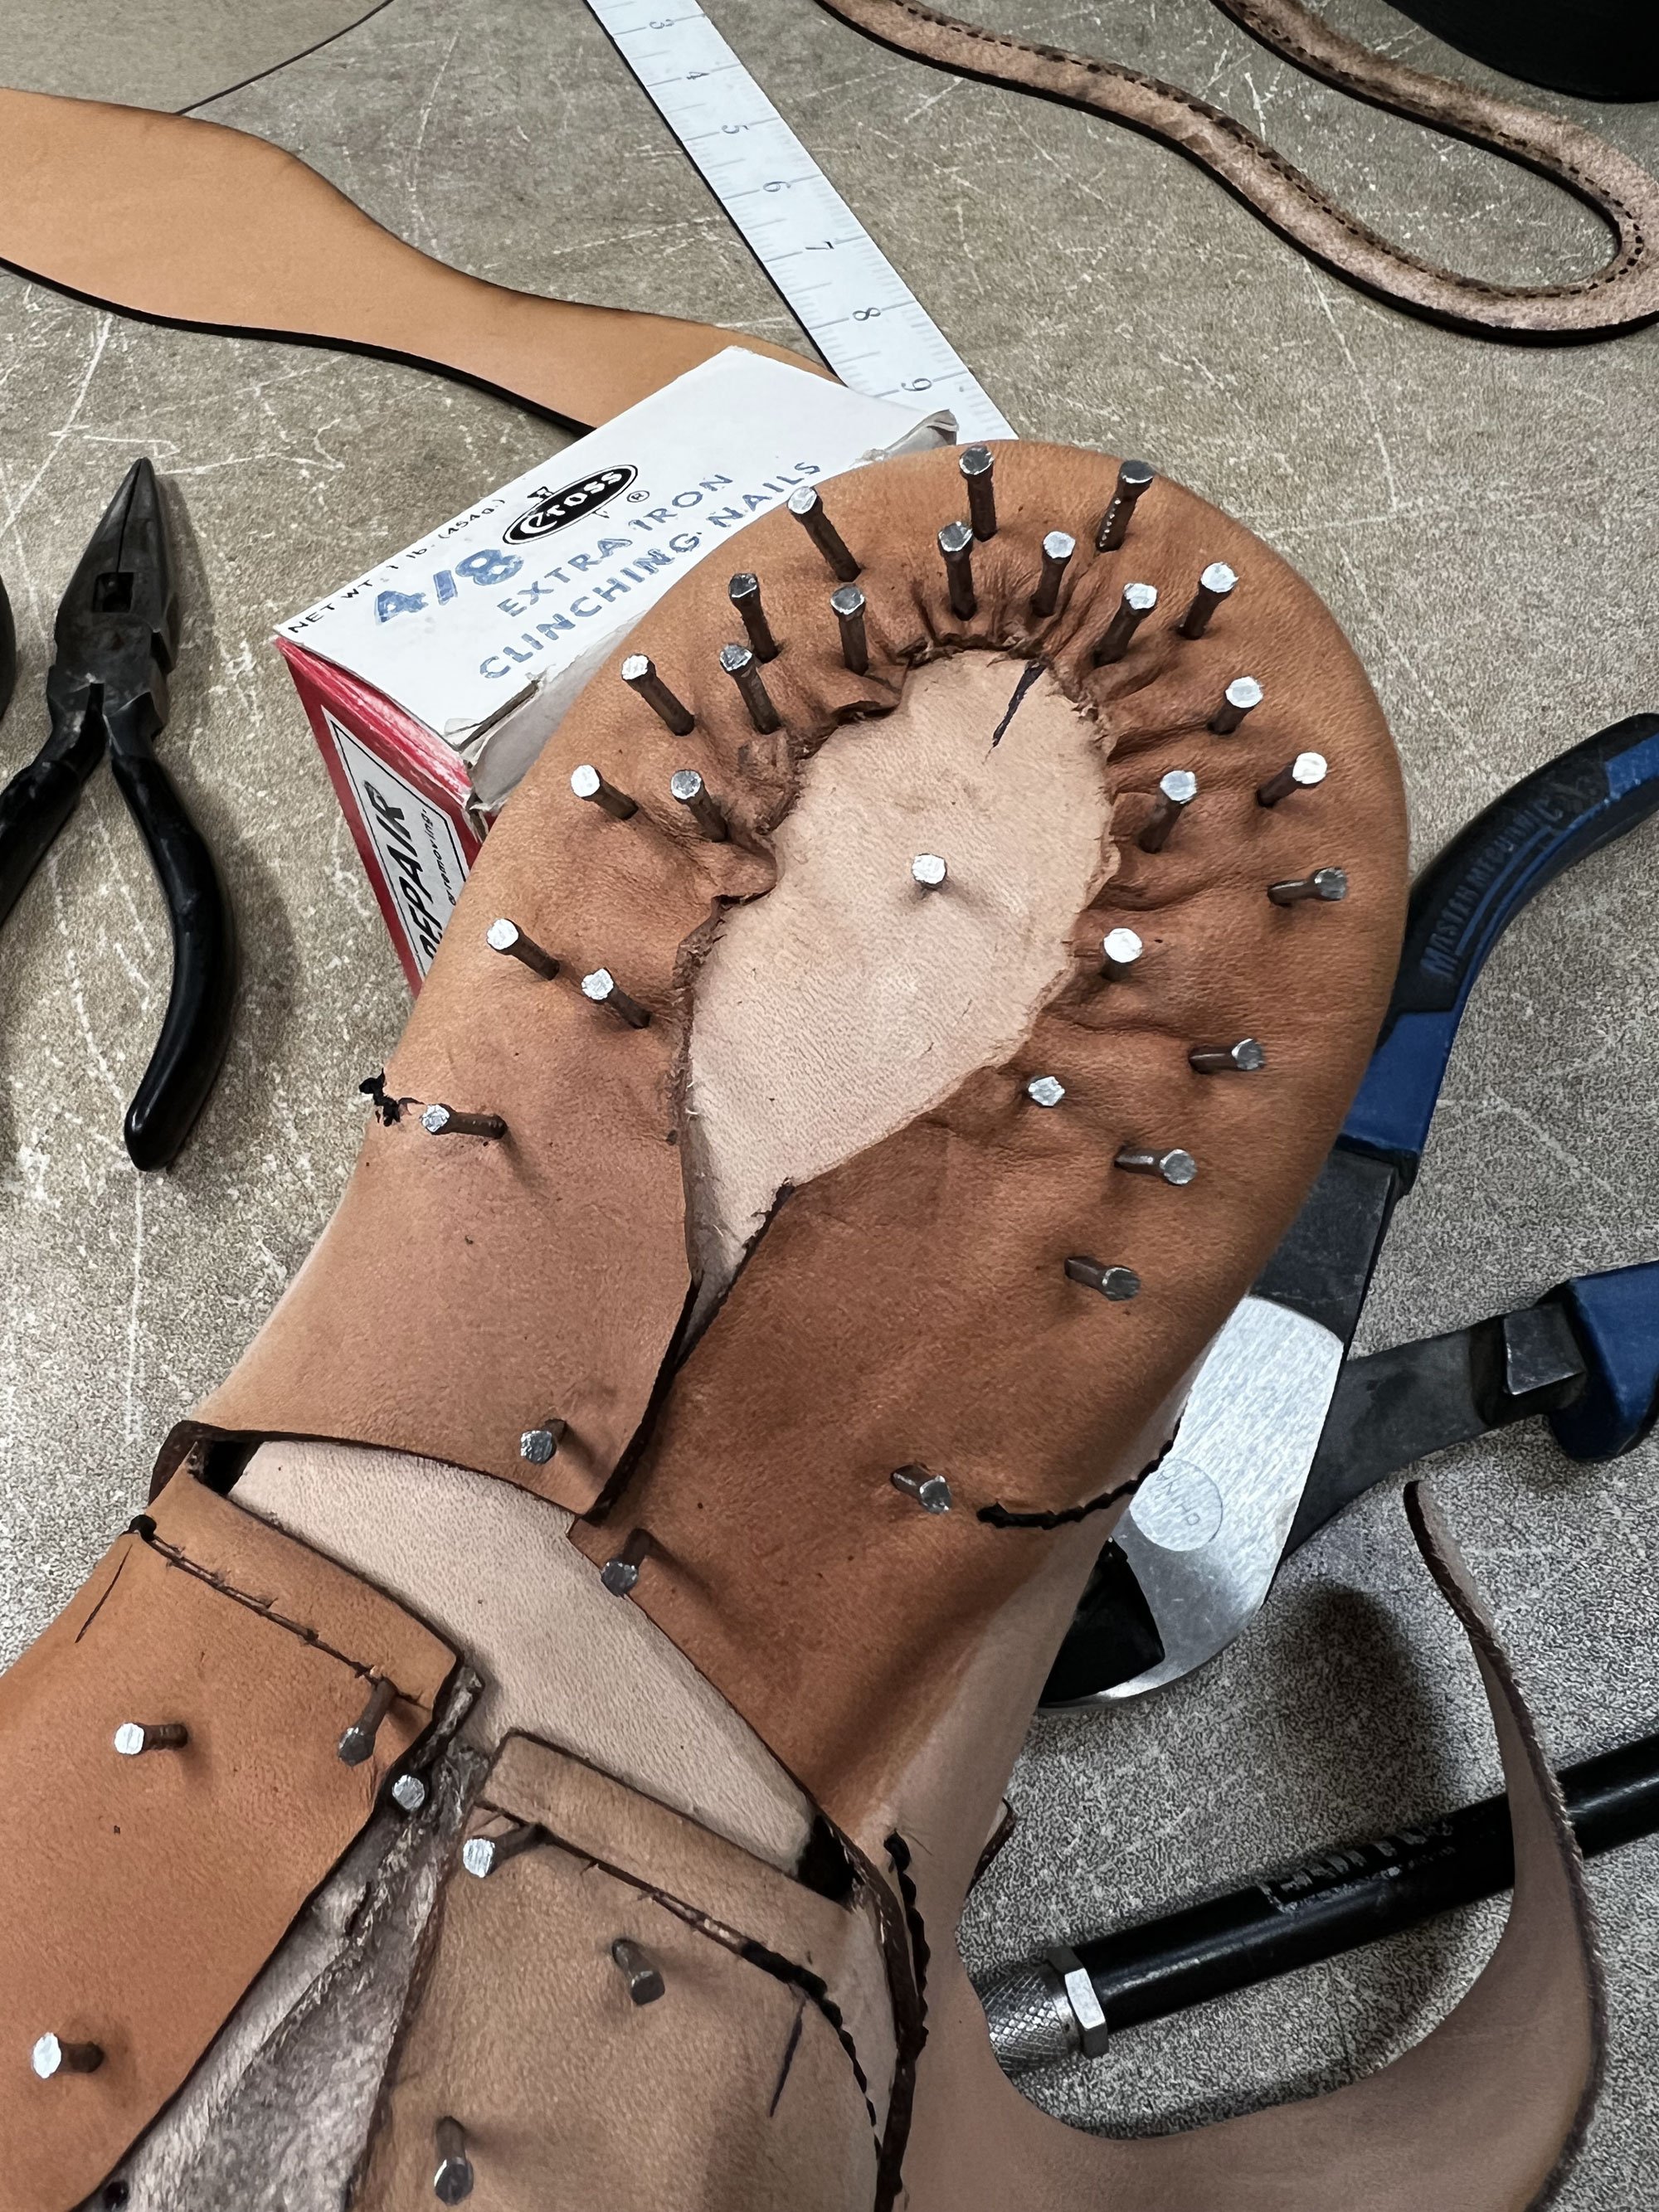
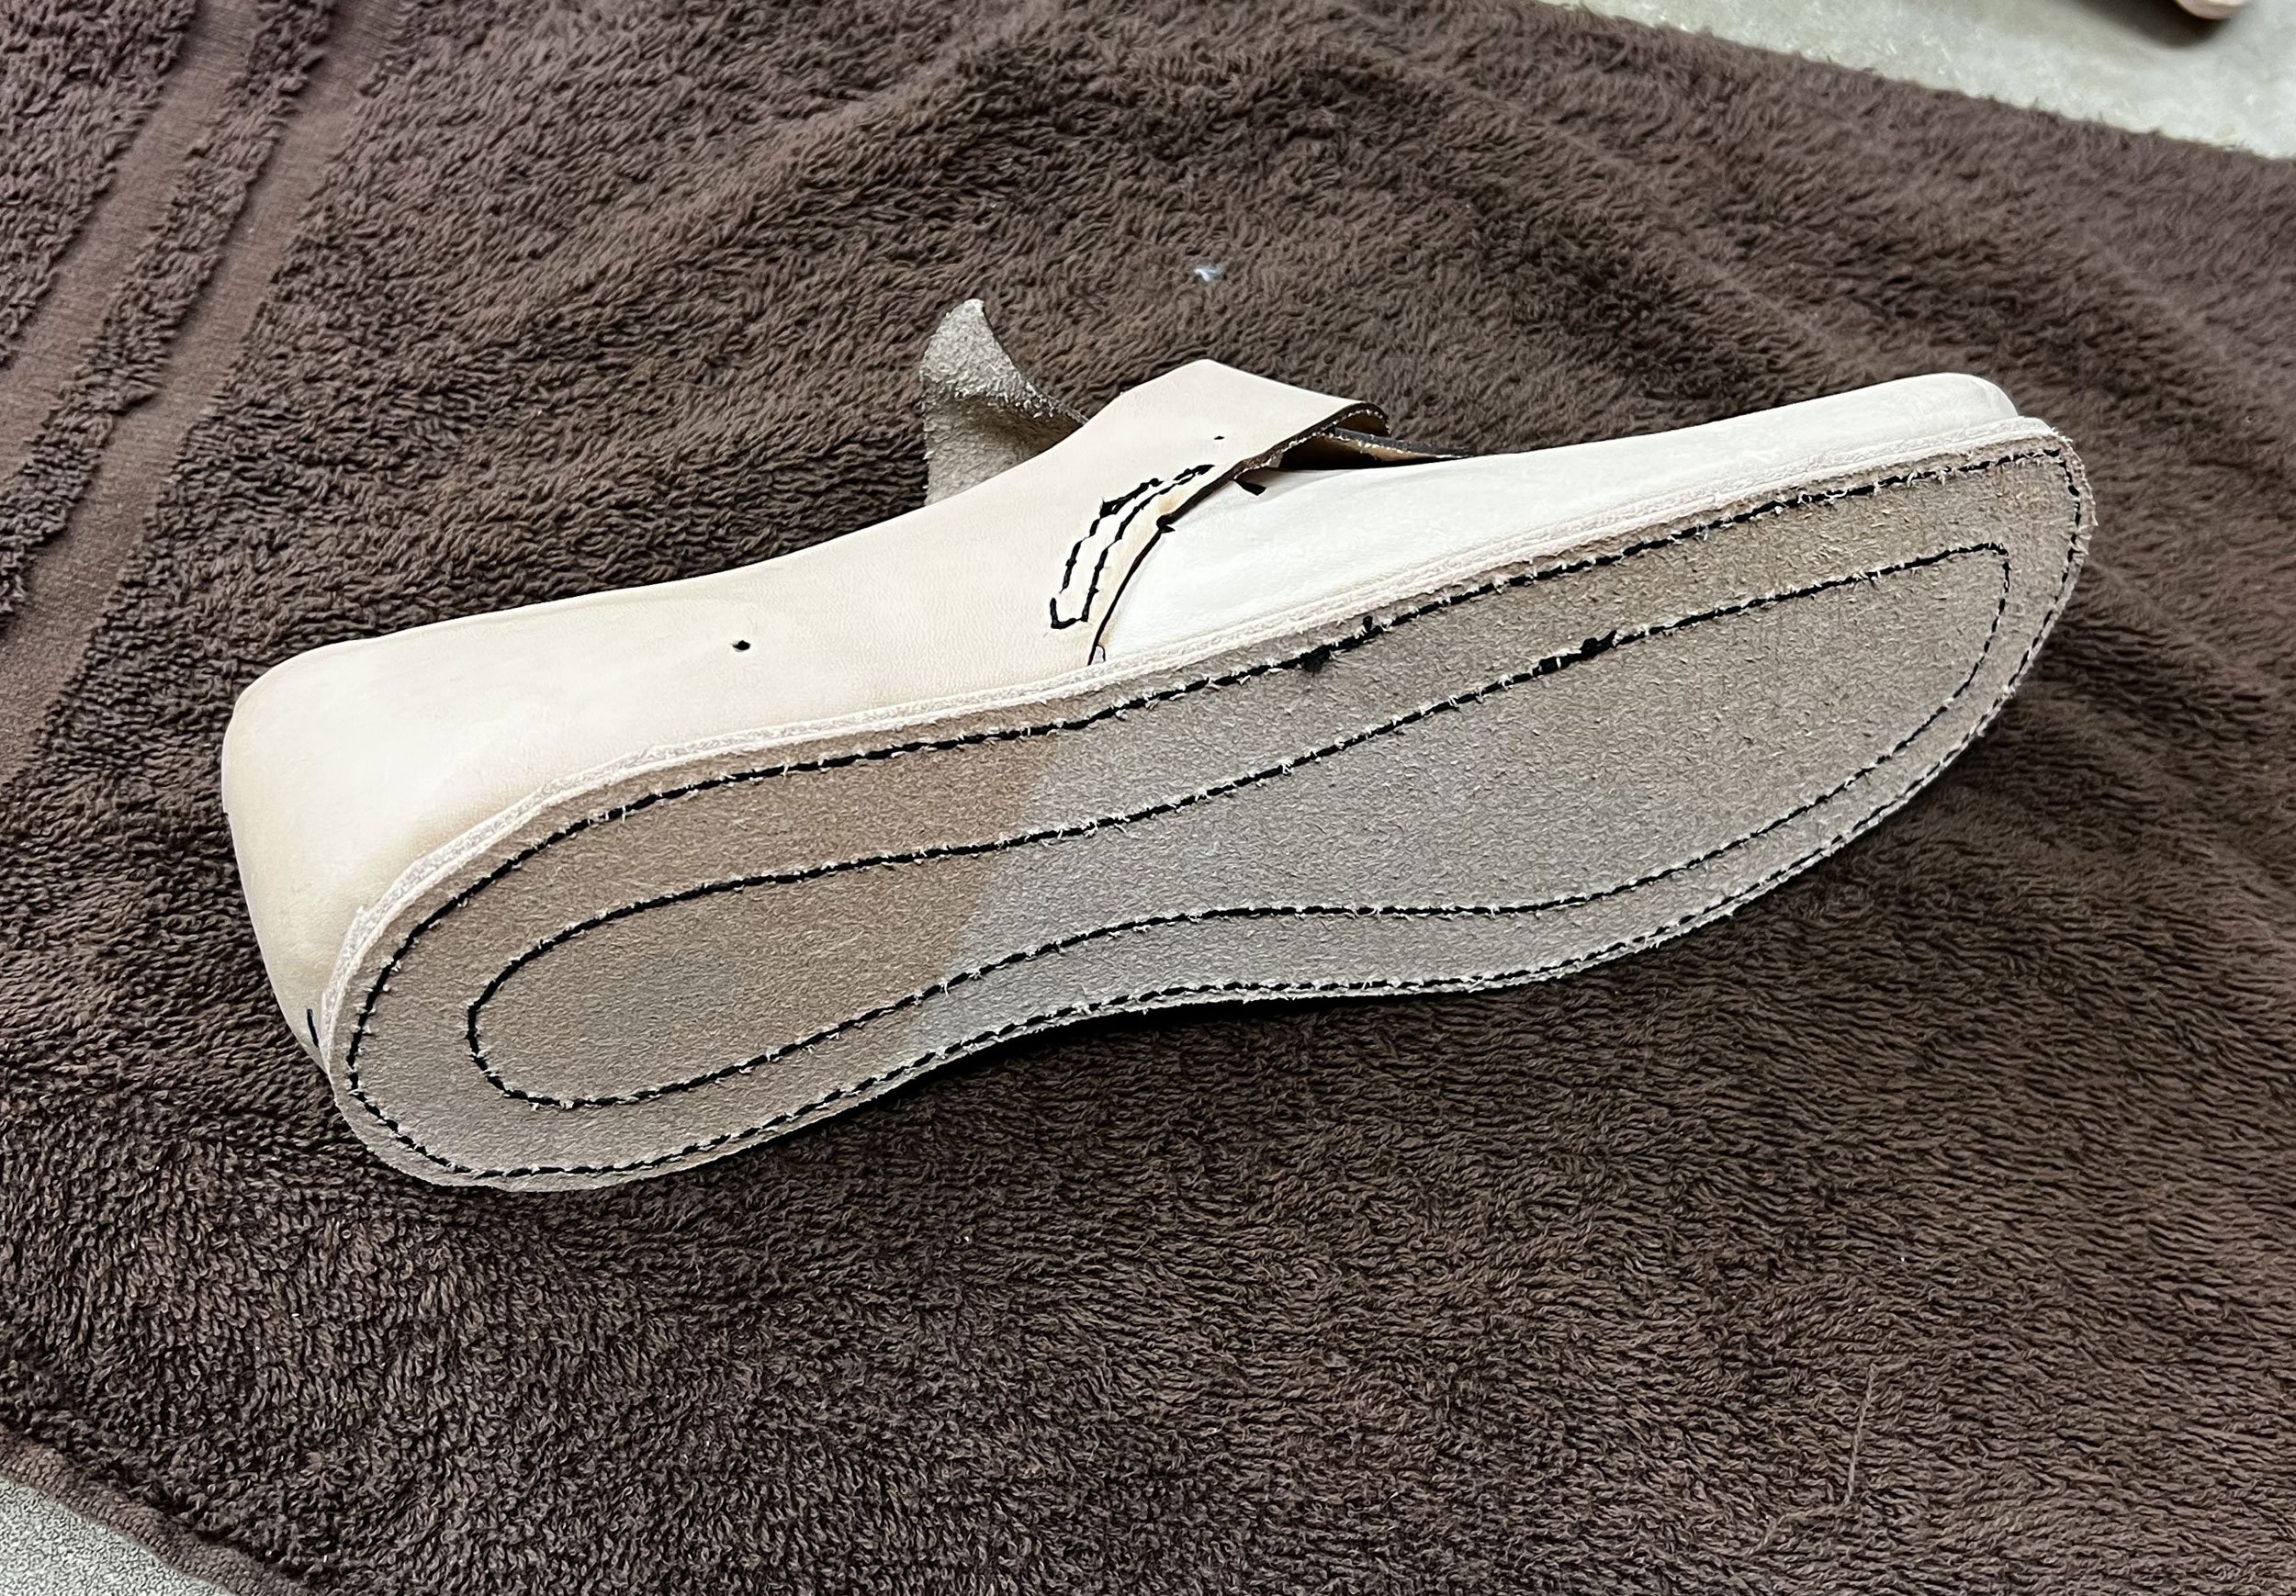
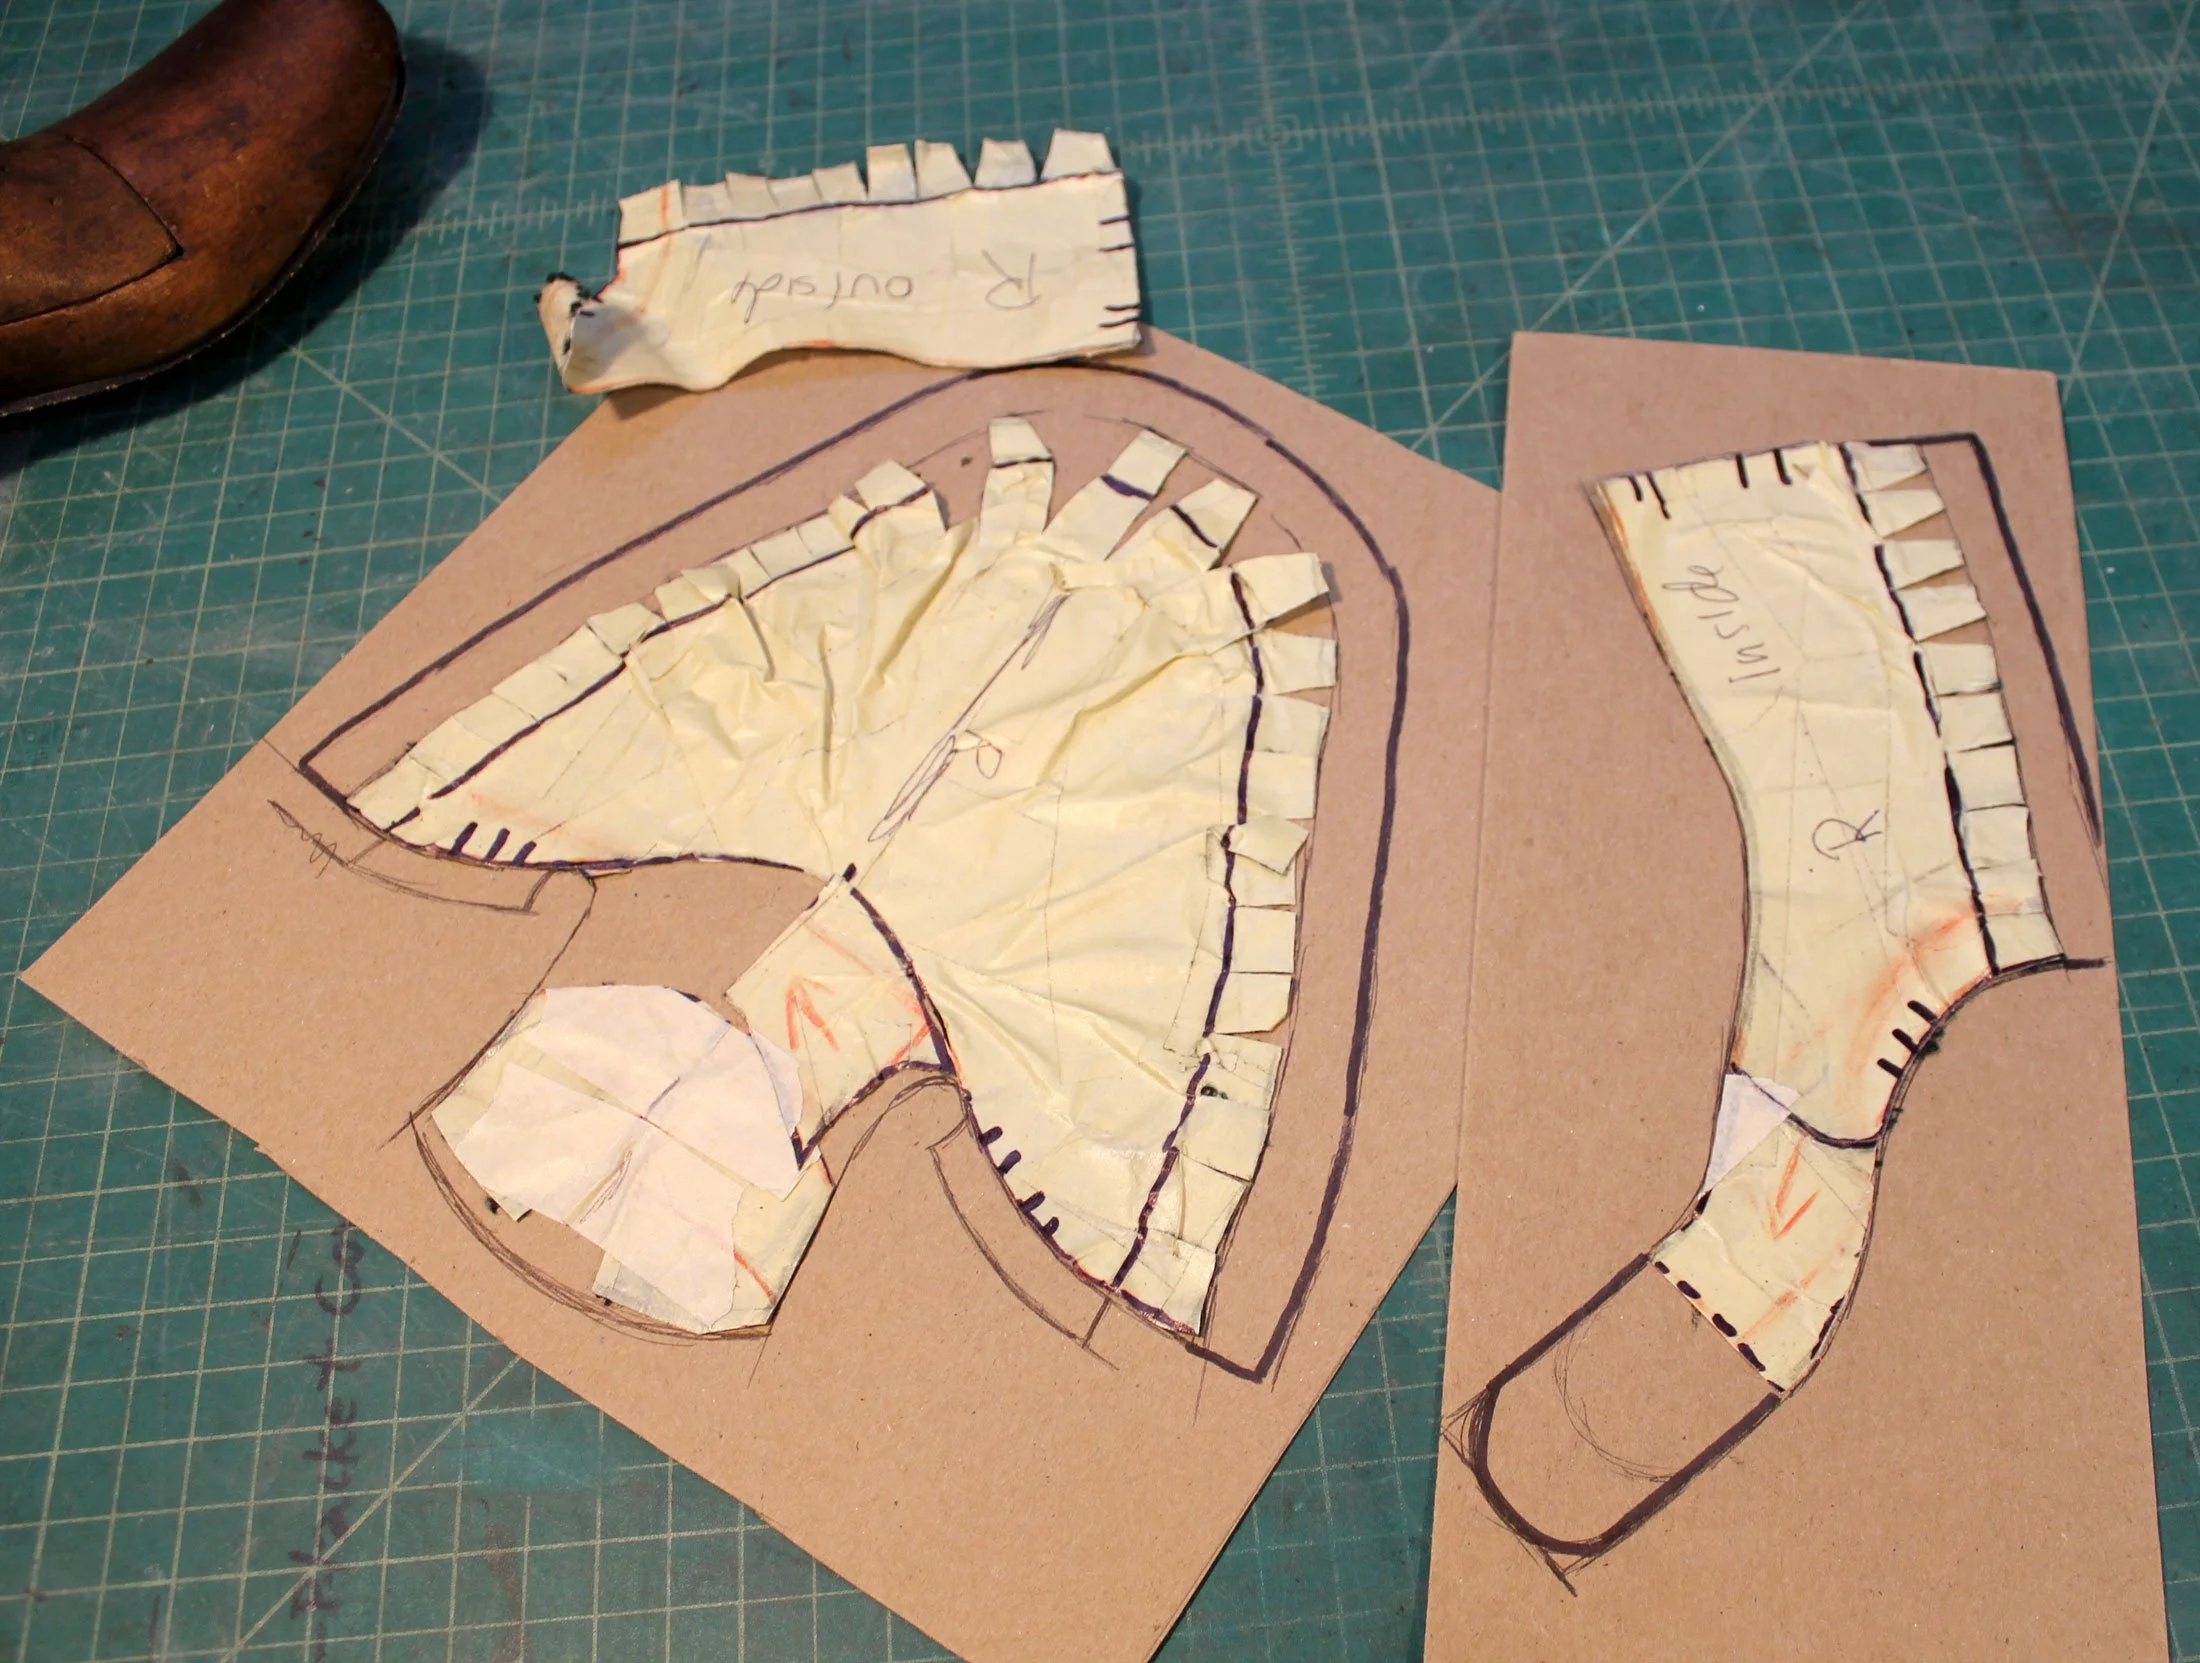
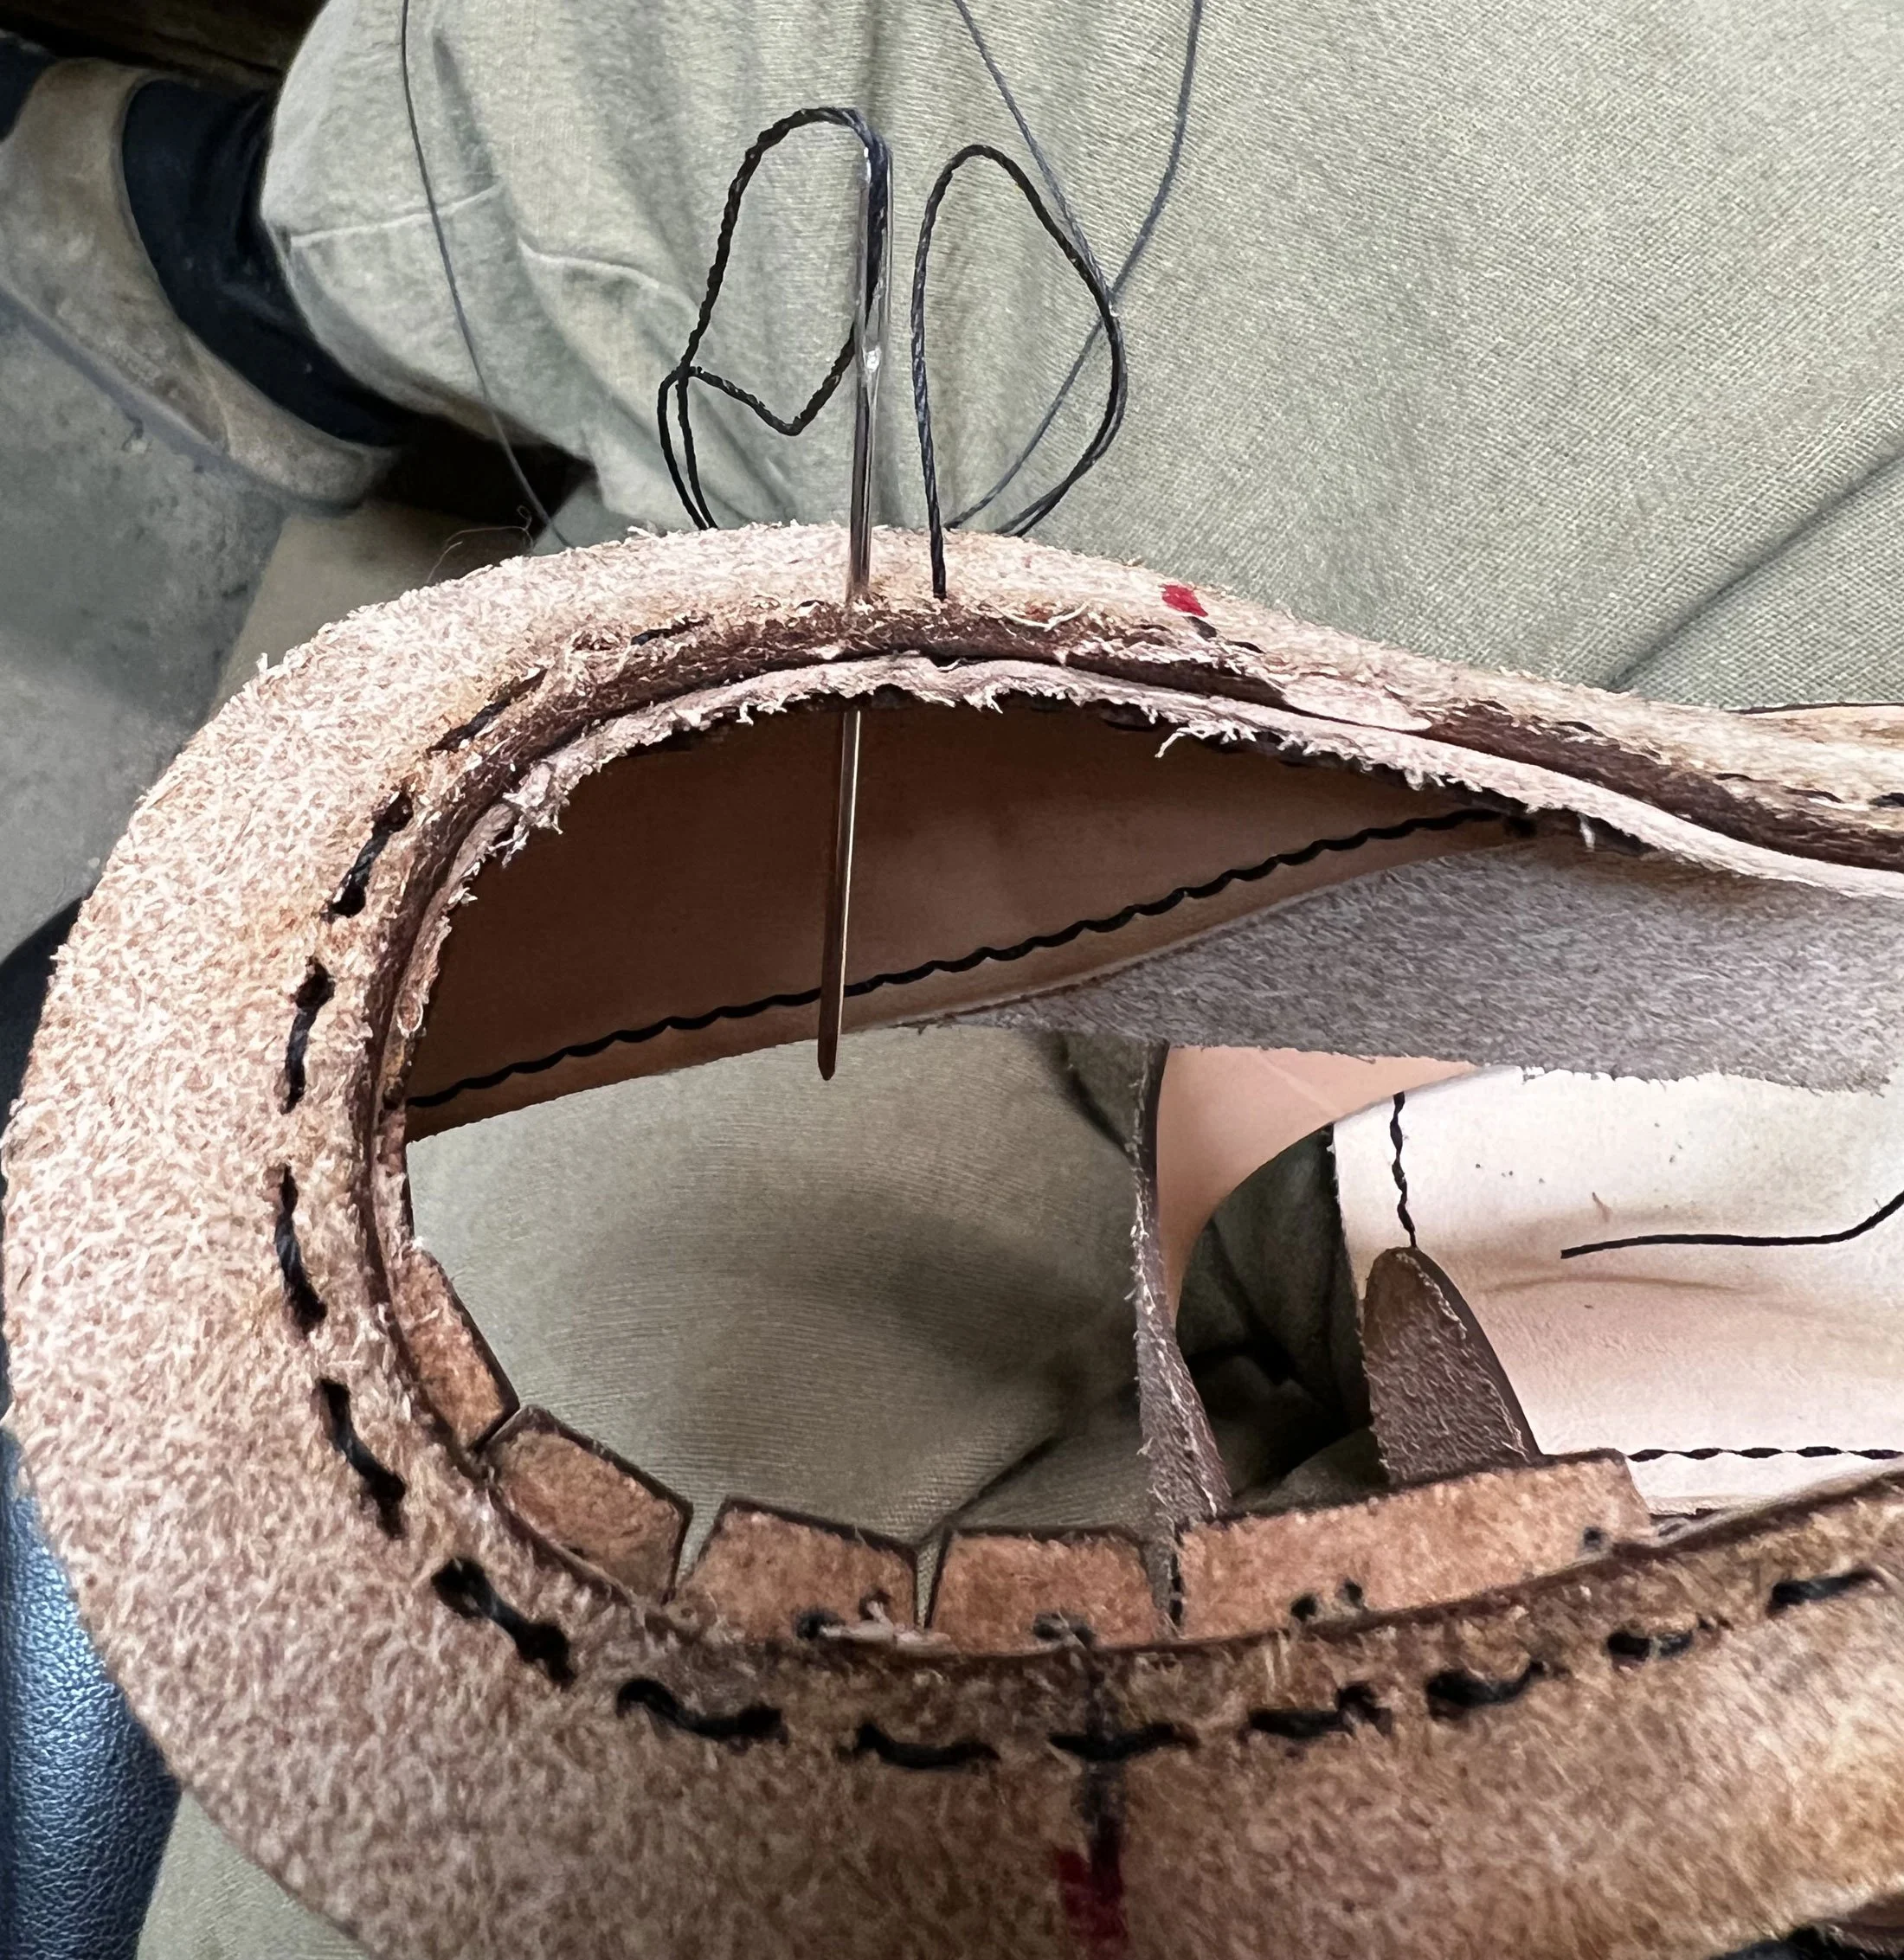
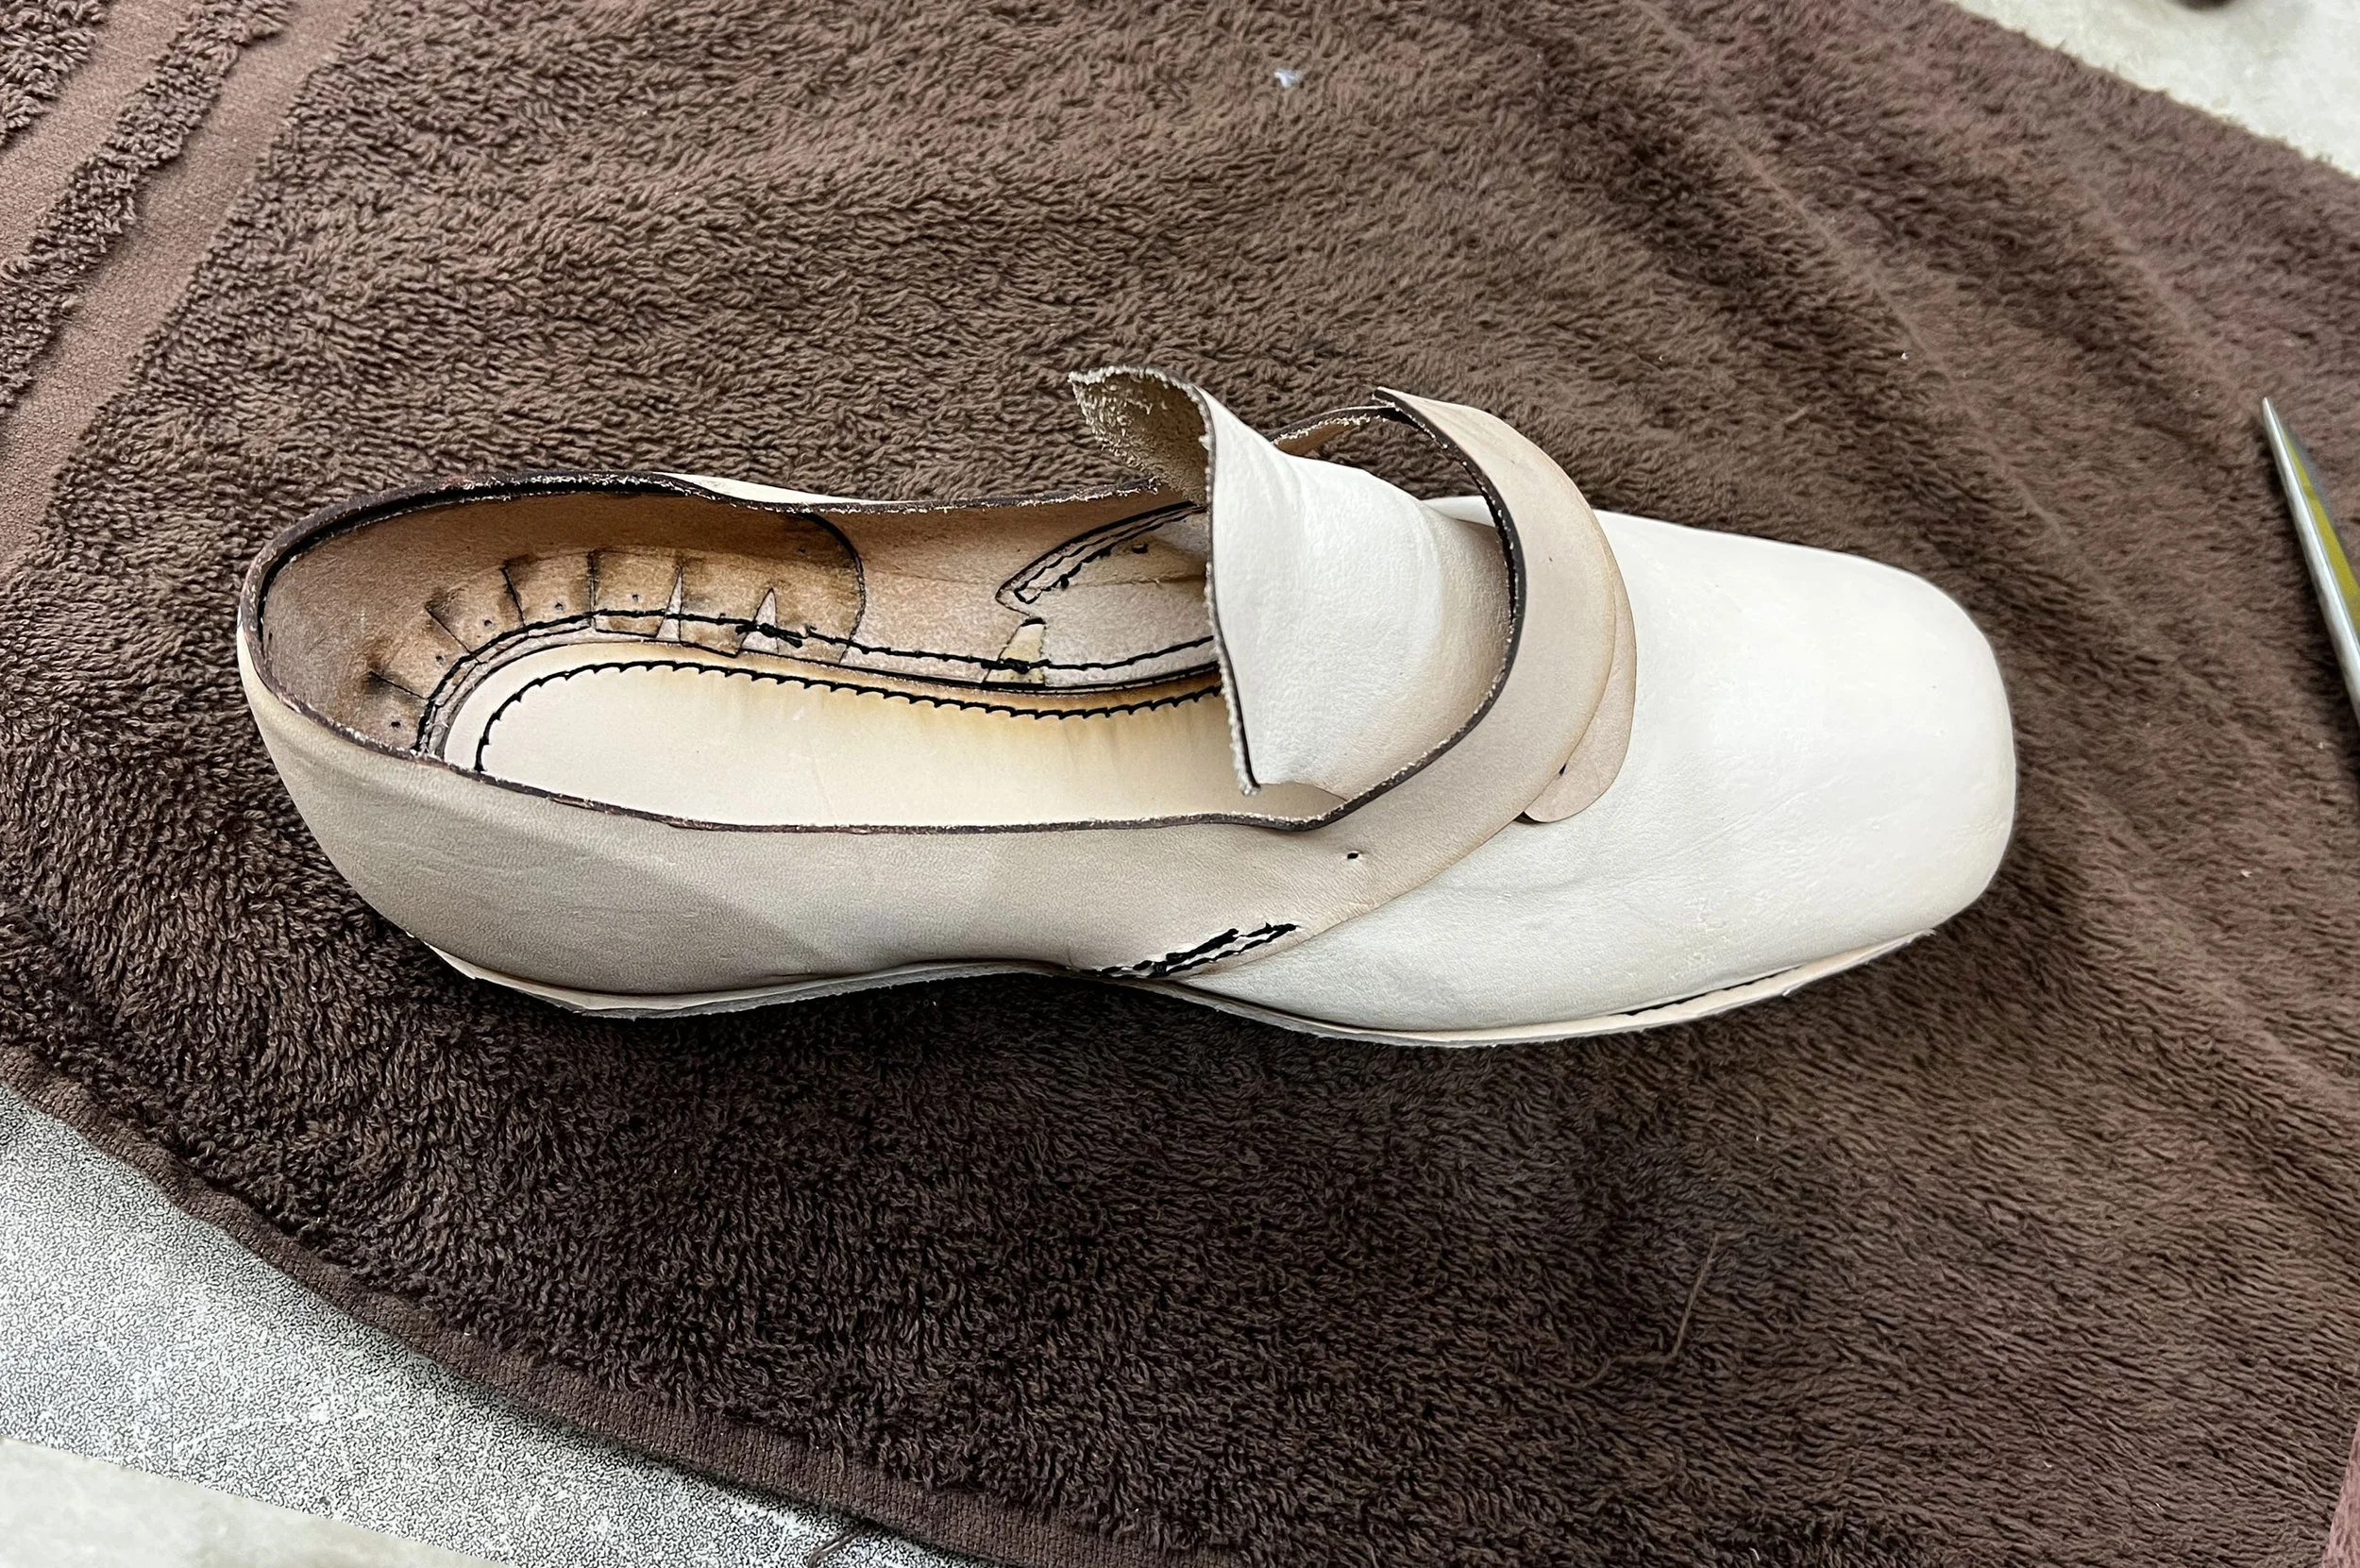
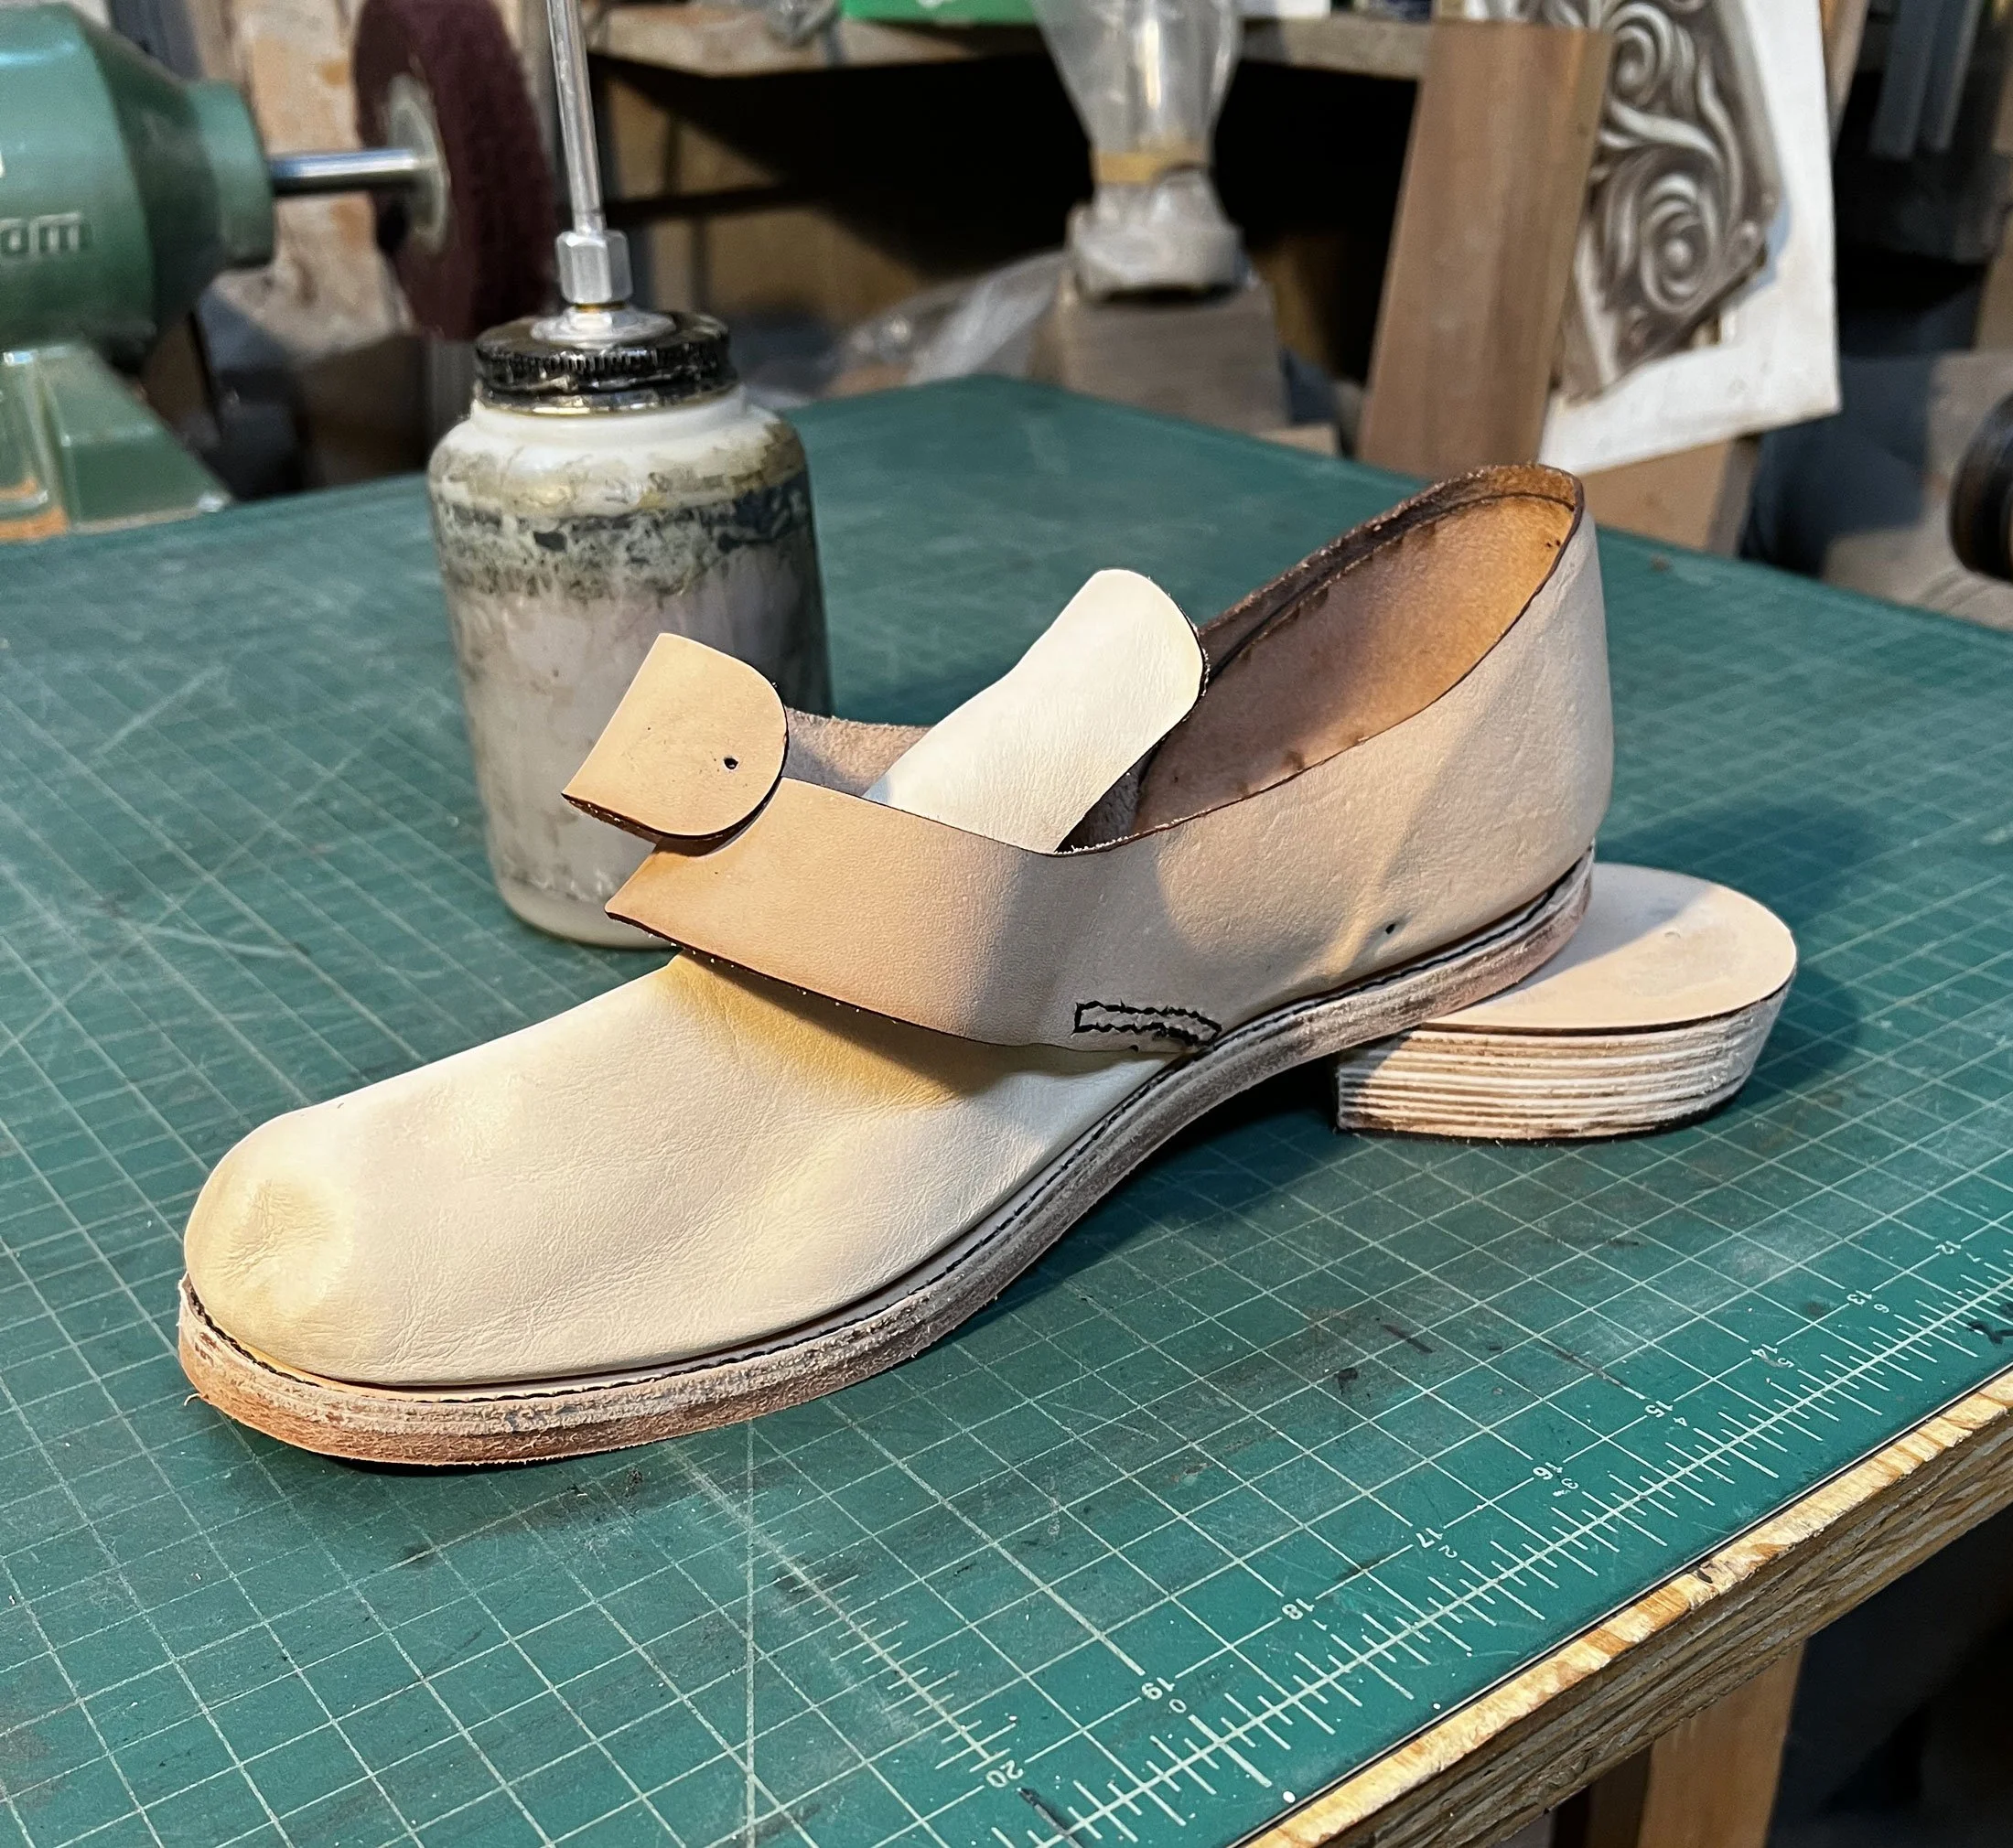
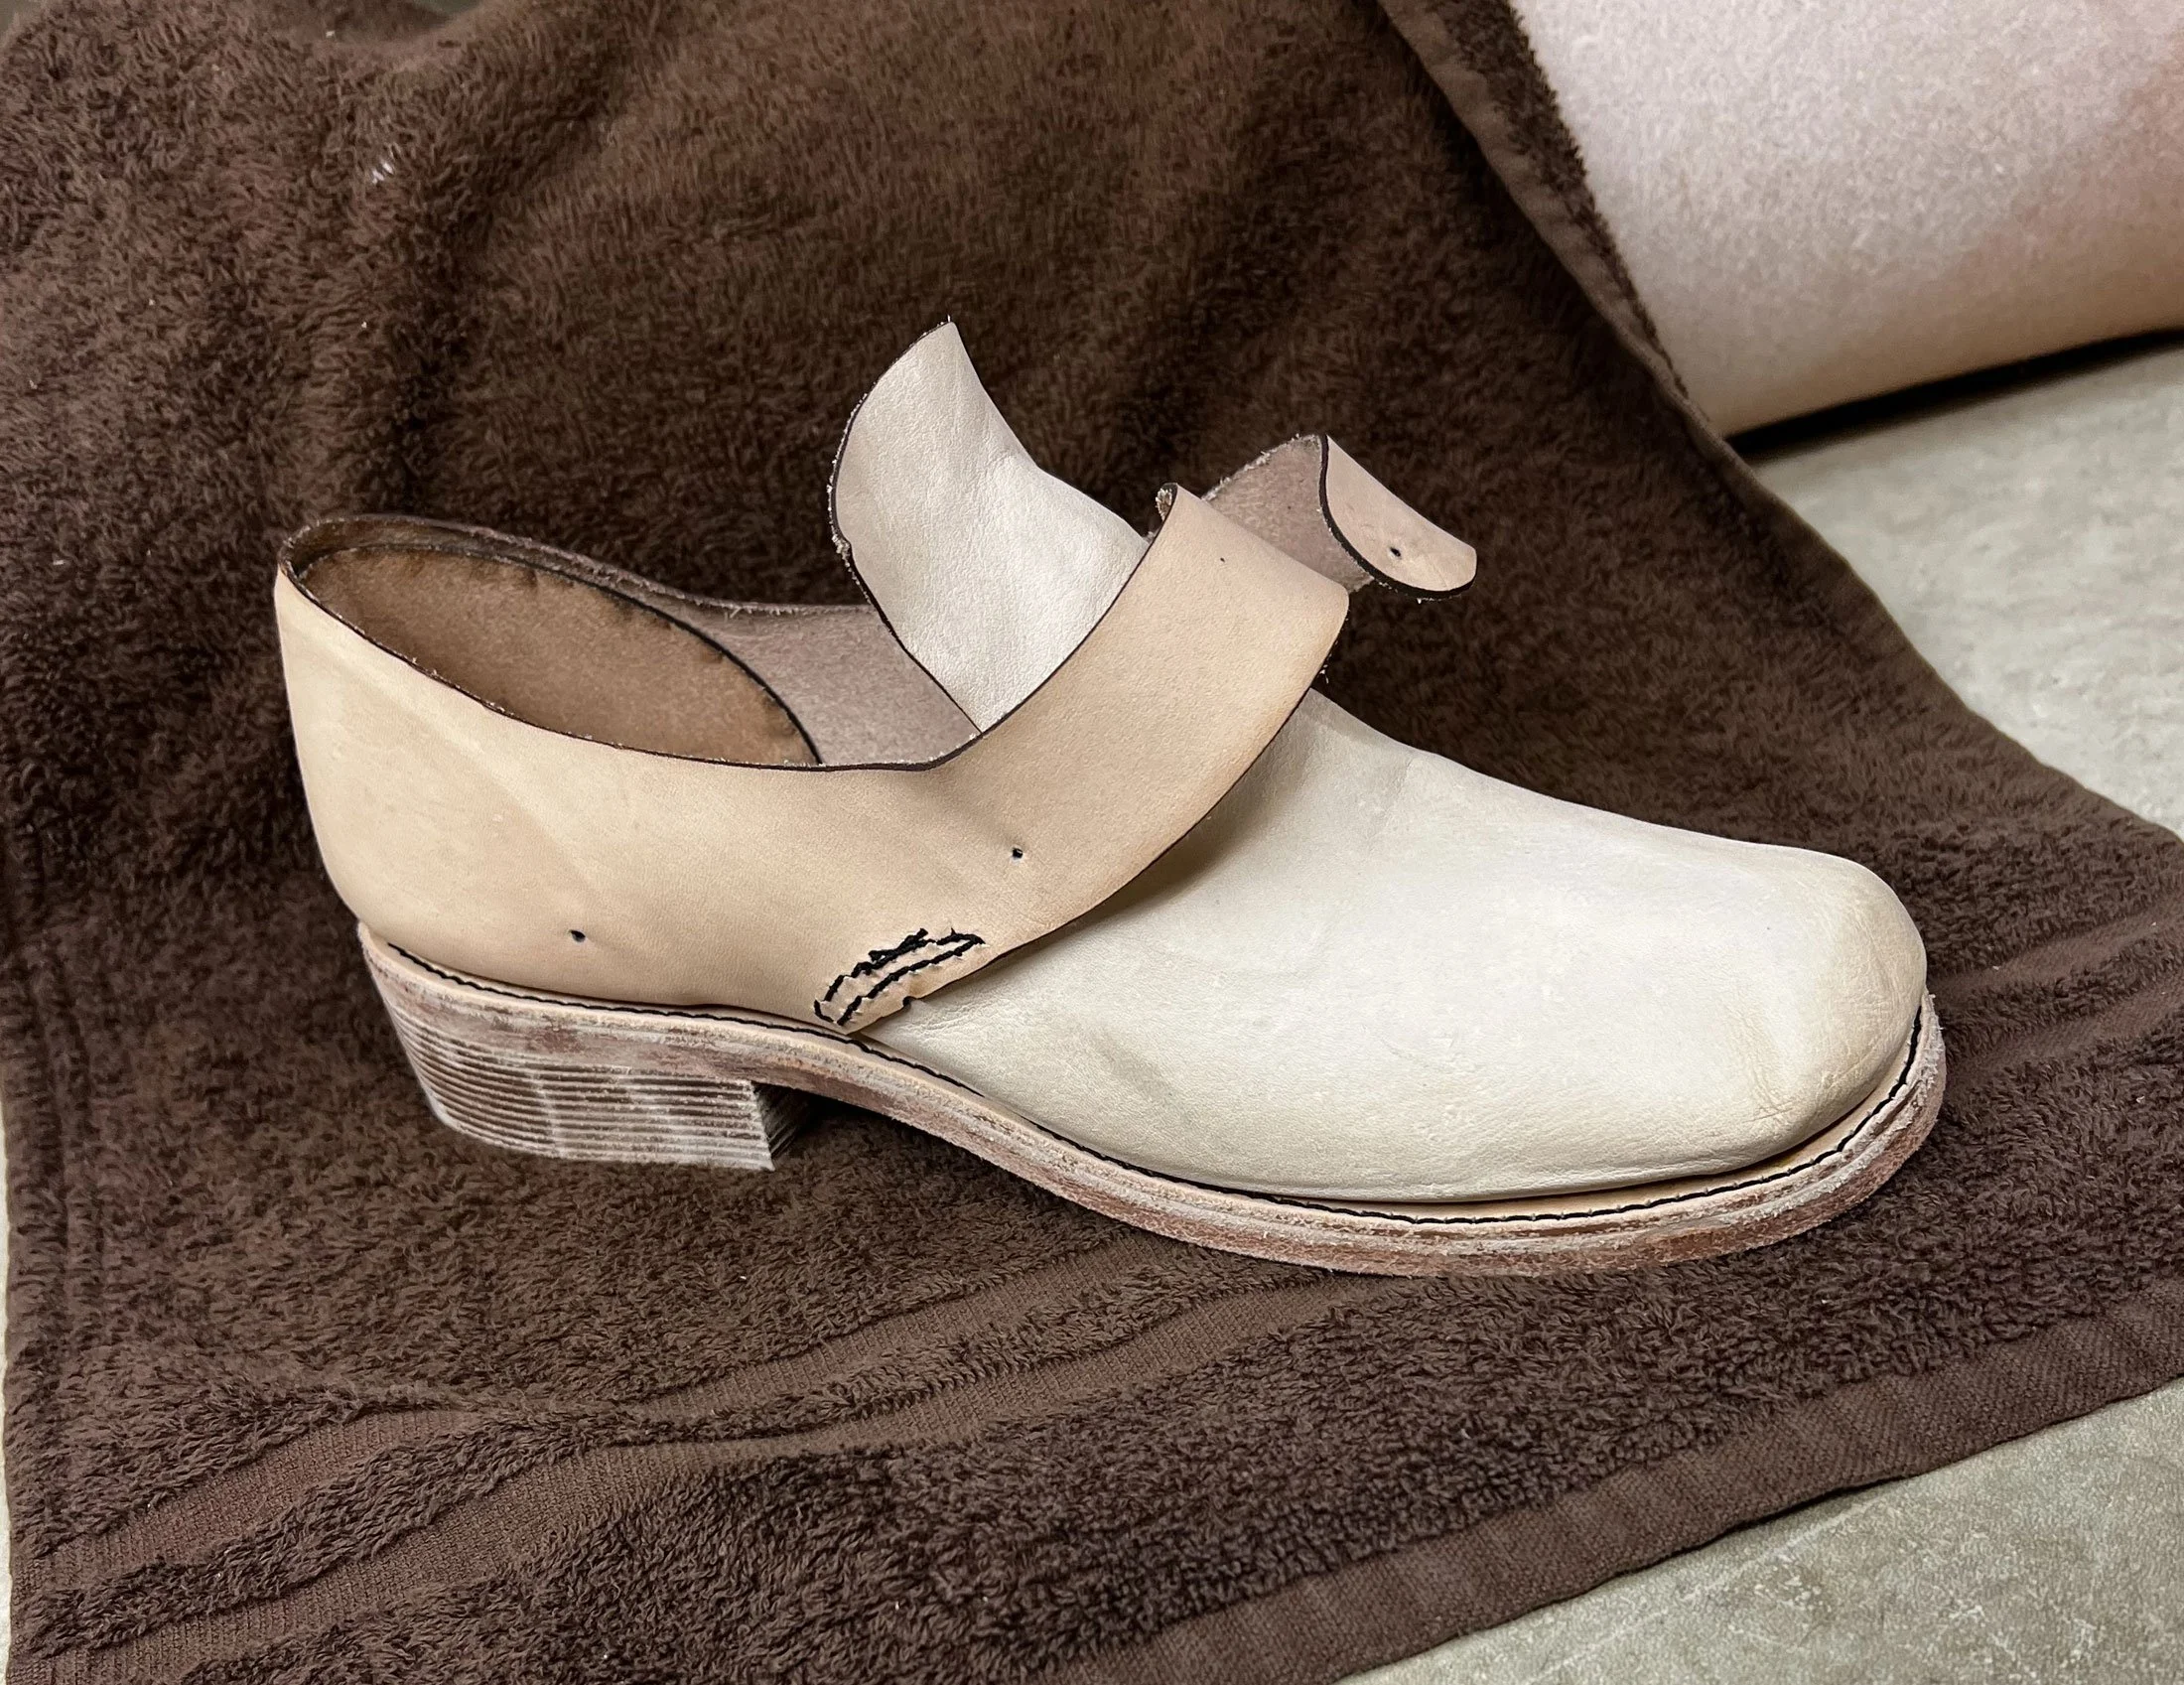
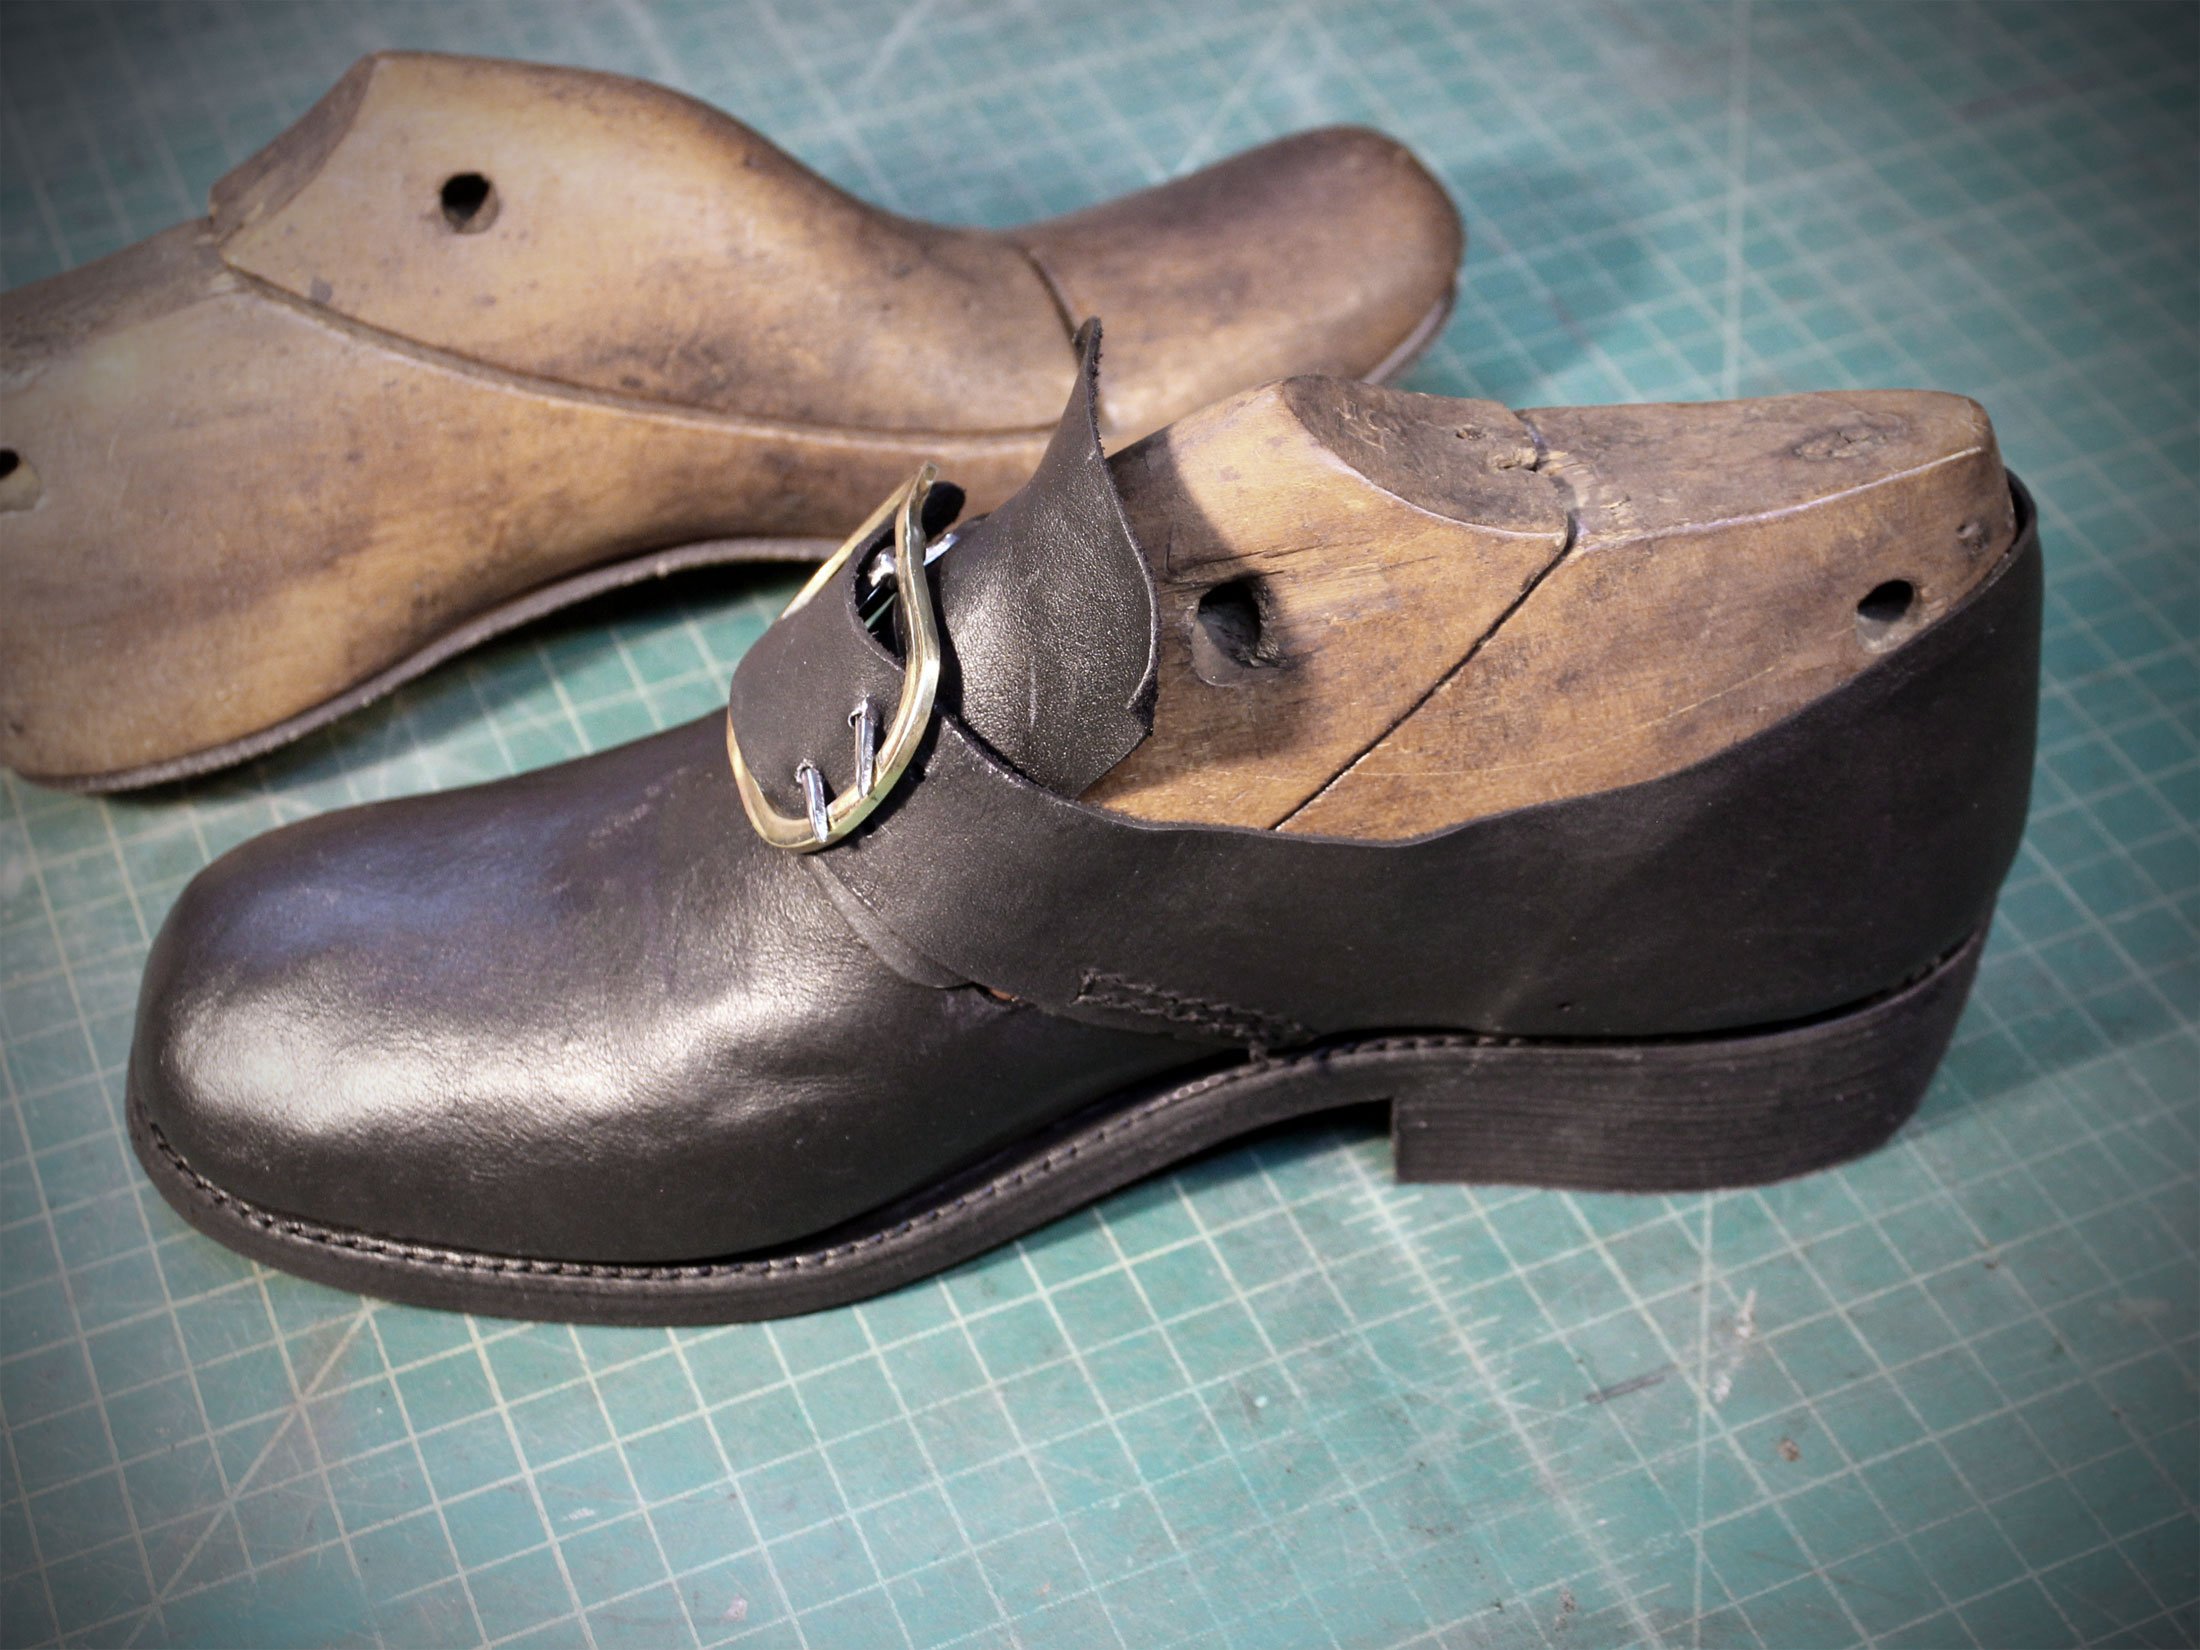
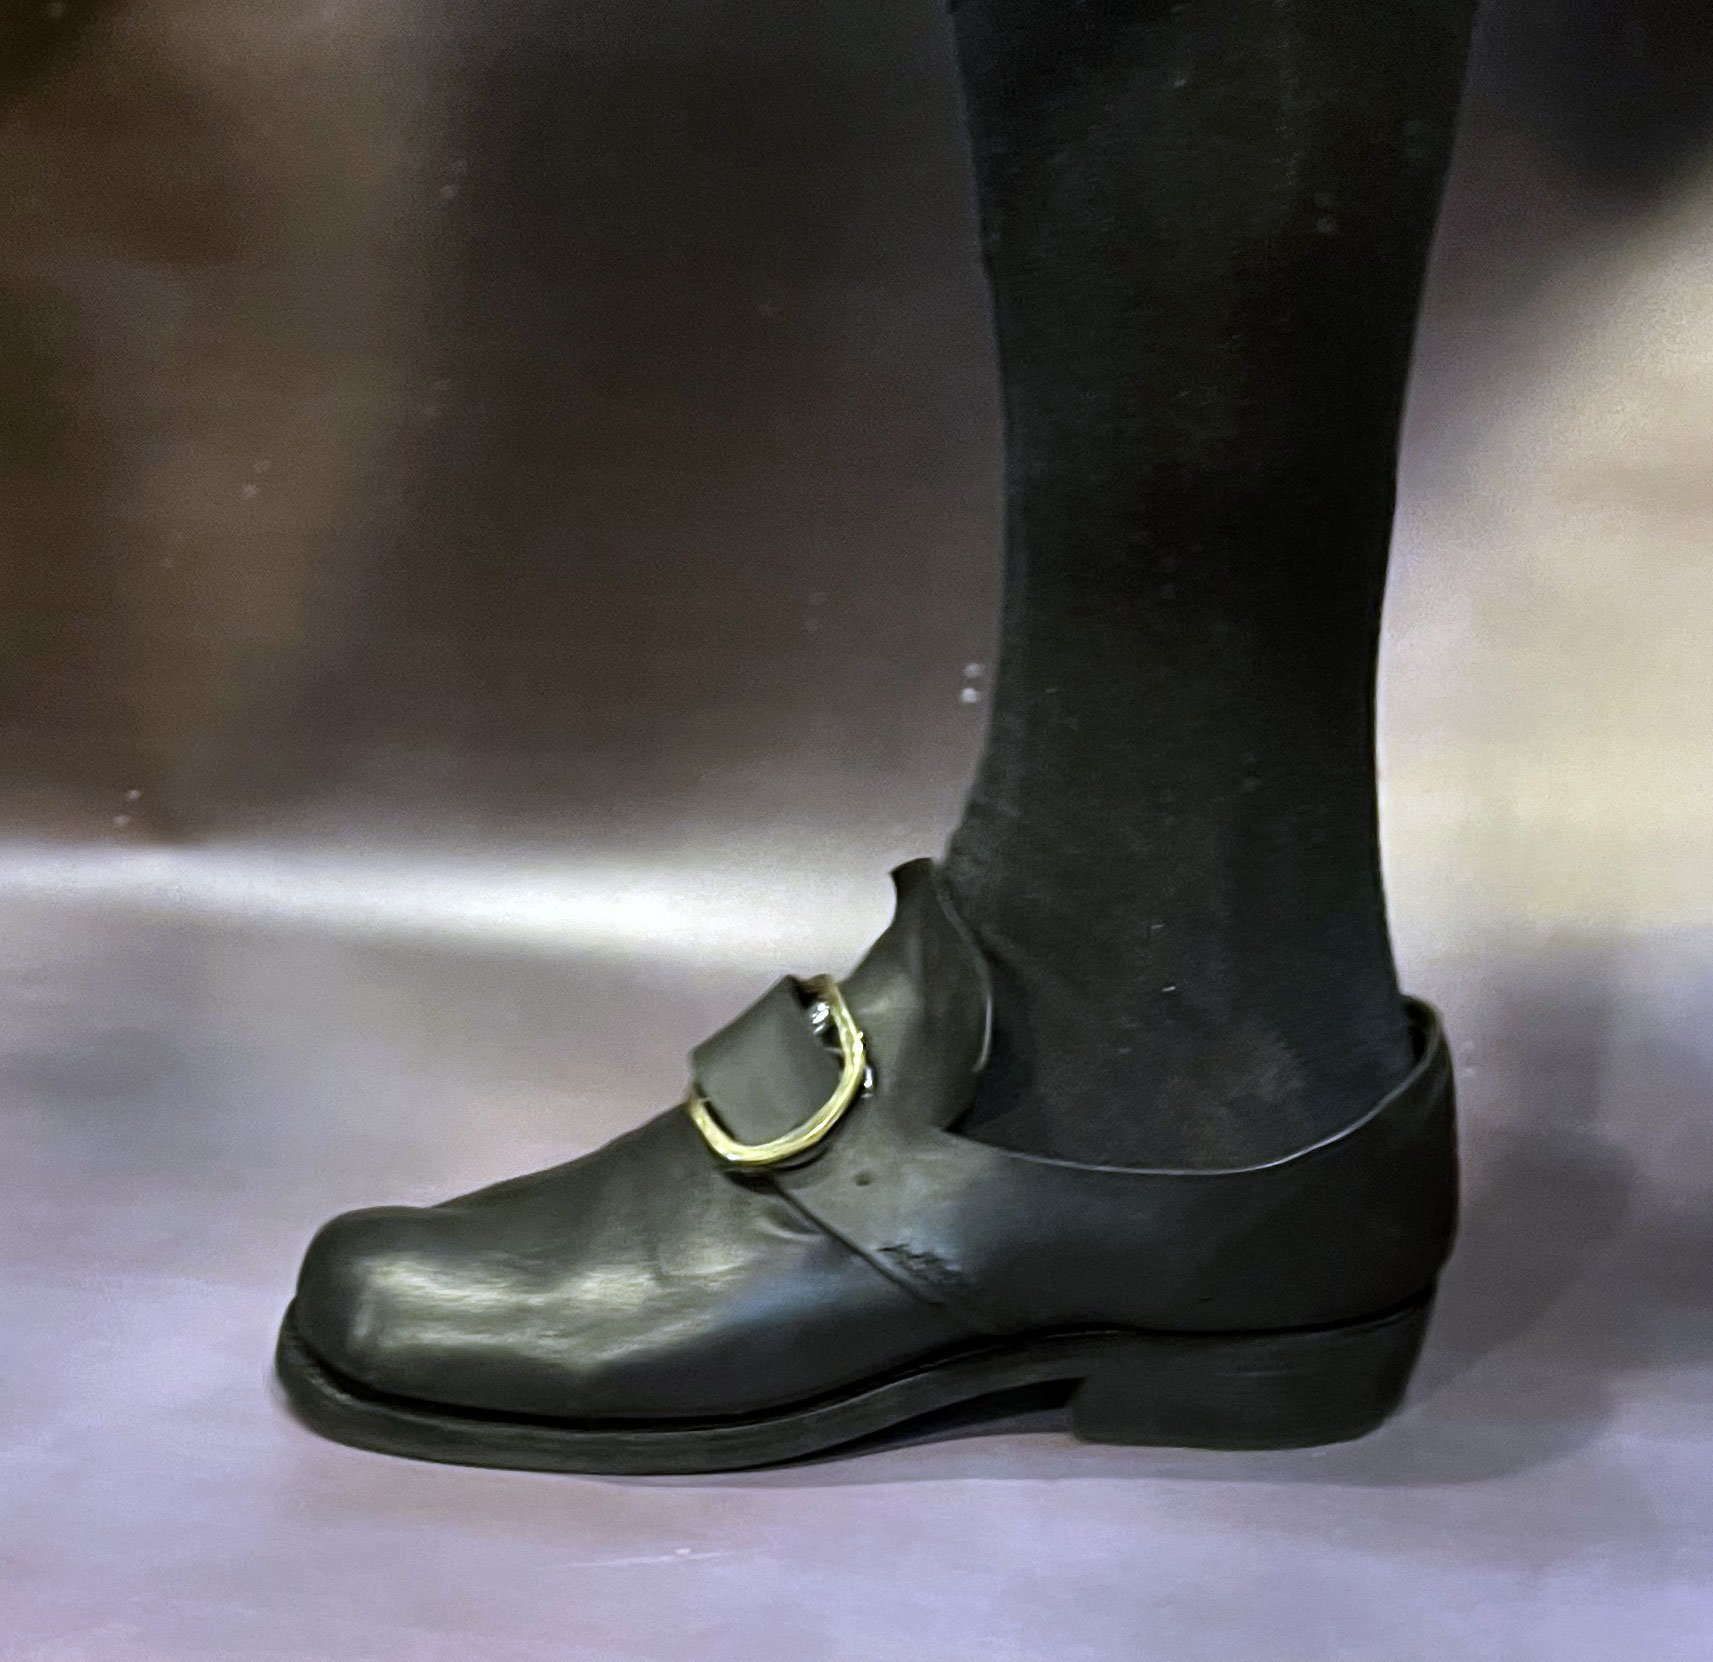
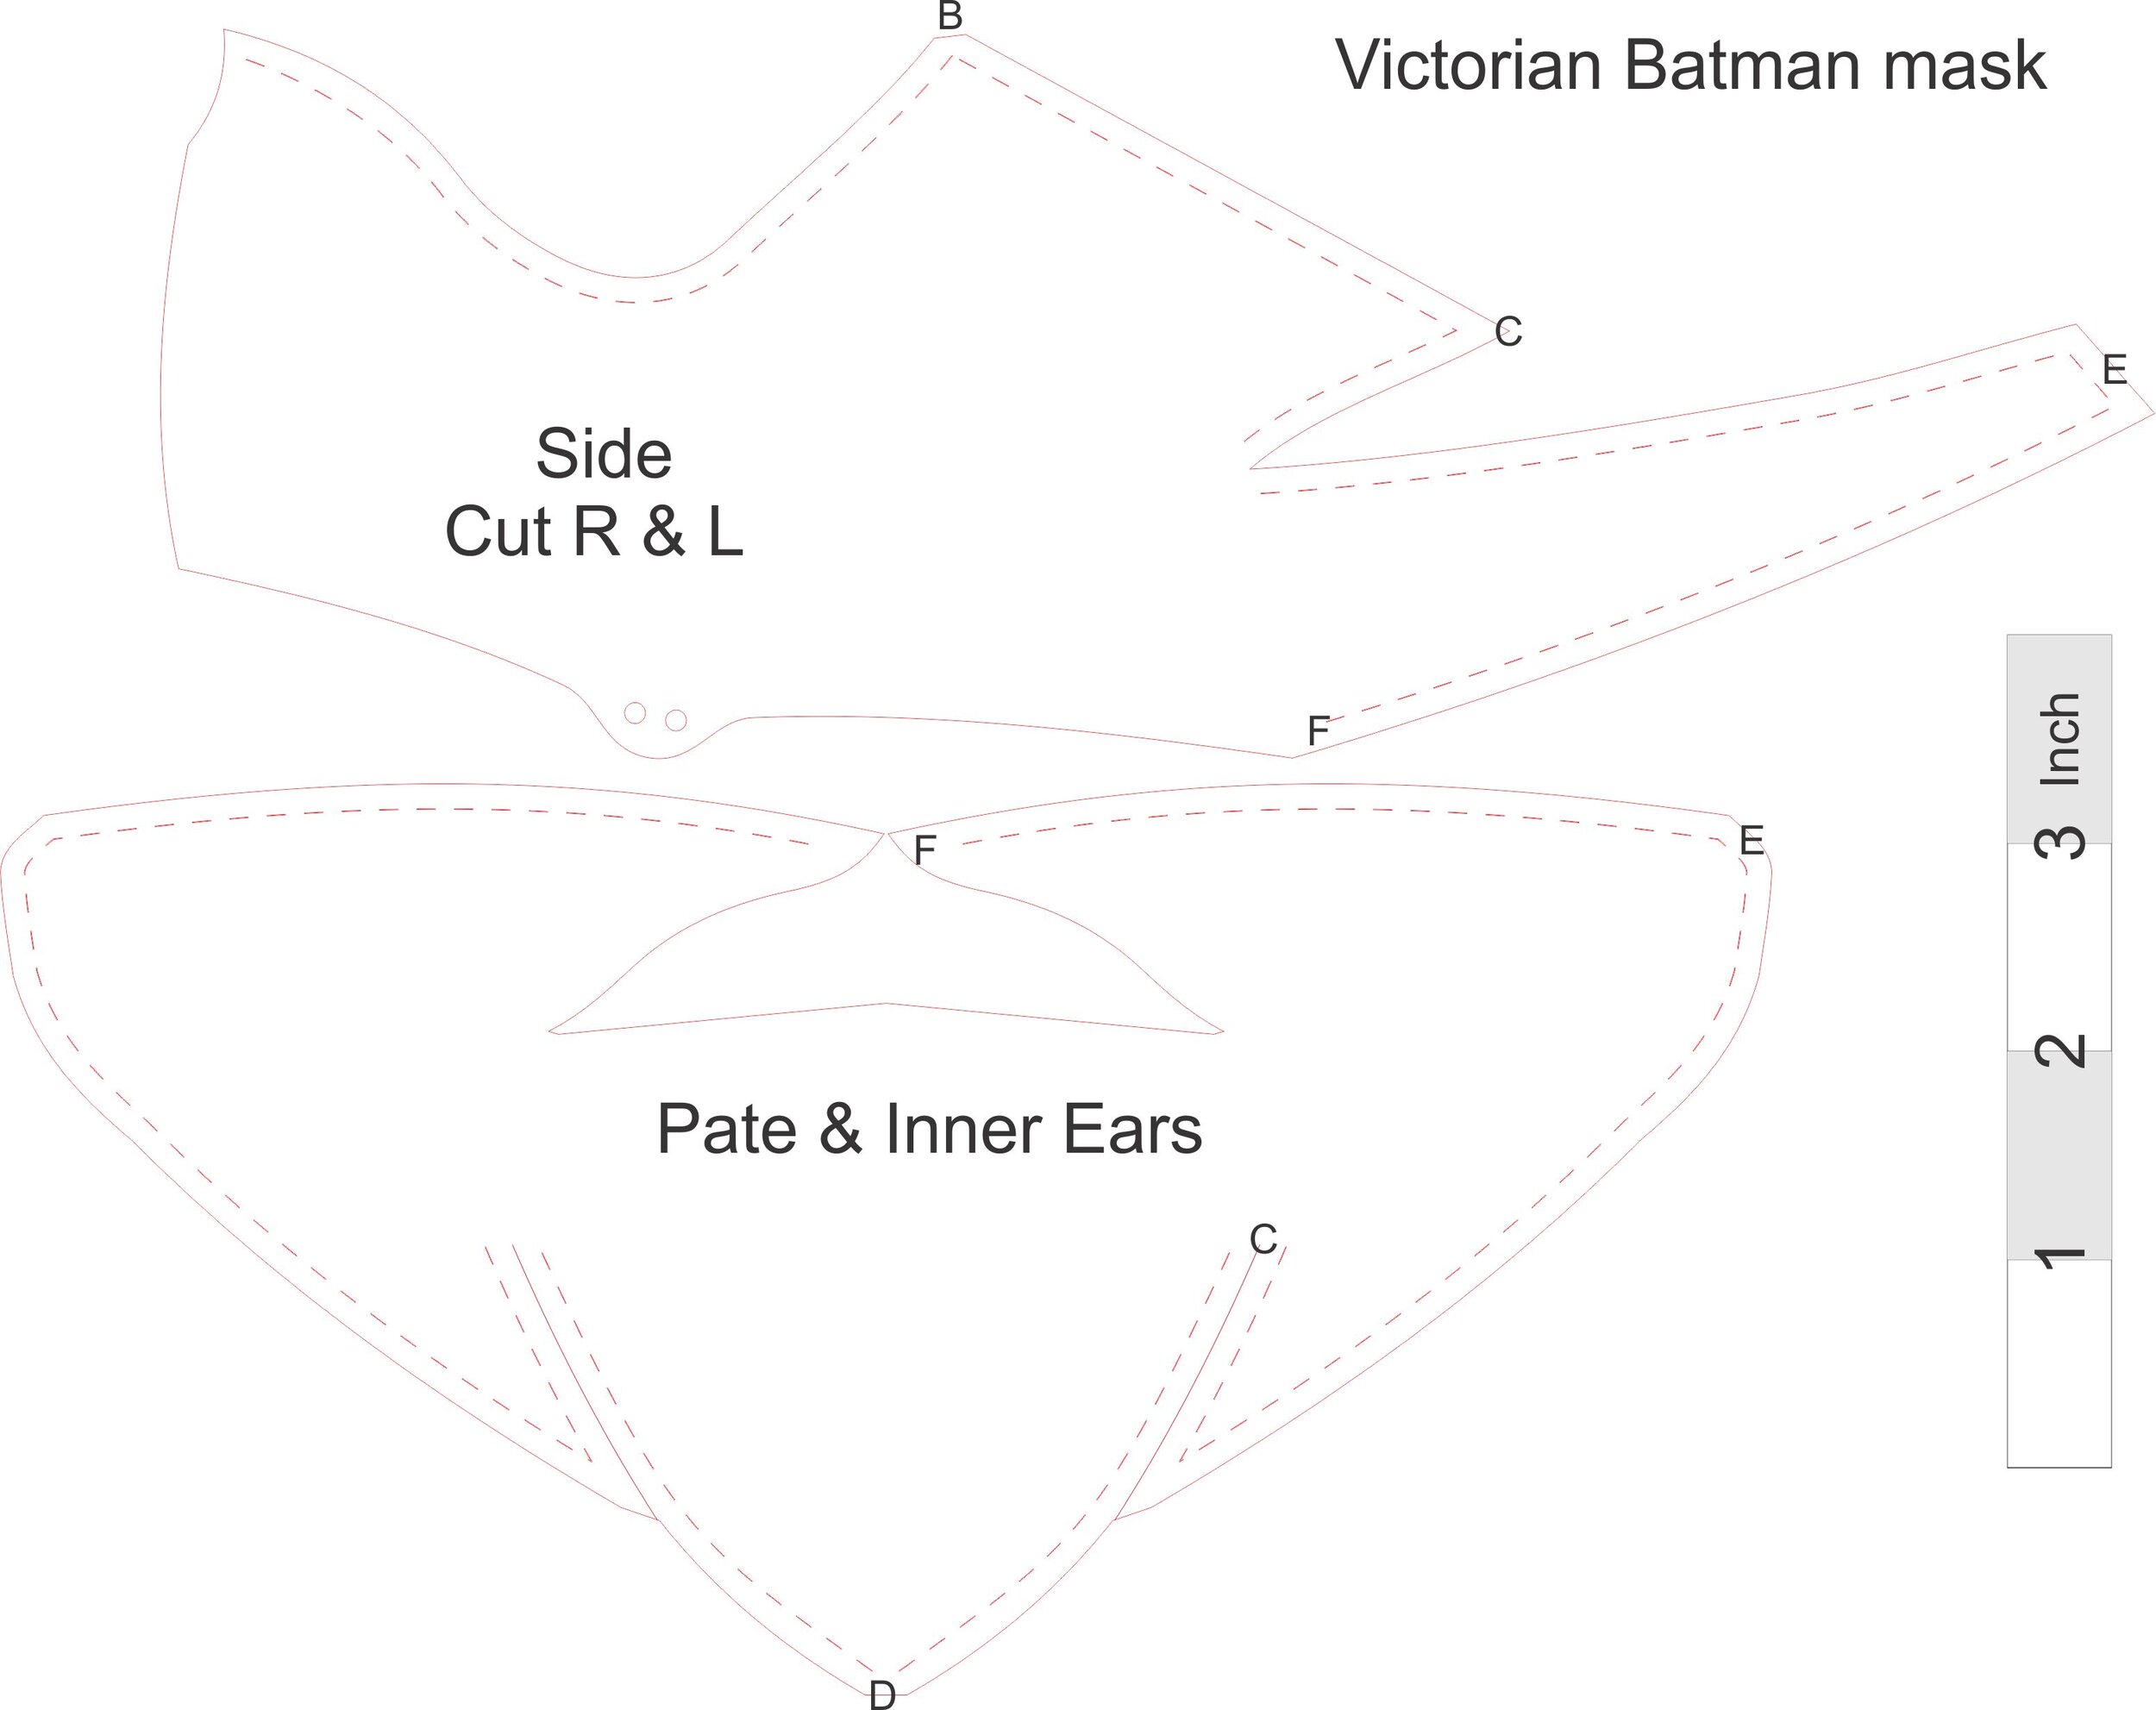
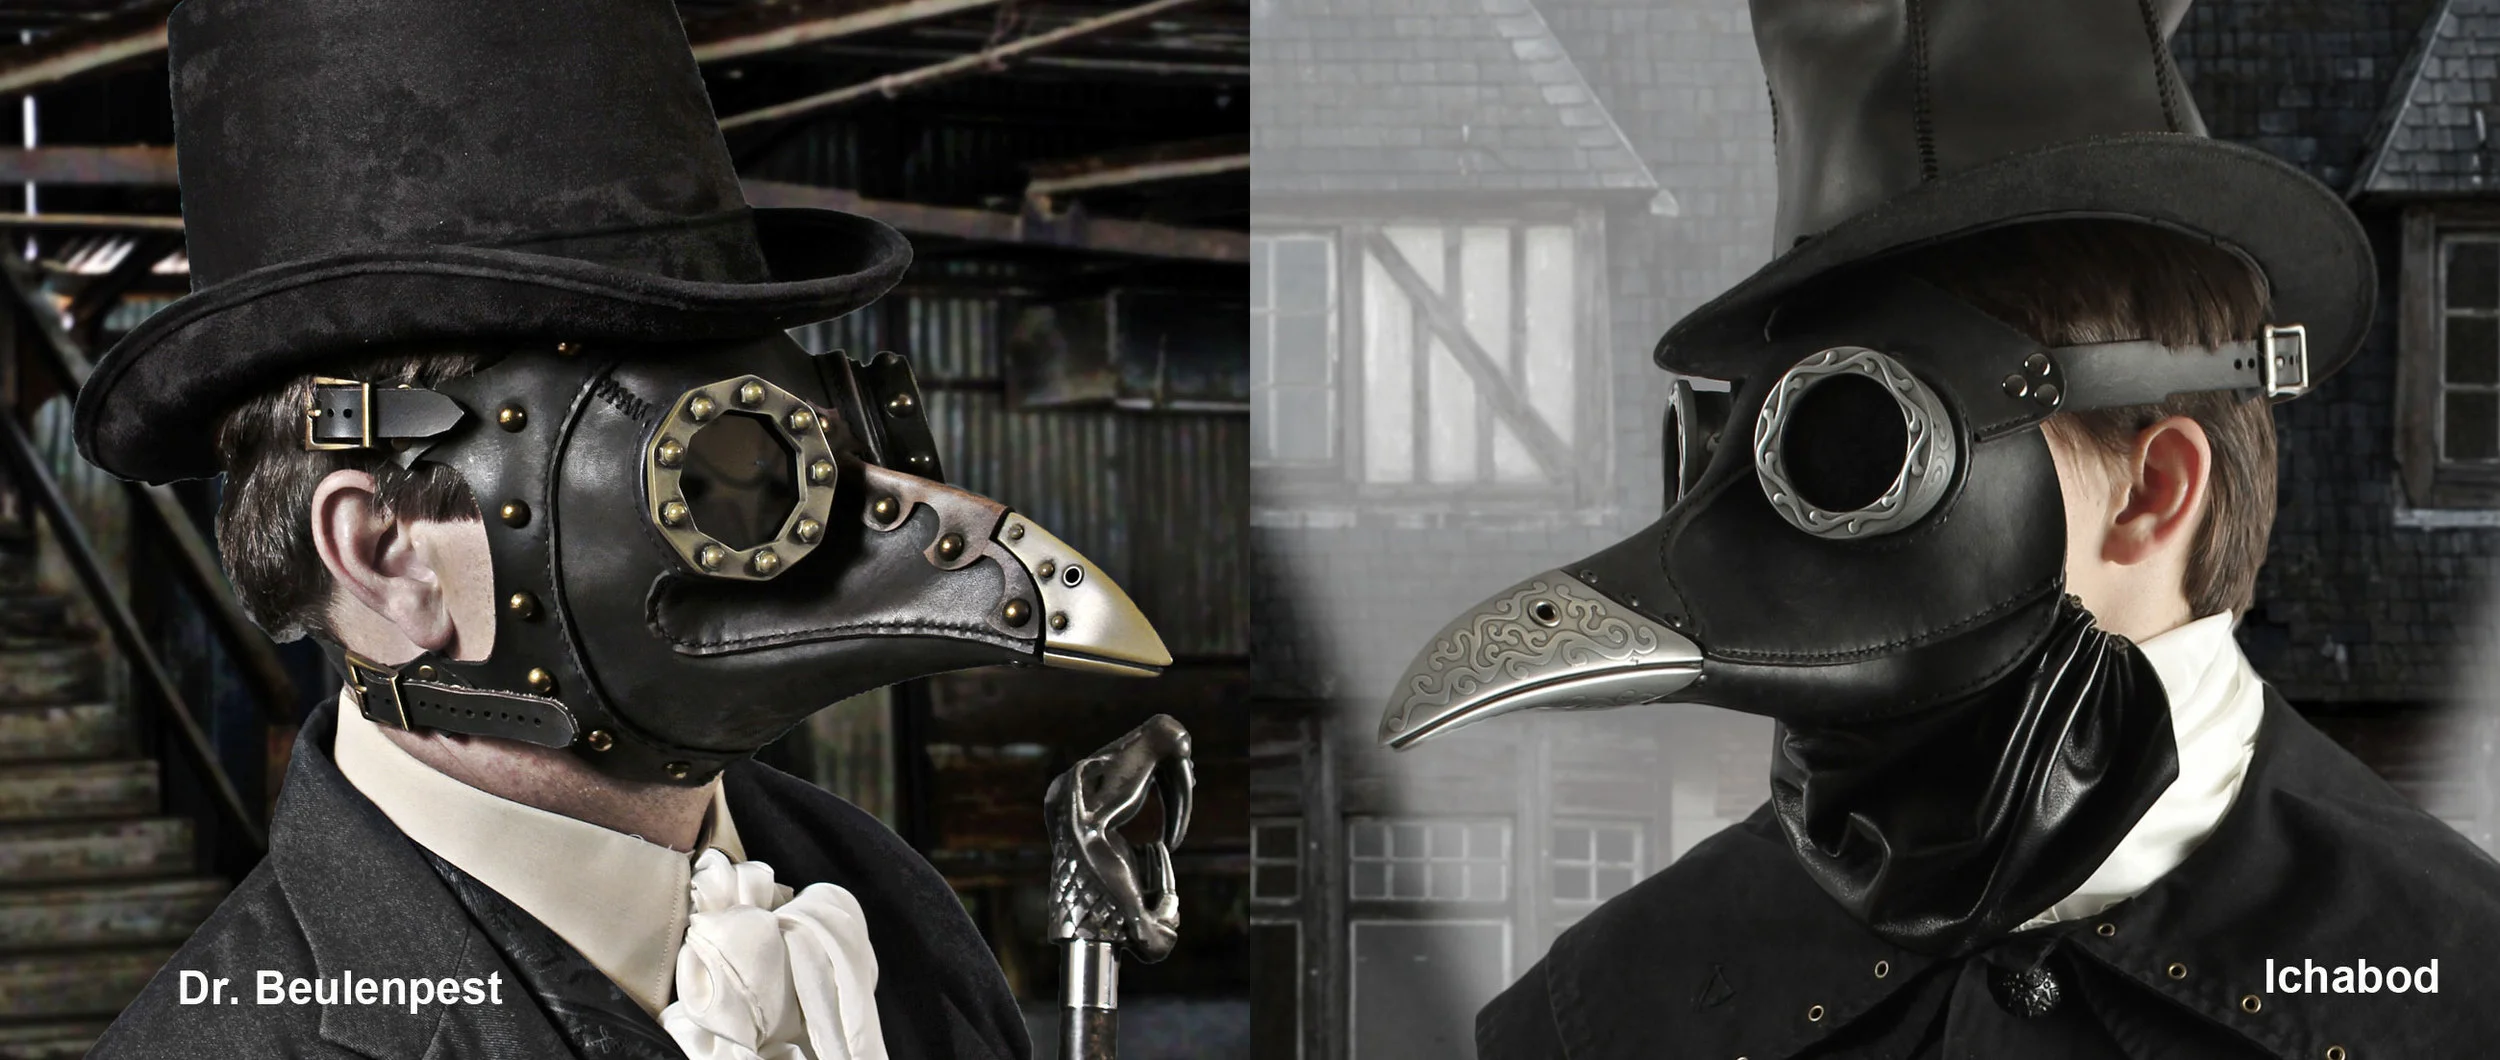
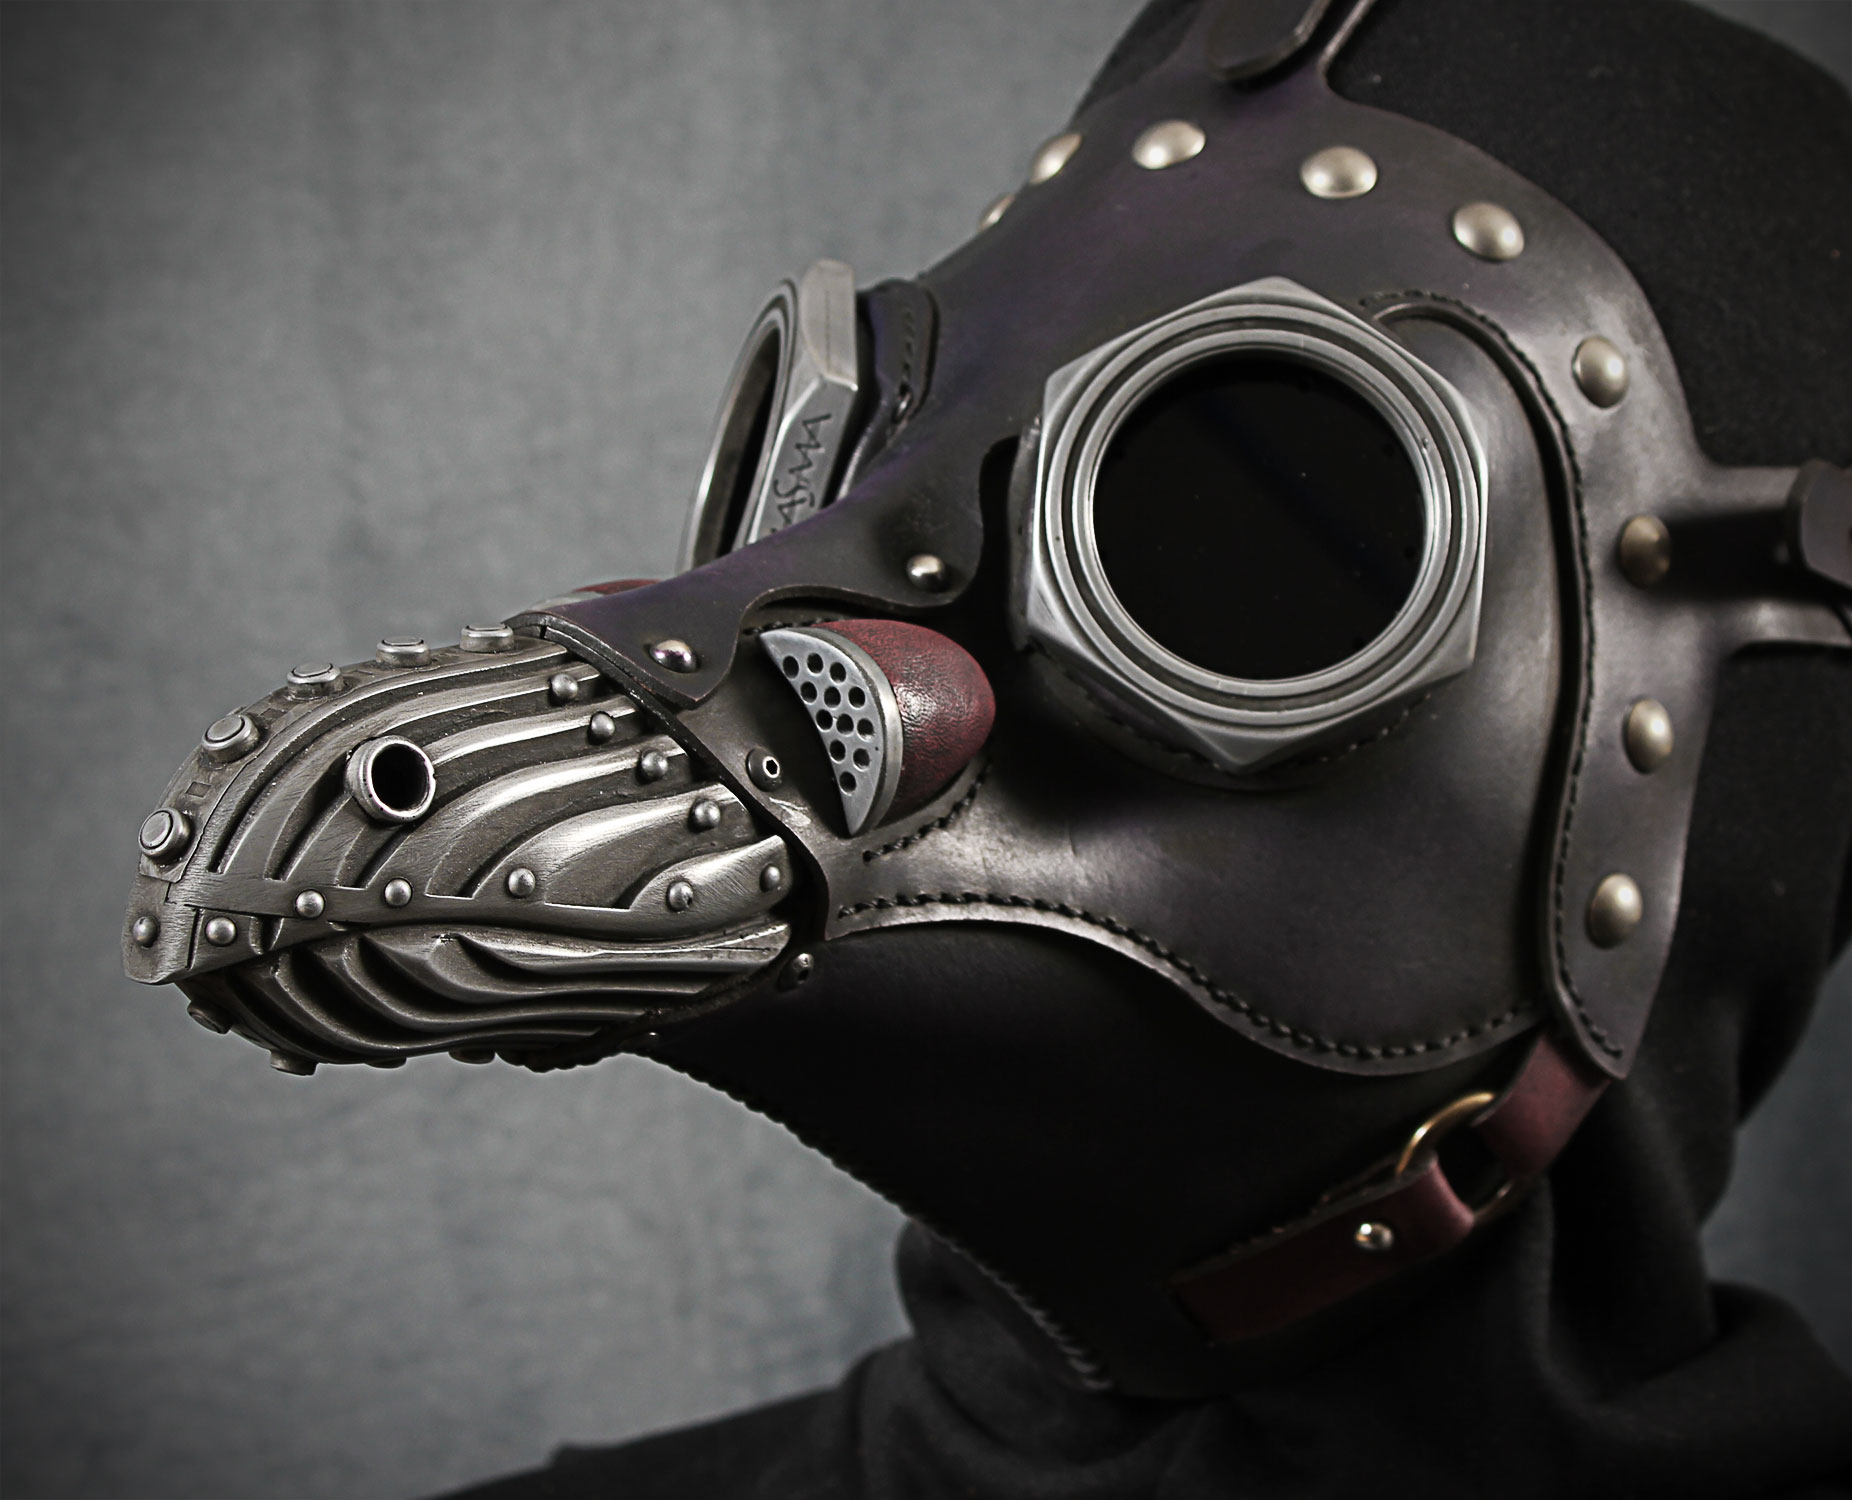
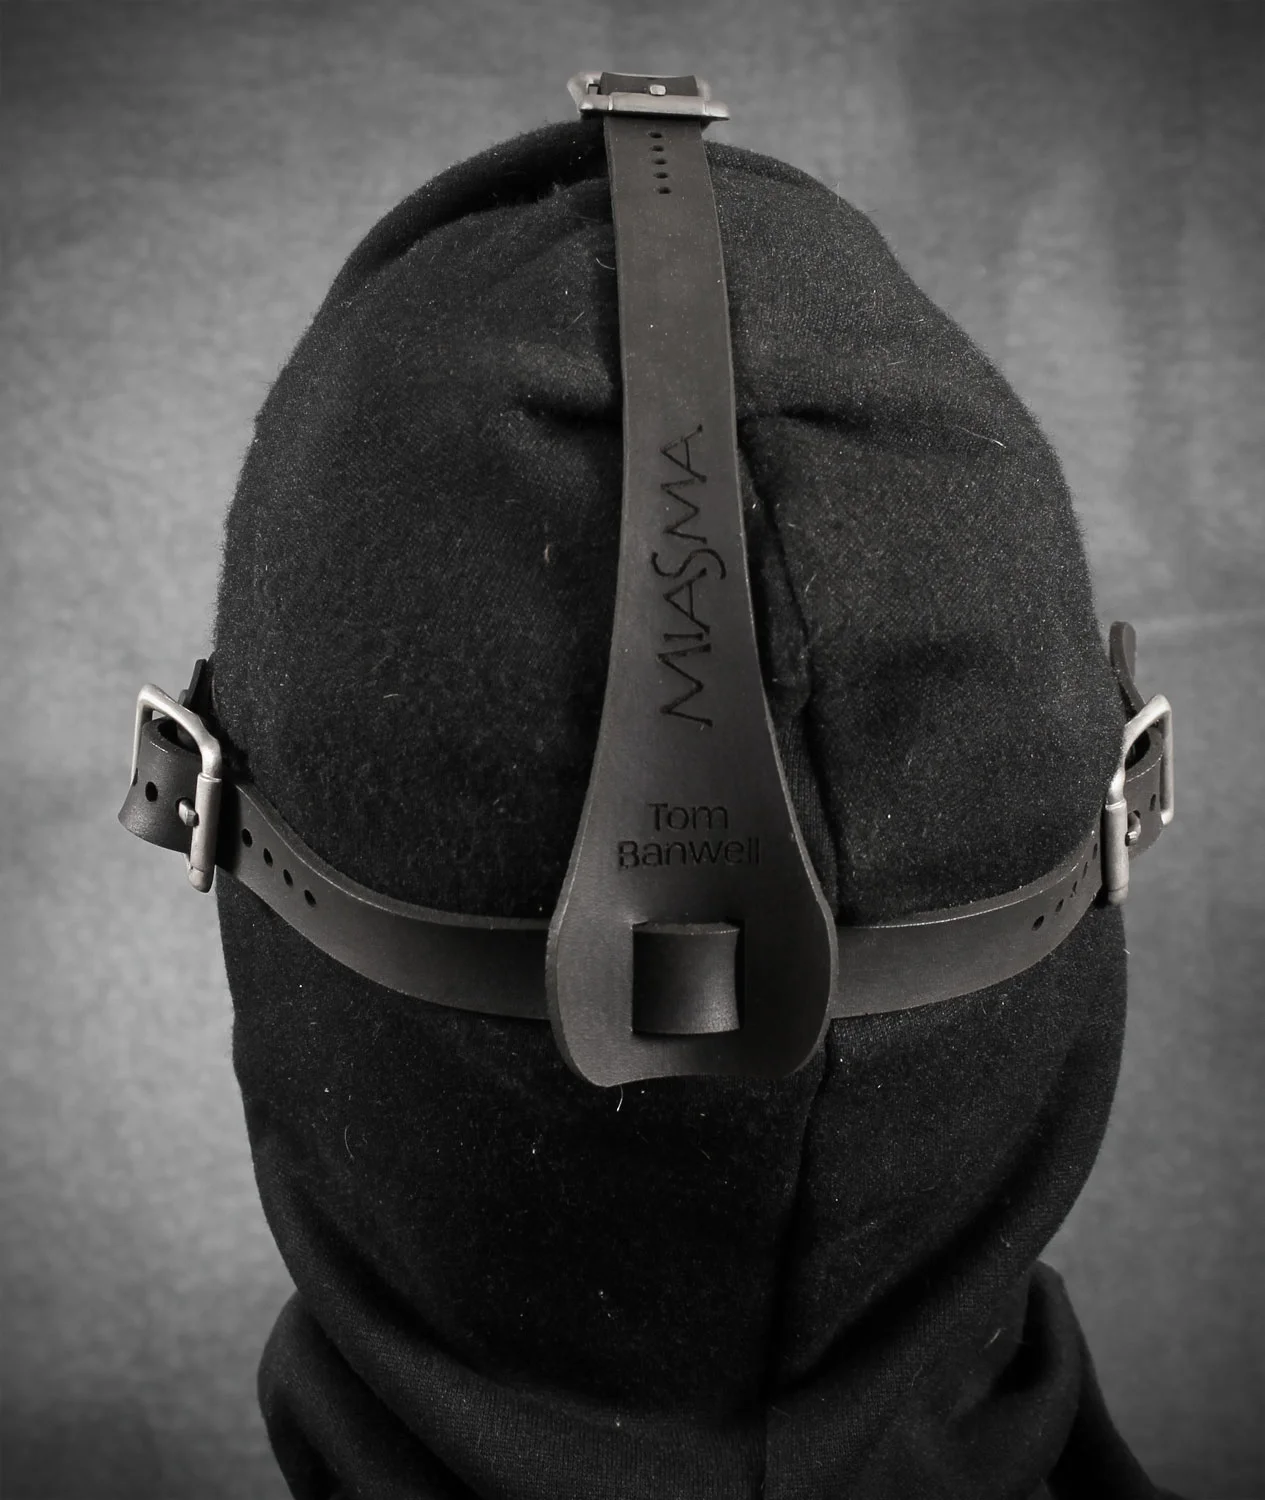
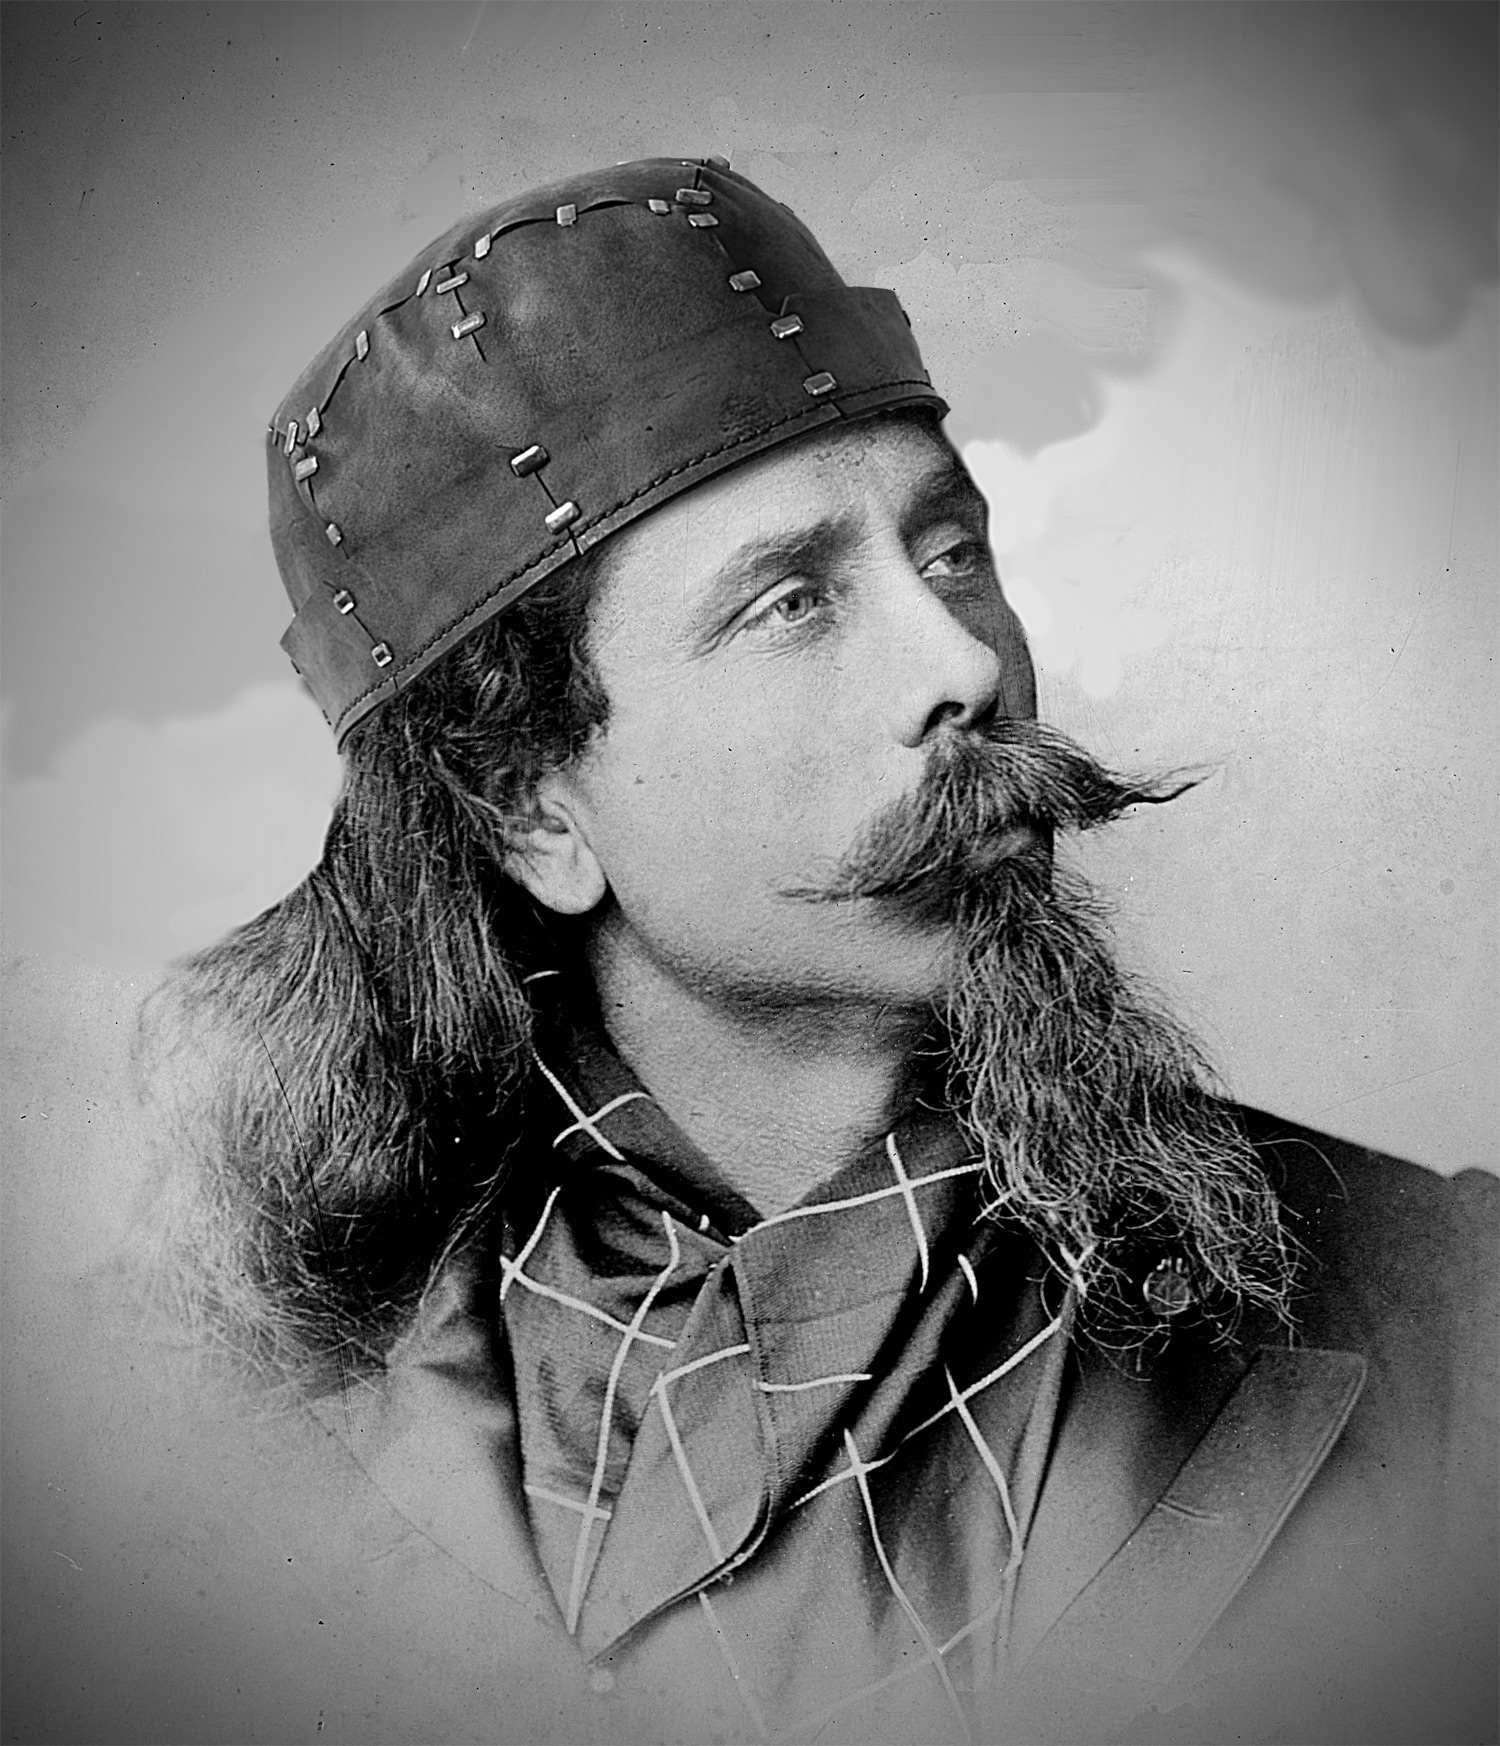
Banwell's pieces are perfectly suited for the modern man or woman on a time-travelling journey to a grim portrait of a plague-infested London as it looked at the turn of the century. The "Ichabod," a plague doctor's mask, features a custom cold cast aluminum crane's beak and laser-cut metal eyepieces with shaded lenses. The wearer's face and neck are covered in premium leather hand-stitched together with waxed thread, of course.

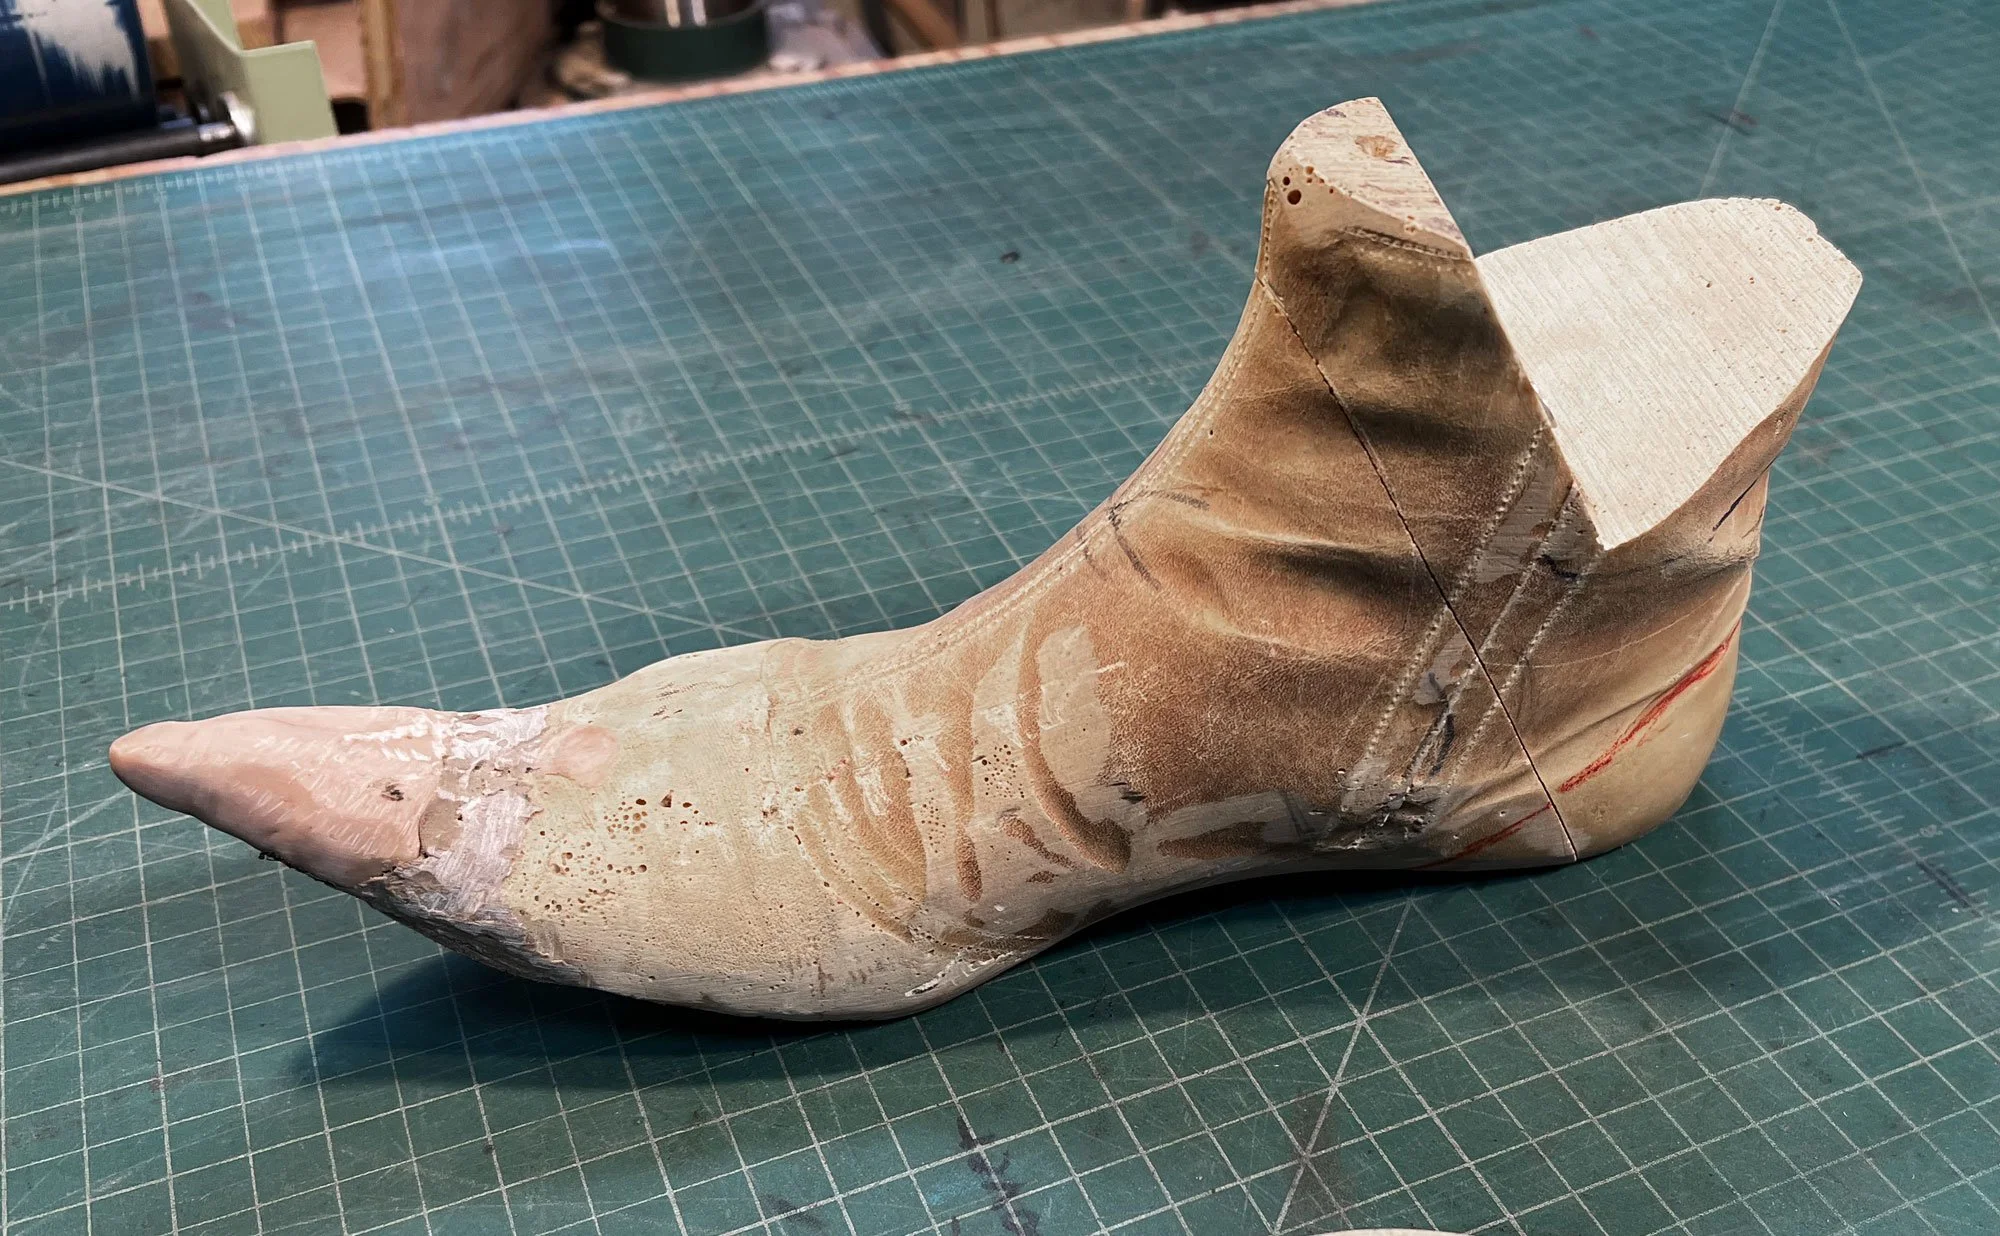
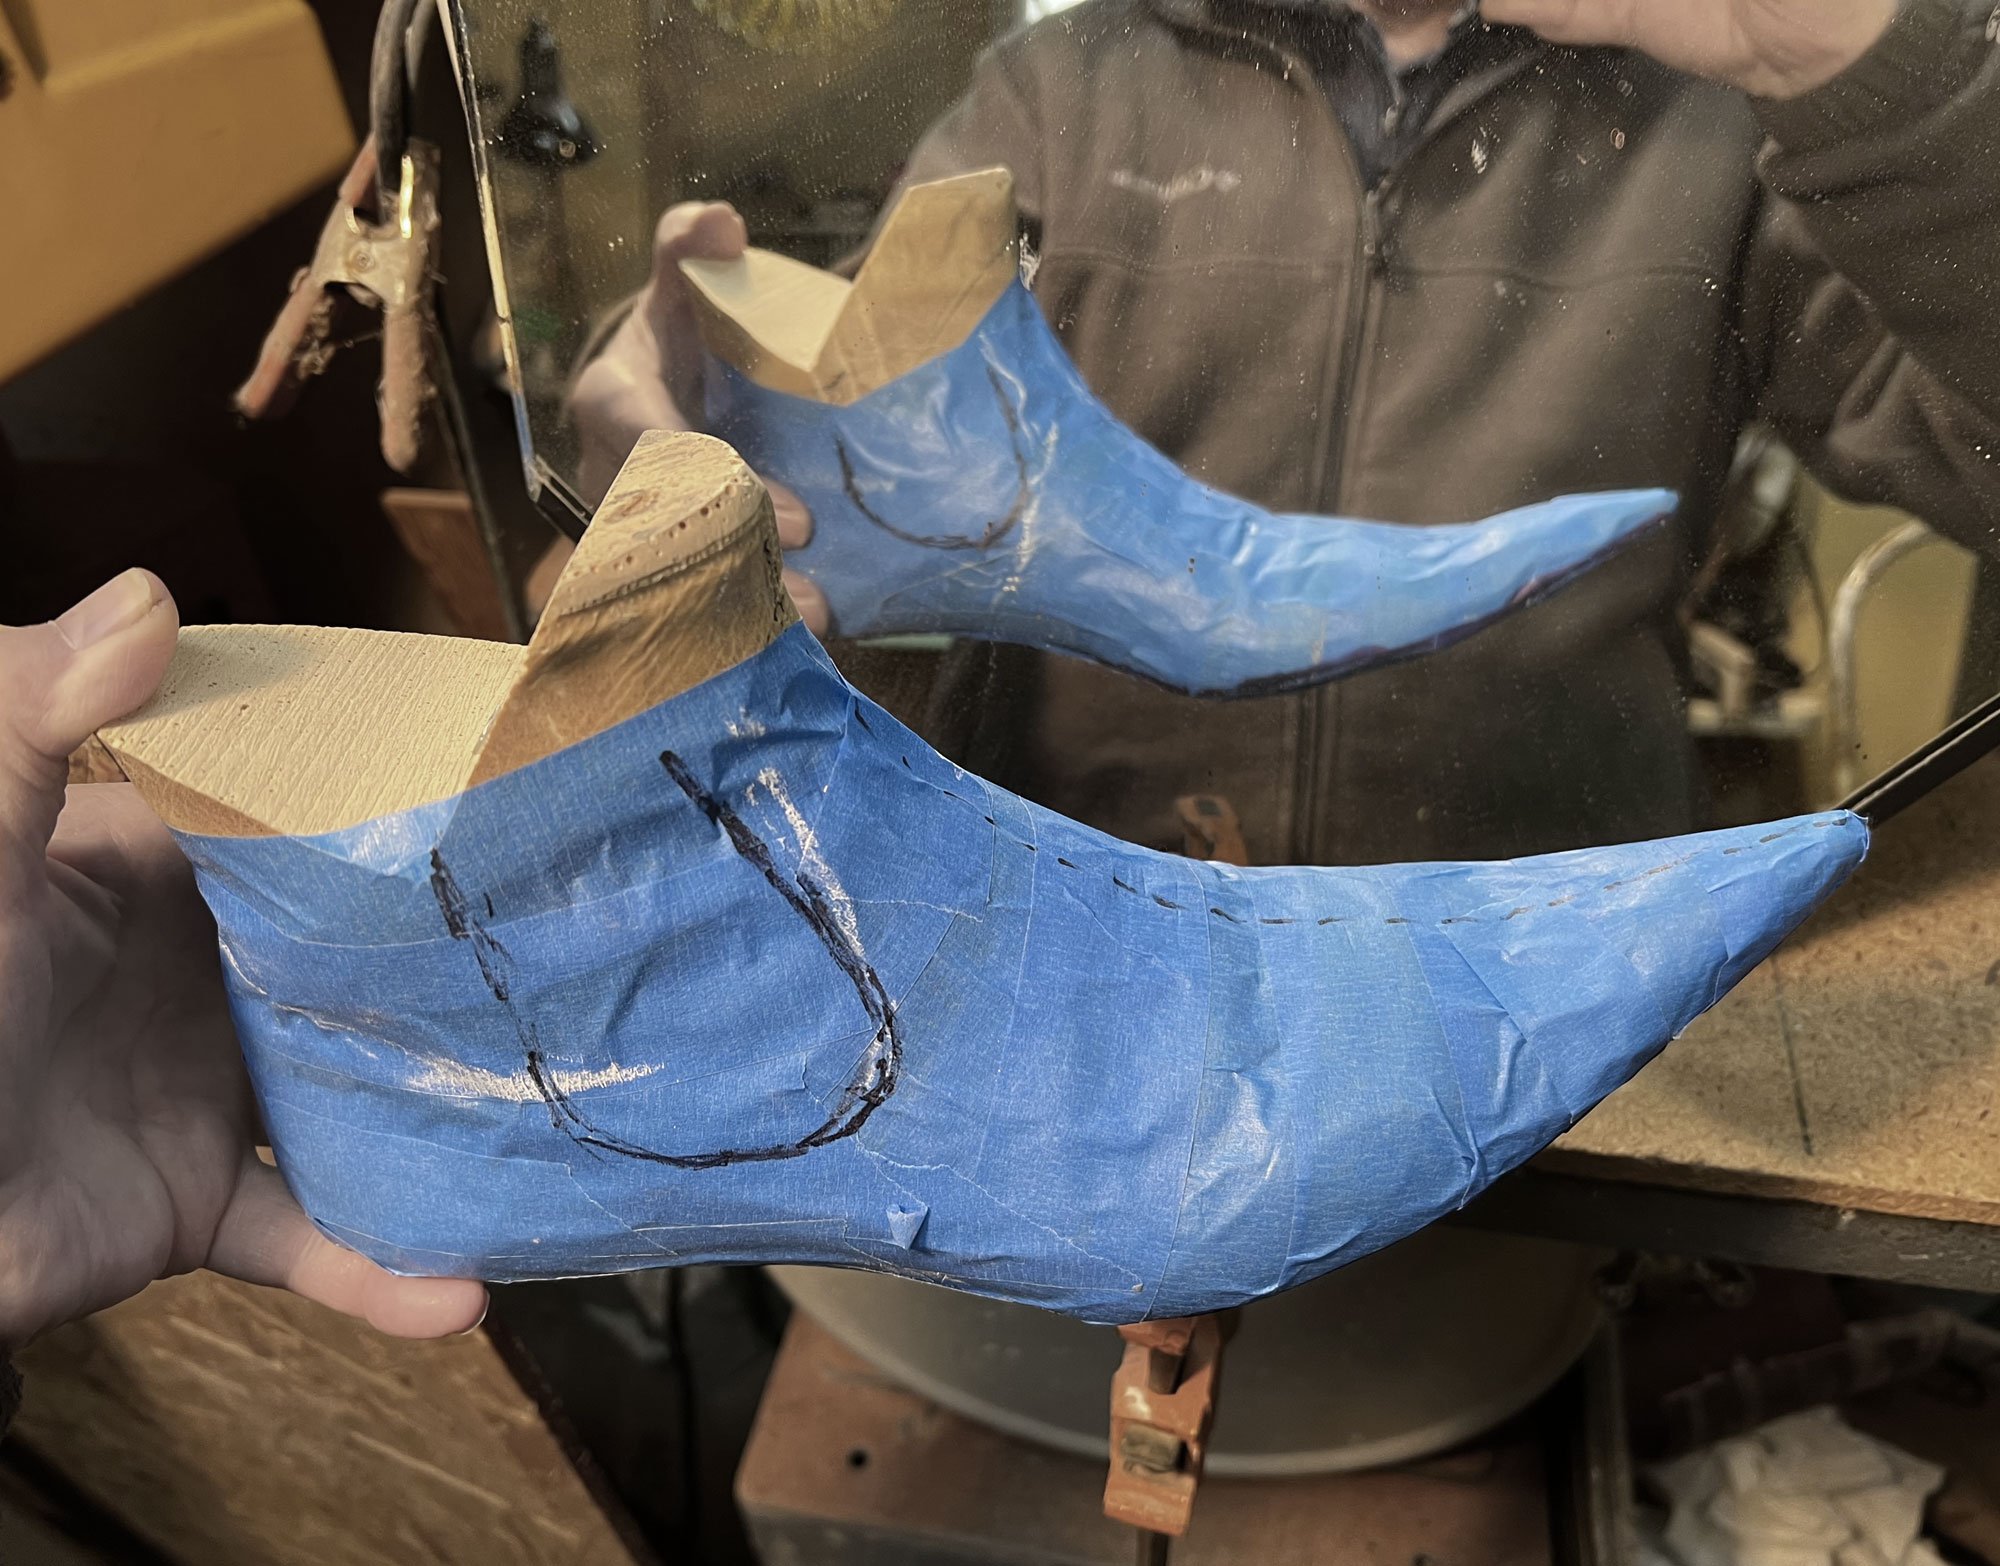
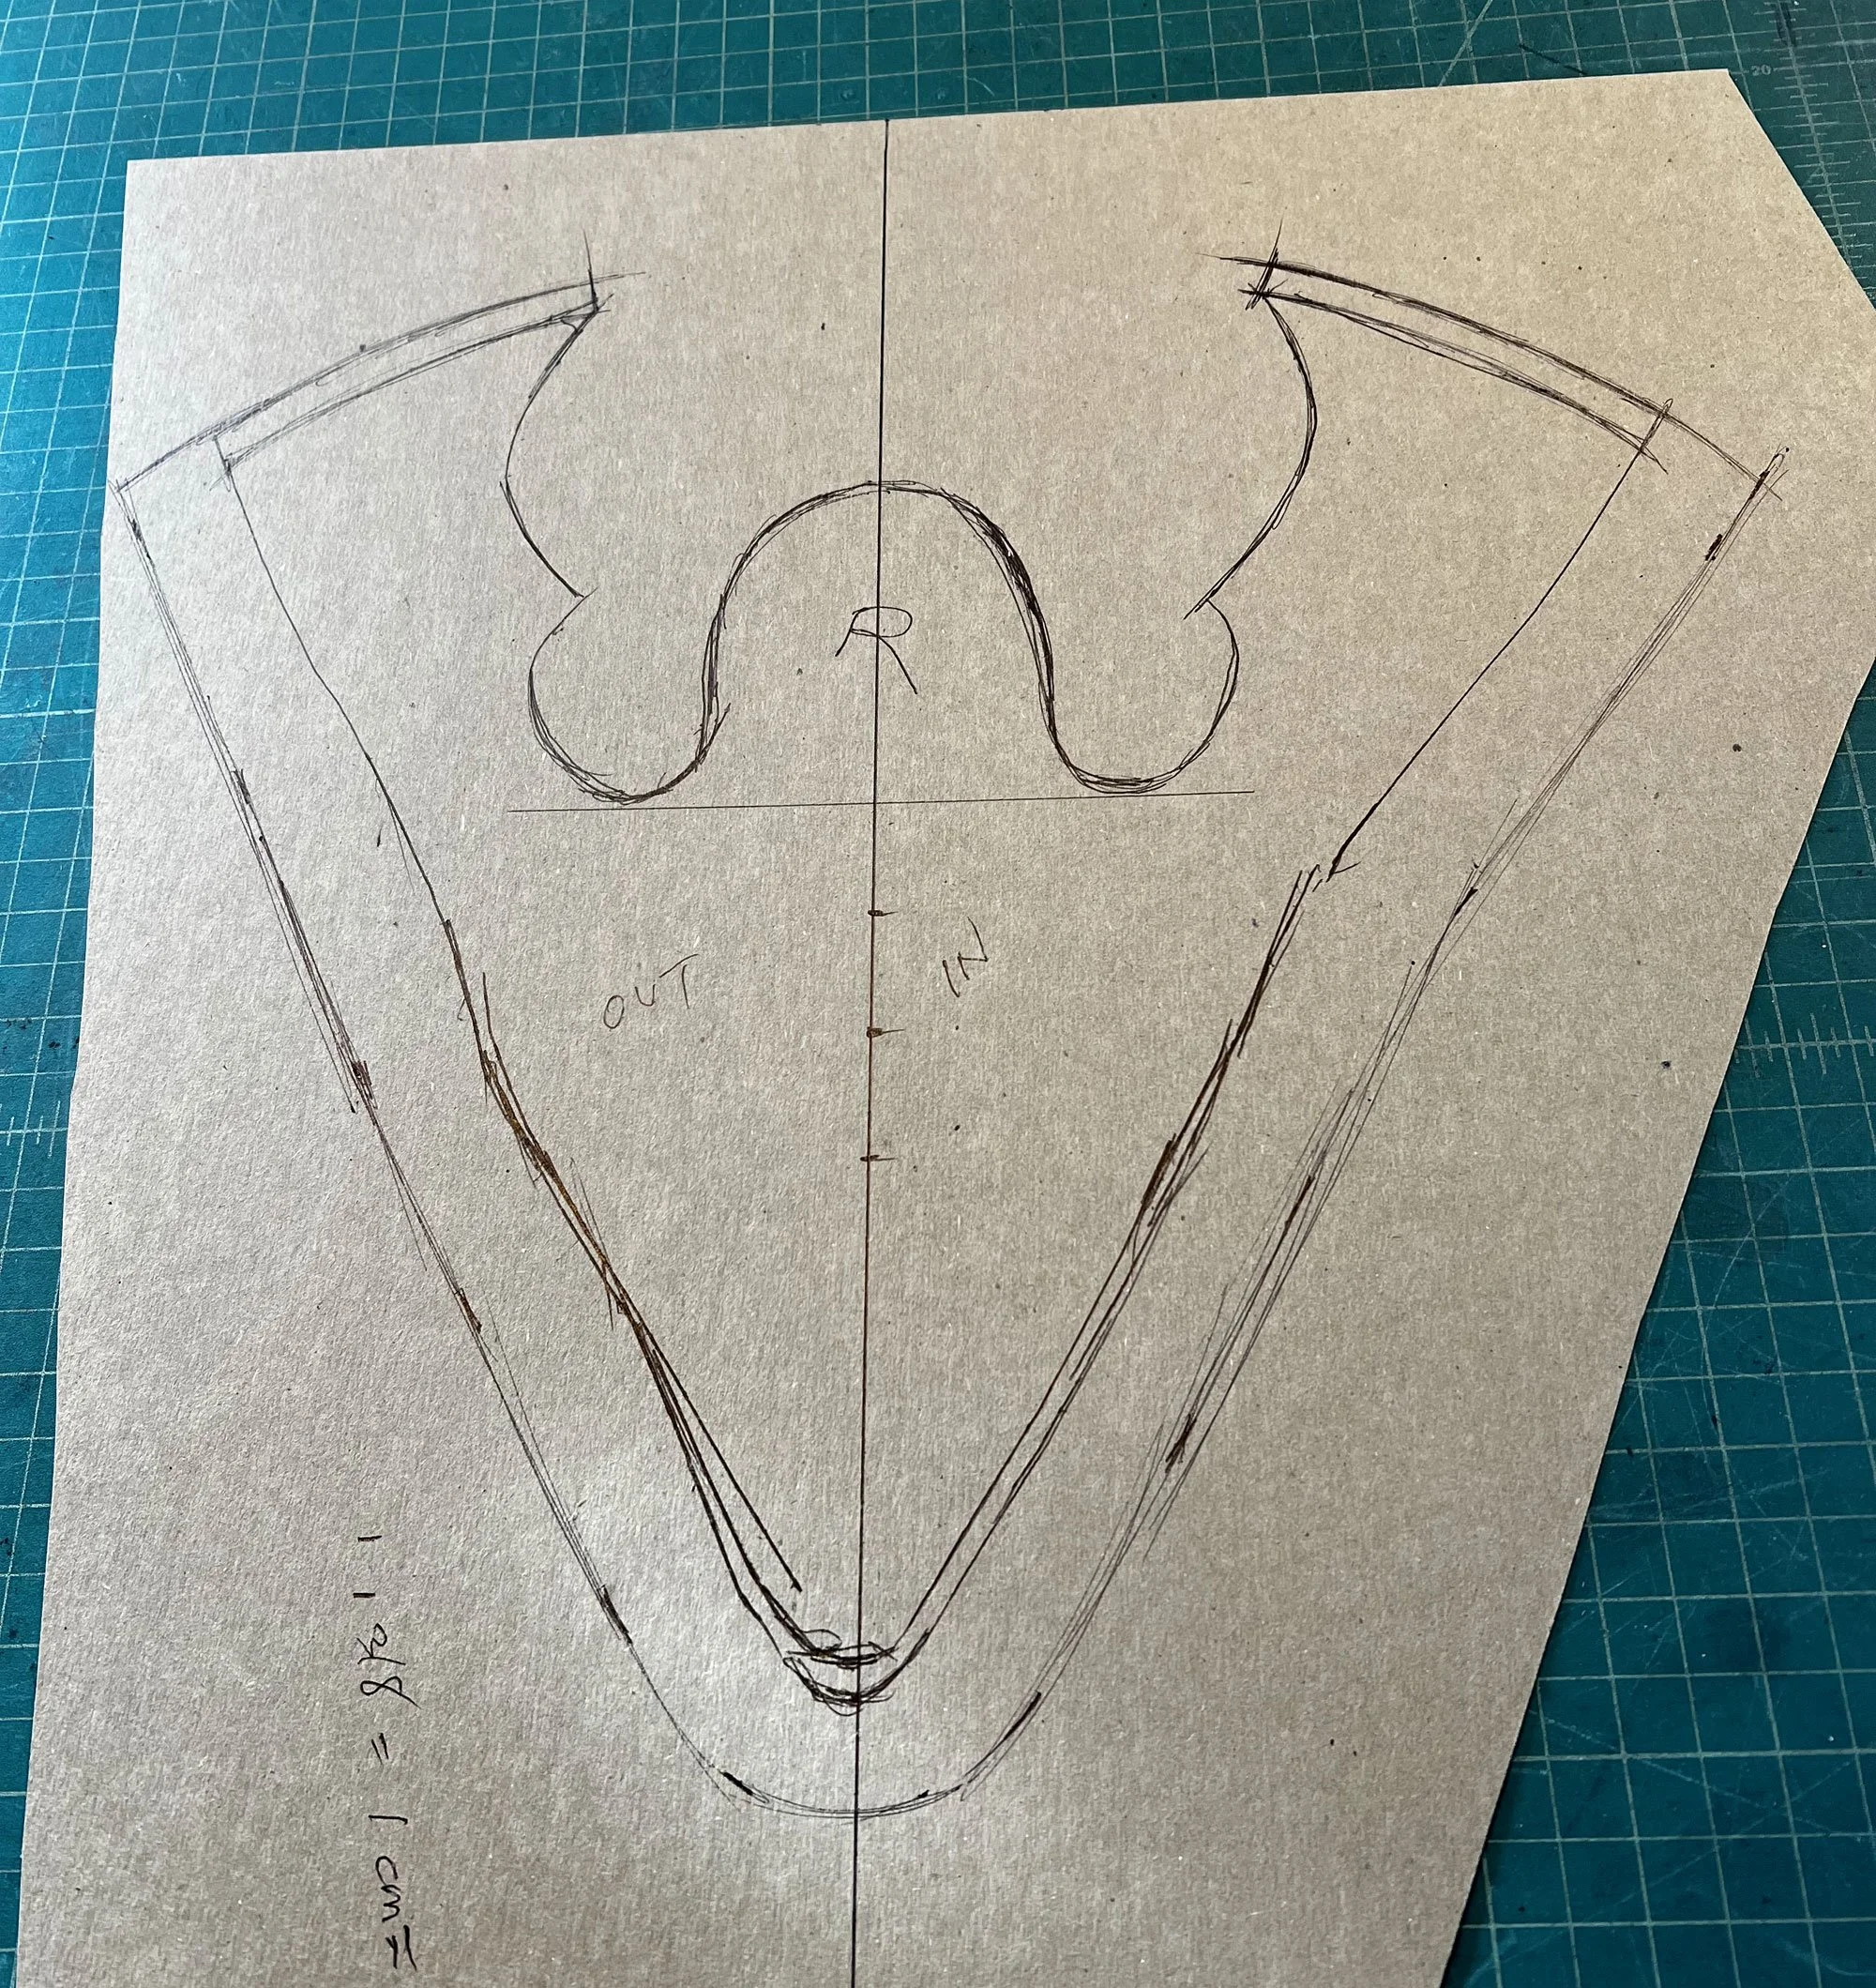
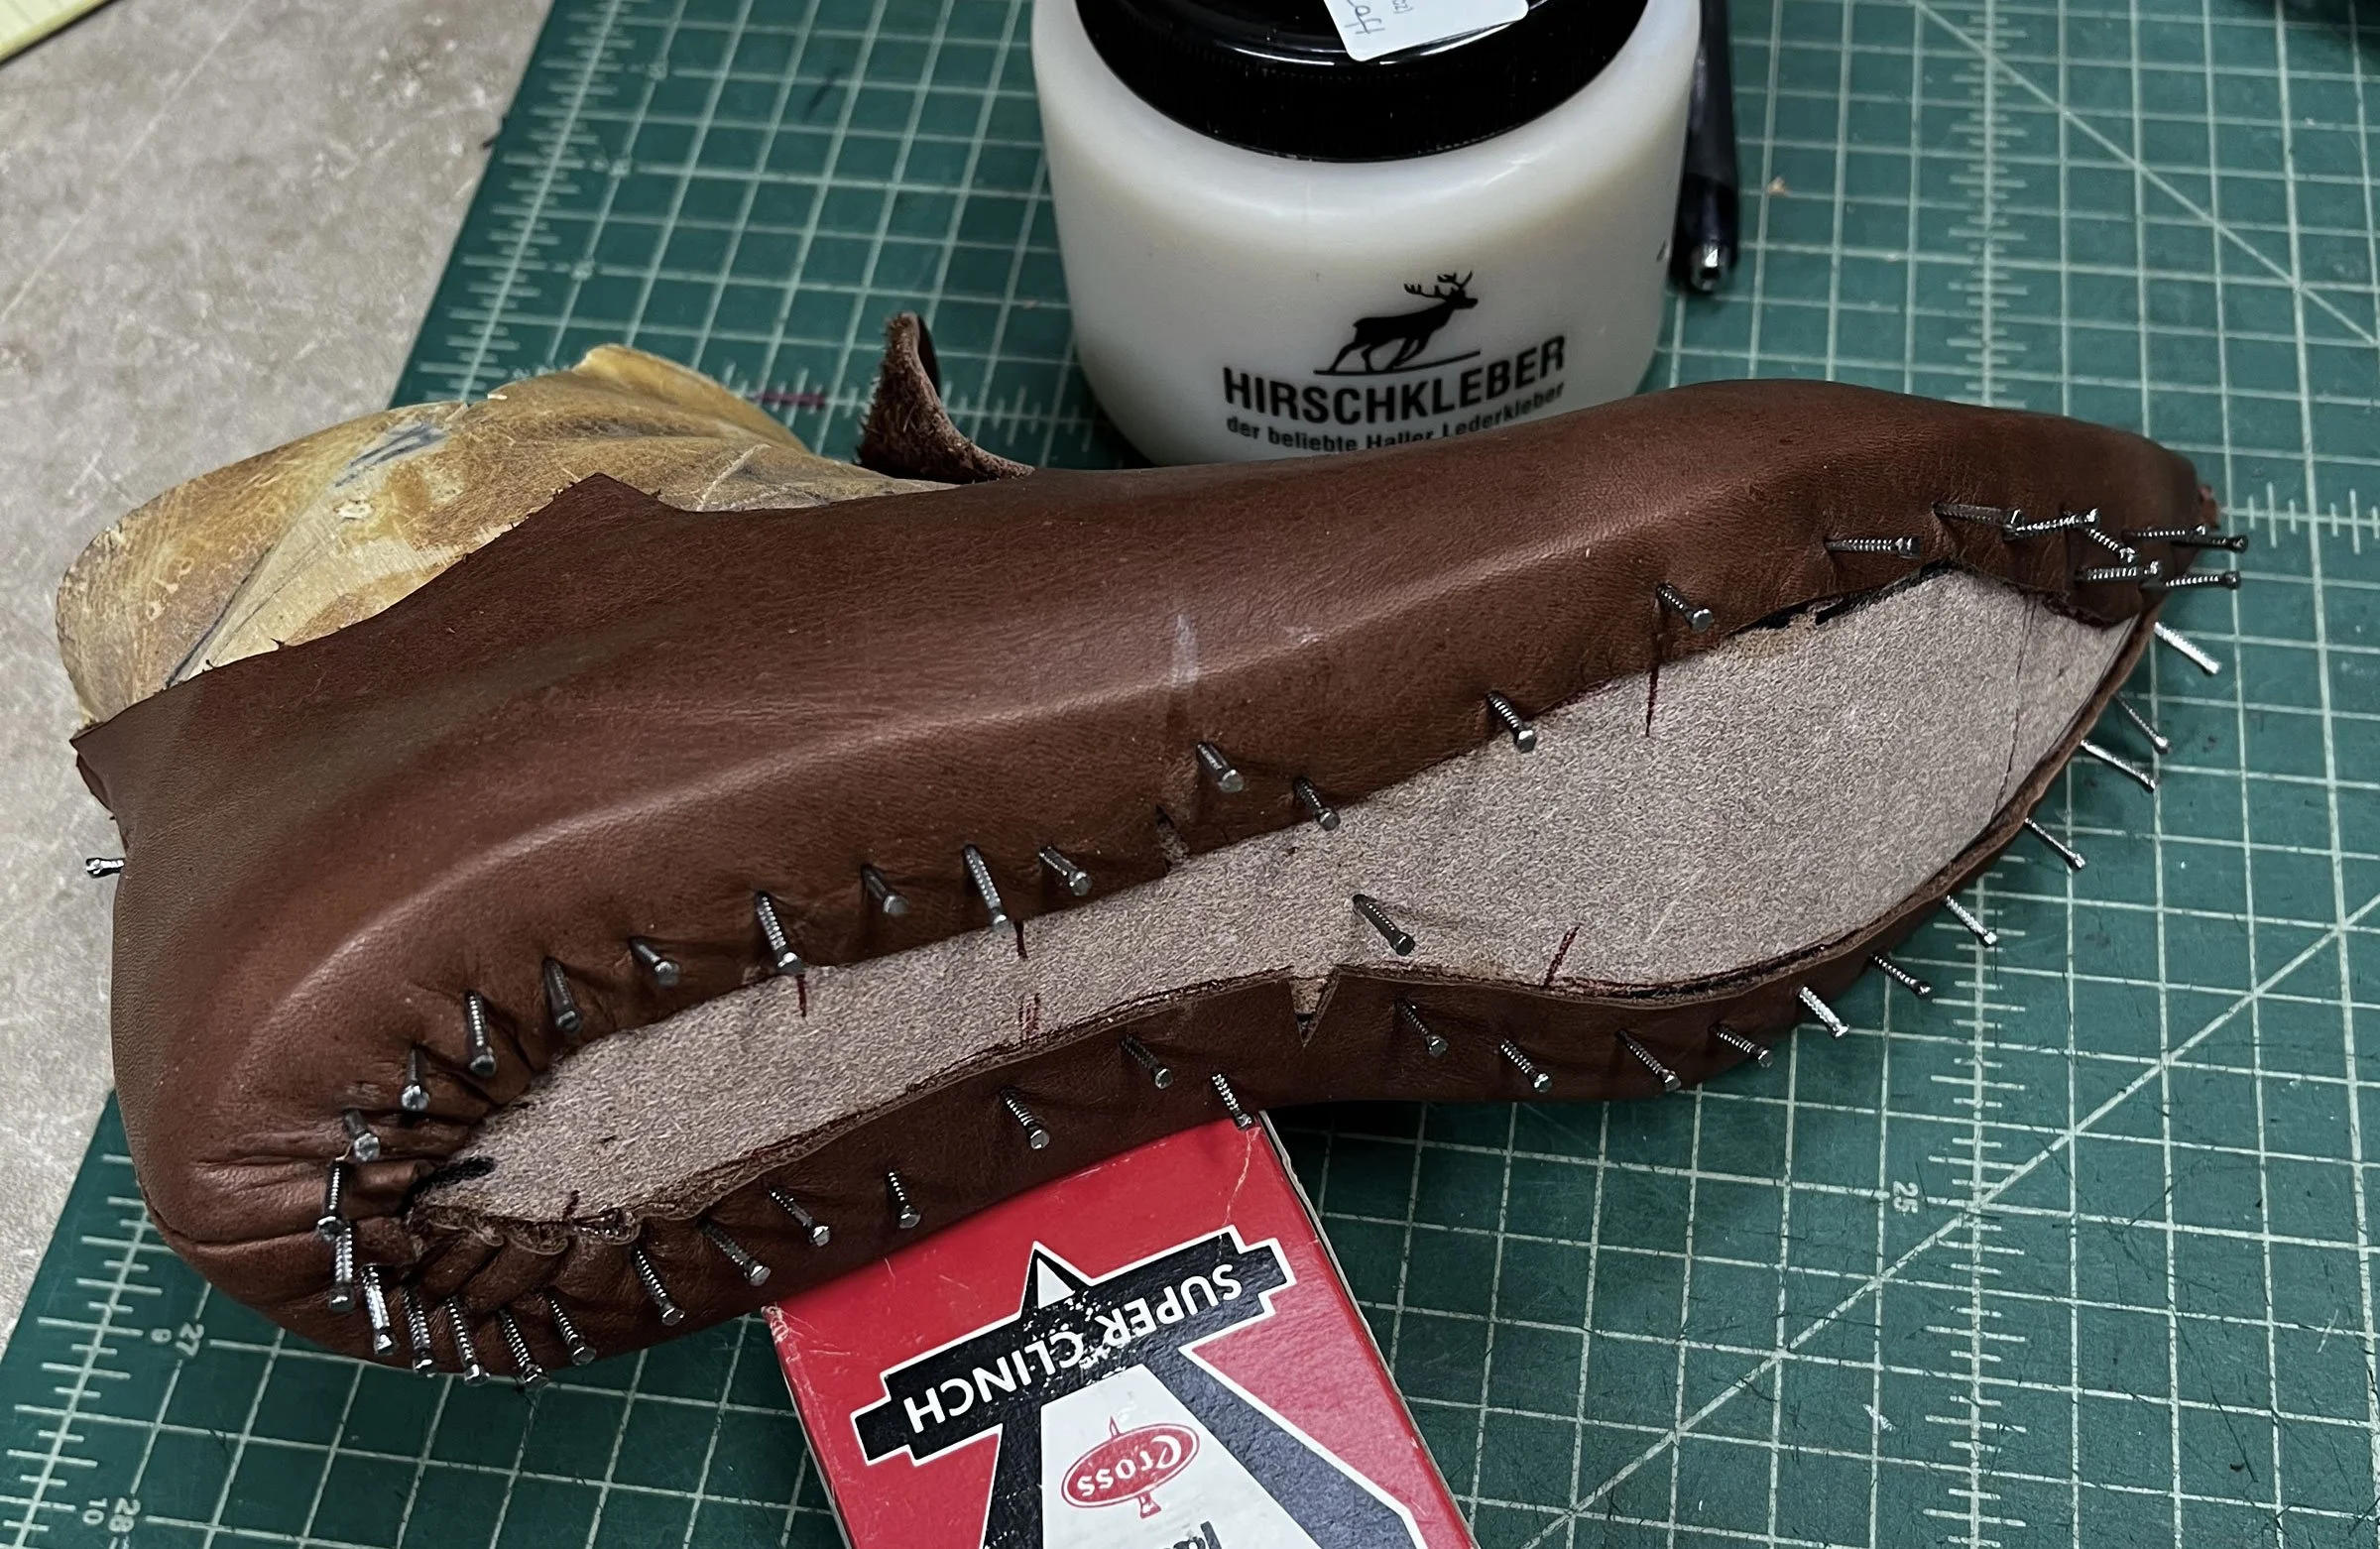
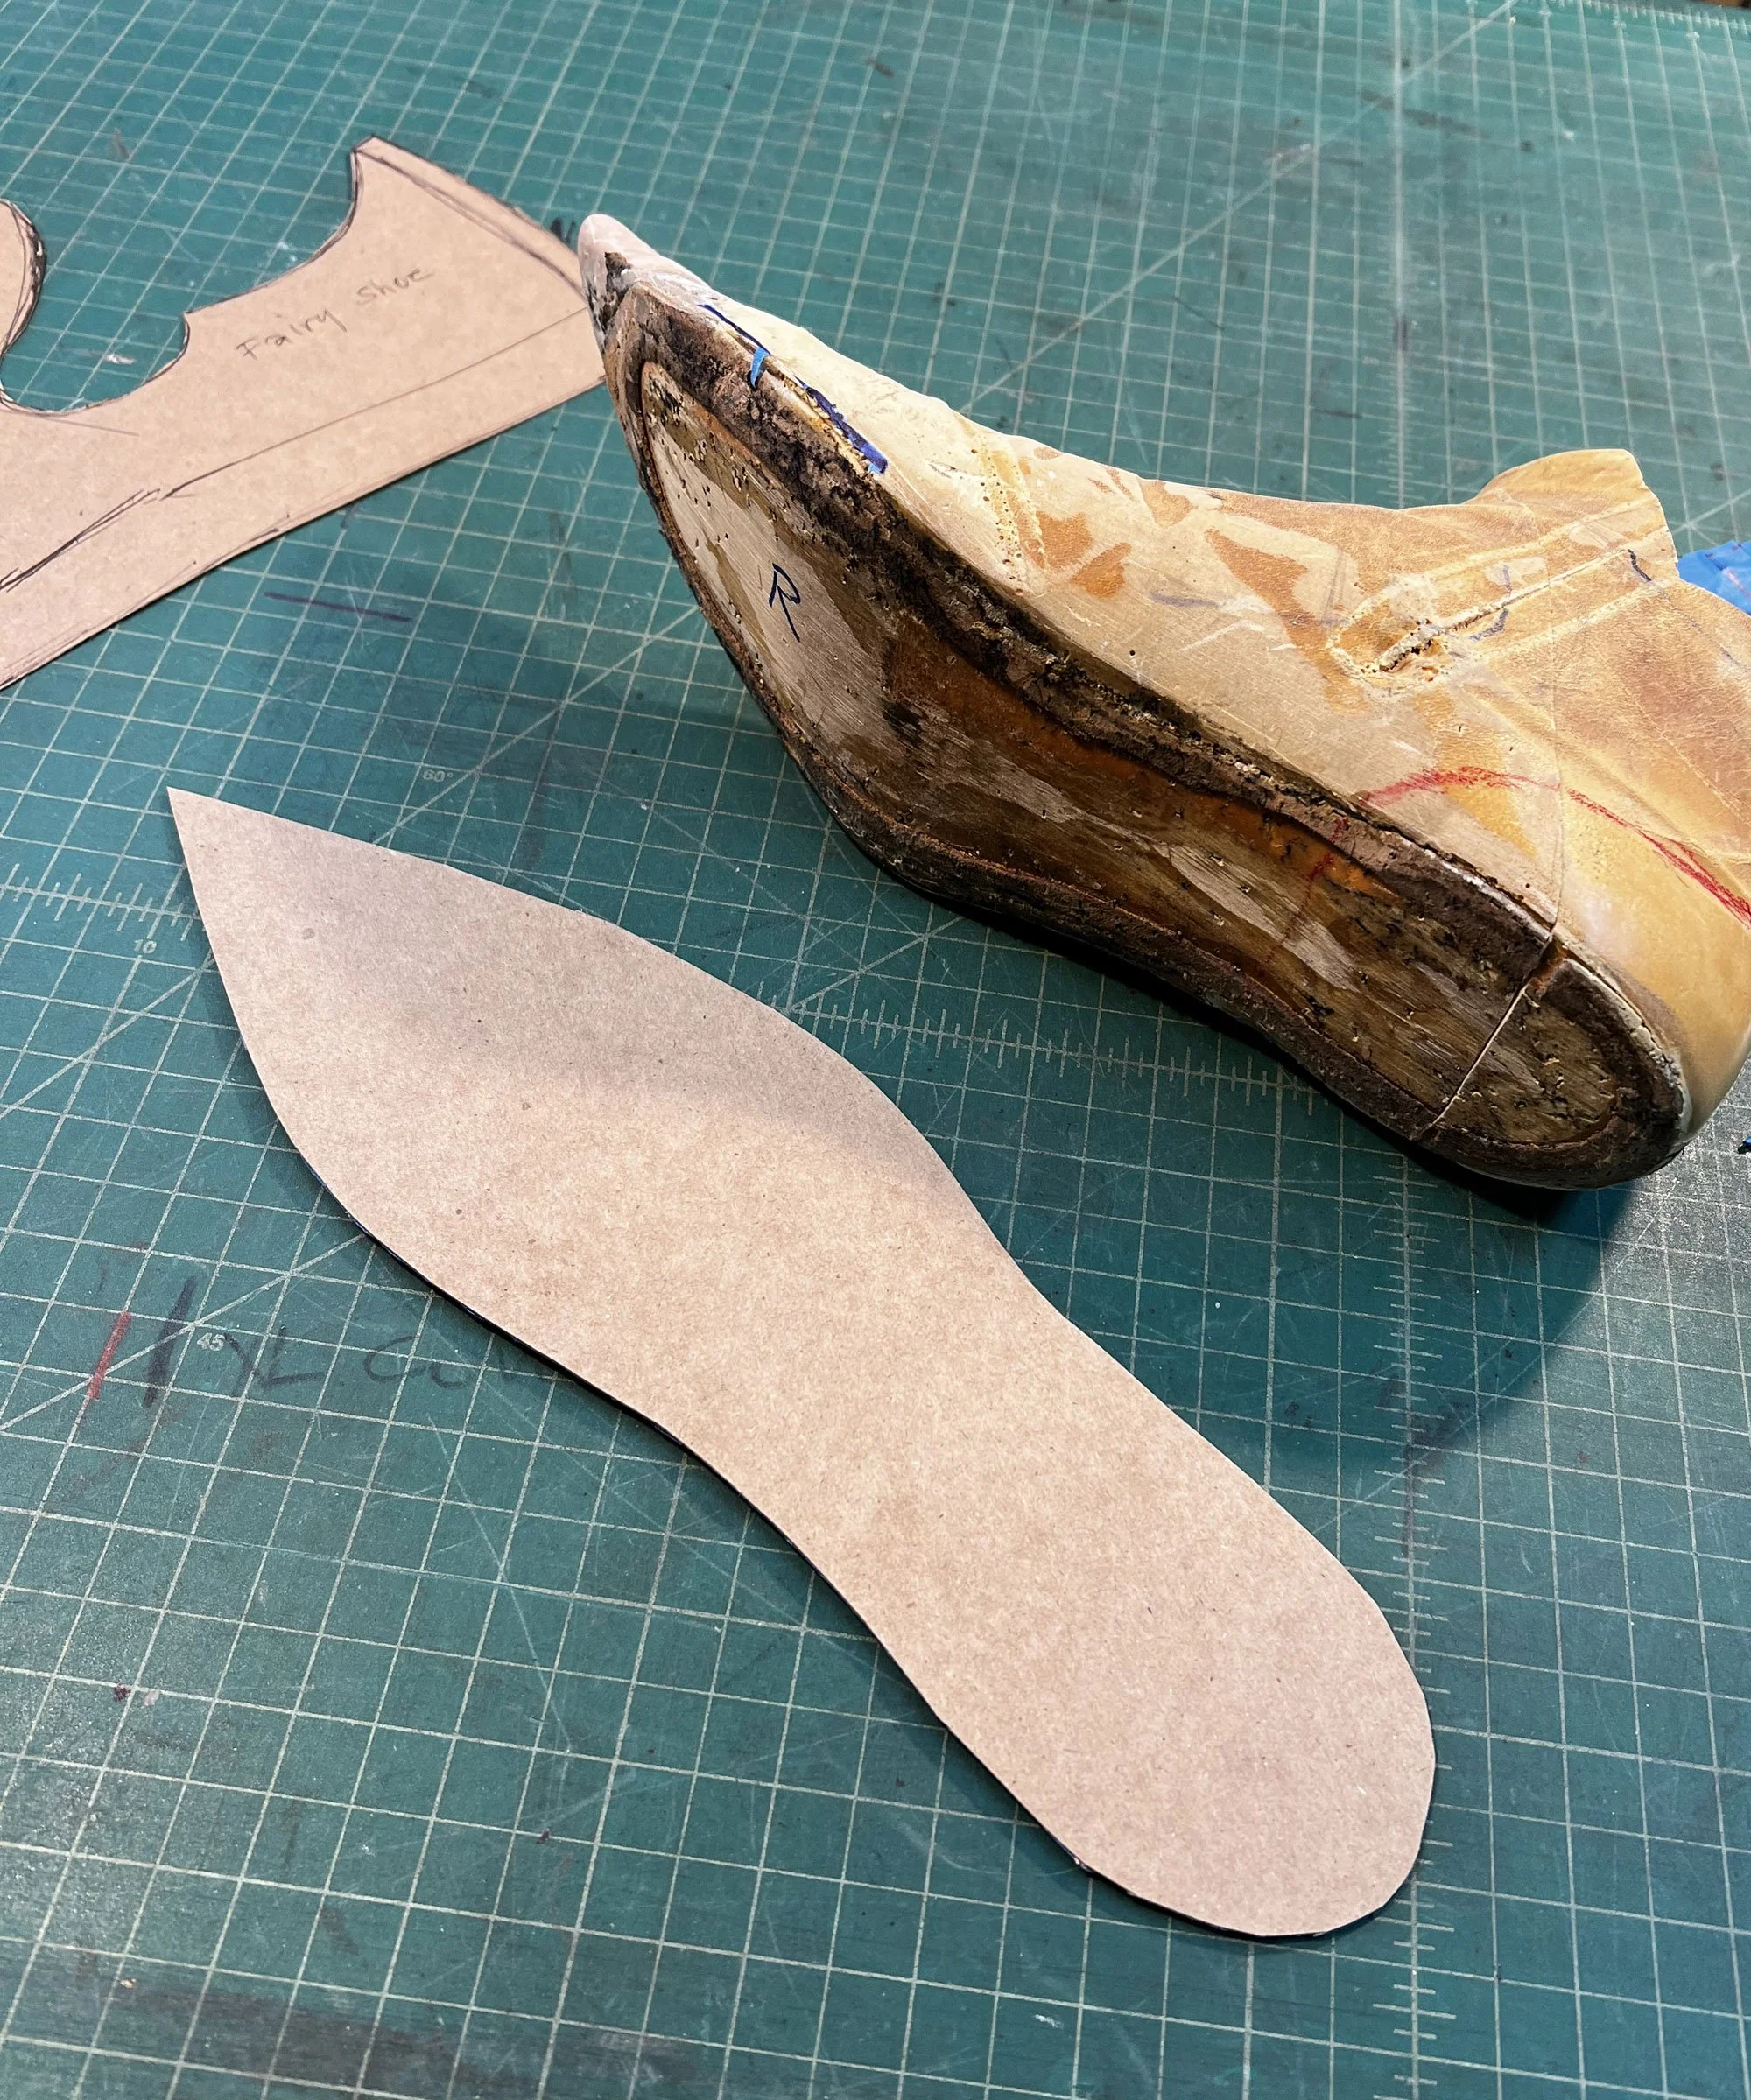
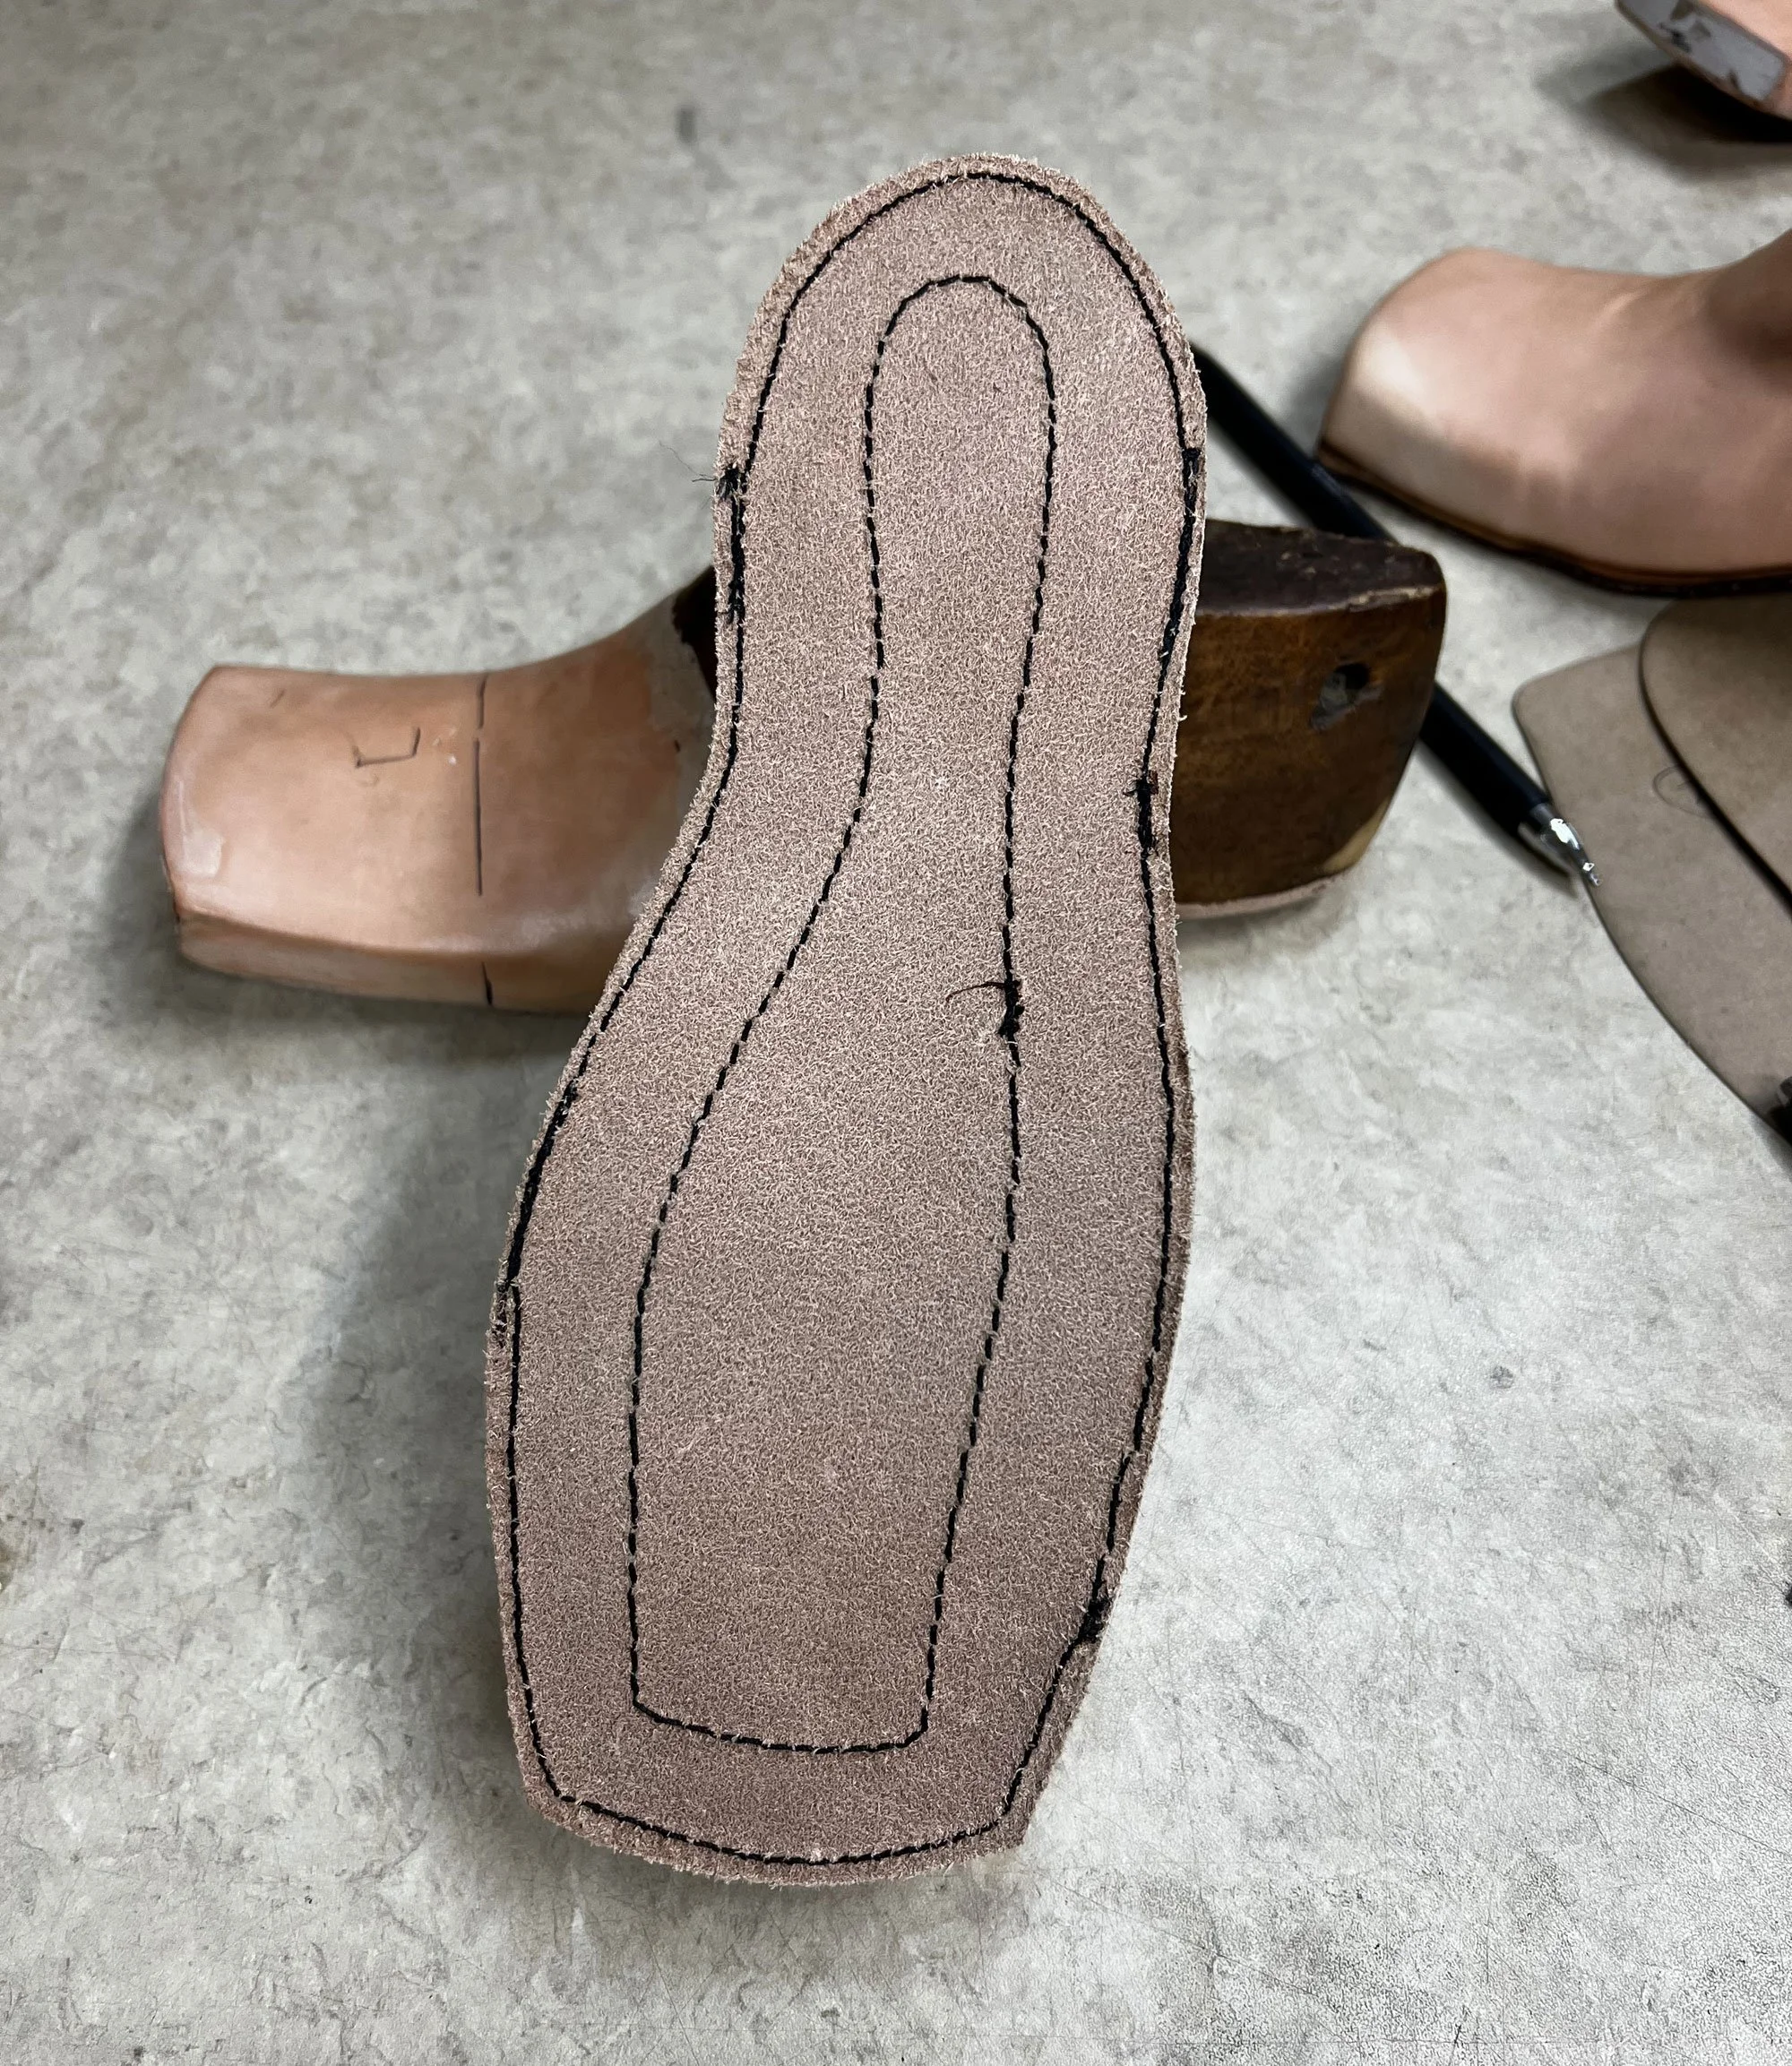
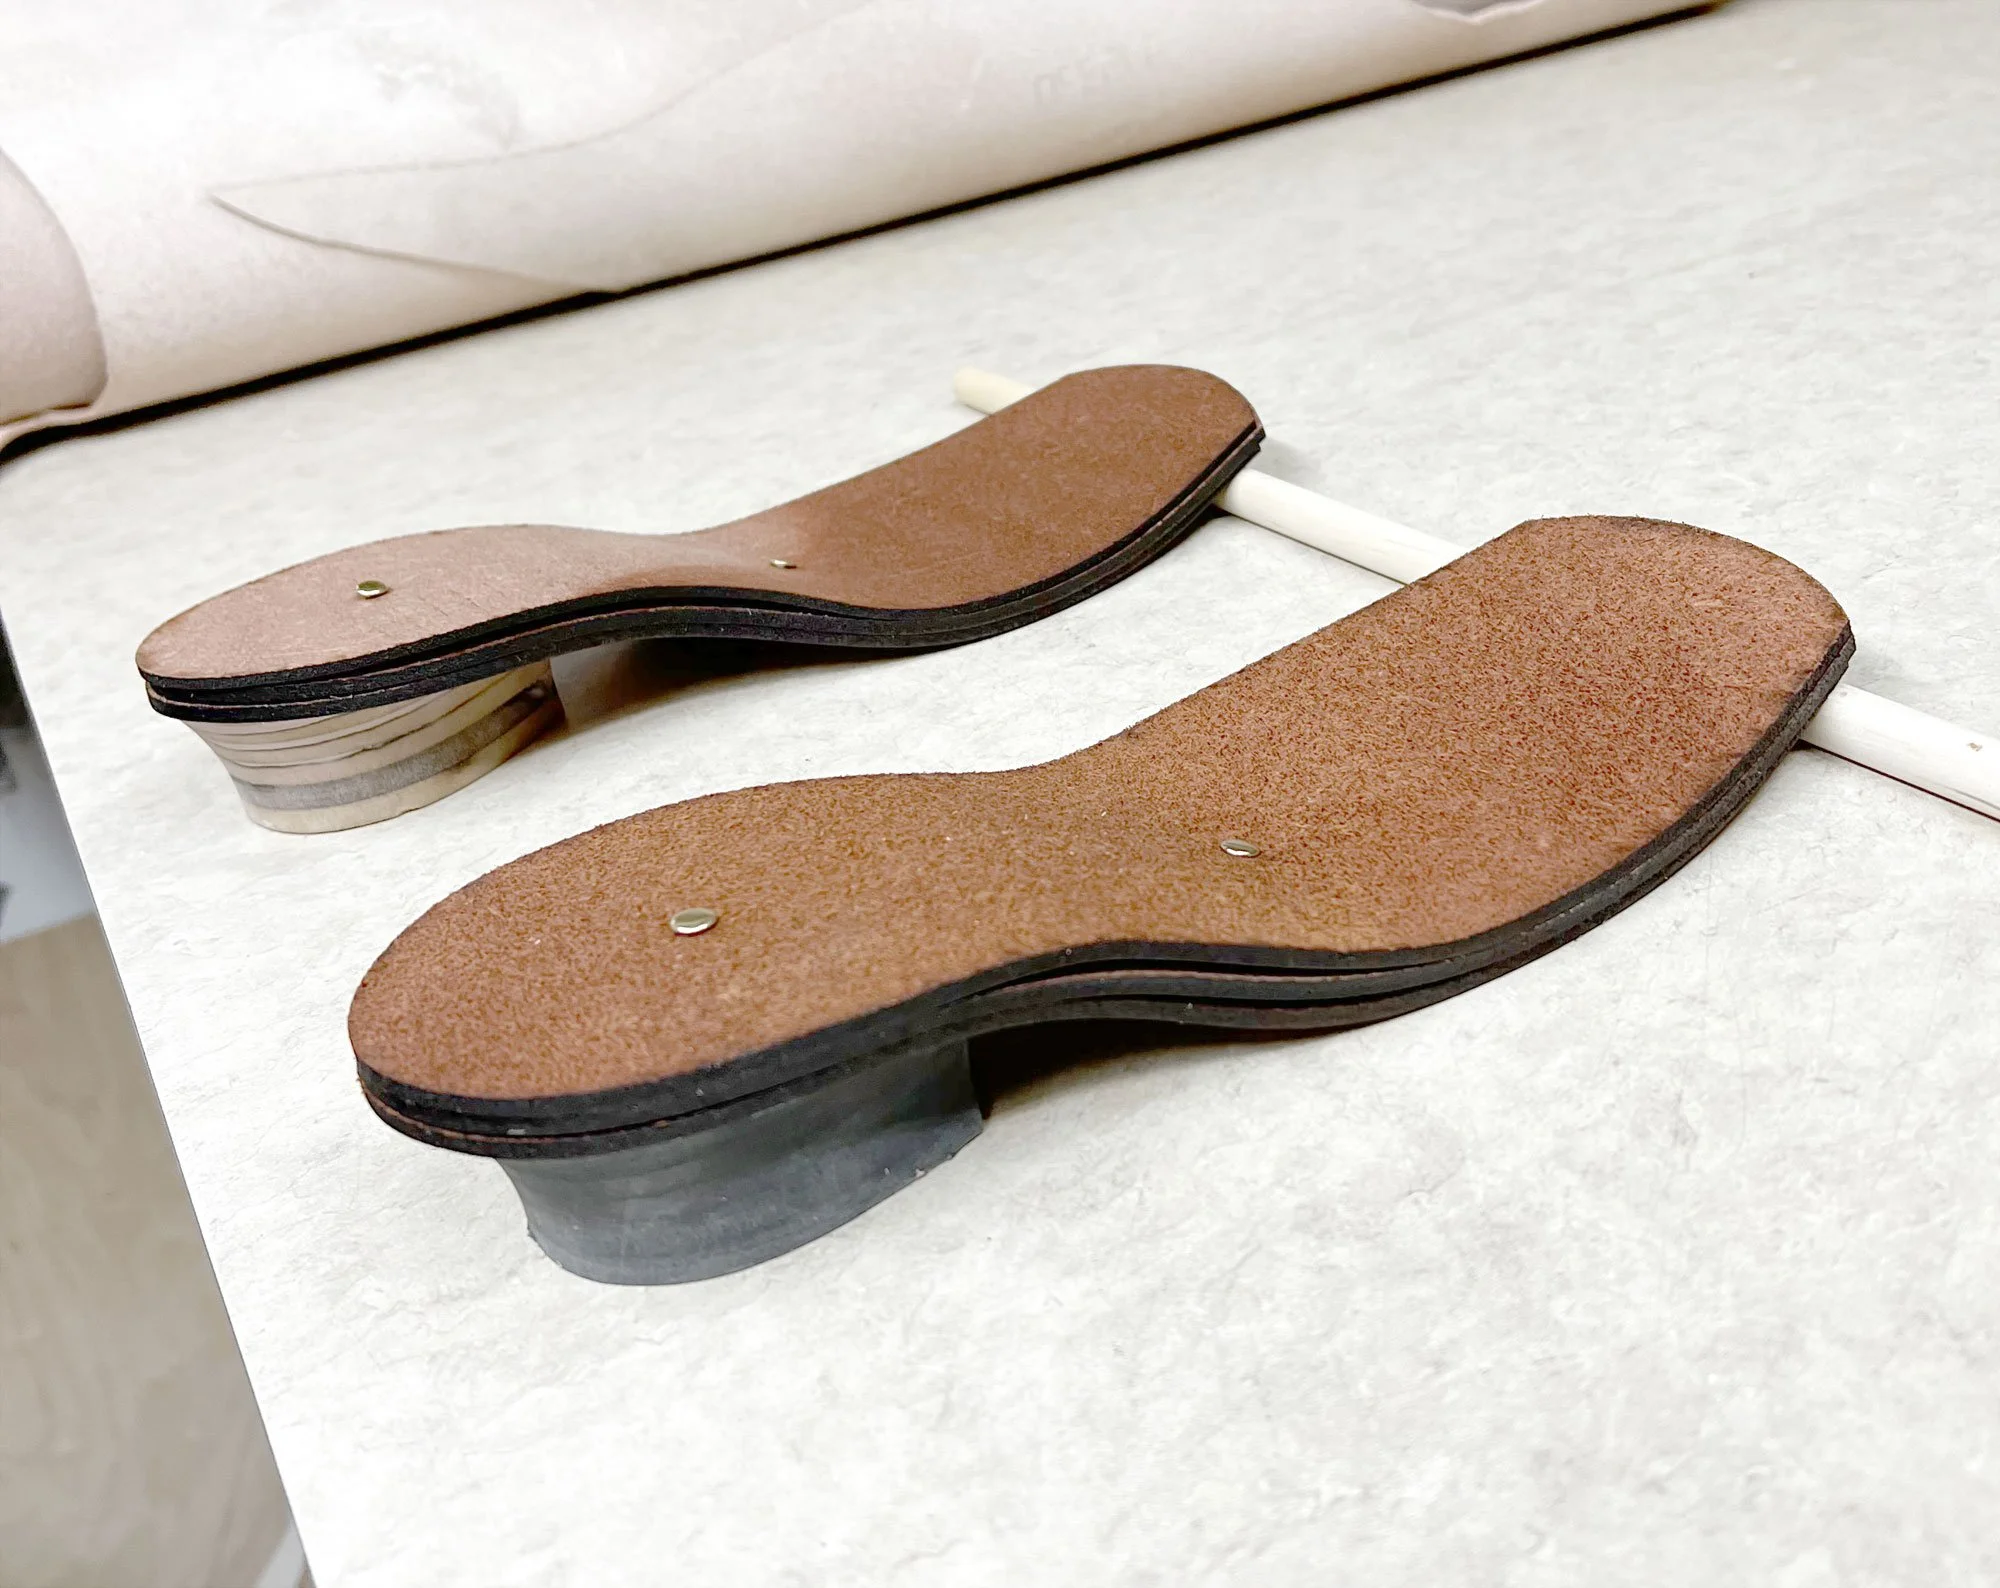
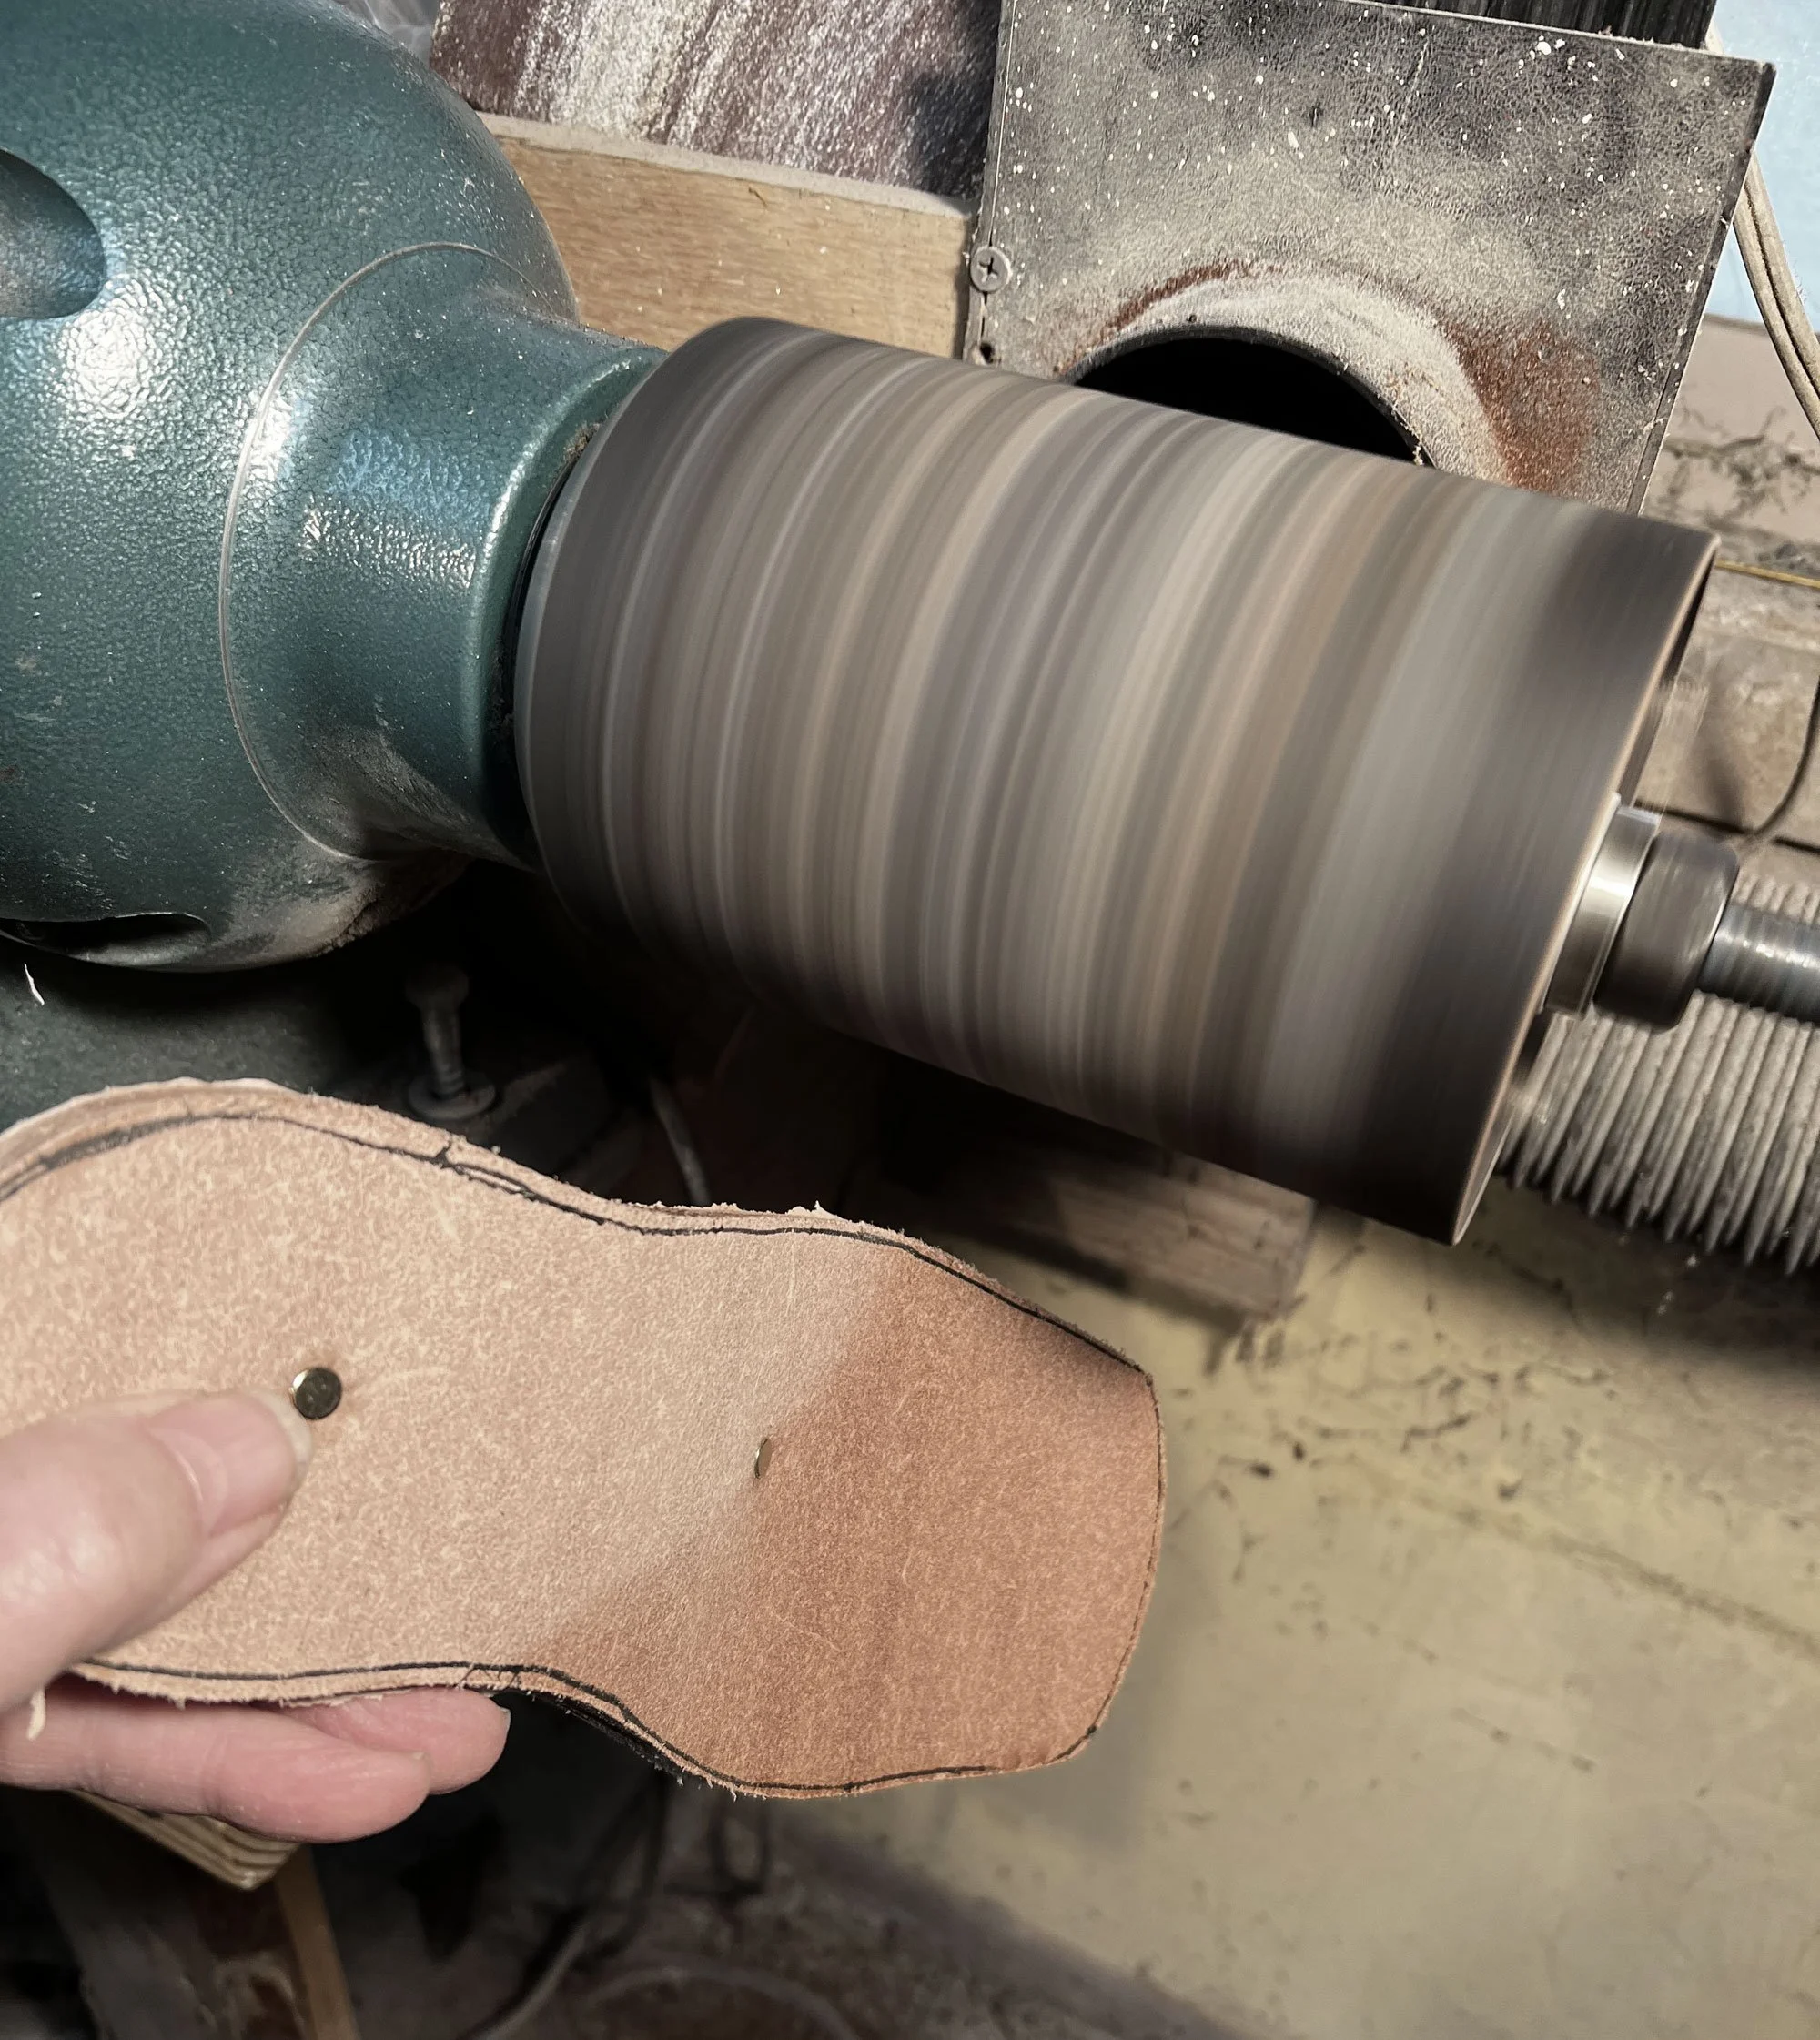
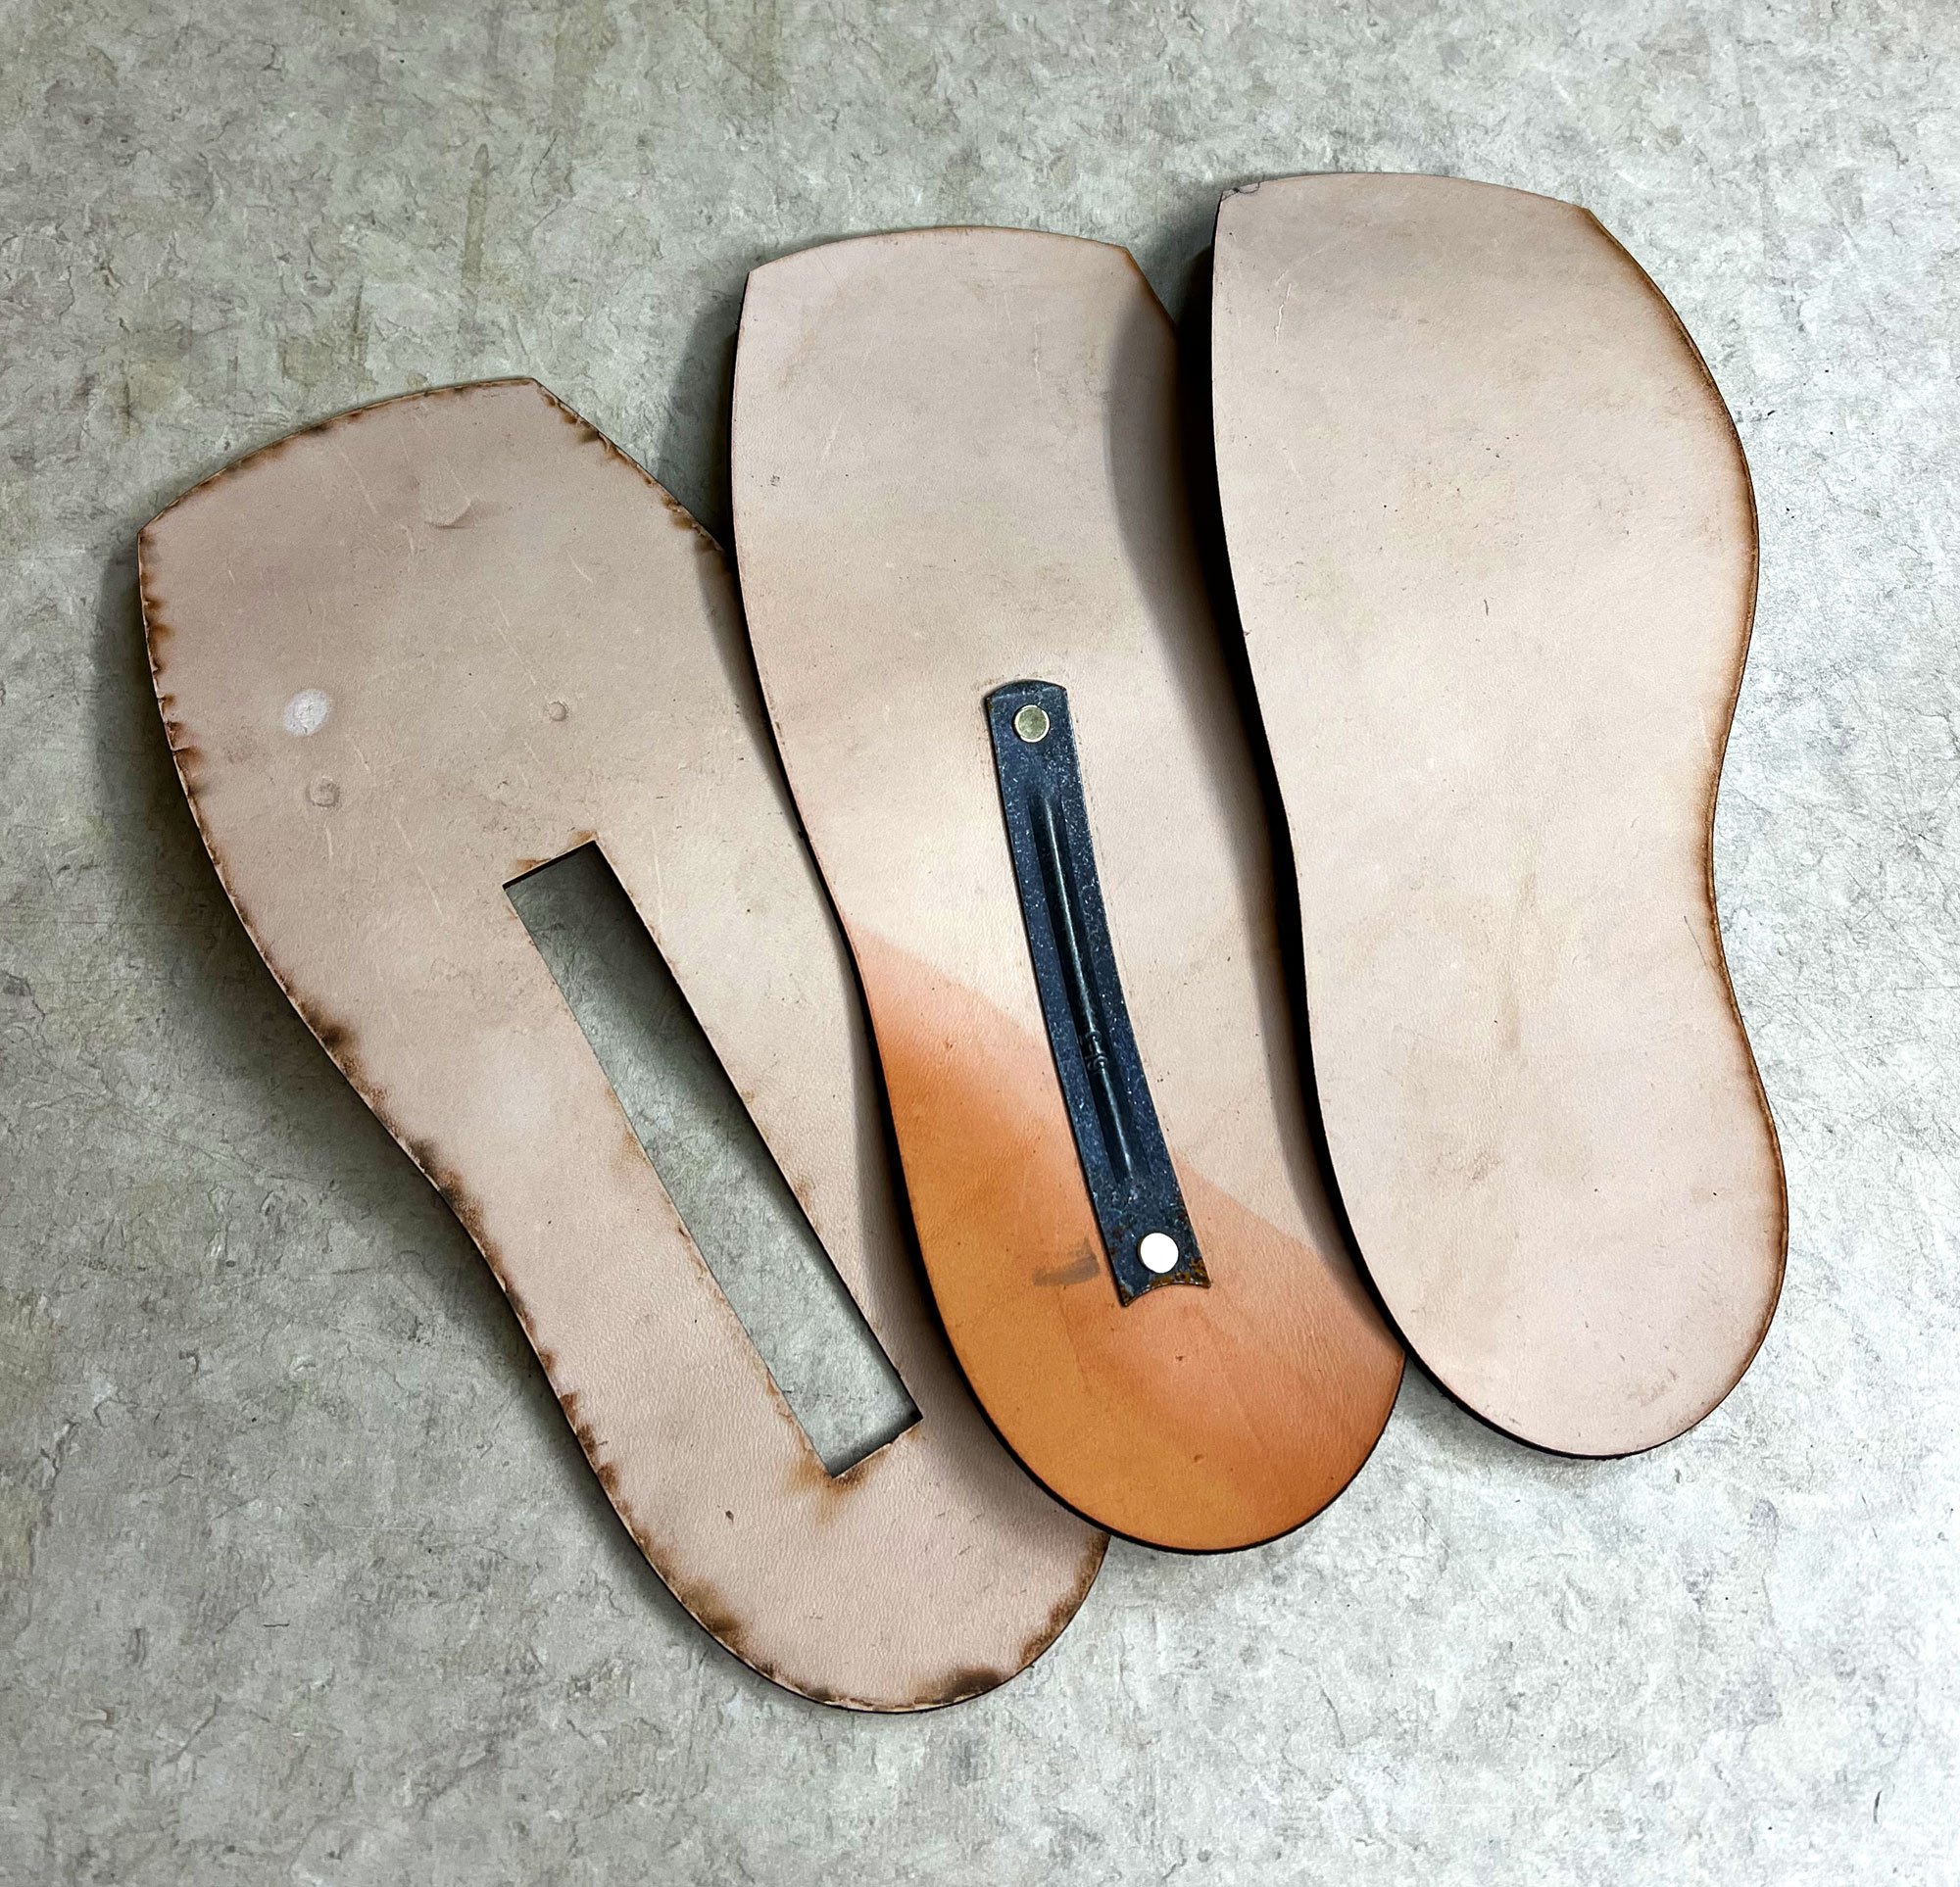
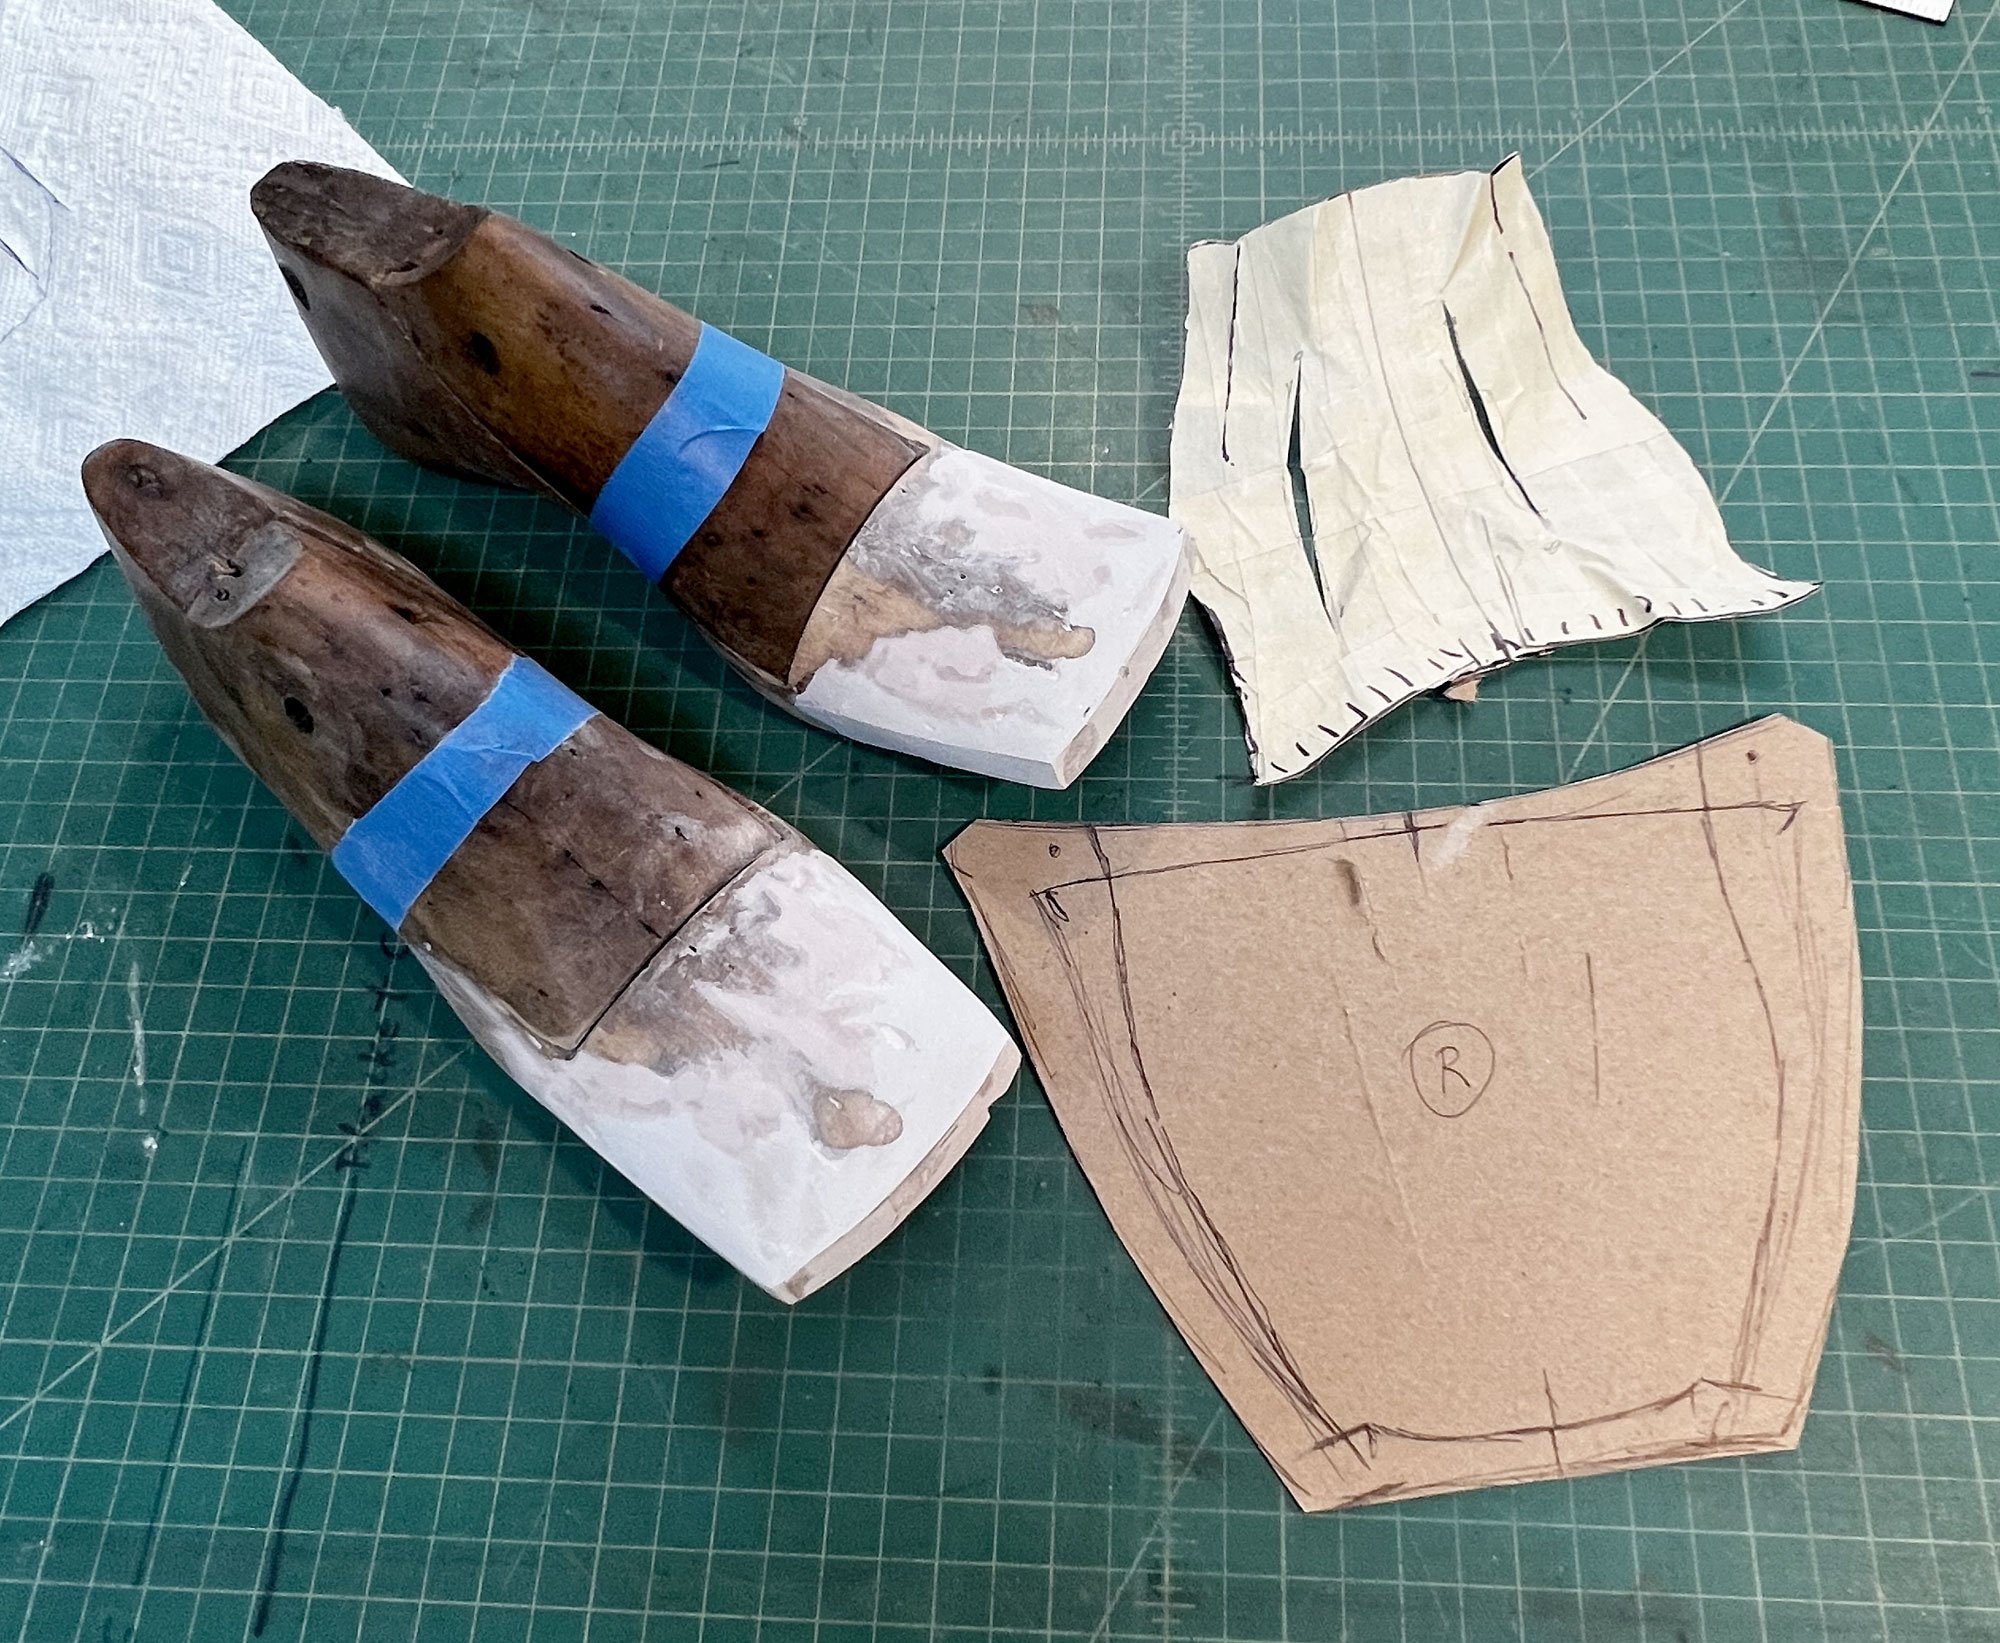
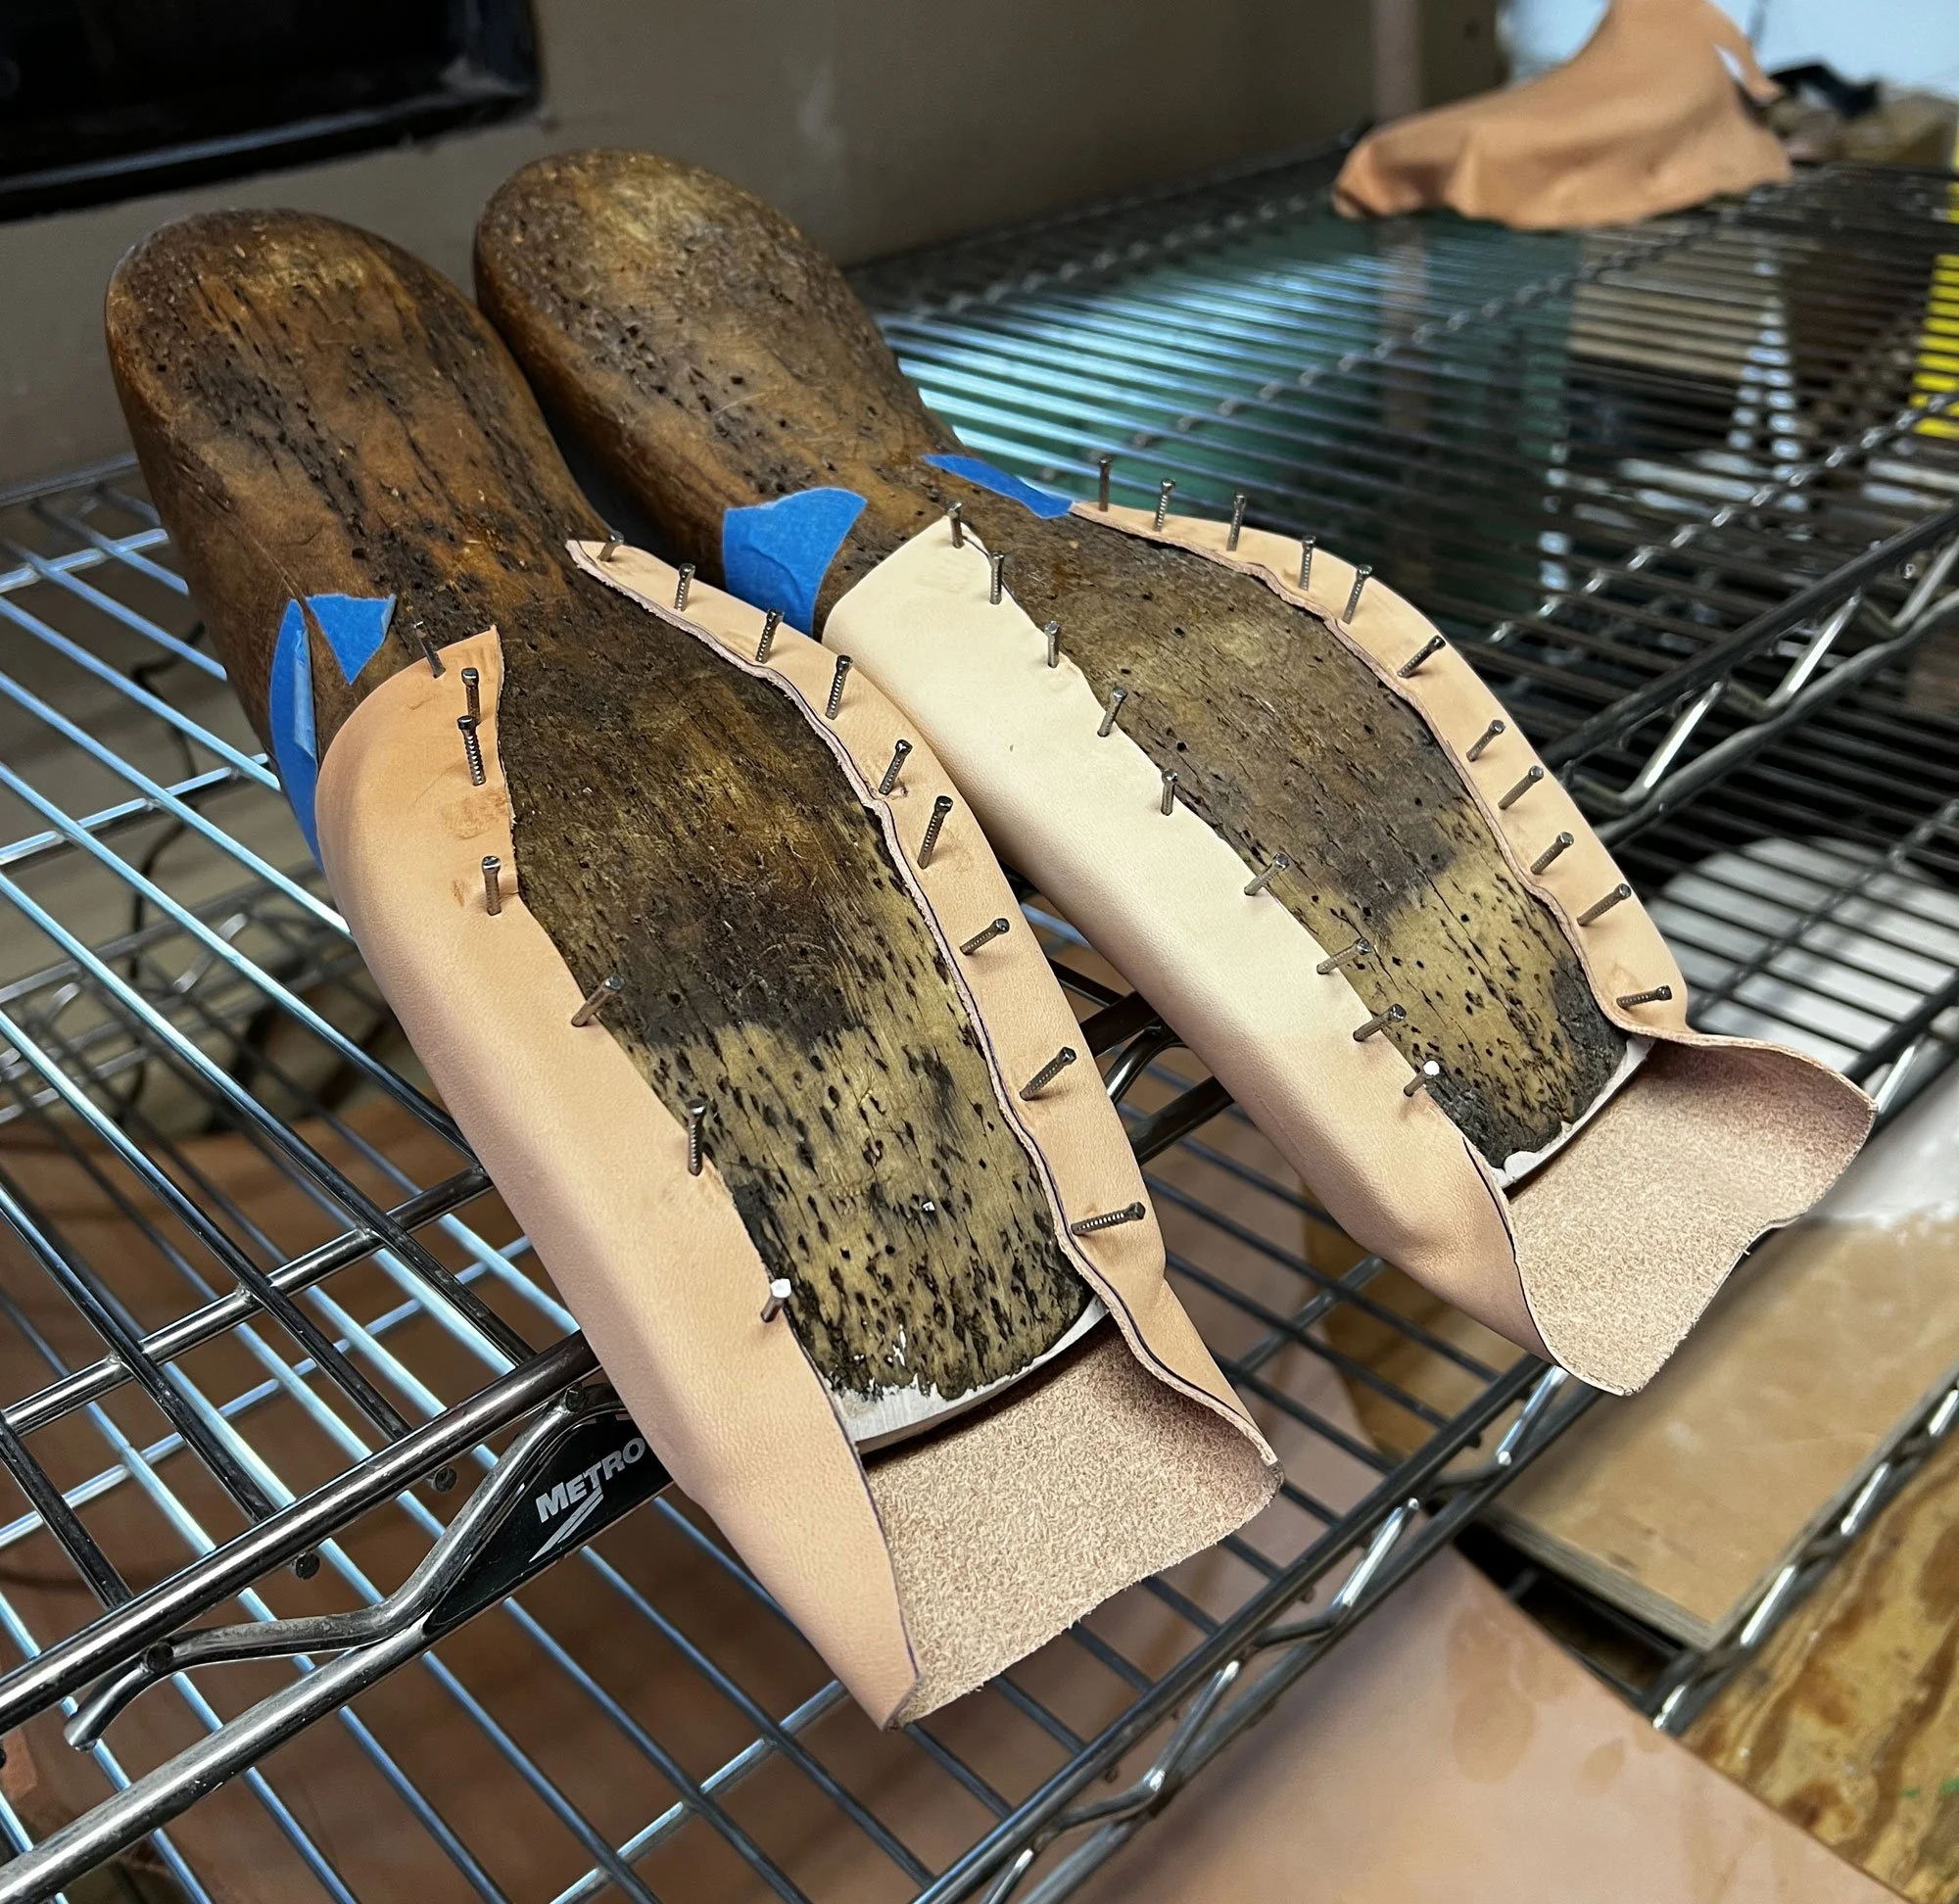
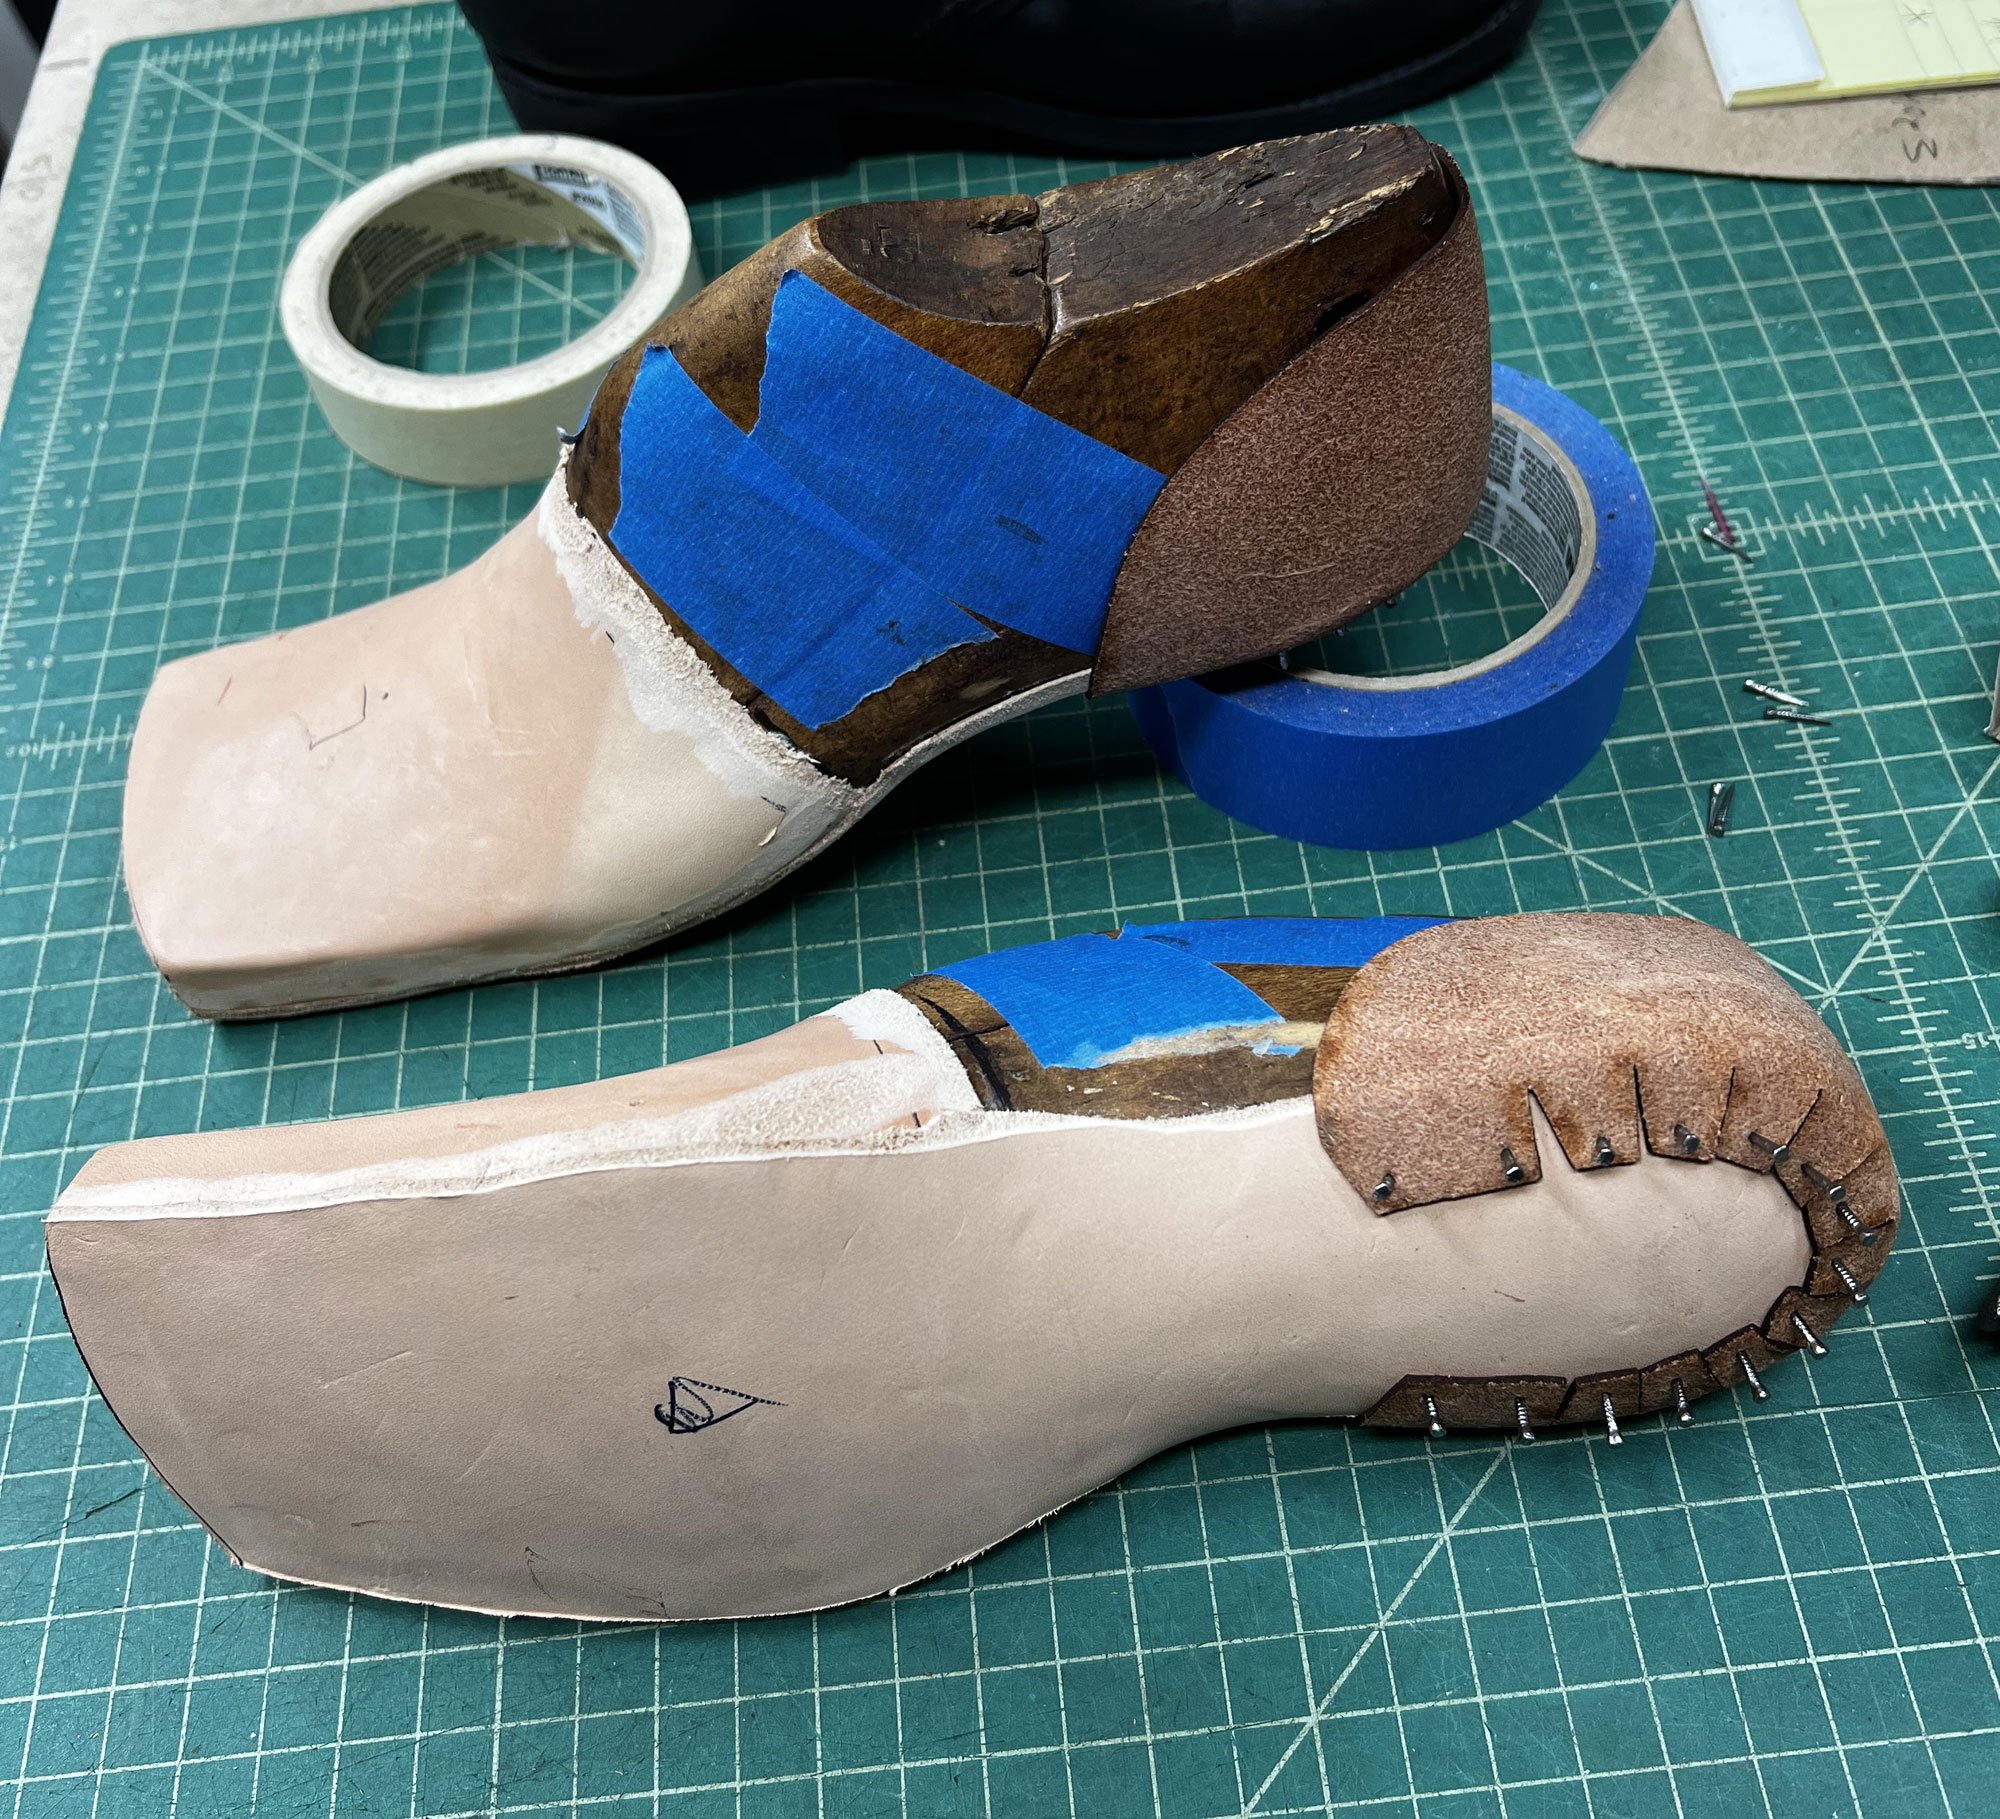
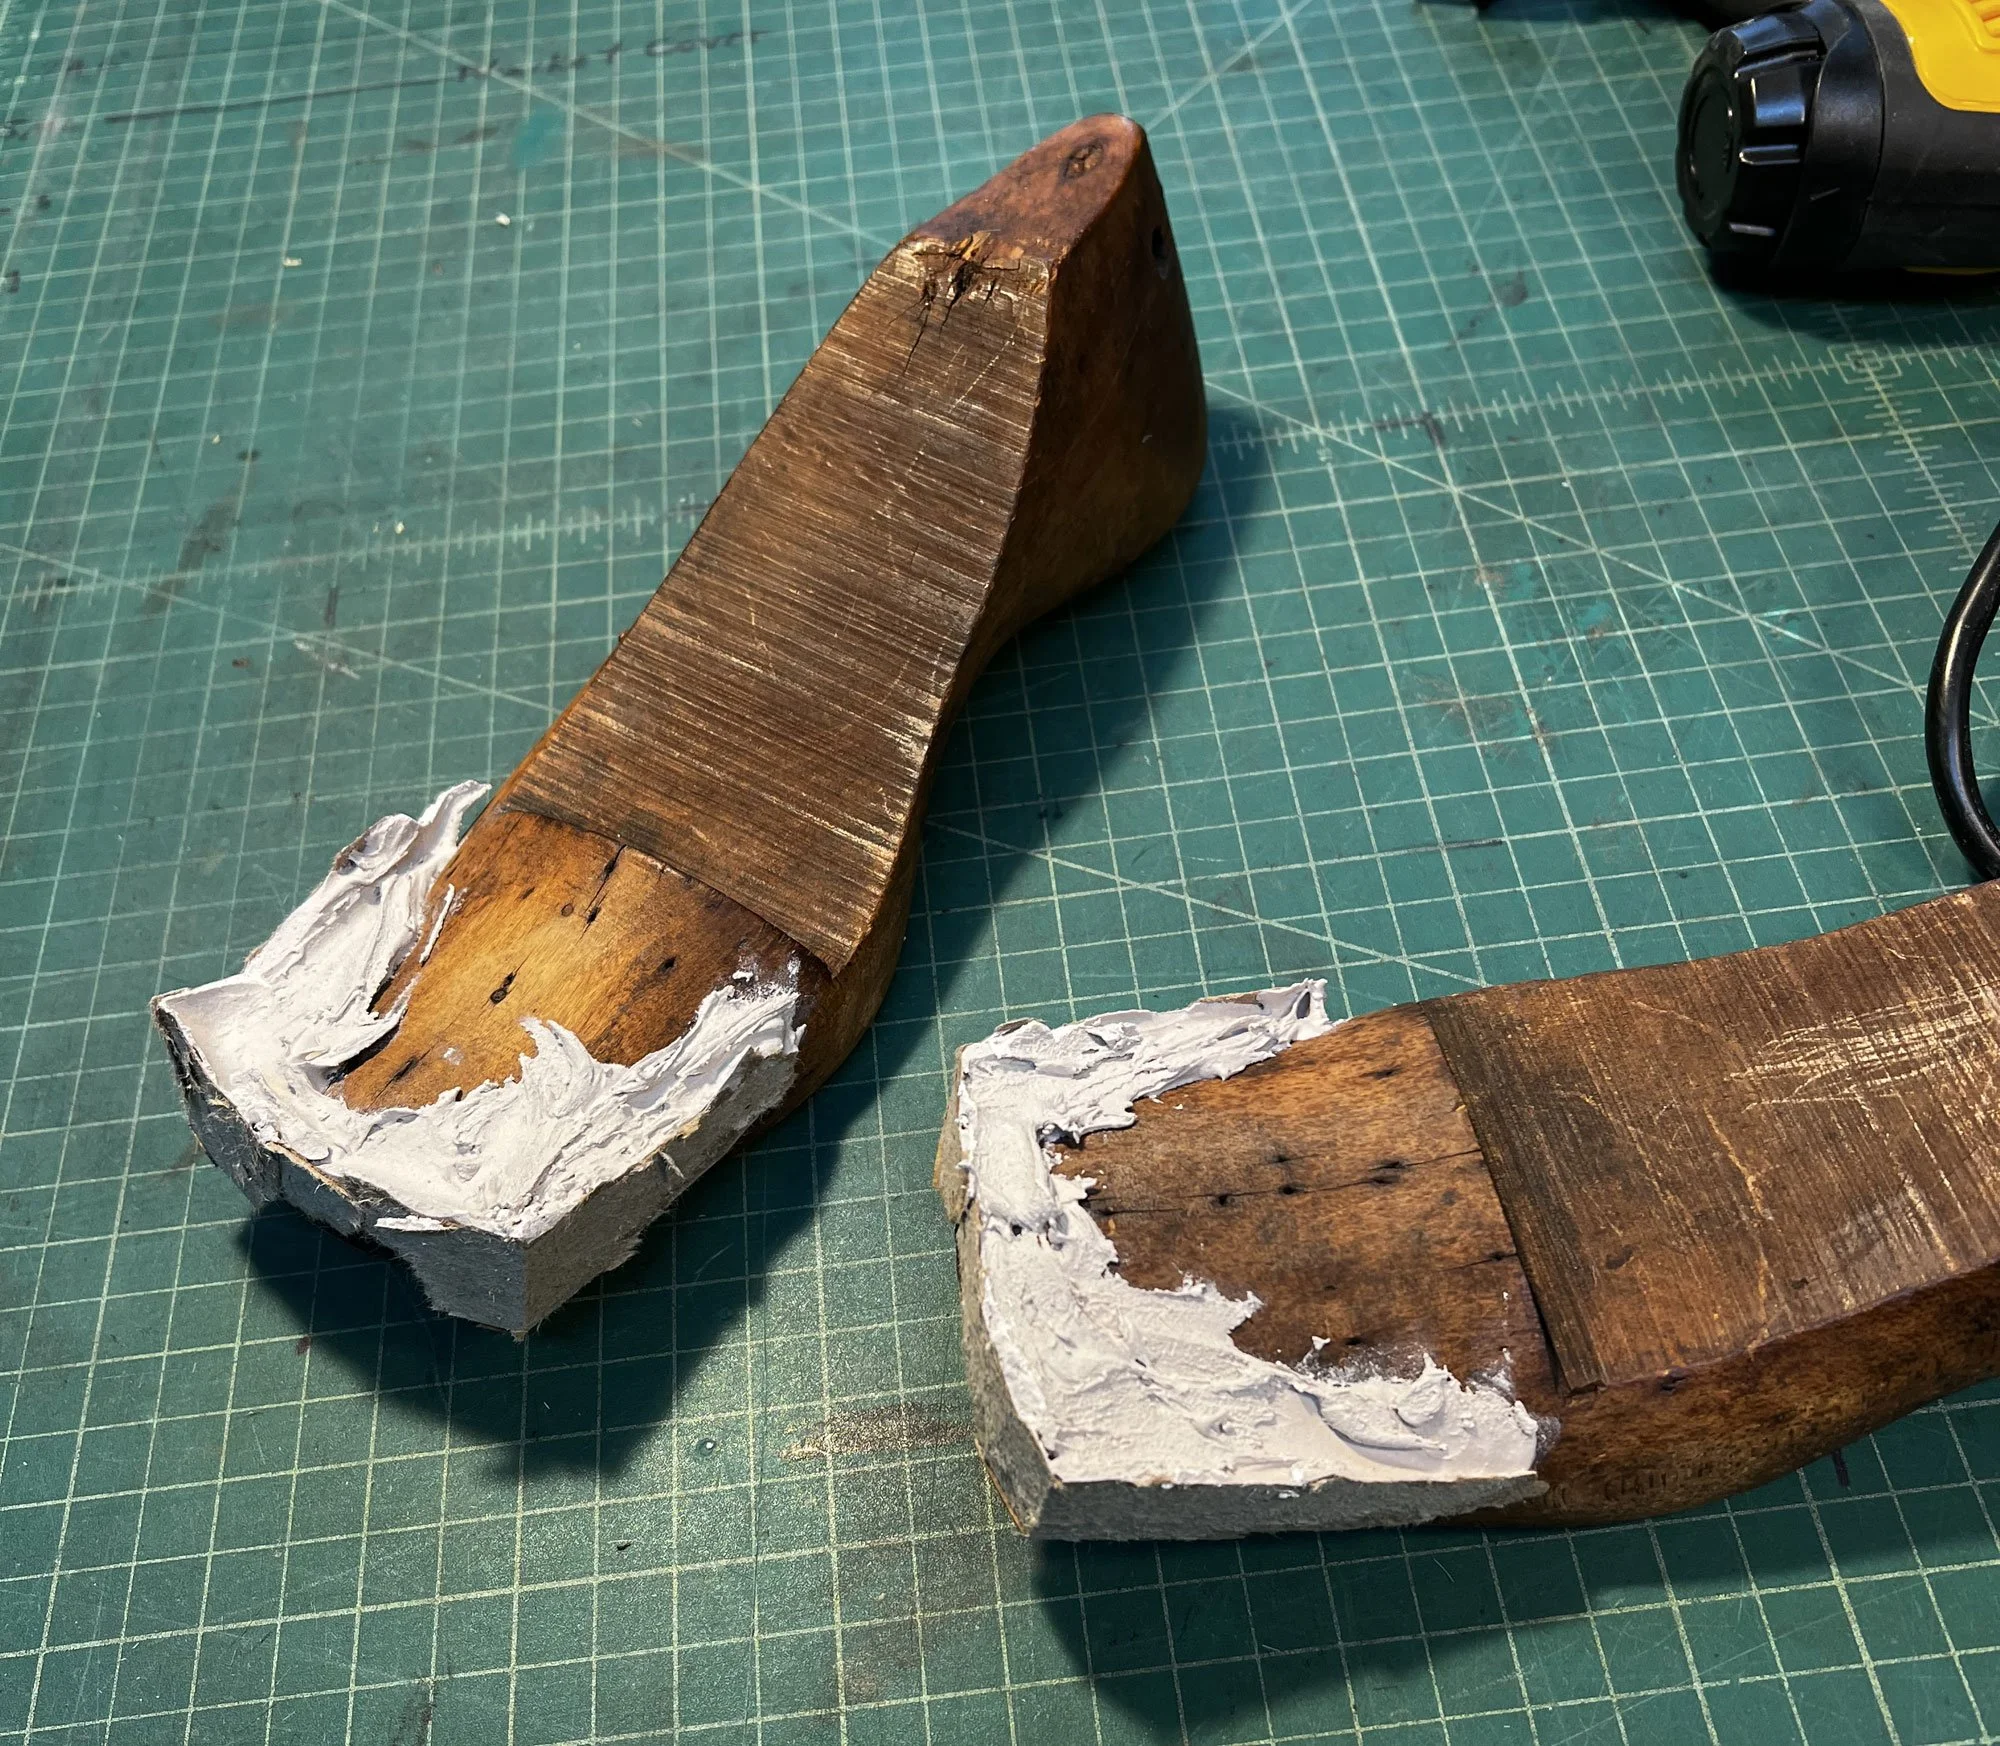
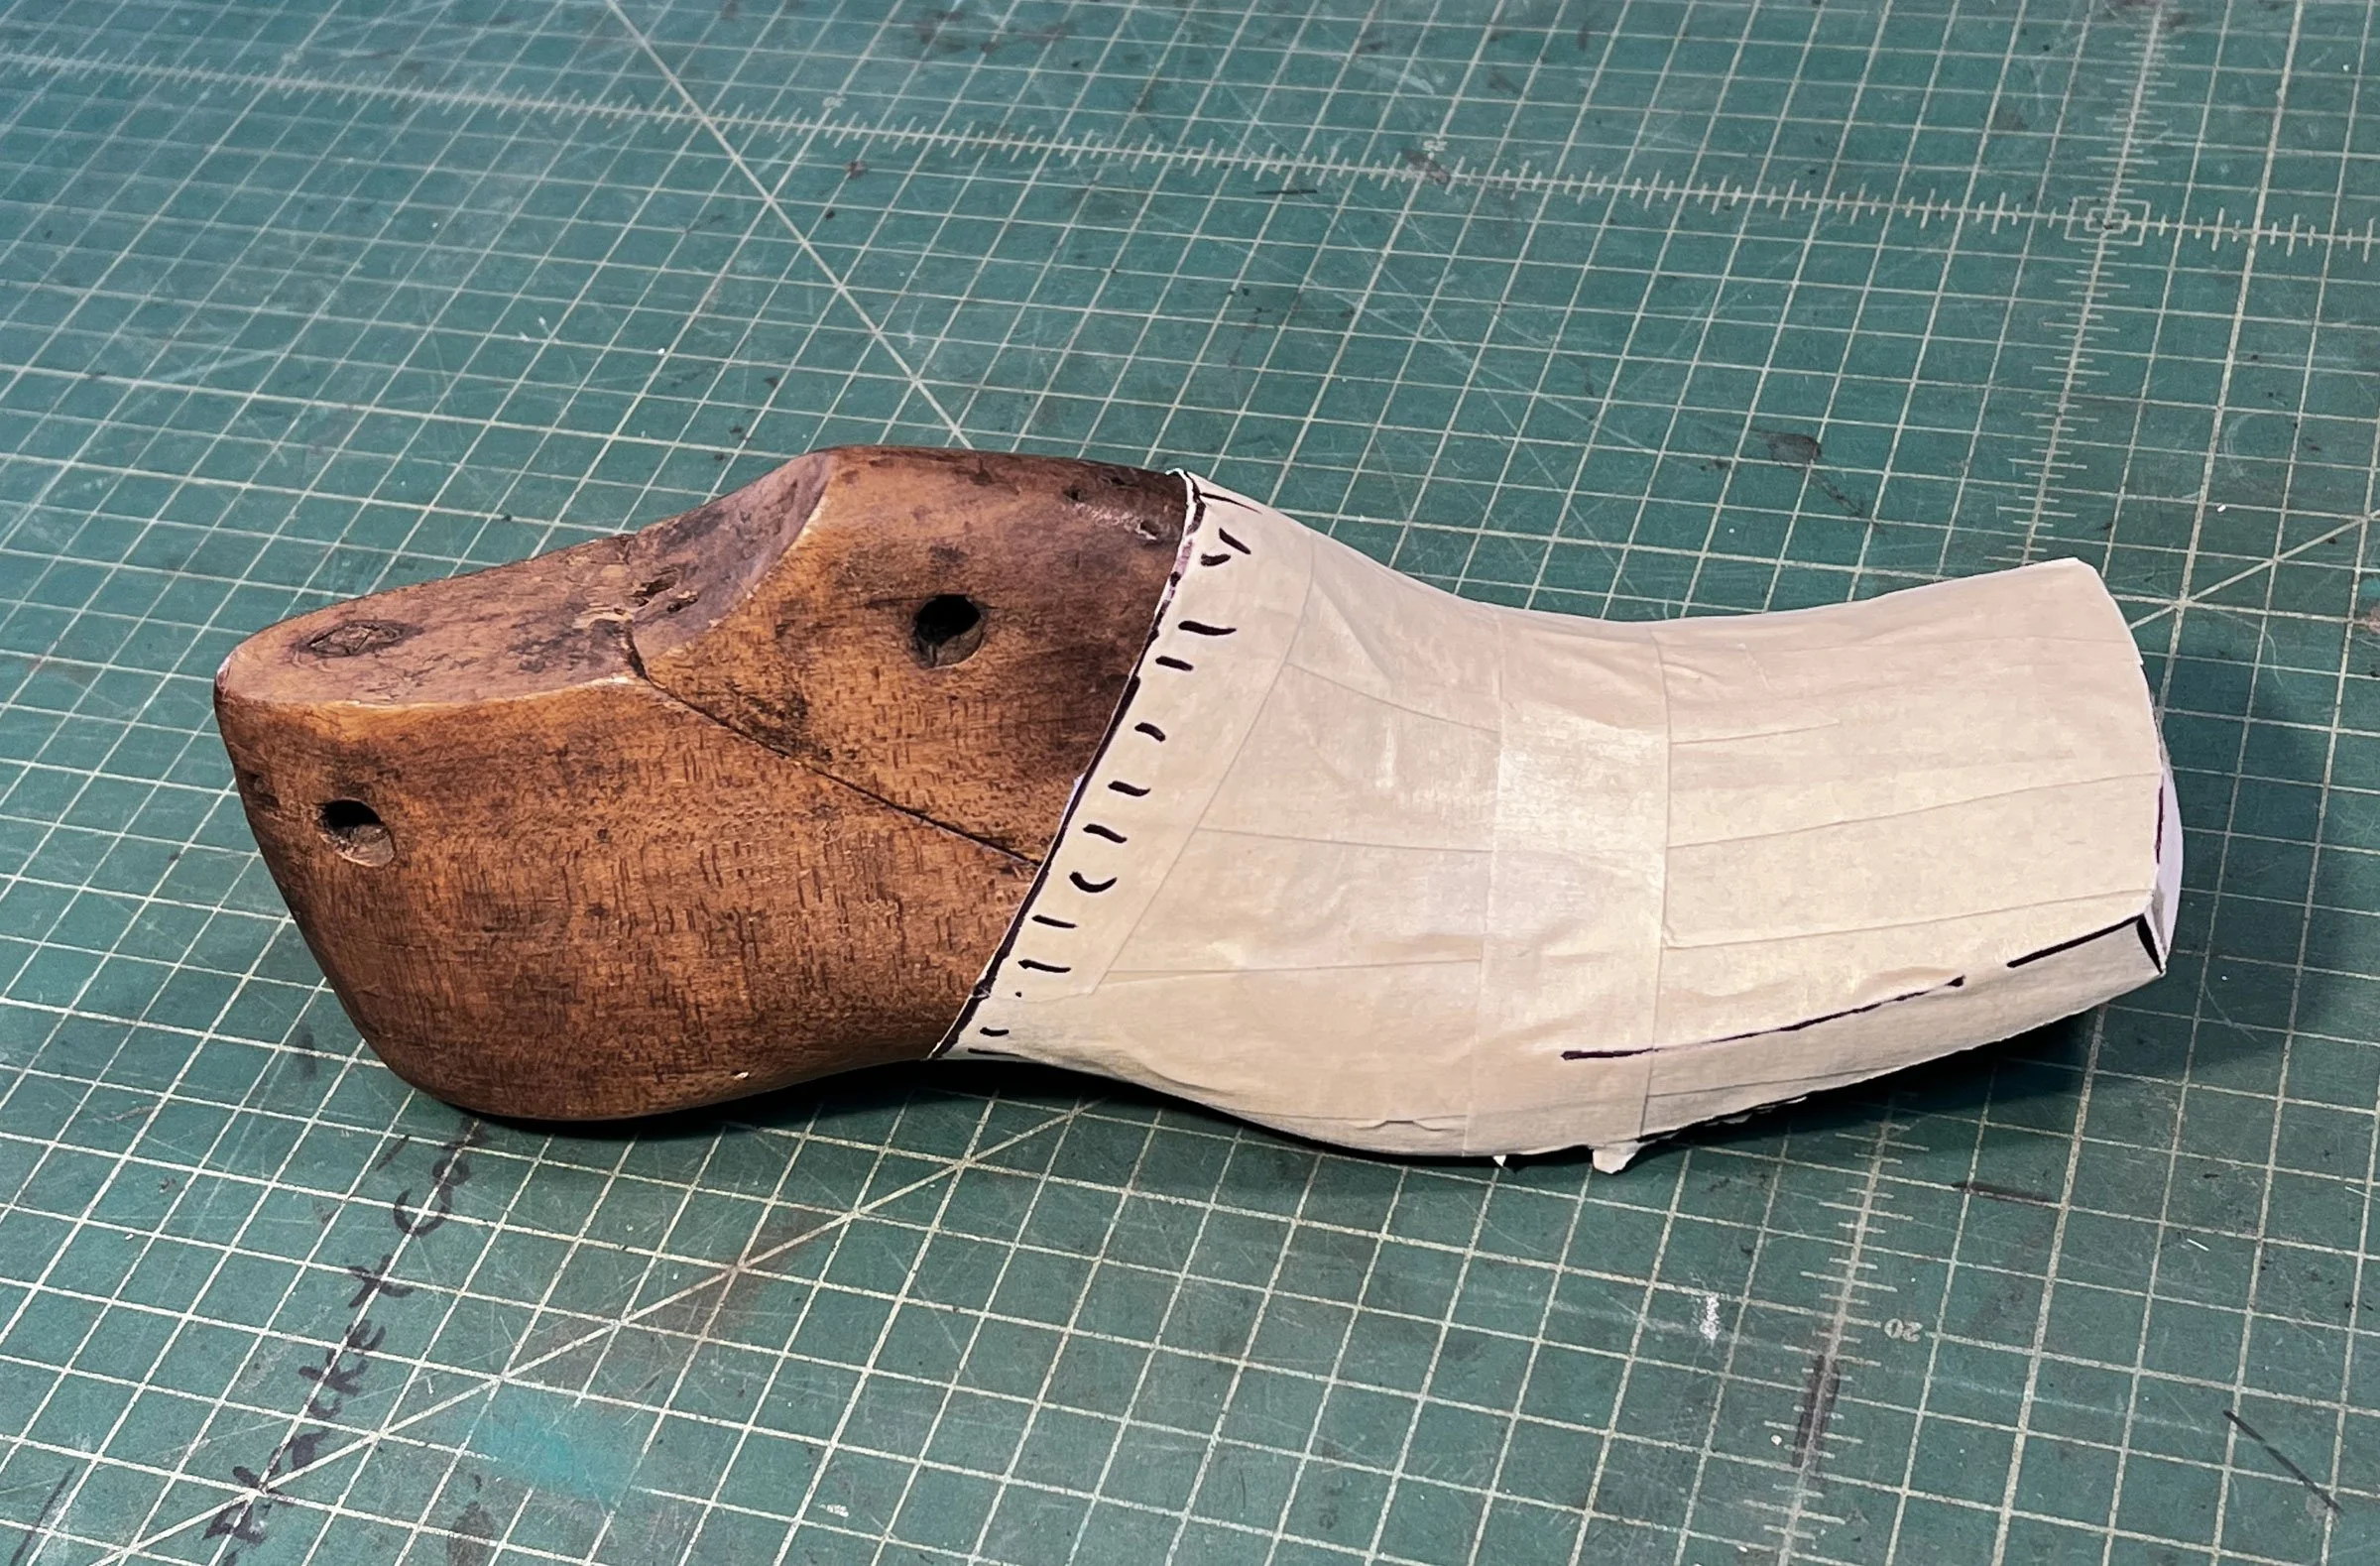
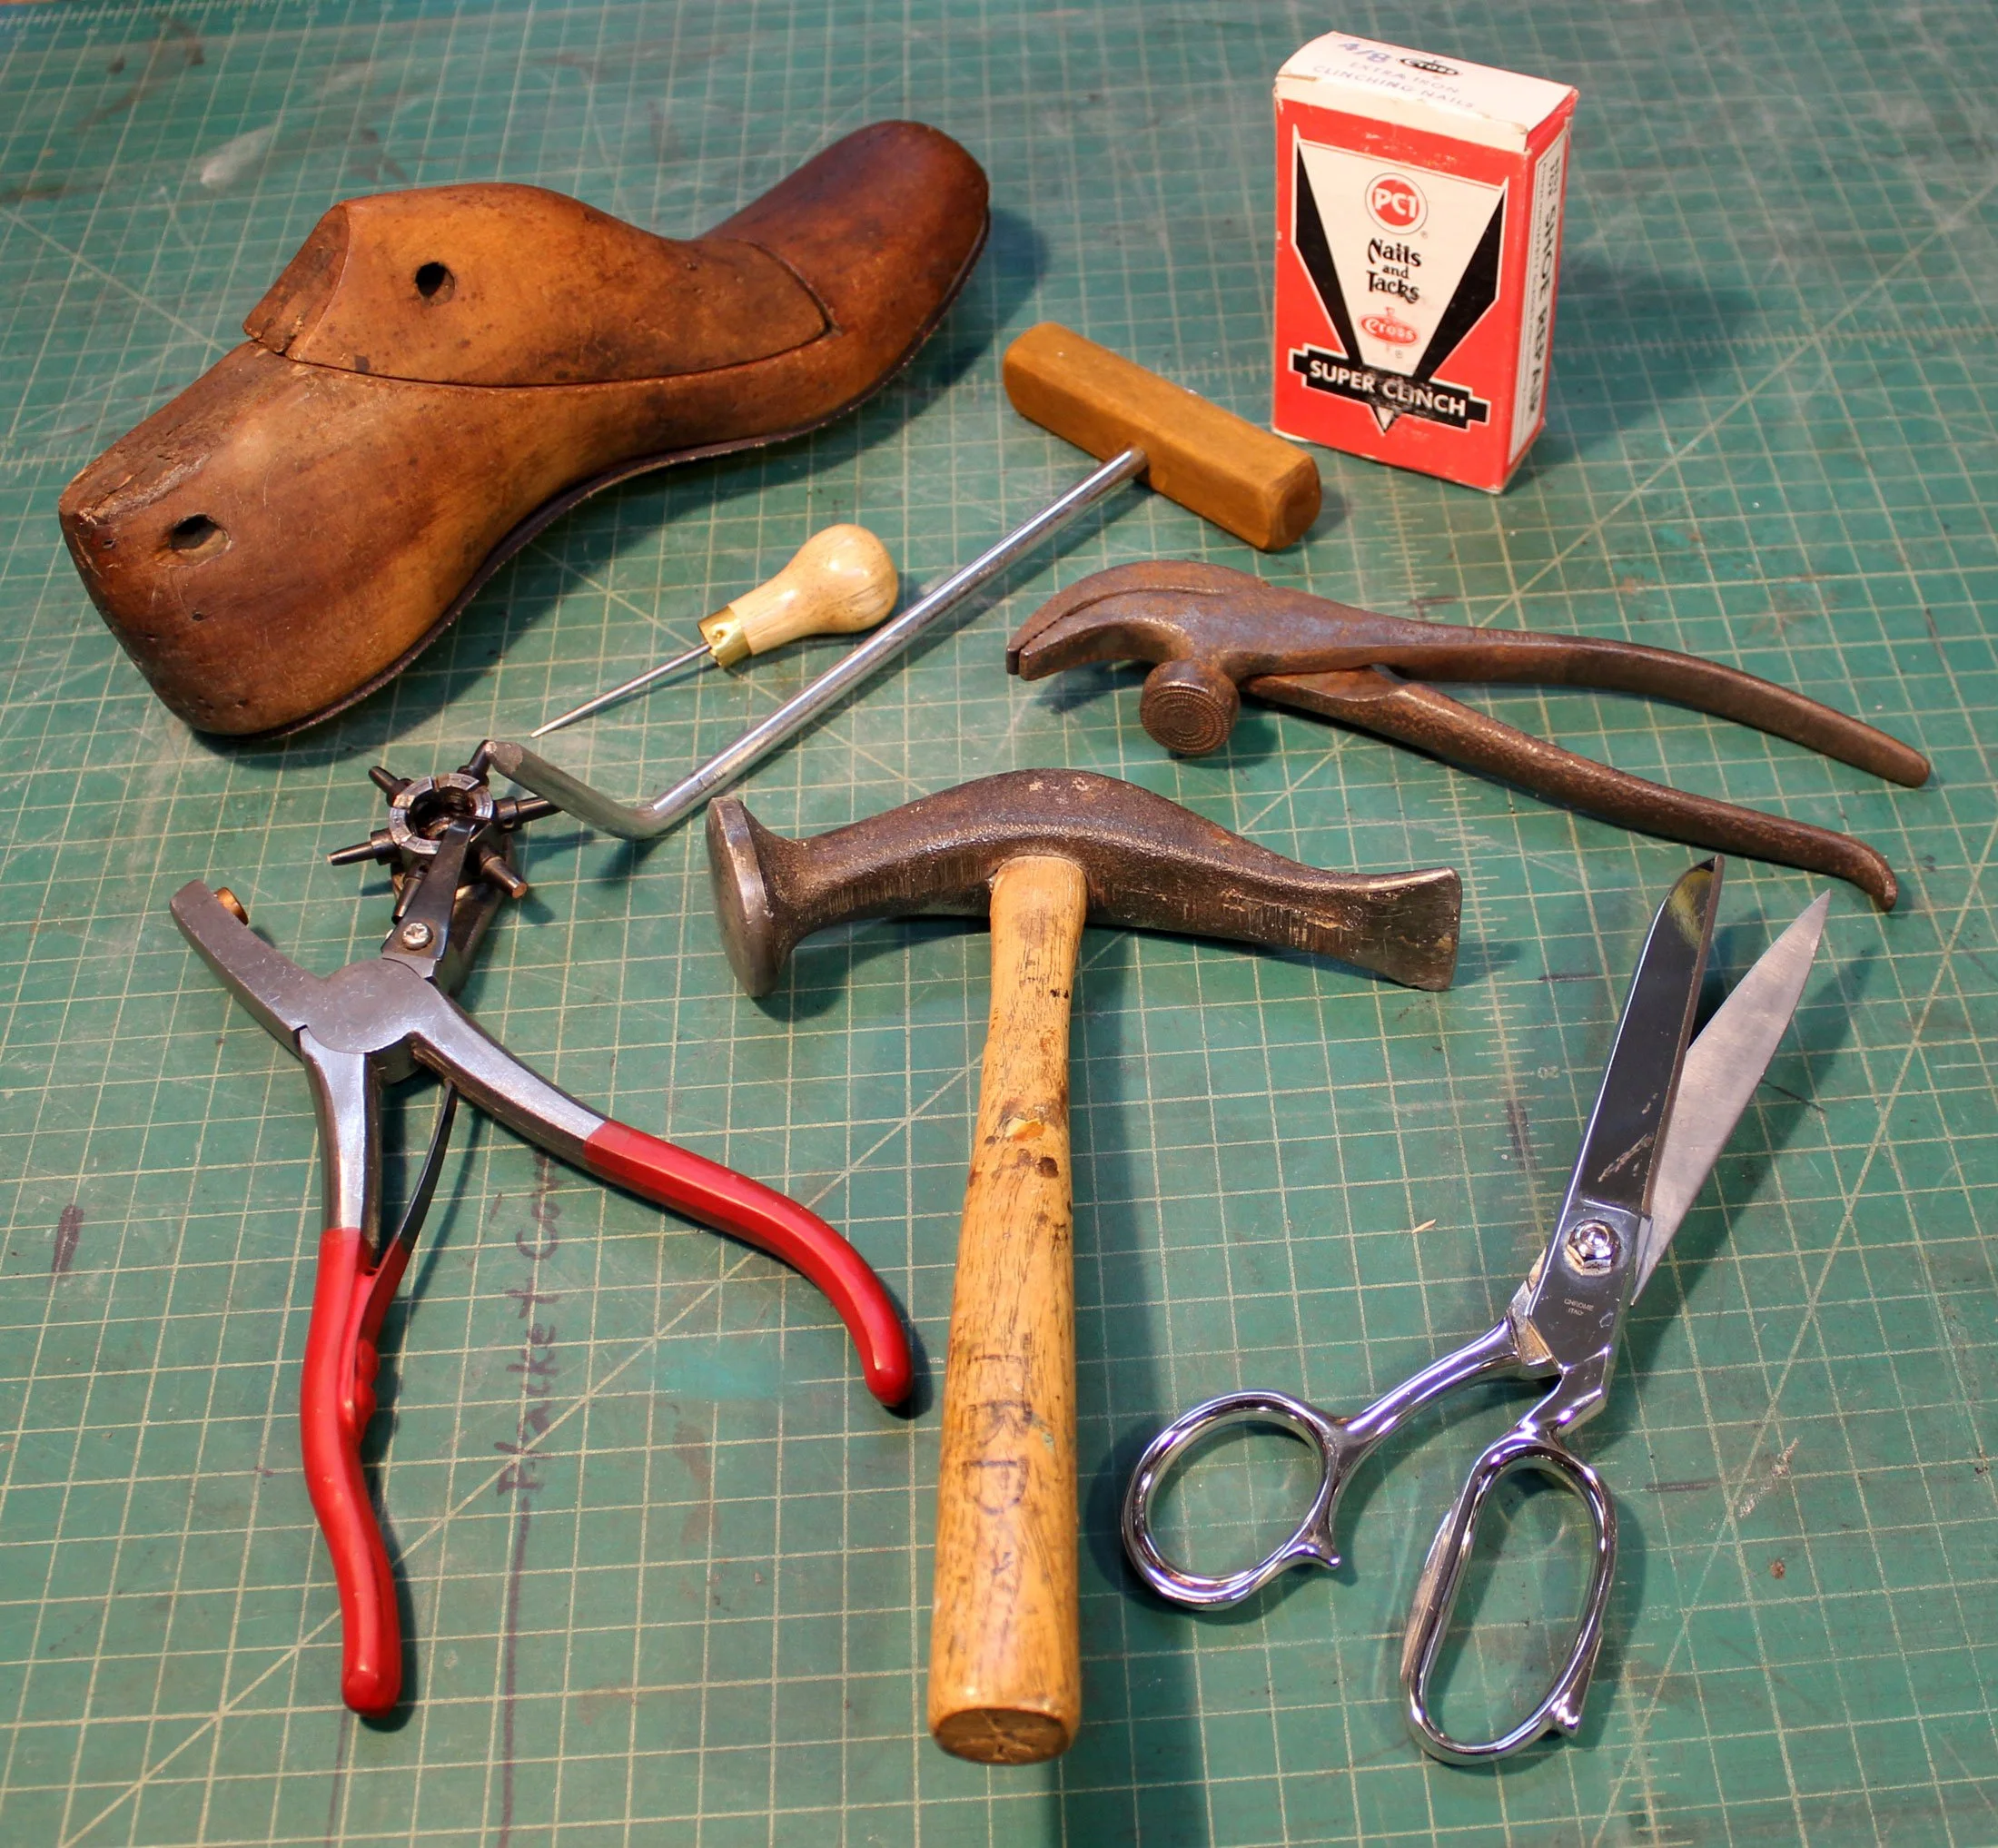
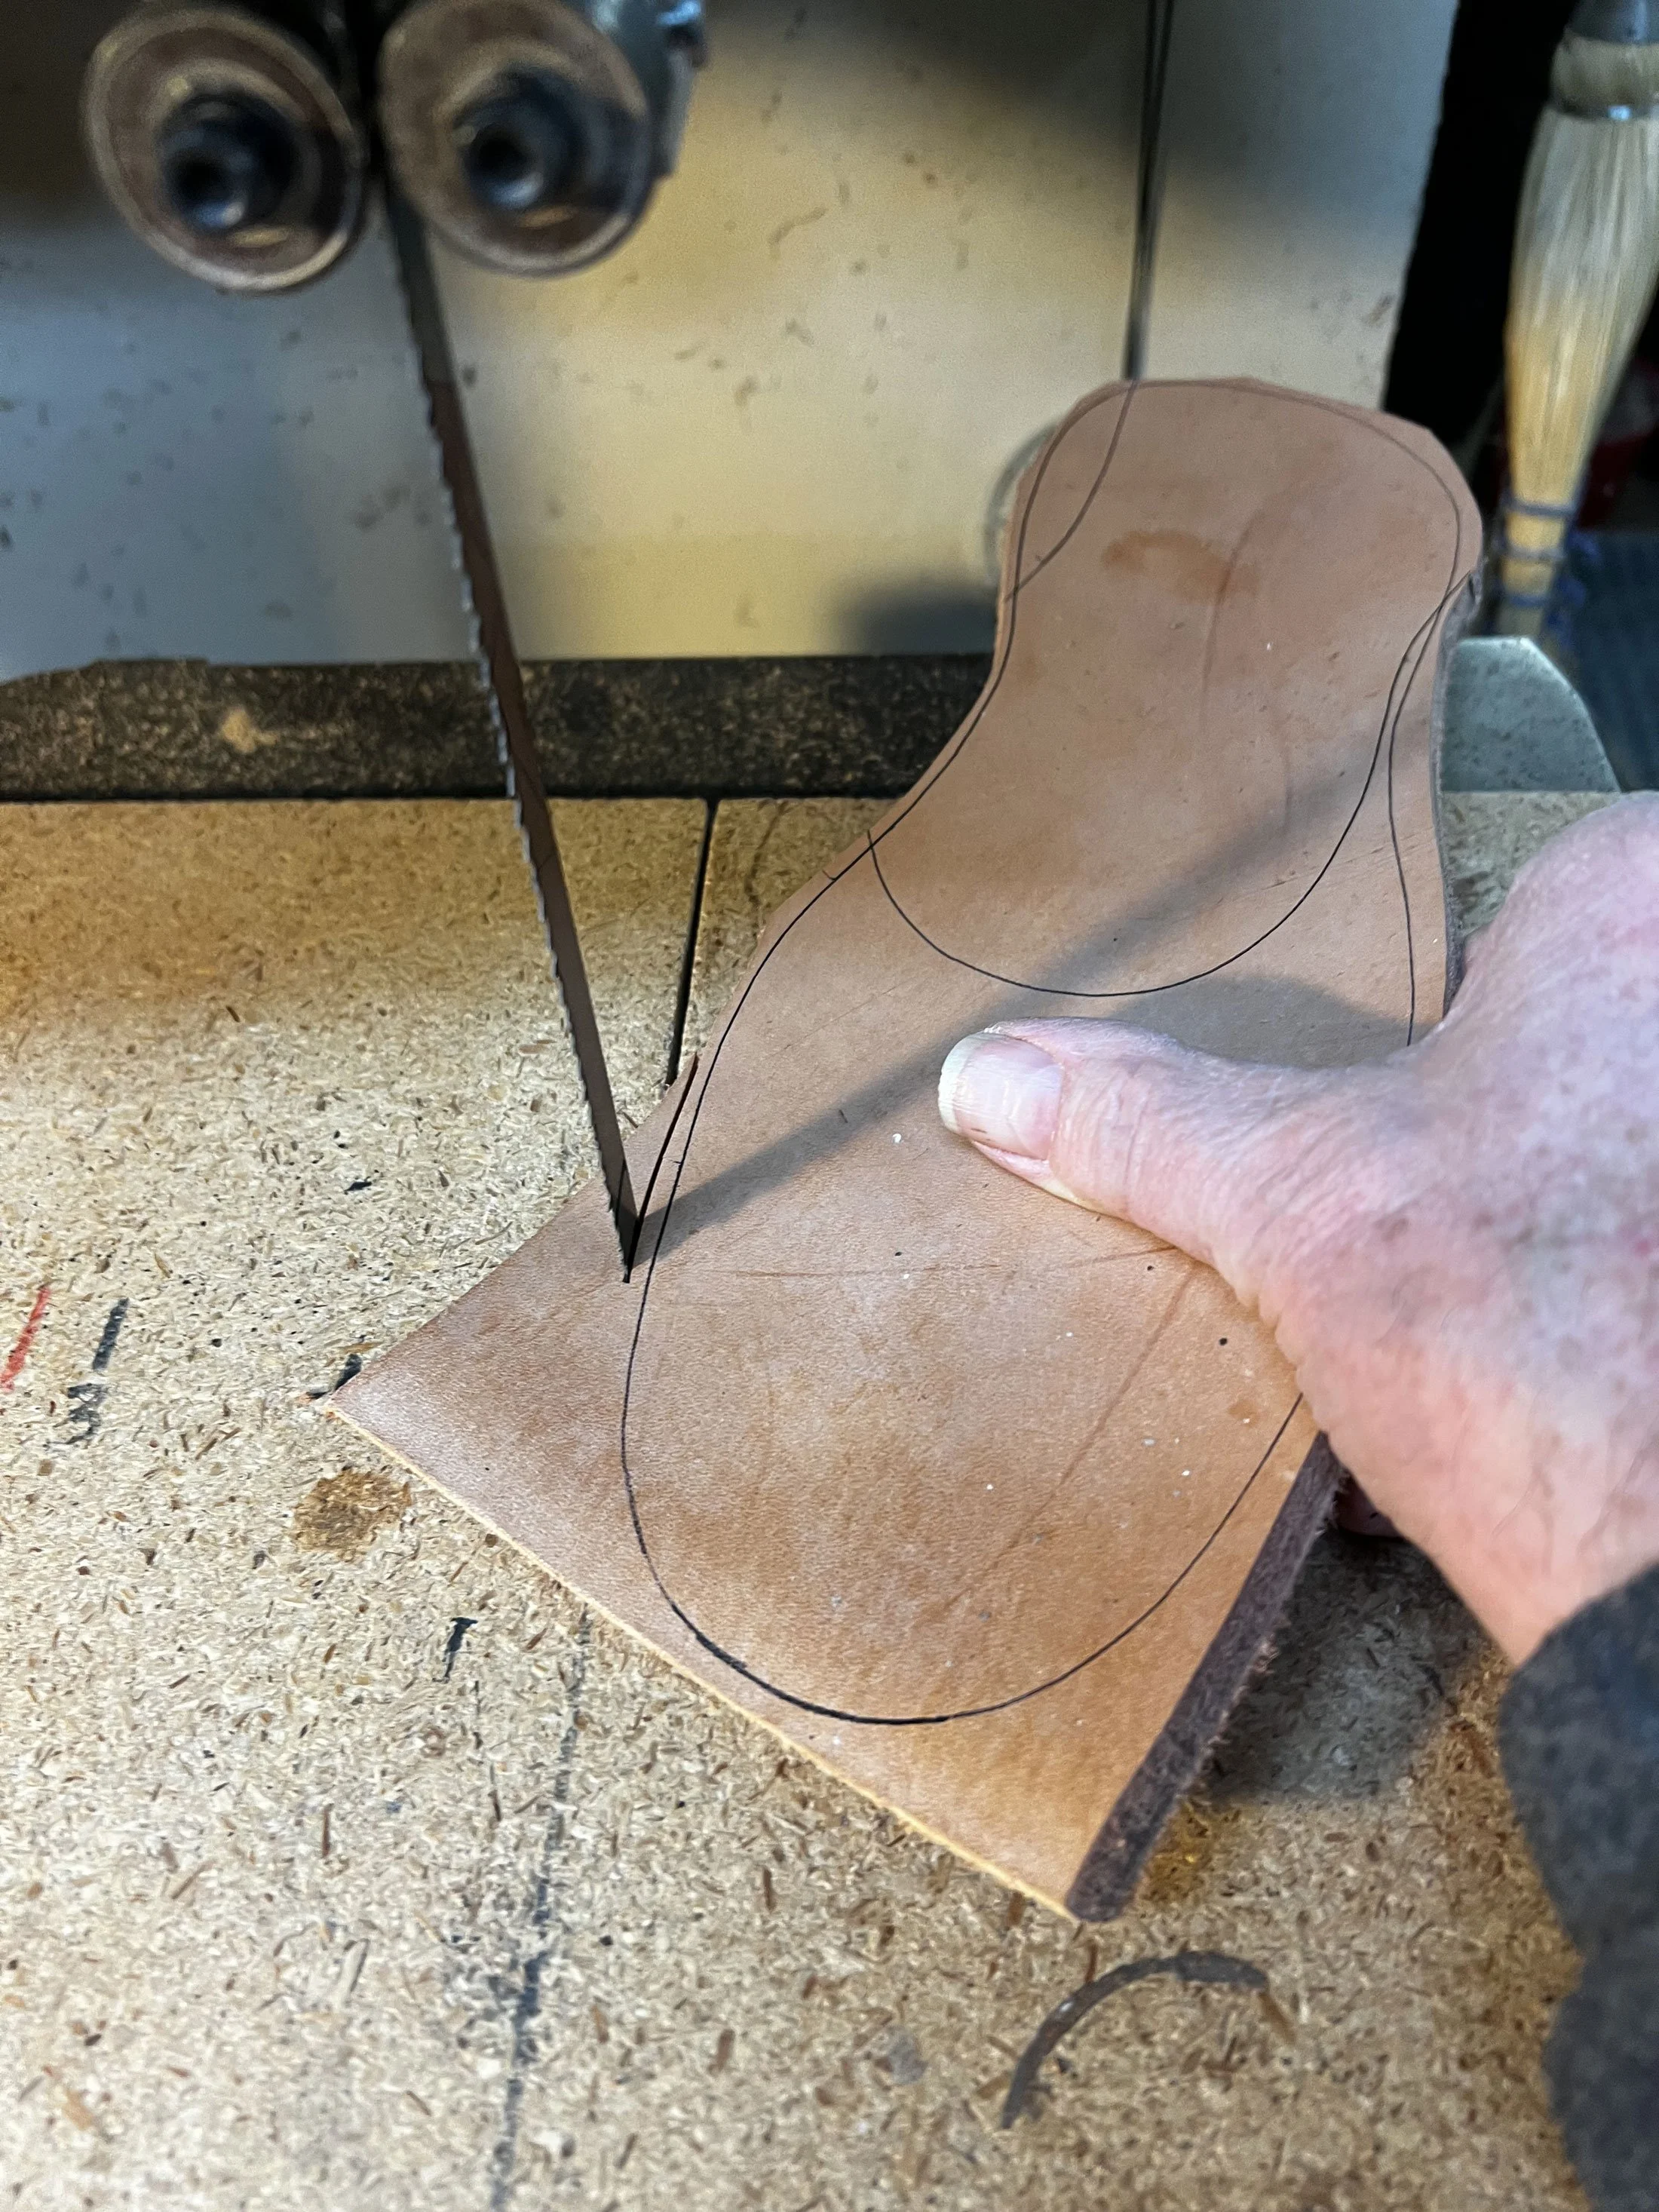
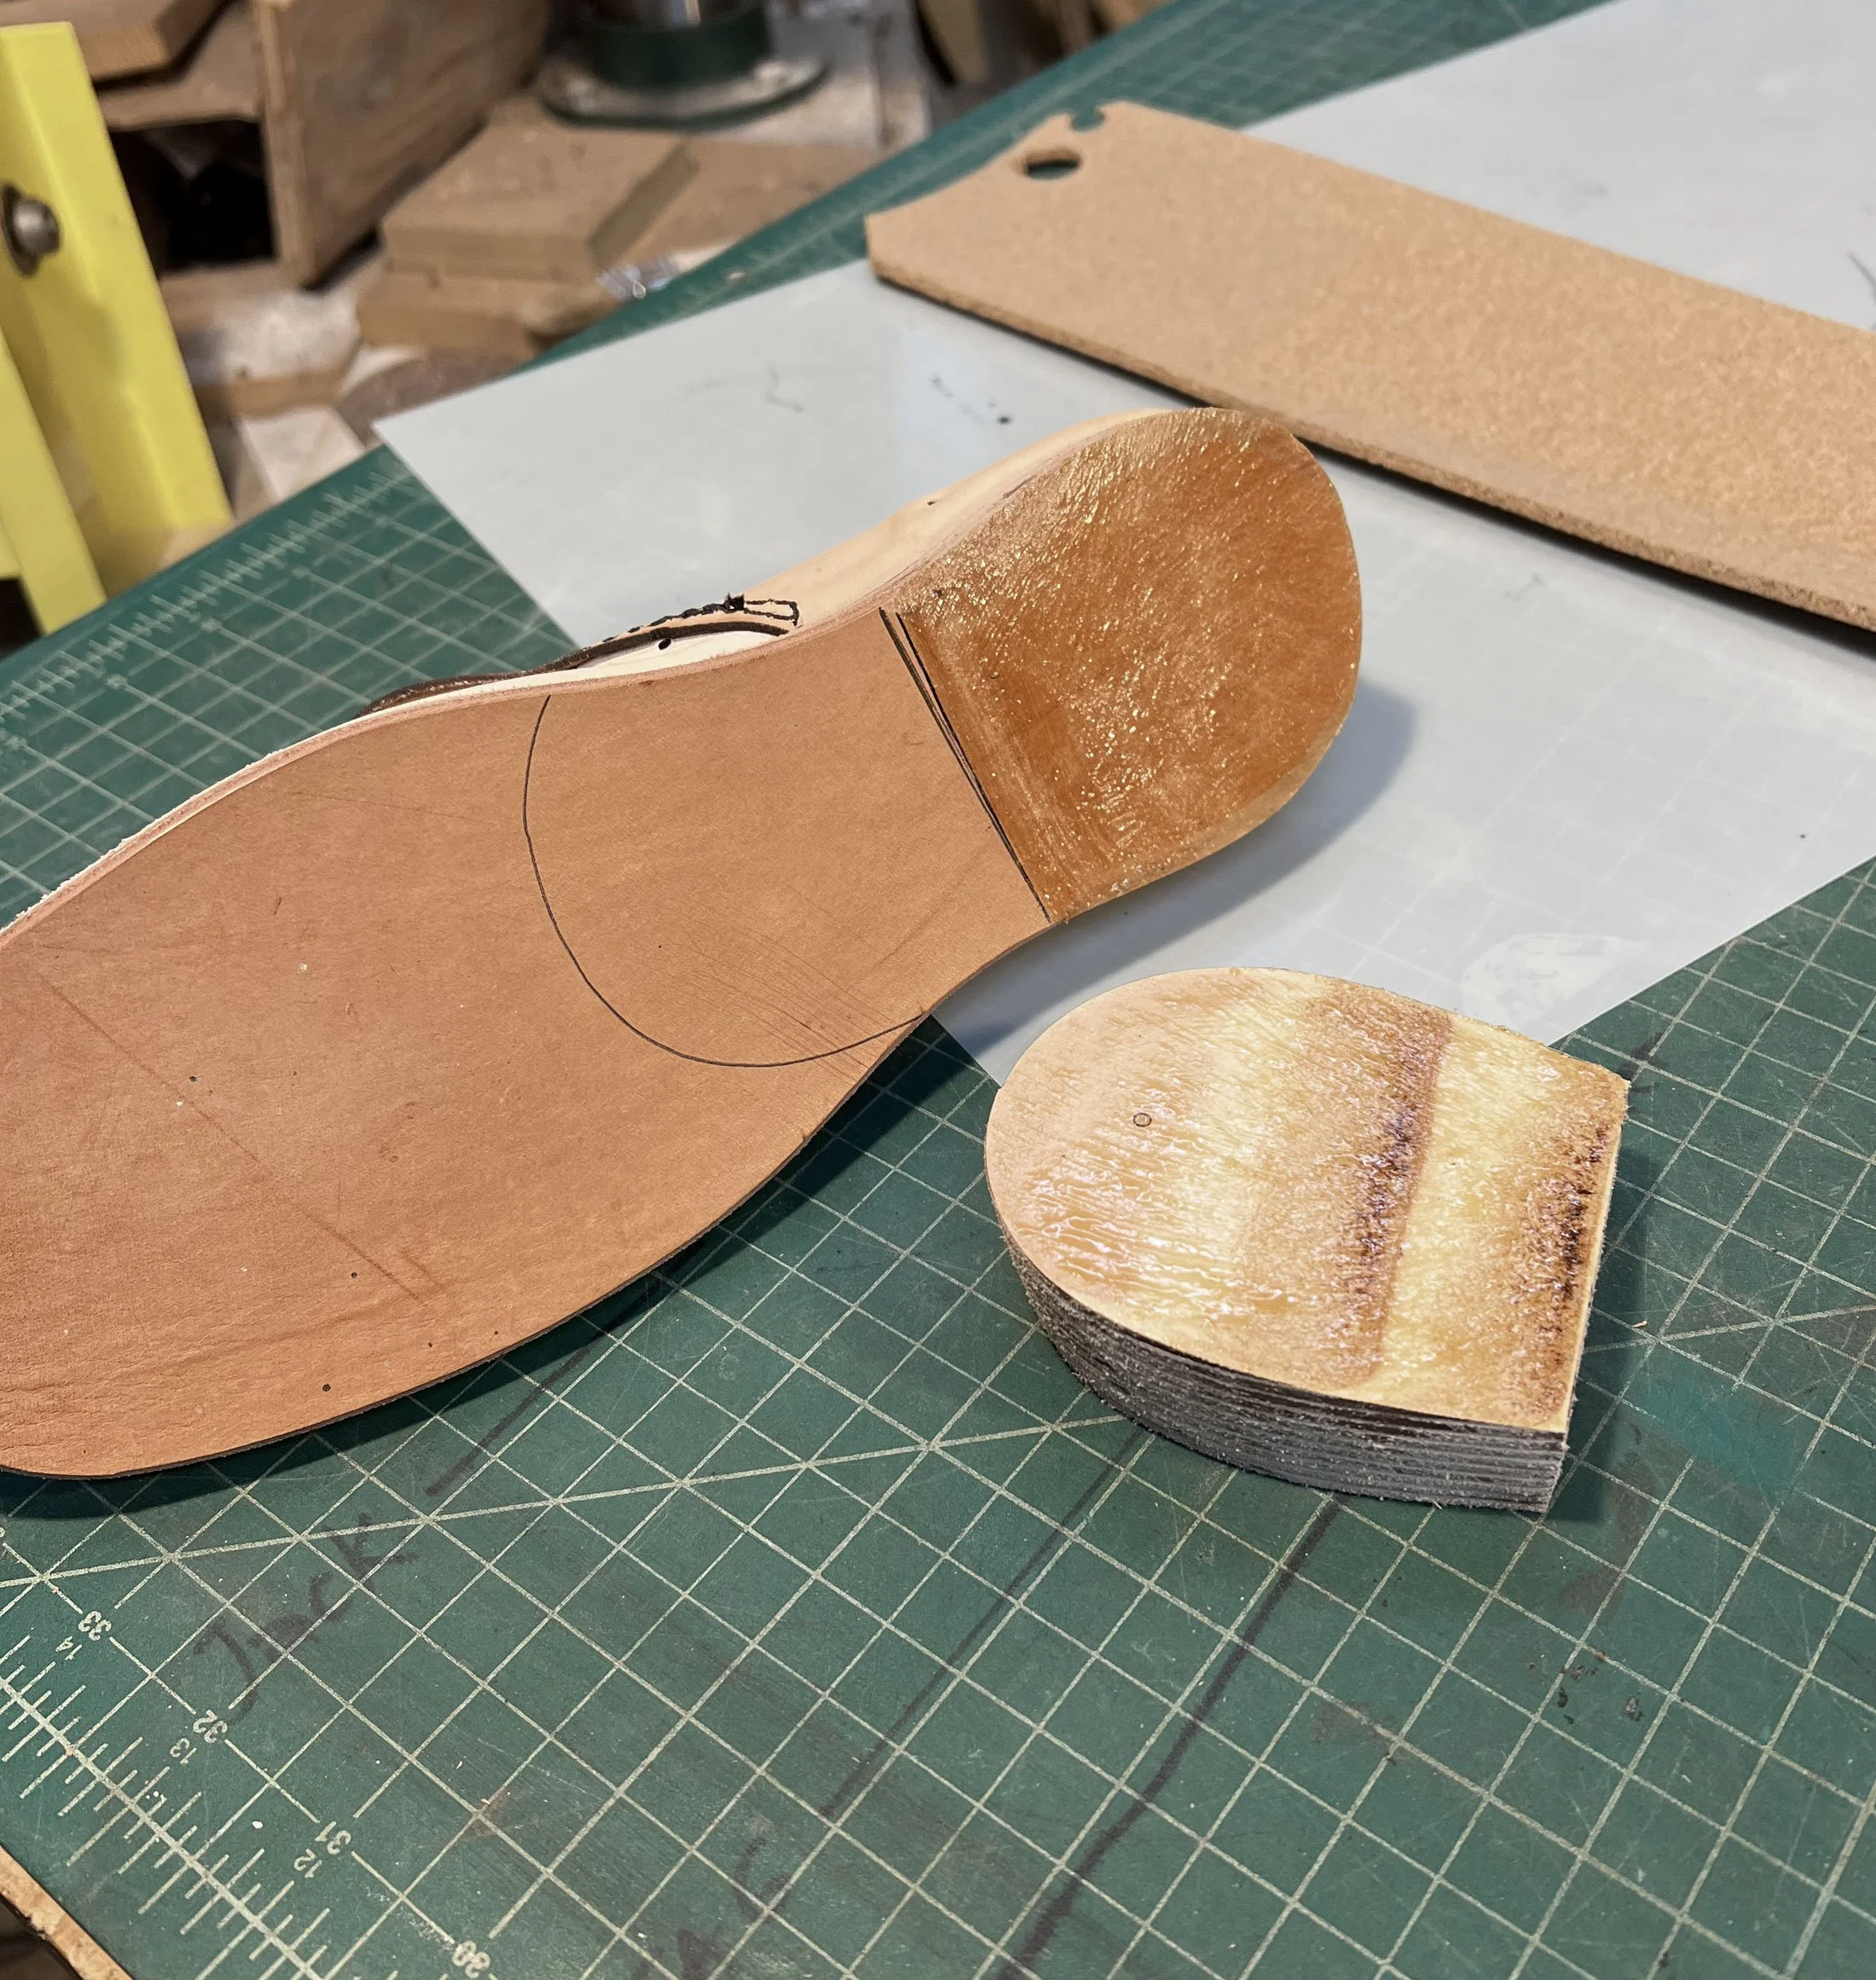
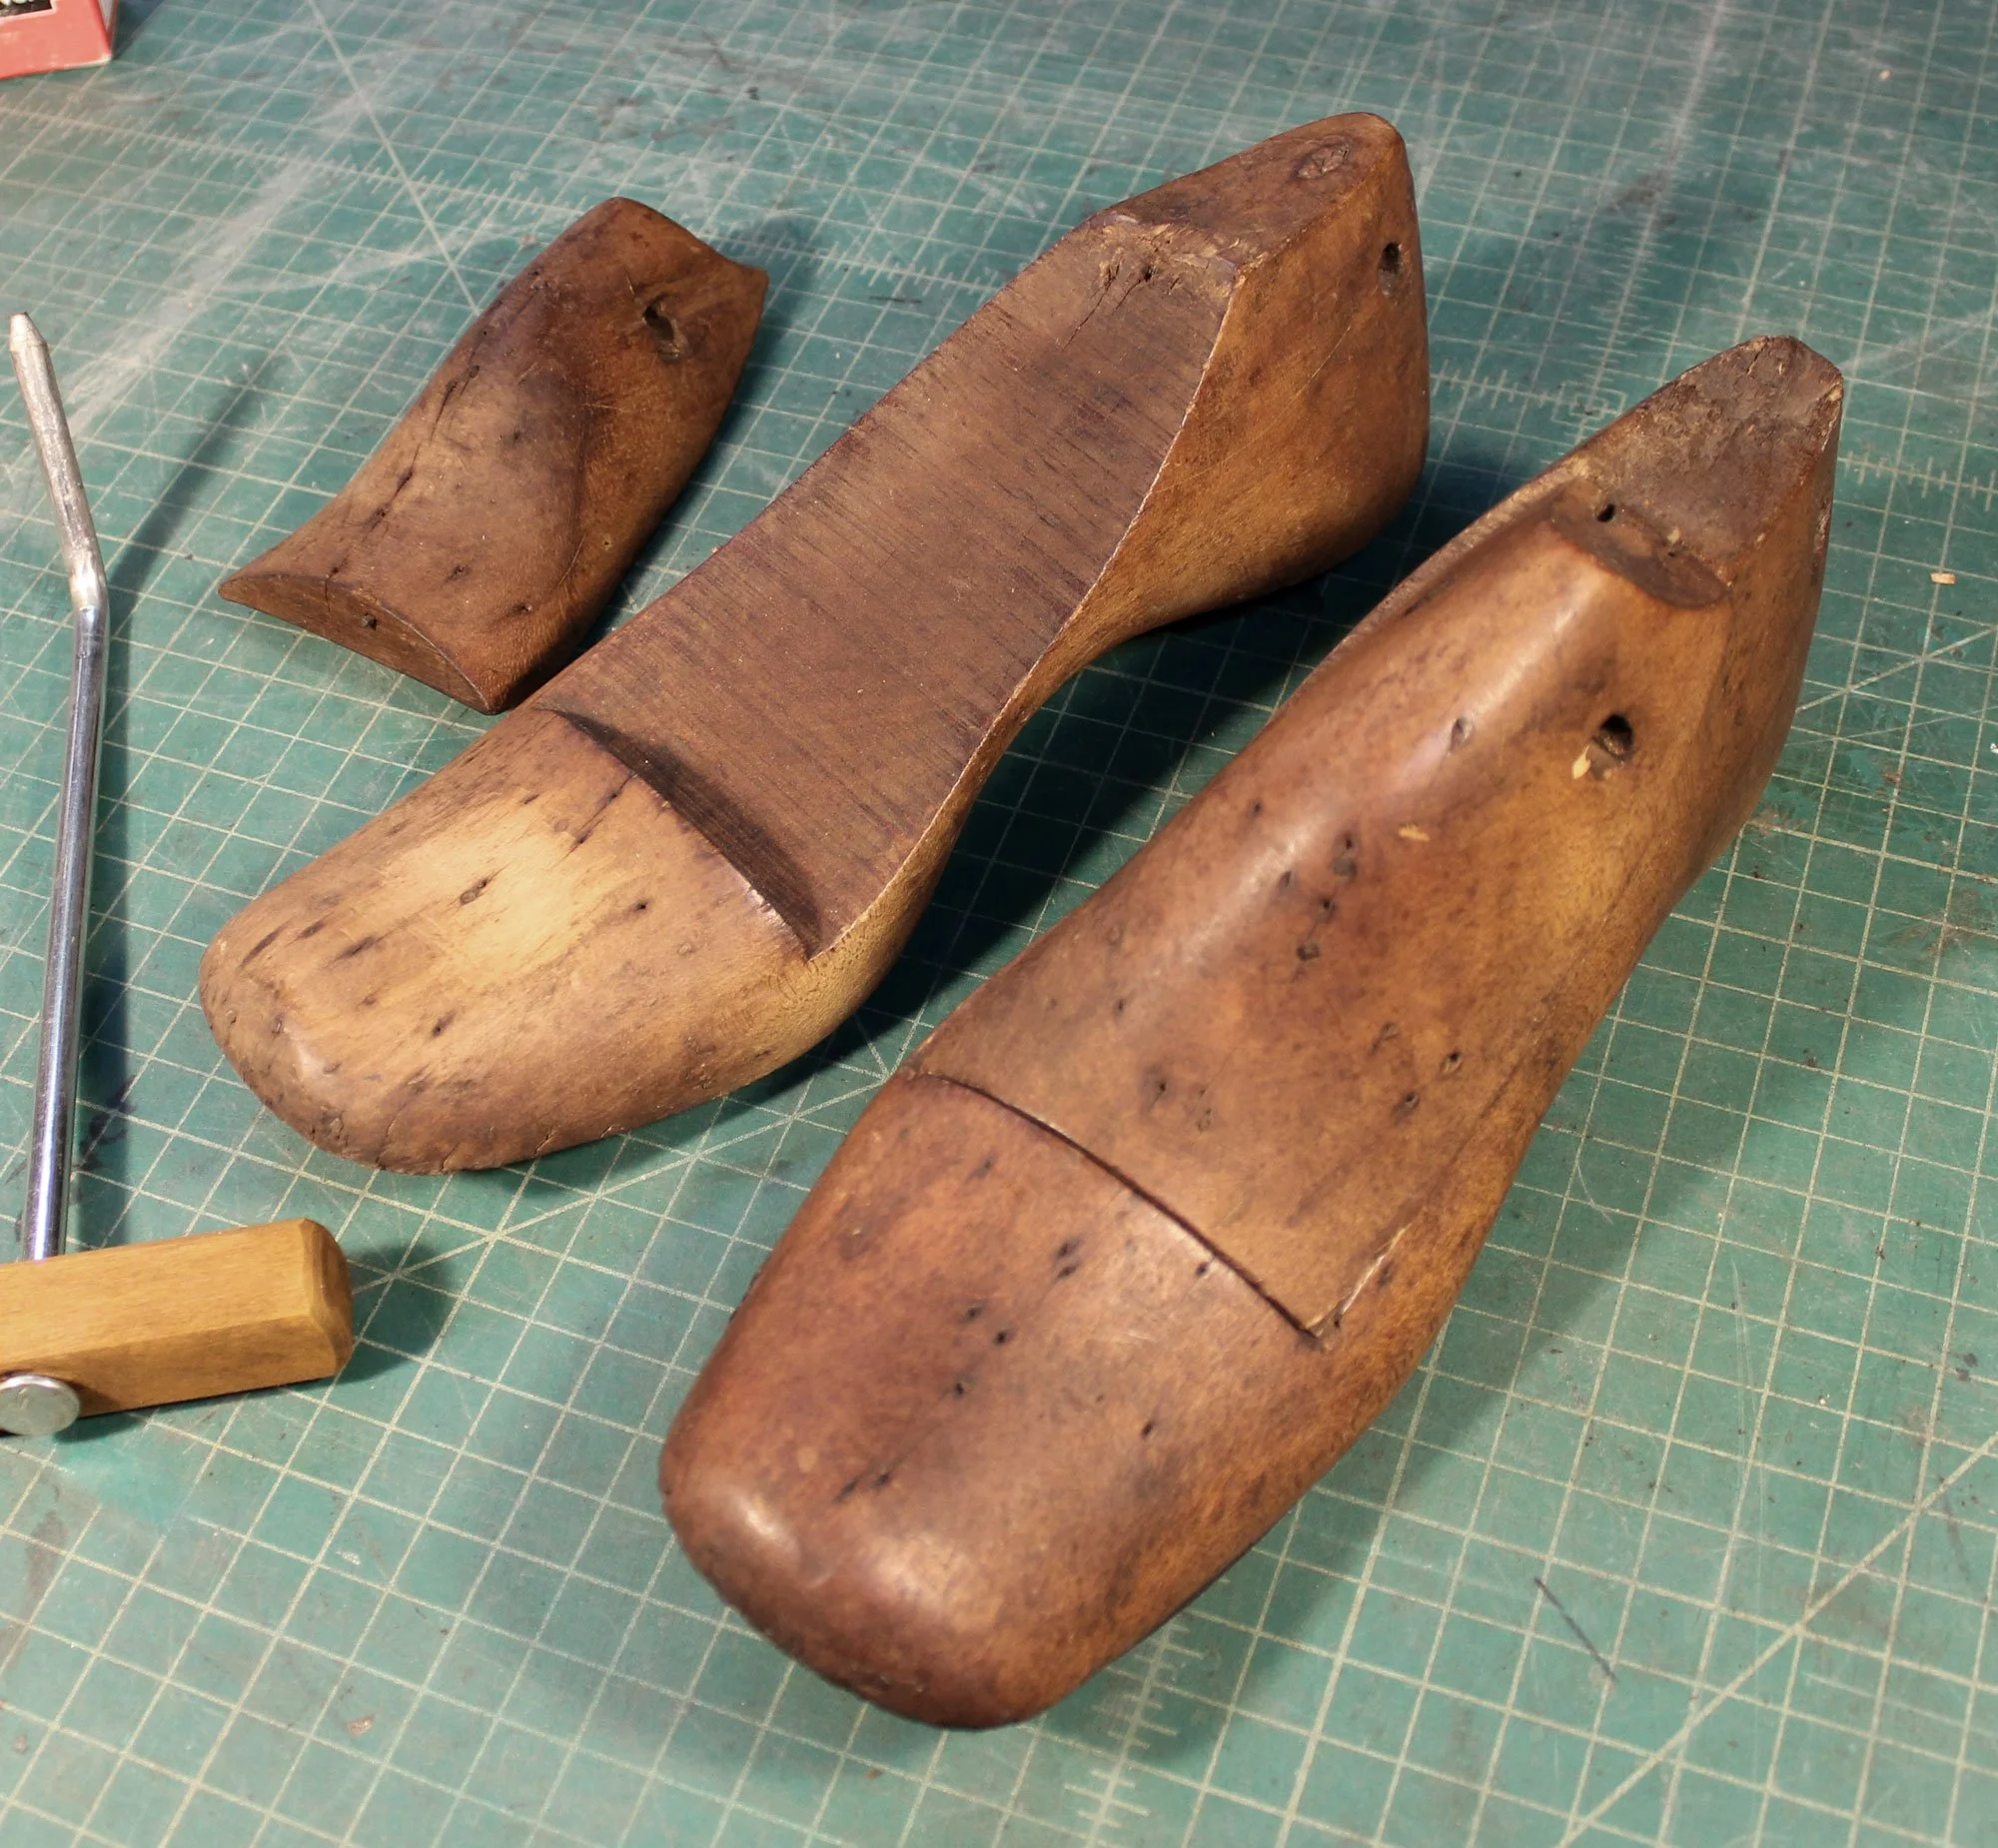
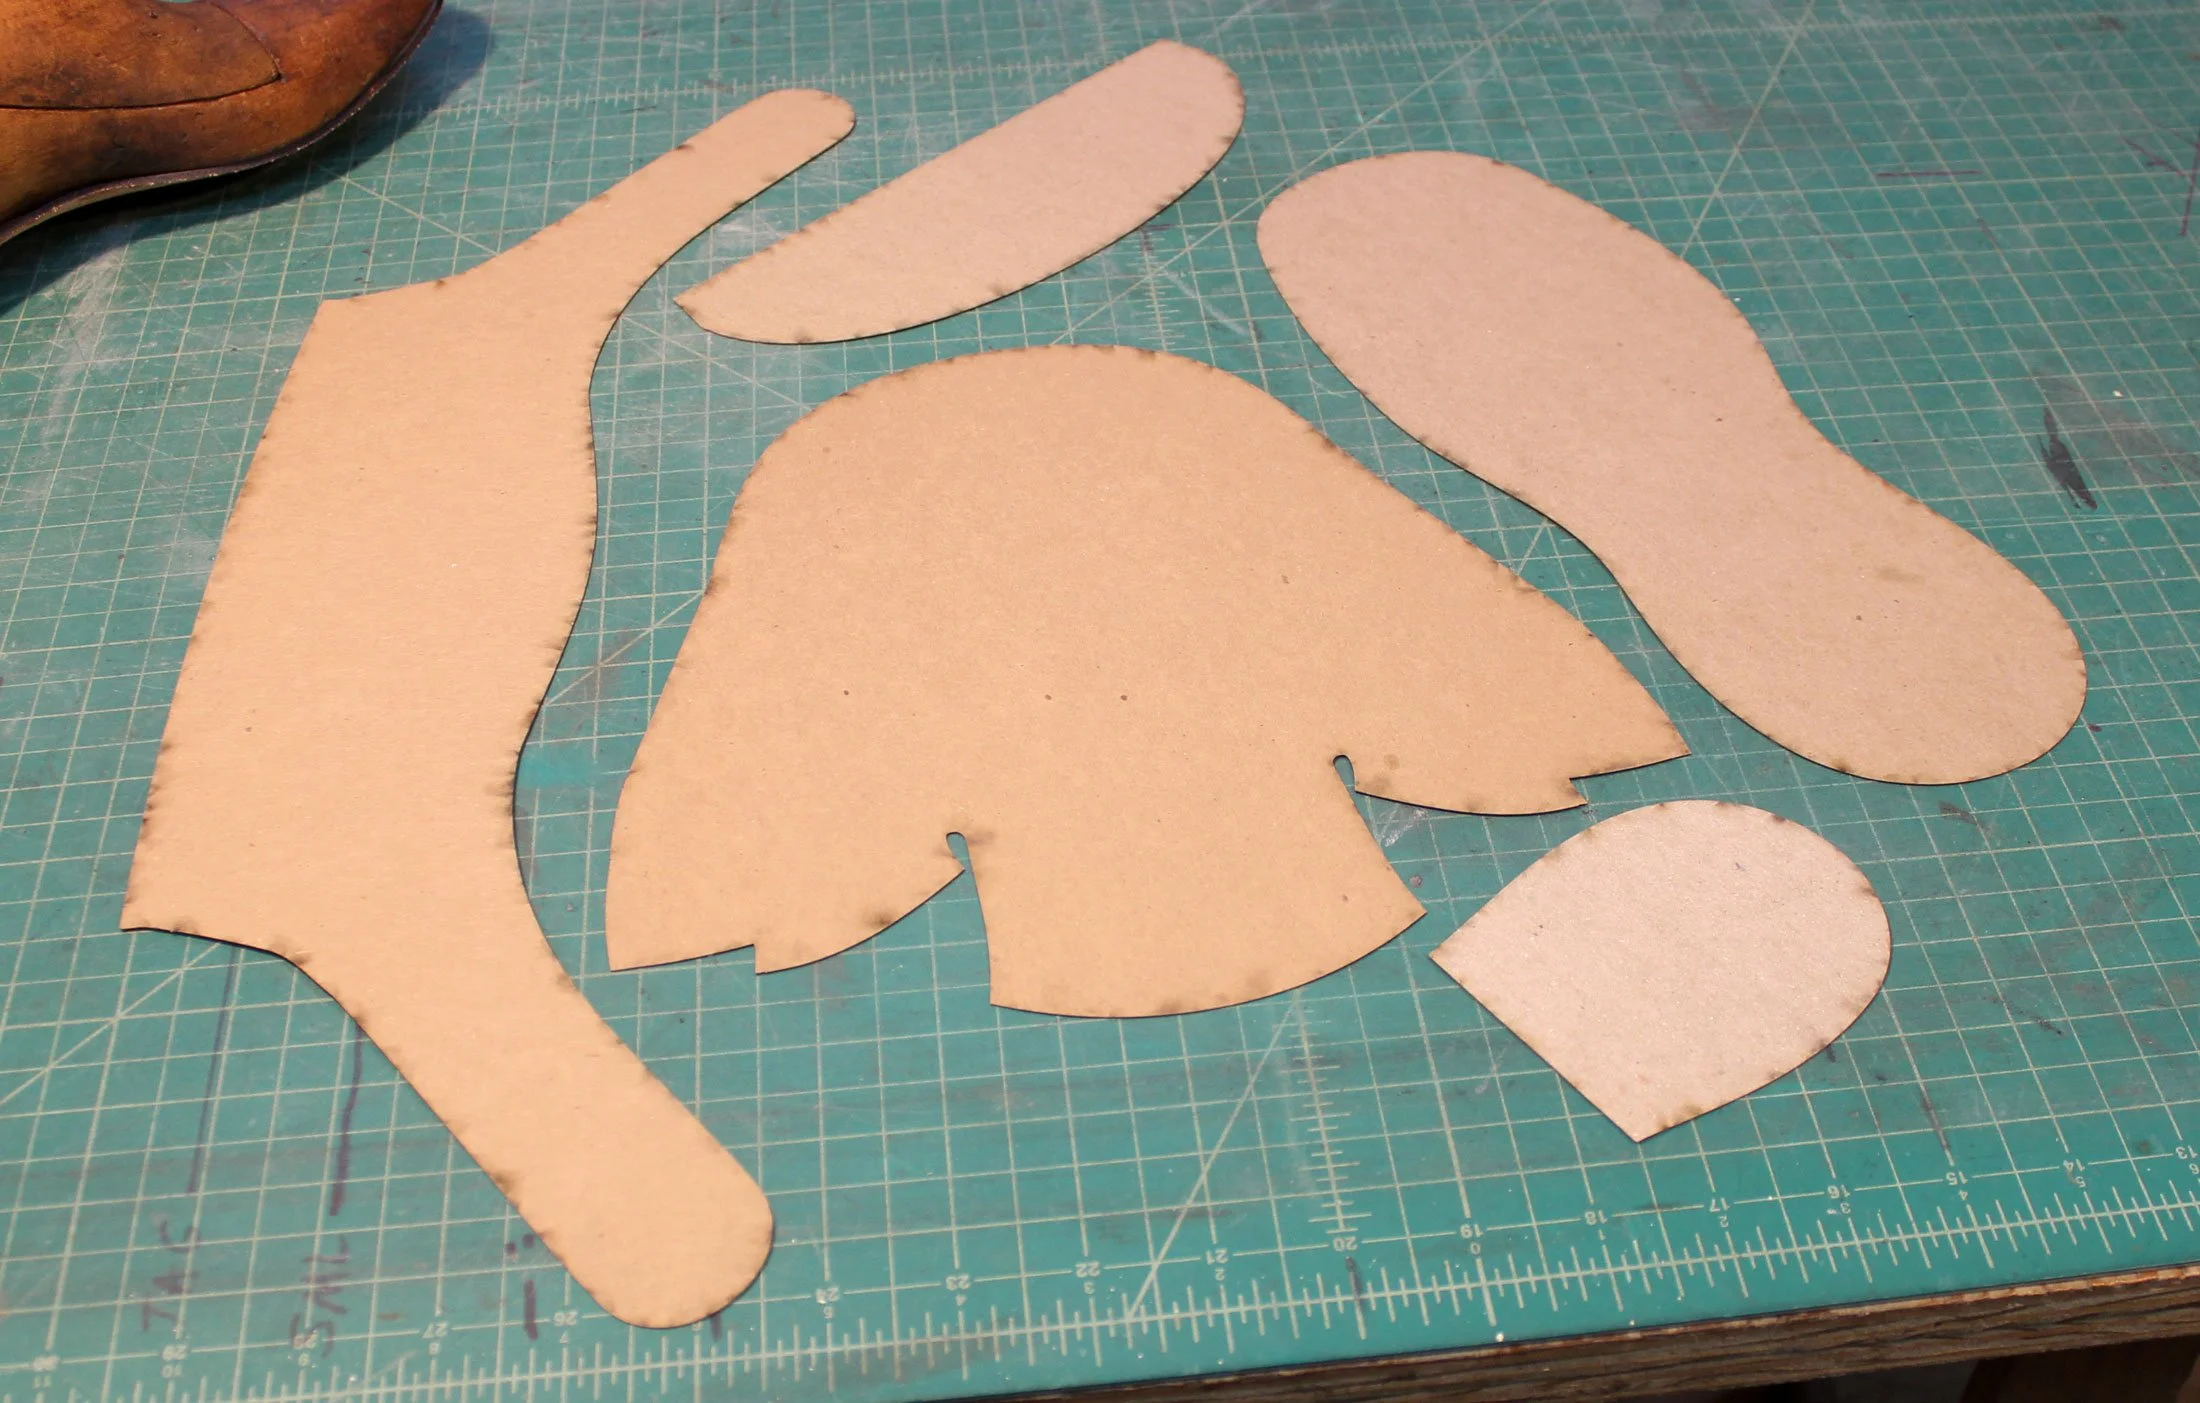
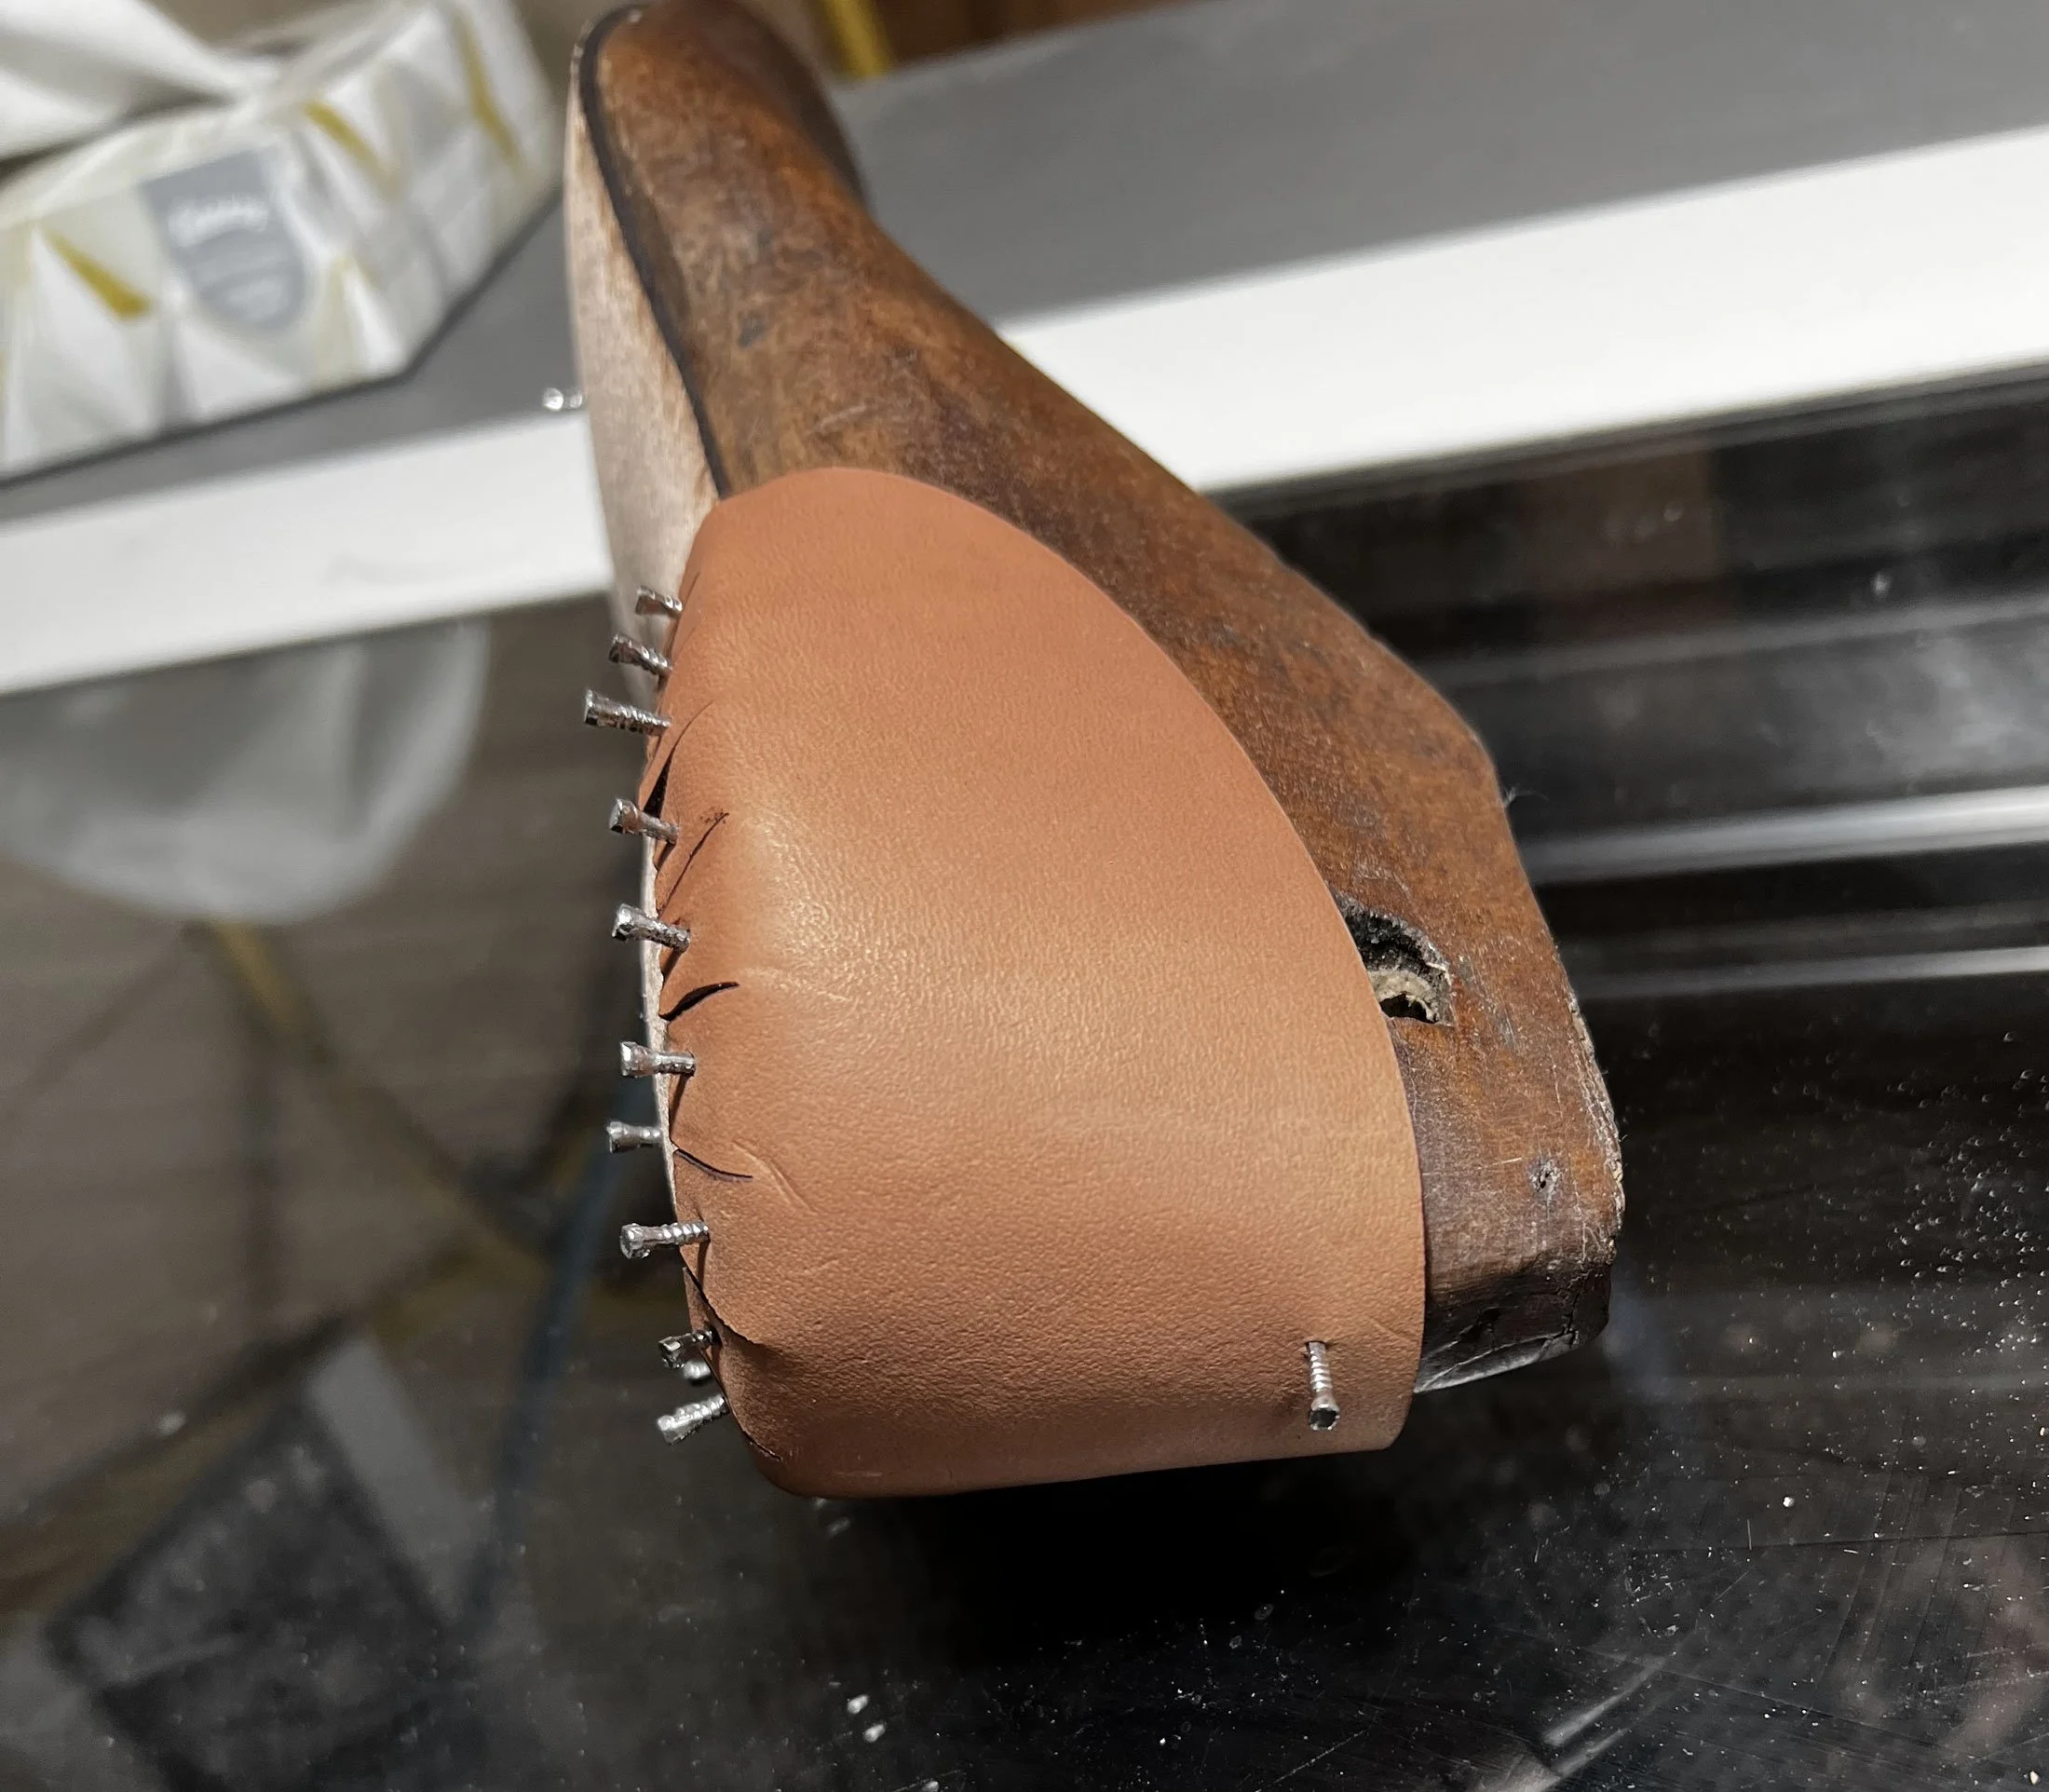
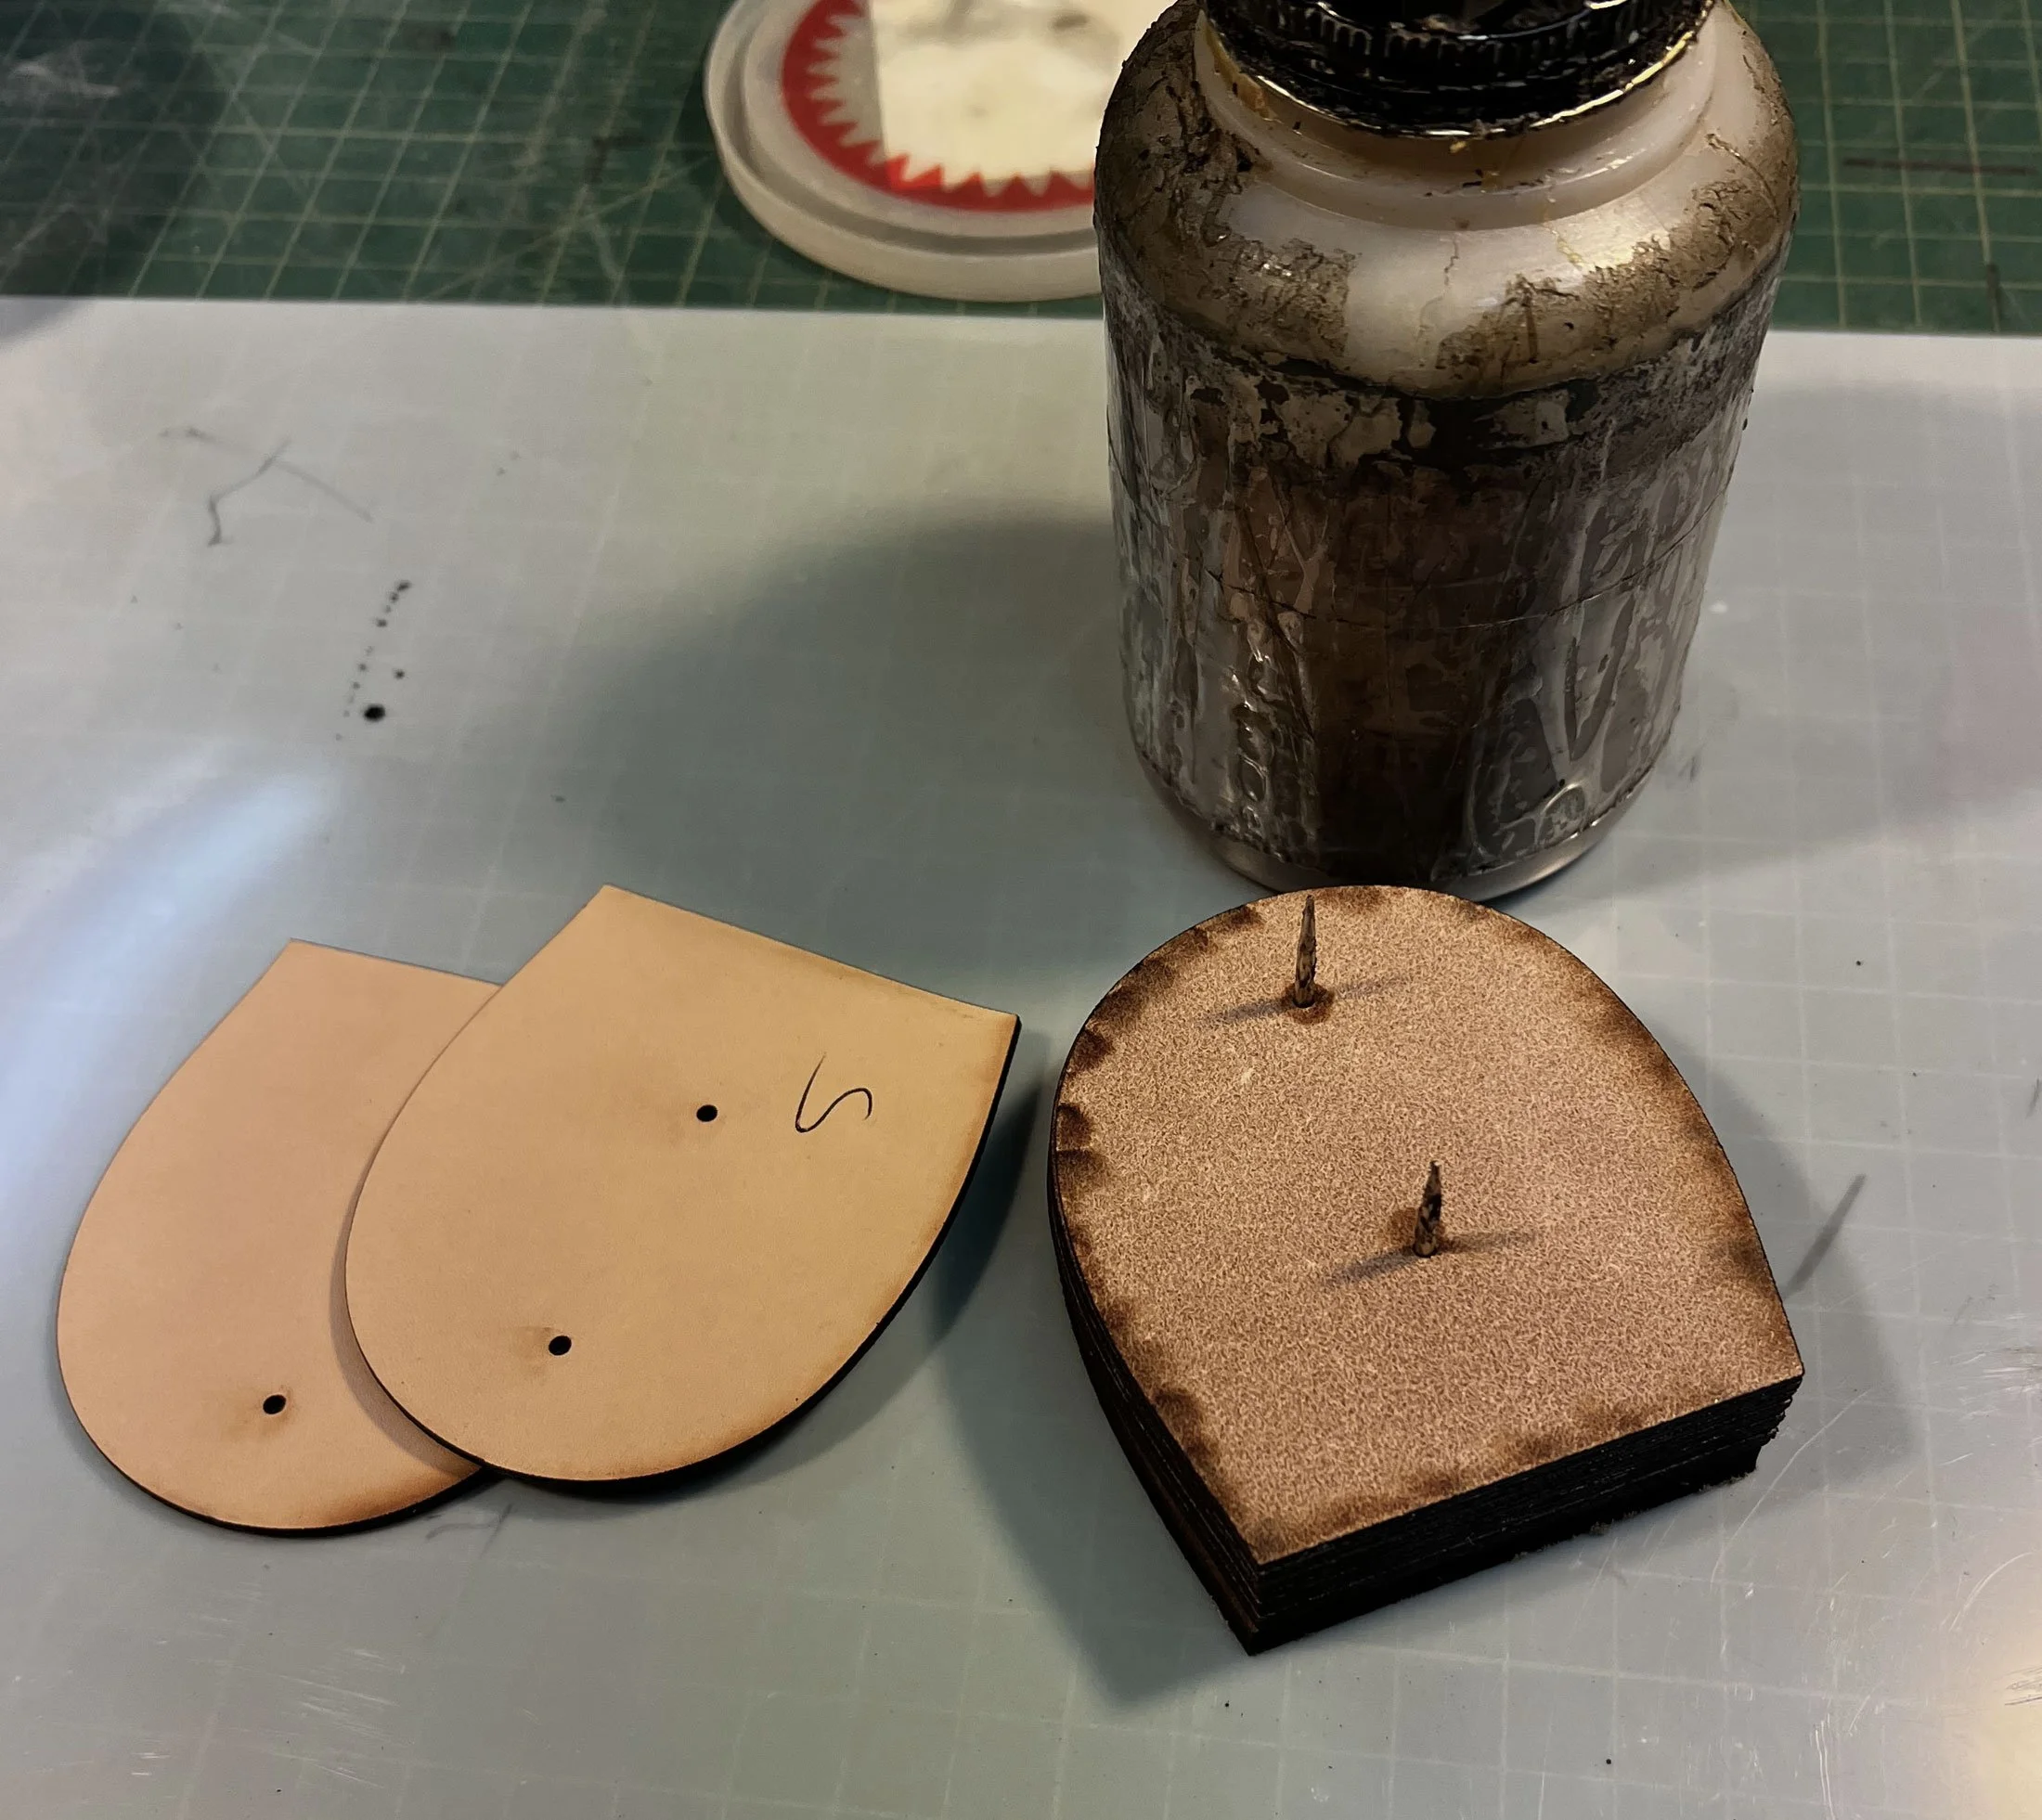
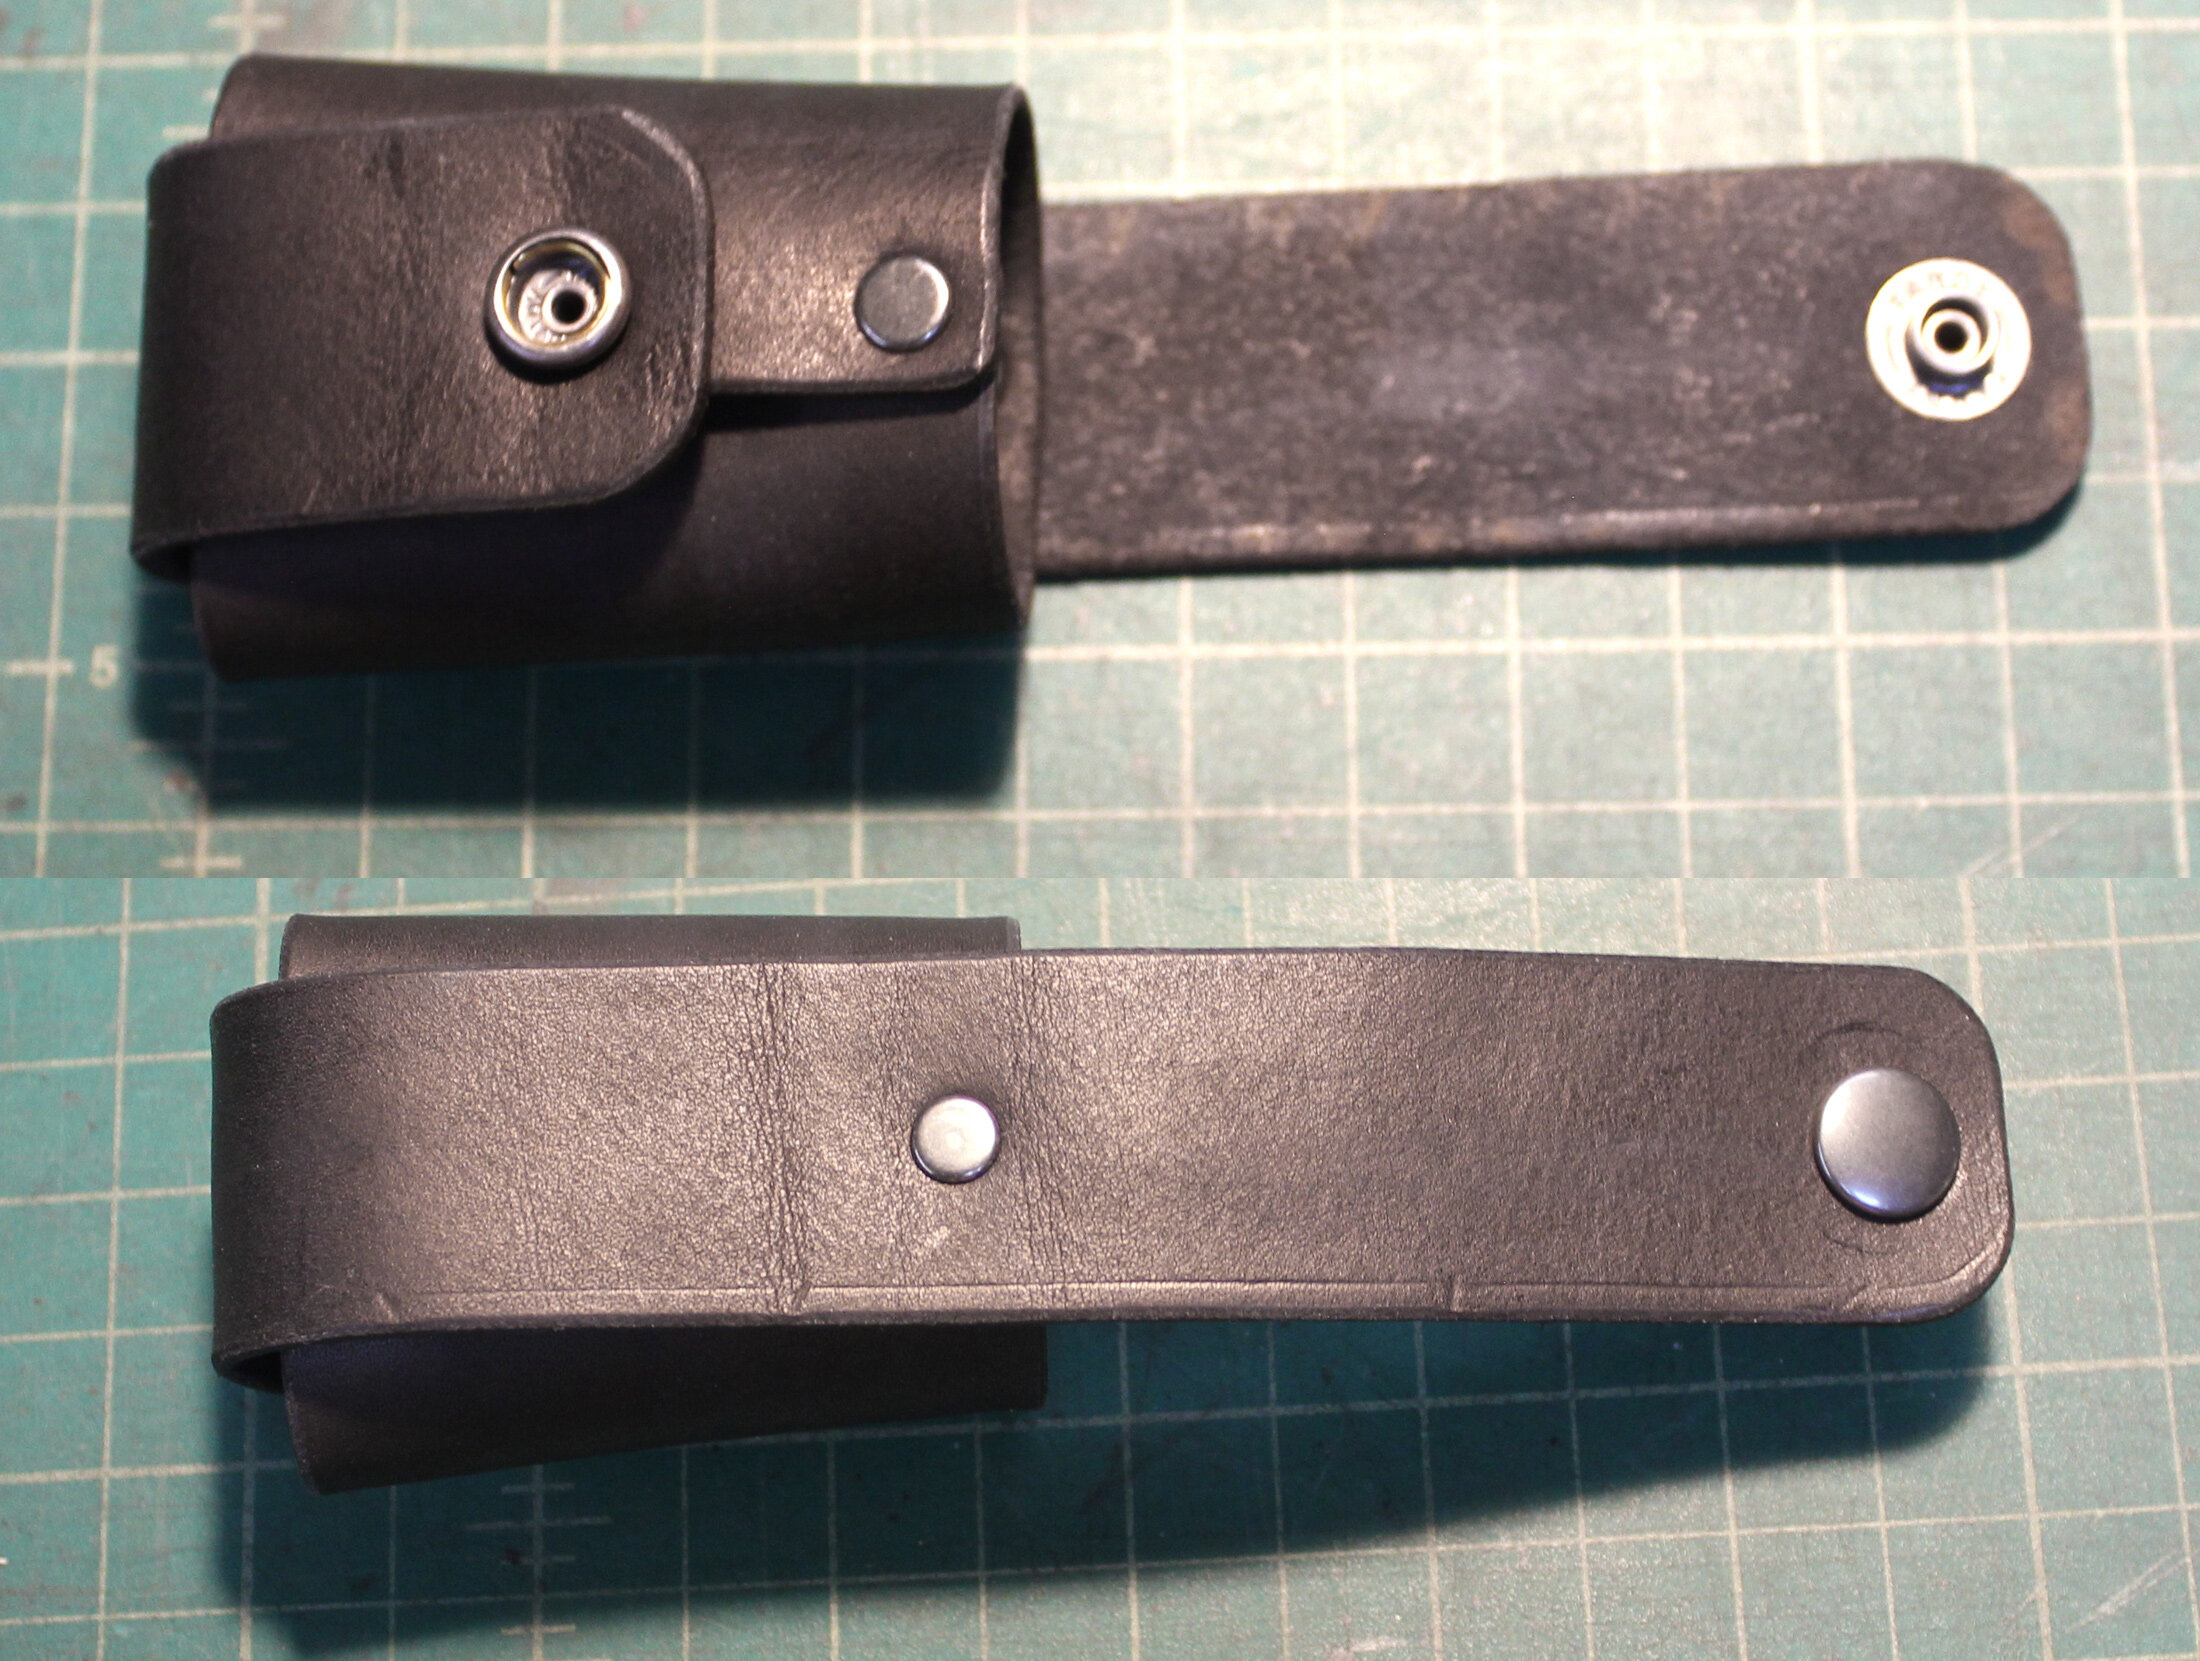
The UC Berkeley grad has been honing his craft for decades, his background studded with woodworking, resin casting, laser cutting and his main passion, leather working. Banwell made everything from sandals to coats at a shop in Tahoe before launching his own leather hat business in the '70s.

His designs were successful but his creativity and interest in the style of a dramatically different world developed into Tom Banwell Designs, a leading provider of stunning costume creations. Banwell utilizes old world and repurposed materials, modern technology and masterful craftsmanship to deliver a huge line of leather masks and headgear.

Jordan Layman, one of the Idea Fab Labs founders, puts Banwell in a league of his own.

"He's one of the most talented people to come through here, " Layman said. "He has been at it for so many years, he's achieved a level of mastery."

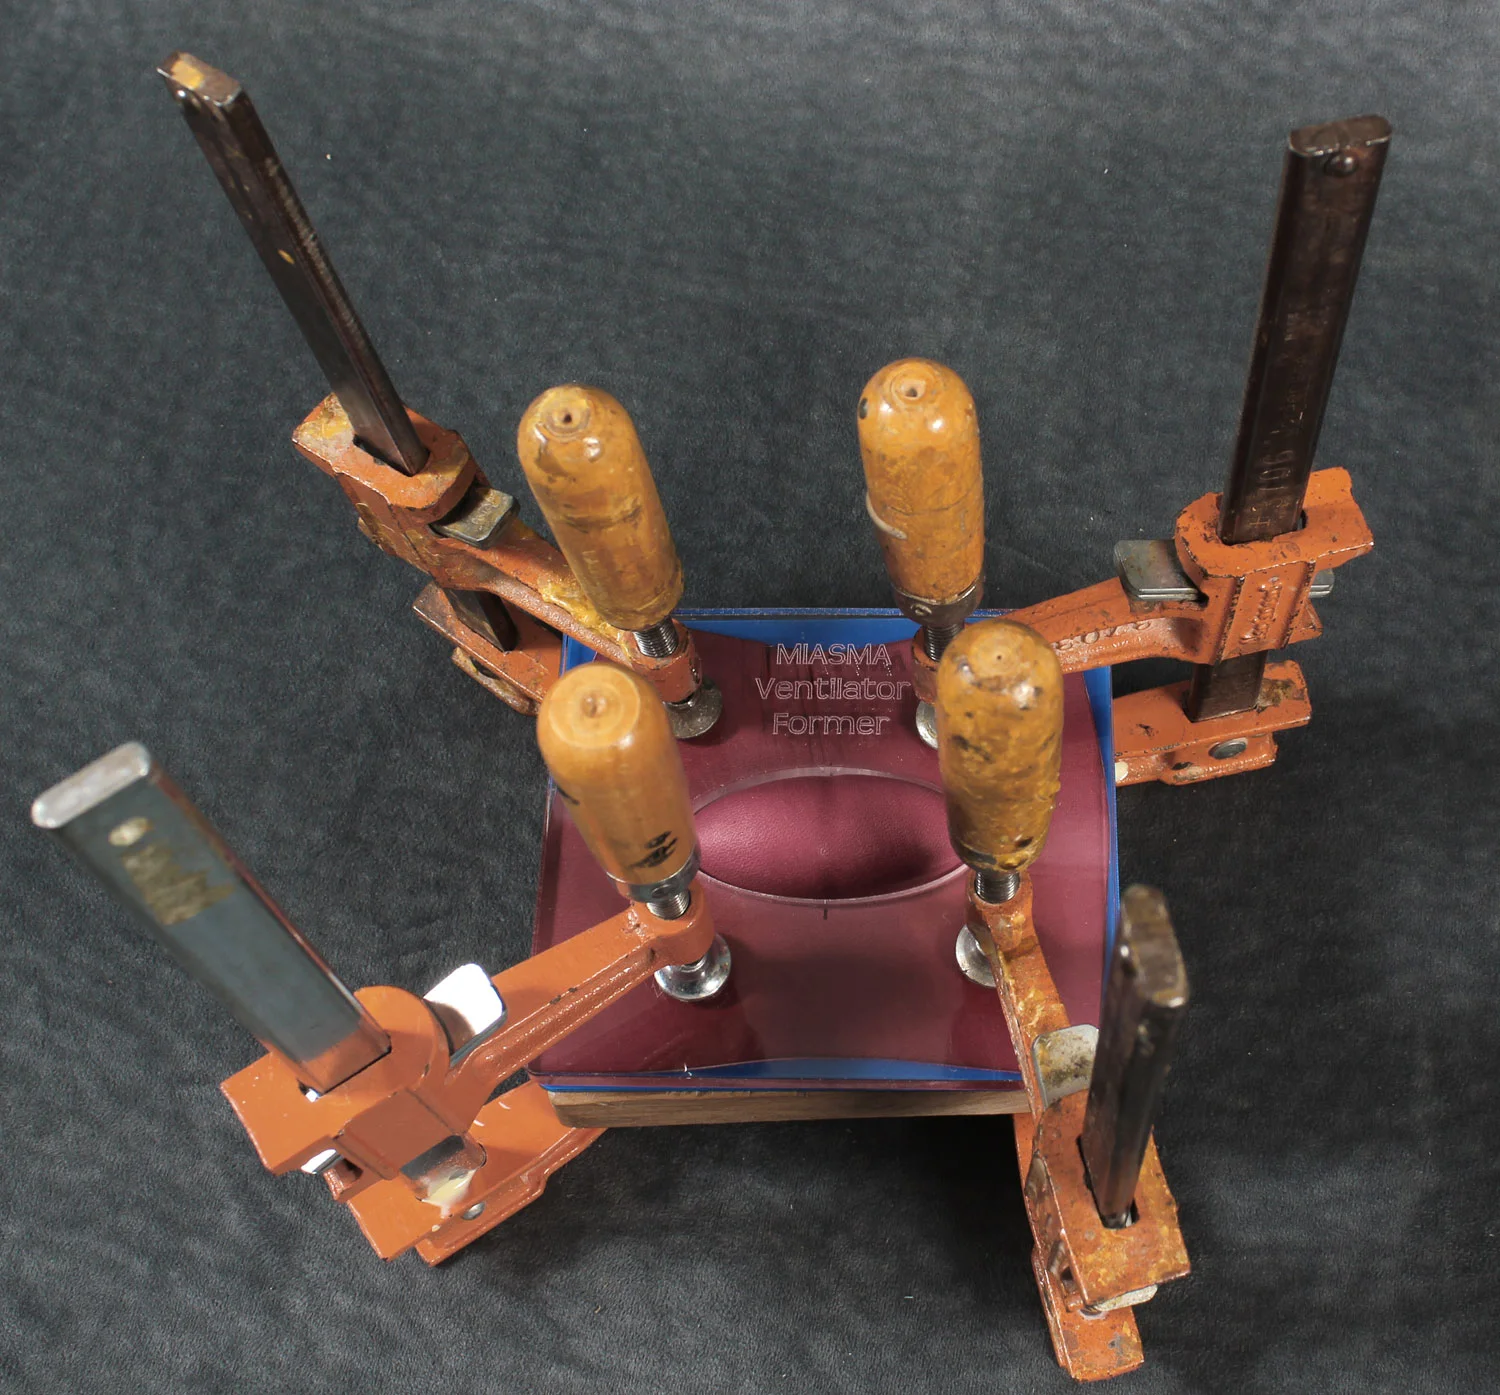
Banwell is also the first artist to put on an exhibition at Fab Labs without a residency at the facility beforehand. He chose to forego the Labs' leather and woodworking studio and laser cutter and work from his own impressive studio in Penn Valley, complete with two laser cutters, a resin casting setup and industrial leather tools.

This will be Banwell's first solo show in 30 years, not to mention the first time he'll be seeing his rather large collection out in one place. The artist has custom designed displays for his numerous pieces, adapting the Fab Labs space into a veritable steampunk boutique.

The show will also feature windows to Banwell's own realm of inspiration. Poster-sized photo illustrations feature soldiers in Banwell's leather and metal gas masks and models with brass ray guns.

Not all of the pieces are so heavy though. The warehouse gallery might resemble a masquerade ball with a broad variety of Banwell's lighter, laser-cut leather masks paired with the facility's colorful LED ceiling. Clusters of hearts, simple superhero silhouettes and bold geometrics in an array of colors build into more dramatic pieces — bird's wings, folded leather rabbit ears and intricate butterfly masks spark flights of fancy.

Banwell's upcoming exhibit is sure to provide a little shock and awe for Chico audiences, bringing his dramatically-styled and striking steampunk creations together to give leather a new life in art.

When/where: 3-6 p.m. June 28 at Idea Fab Labs, 603 Orange St.

Tom Banwell: Masked Machinations

Amy Olson, SYNTHESIS Weekly, Chico, California

By now you’ve certainly heard of Steampunk—it’s in the dictionary for pete’s sake. You’ve seen movies like The League of Extraordinary Gentlemen and Van Helsing, you’ve noticed little bits of re-imagined Victorian fashion and technology woven through television and comic books and half the costumes at Burning Man.

What you may not realize is that along the way you’ve probably seen the art of Tom Banwell.

Tom Banwell is a craftsman—an artist who walks between the fantastic and the practical. His leather masks, hats, and helmets typify the strange beauty of a dystopian future that never was: crow-beaked plague doctors, elephant and aardvark-faced mutants who are well prepared for gas attacks, masquerade balls full of woodland creatures and elemental super heroes.

His work has made its way into Once Upon a Time in Wonderland, So You Think You Can Dance, Smallville, Gossip Girl, One Tree Hill, The Cape, Vogue Paris, pretty much every book ever written about Steampunk art and costumes, and museum exhibits from Seoul, South Korea to Oxford, England. Somehow, through all that, he hasn’t had a solo exhibition in 30 years. Until now. And, it’s in Chico.

By now you’ve certainly heard of Idea Fab Labs—it’s been on our cover for pete’s sake. You’ve seen their incredible maker-oriented exhibits, and heard about their laser cutter, 3D printer, and their stunning, possibly-too-hip to be so far from the Bay LED ceiling—wait, what? You haven’t? You mean you don’t read this paper religiously and remember everything we’ve ever written? Well, to be fair, that cover story was just before I started here, and this paper sucked (kidding!).

OK, for those of you just joining us, Idea Fab Labs (or “the Fab Lab,” as we call it in the biz) is located at 603 Orange St. It’s “a member- driven creation zone,” a warehouse space with all kinds of tools and materials for making art happen. Aside from the aforementioned laser cutter and 3D printer, they have traditional fabrication tools and spaces for woodworking, electronics, jewelry making, and textiles. They hold classes and host exhibitions, and you (yes, YOU!) can become a member for a nominal monthly/quarterly fee that varies based on the services you want access to. Also, they have an LED ceiling that’s like a crazy upside down disco. (If you can upside down disco dance, I just made your day.)

Coming up on Saturday (June 28th) from 3-6pm, there will be a reception for Tom Banwell’s first solo exhibit in 30 years (I know I just said that, but it’s sort of a big deal and we’ve established that you have a bad memory): Masked Machinations. It’s FREE, suitable for all ages, and open to whomever feels like dropping in and being amazed. I encourage you not to show up wearing your homemade alternate-reality-firemaster mask and helmet, you’ll just embarrass yourself.

The Sentinel Unmasked

The Sentinel is an ensemble of helmet, gas mask and gorget that I created several years ago. For the first time I am revealing the man behind the mask. This fellow has been at his post for many years.

Selfie Photos for May 2014

Post a selfie of yourself wearing one of our masks on the Tom Banwell Designs Facebook page, and be automatically entered into a competition for best selfie photo. Must be a photo by you and of you. Contest ends on May 31. Jill and I will choose our favorite and winner will receive a $50 credit at our Etsy shop. Enter as many times as you like. By entering you are agreeing to allow me to post it online. Here is one example:

And We Have a Winner....

You guys are just too smart! The very first guess from Aurora B is correct when she called it "a blob of hot glue".  It is in fact an accretion that is formed drop-by-drop when a hot glue gun with a slow leak is left on for several hours. If forms a relatively symmetrical structure, as each drip runs to the lowest point where it hardens. Pictured below are two of them oriented in the way that they are formed.

Aurora B, please send me a convo on Etsy to receive your prize.

What is this Contest?

Well, gang, I know this blog is new, but except for one comment from a reader who informed me that the RSS feed wasn't working, I have yet to receive a single comment. <Insert sad face here>

So, I am having a contest. With a prize. That should get a few comments, eh? Here it is: Tell me what this is a photograph of. Post your answer as a comment here. Posts on Facebook don't count. First one to correctly identify the object pictured below wins a $50 credit at my Etsy store.